If you are new to Lightroom then it can be a bit overwhelming. As an experienced Lightroom user, there are things that I wish I had known when I started using the software. Here’s a list of the ten most important.

“Photo editing” by Håkan Dahlström
1. Store All Your Raw Files in a Single Master Folder
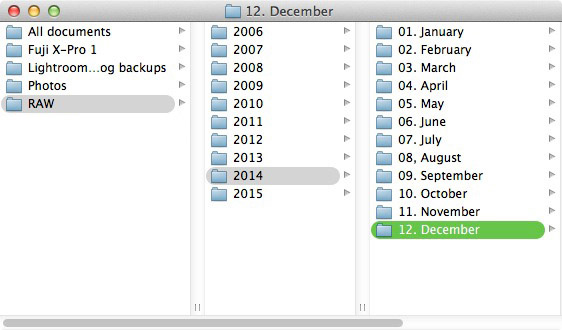
Lightroom is designed for organizing and processing Raw files (plus other photo files like TIFF and JPEG). But it helps greatly if your Raw files are well organized in the first place. That means storing them in a master folder (I call mine Raw) containing sub-folders for organizational purposes.
This is a great deal more efficient than keeping Raw files in various folders scattered over different locations.
Ideally, the photos will be stored on a hard drive other than your system drive, either on an external hard drive or a second hard drive in a desktop system. This saves you using up too much space on your system drive, which will ultimately slow your computer down.
This screenshot shows my folder structure.

Folder Structure
2. Back Up Your Catalog to the Same Drive as Your Raw Files
With Lightroom, all you need for a successful backup is a copy of your Raw files and your Catalog (minus preview files). Any JPEG or TIFF files created by exporting from Lightroom can be created again. Think of Raw files as being like negatives—you will never suffer an irrevocable loss as long as they are safely backed up.
Lightroom saves the Catalog to your system drive, so setting the backup location to a separate hard drive means you always have two copies of your Catalog (as long as you backup your Catalog every time you exit Lightroom).
3. Use a Single Catalog
Earlier versions of Lightroom slowed down as the number of photos in the Catalog grew, but with Lightroom 5 tha’s no longer an issue. Lightroom is for organizing and searching your Raw files as well as processing them, so it makes sense to keep your entire image collection together. You can only have one Catalog open at a time, so if your images are spread across multiple Catalogs you can’t search your entire photo collection in one go.
Note: There are exceptions to this, but they are mainly for high volume shooters like wedding photographers or people who work on their photos away from home on a laptop. But for most photographers, a single Catalog makes sense.
4. Keep a Copy of Your Raw Files and Catalog Off-site
If the worst happens, you’ll be glad you did. That’s another benefit of keeping all your Raw files in a master folder it’s easy to copy them up to a another hard drive for backup purposes.
5. Devise a Rating Plan
Decide how you are going to use star ratings, keywords, color labels and flags from the outset and then stick to it. This isn’t easy, as you’ll probably find lots of different ways you can use these features as you become more proficient with Lightroom. But, the more consistent you are, the easier it is to use these tools to organize and search your photos.
6. Organize Your Images with Collections and Sets
These are the heart of Lightroom and free you from the physical constraints set by the folders containing your Raw files.
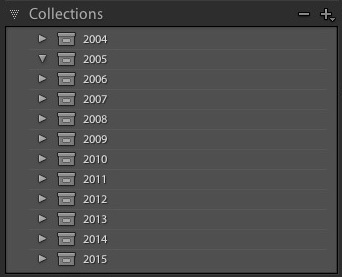
You may have noticed that you can only browse photos by folder in the Library module. In the others you only have access to Collections. Adobe wants you to use Collections and Collection Sets as they are the easiest way to organize and collate your images.

Lightroom Collections
7. Use Smart Collections Sparingly
There are many ways to use Smart Collections. While they may seem useful because they are automated, it’s easy to over-complicate things. Only use them when they will genuinely save you time, or as a way of storing search results.
8. Convert Your Raw Files to DNG
It increases the length of time required to import photos but it’s worth it. The are two main benefits. The first is that DNG files are smaller than your regular Raw files, saving hard drive space.
The second is that using DNG speeds up Lightroom. DNG files contain a preview in a form called fast load data that enables Lightroom to render previews up to eight times faster. This saves you time when viewing and processing images. There’s nothing more frustrating than zooming into an image and having to wait several seconds for the preview to render. Using DNG helps prevent that.
9. Undo is Your Friend
Just about anything you can do in Lightroom can be undone by pressing Cmd-Z (PC: Ctrl-Z), If you’re not sure what effect doing something will have on your photos, just try it. The Undo shortcut is there to help if it doesn’t work out. On the rare occasions that you are about to do something that cannot be undone, Lightroom will warn you.
10. Do as Much Work in Lightroom as Possible
When processing images, do as much as you can in Lightroom. You should only export a photo to Photoshop or a plug-in if you need to do something that Lightroom can’t handle.
Processing images solely in Lightroom whenever you can helps keep your workflow quick and simple. Exporting to other programs or plug-ins uses more hard drive space and means that you end up with additional JPEG or TIFF files to keep track of and backup.
Lightroom will change your life. I’m not exaggerating—you’ll be amazed at how much time having an organized photo collection will save you. If you’re the type that’s always behind on processing, Lightroom will help you catch up.
About the Author:
Andrew S Gibson is author of The Mastering Lightroom series of eBooks that cover everything photographers need to know about Lightroom in order to organize photos and process images beautifully.
Go to full article: 10 Pieces of Advice for New Lightroom Users
What are your thoughts on this article? Join the discussion on Facebook
PictureCorrect subscribers can also learn more today with our #1 bestseller: The Photography Tutorial eBook
The post 10 Pieces of Advice for New Lightroom Users appeared first on PictureCorrect.