Dutch artist Rembrandt Harmenszoon van Rijn is known for his dark and moody portraits, characterized by a single lighting source falling across a subject placed in front of a dark background. It’s an interesting, evocative style that is easy enough to replicate in modern photography.
There are two steps to creating a Rembrandt-style portrait. The first is to get the lighting and composition right. The second is to use Lightroom to emphasize the dark and moody feel created by the lighting.
Rembrandt inspired lighting is easily achieved using natural light. The important thing is that the light is directional. Take a look at these portraits to see how it works.
Portrait #1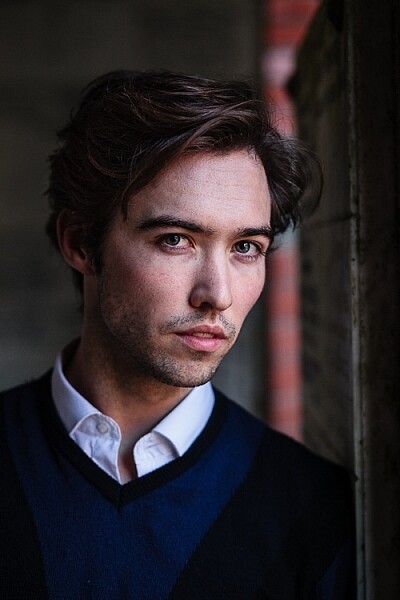
This portrait was taken with the model standing under an archway that was part of a local building. We took the photo on a cloudy day, so the light was quite soft and even, perfect for portraiture.
The light comes from the model’s left, through the archway, casting a shadow across his face. The right side of his face is dark because no light is coming from that side. The background is also dark because less light is falling on it.
The photo looks like it could have been taken in a studio – but the light was shaped by the archway rather than a softbox.
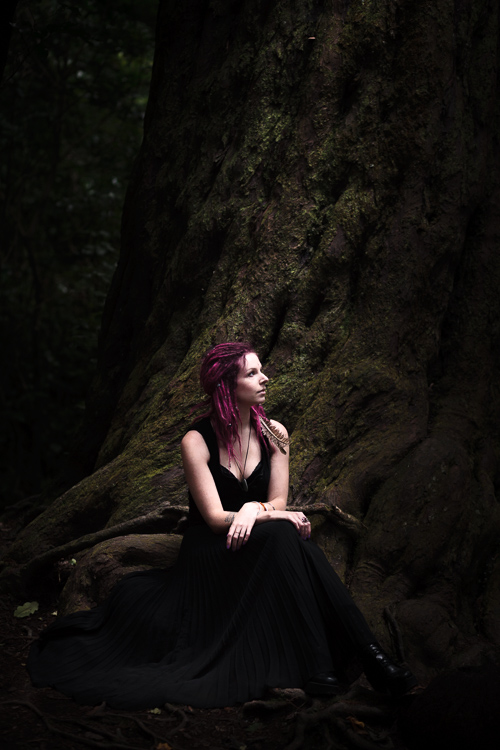 Portrait #2
I made this portrait in a forest. The light was coming through the trees from above. It was a cloudy day, but the narrow gaps between trees meant the light was very directional. I asked my model to lift her face up towards the light so that it didn’t cast shadows under her eyes.
I selected these portraits because they are interesting from a post-processing point of view. One of them was very easy to process, and the other took a lot more work. Can you guess which one was which?
Processing Portrait #1
The first portrait was the easiest to process. Here’s the Raw file as it came out of the camera.
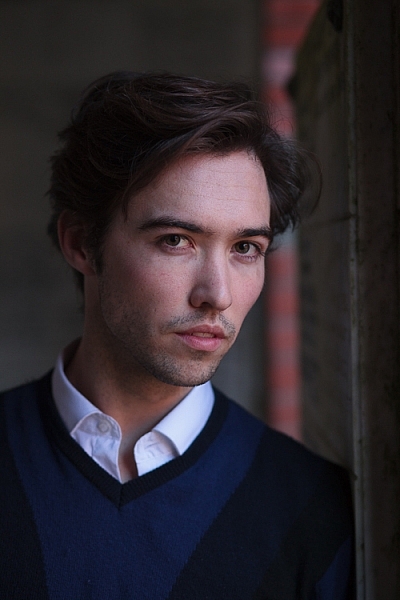
Virtually all the work for this portrait was done in the Basic panel in Lightroom. These are the main adjustments.
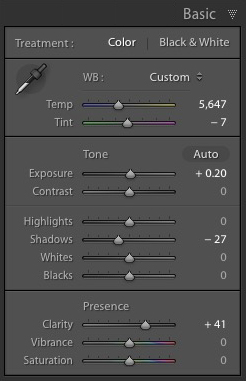
- Exposure +0.20. A slight tweak to brighten the photo.
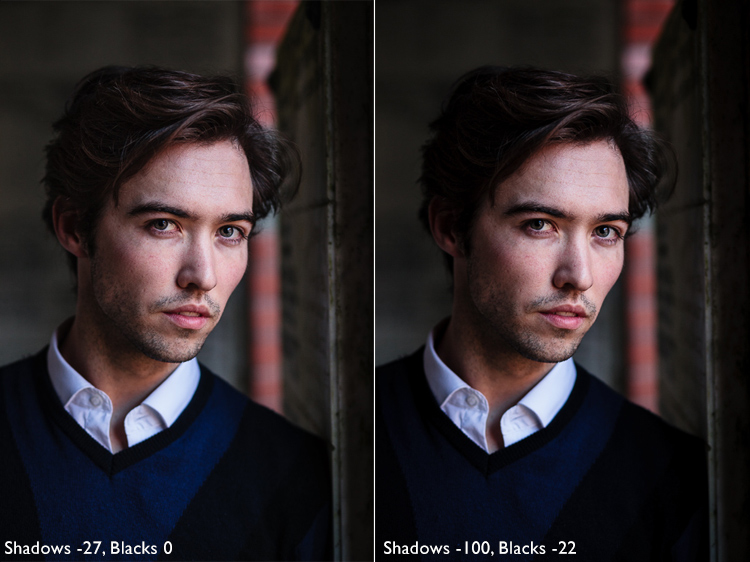
- Shadows -27. This makes the darkest tones in the photo darker without affecting the lightest tones.
- Clarity + 41. A global adjustment to enhance texture and details and add a gritty feel to the male portrait (a much lighter touch is required with portraits of women).
You’ll note that I didn’t use the Contrast slider to make the background darker. The reason is that the Contrast slider affects both dark tones and light tones equally. It is better to use the Highlights and Shadows sliders to control highlights and shadows separately.
Taking control of dark tones with the Shadows slider gives you a lot of choice when it comes to setting the tonal values of the image. You can also move the Blacks slider left, although you may block up some shadow areas when you do so.
Remember, your aim is to create a dark and moody Rembrandt style portrait, so it’s up to you how dark you want to make the shadows. Here’s a comparison that shows what happens with this portrait when I push Shadows to -100 and Blacks to -22.
Local adjustments
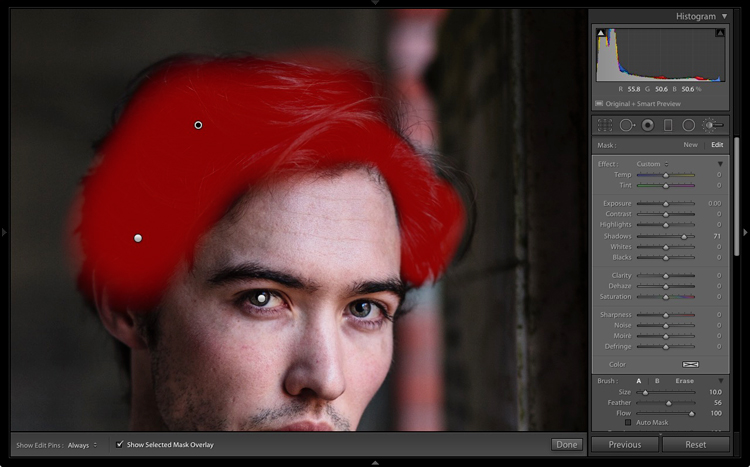
Pushing Shadows and Highlights sliders left may also darken parts of the photo that you would prefer to remain as they are. In this portrait, the model’s hair became too dark, so I used the Adjustment Brush to lighten it. This screenshot shows the mask created by the Adjustment Brush in red. I set Shadows to +71 to make his hair lighter.
Processing Portrait #2
The next portrait required more work in Lightroom. You can see why when you look at the original image as it came out of the camera, below.
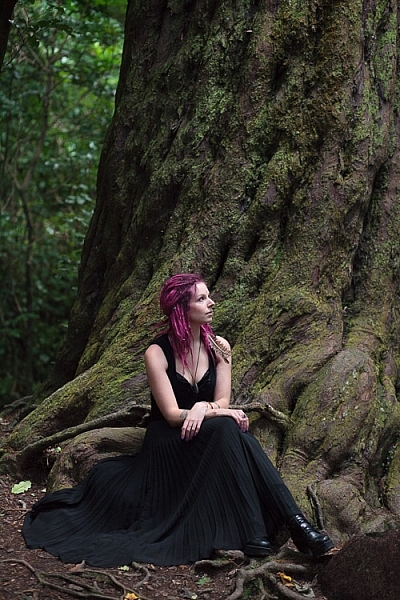
While the light is coming from above, it wasn’t as directional as the processed image suggests. An image like this needs a little more work in Lightroom in order to obtain the dark background that a Rembrandt style portrait requires.
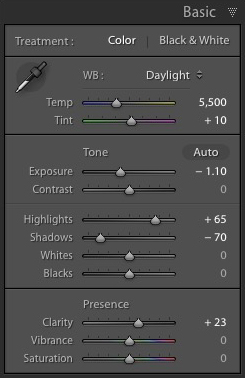 I made some subtle changes by setting the following:
- Exposure to -1.10
- Shadows to -70
- Highlights to +65
- Clarity to +23
Moving the Shadows and Exposure sliders left made the entire image darker, making the background look more how I wanted. Moving Highlights to +65 then made the highlights (in other words, the model’s skin) brighter. Once again this has increased contrast, but in a way that is much more controlled than using the Contrast slider.
Here’s the result so far.
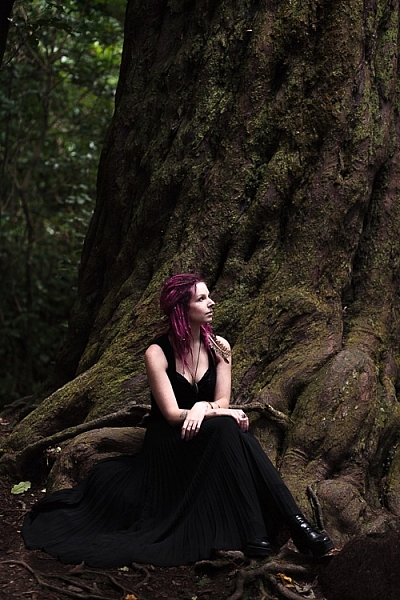
Local adjustments
Once you have achieved all you can with global adjustments, it is time to work with local adjustments. Lightroom has three local adjustment tools – the Graduated filter, Radial filter and the Adjustment Brush. It is up to you to select the tool (or combination of tools) best suited to the task in hand.
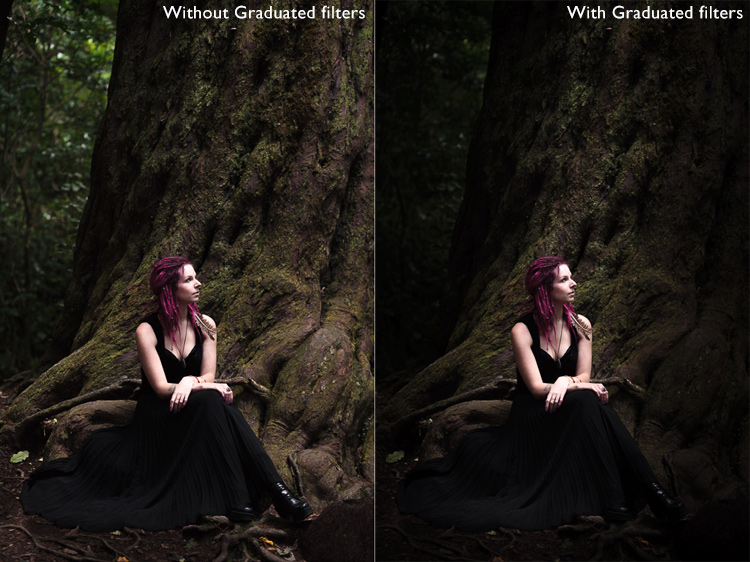
For this portrait, I applied five Graduated filters, and moved the Exposure slider left (to darken) for each one. These screenshots show where the Graduated filters I applied to the image fall.
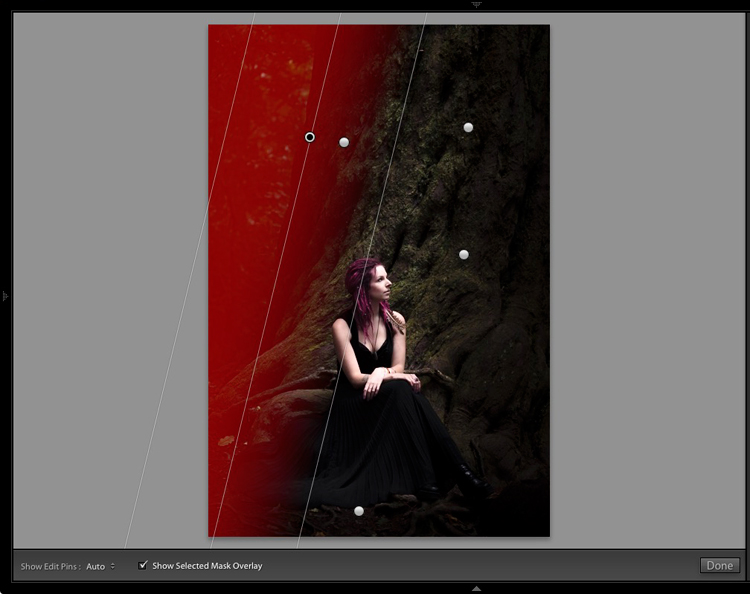
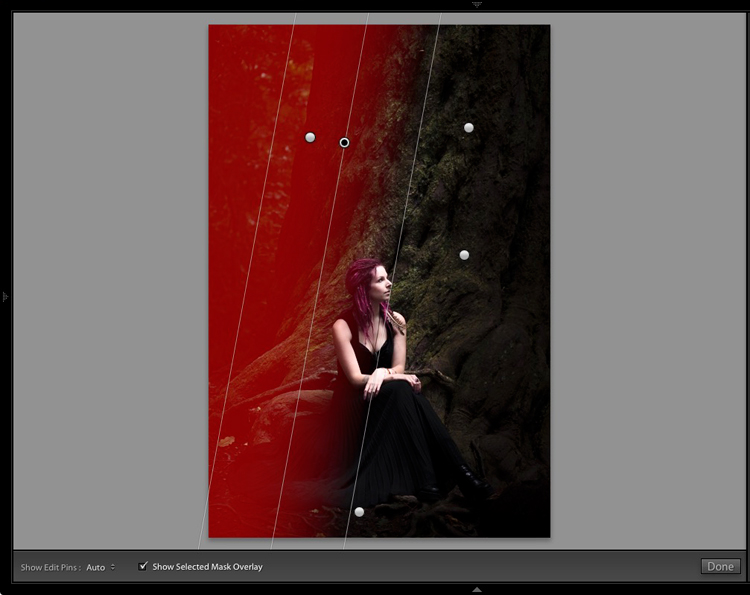
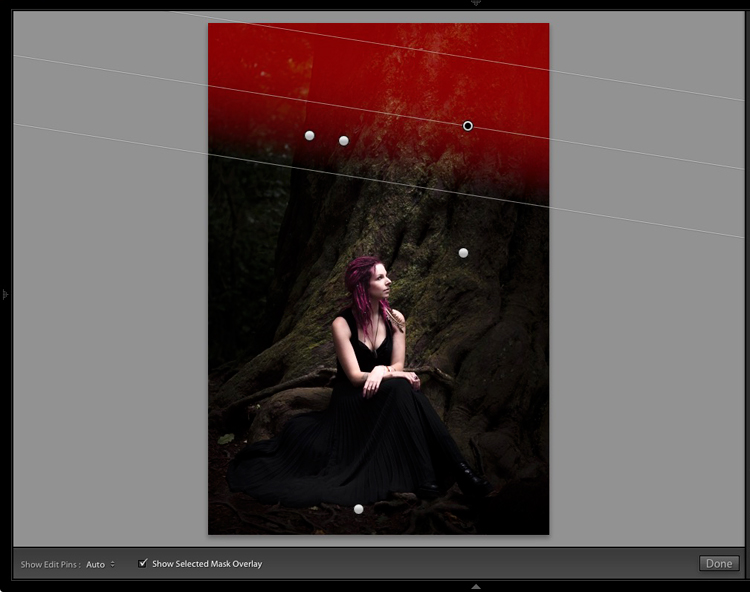
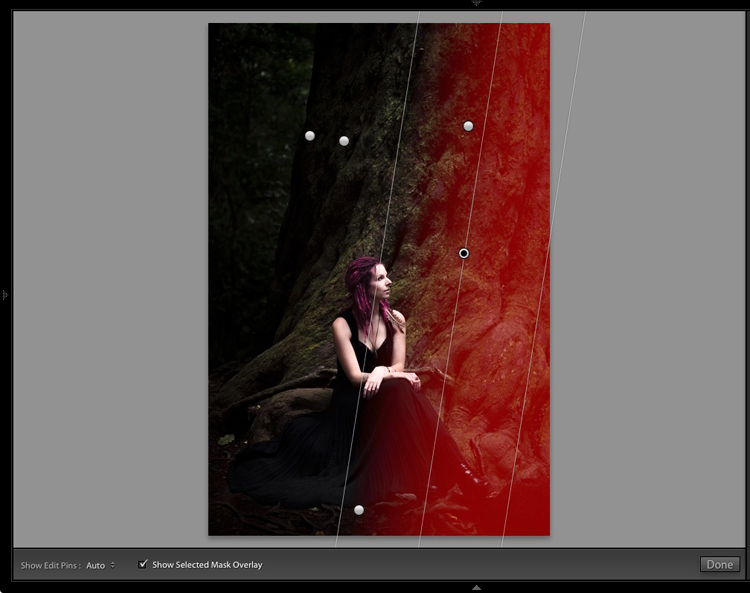
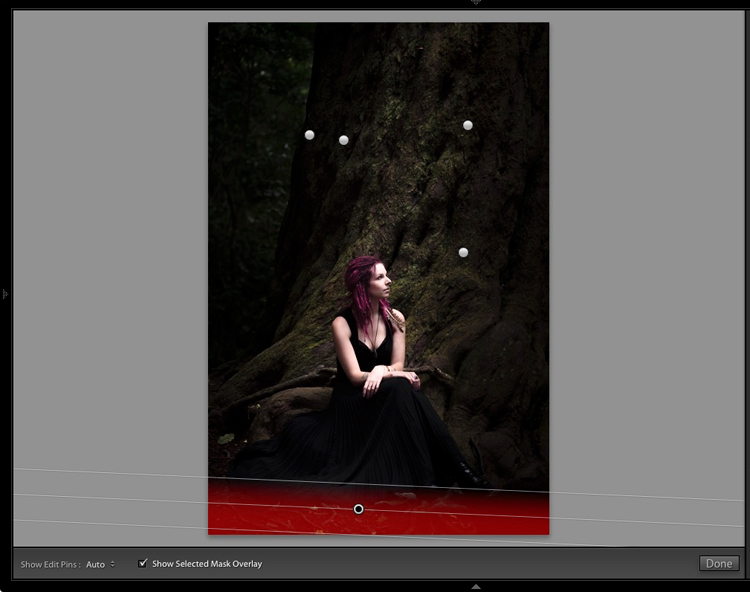
The best way when making local adjustments is to play it by eye. Don’t be afraid to jump around between your local adjustments and tweak the settings until you get the photo looking as you wish.
These comparisons show the difference that the Graduated filters made to the image.
Finally
The key to re-creating the style of a painter like Rembrandt in Lightroom is to analyze the type of lighting used in his portraits and think about how you can replicate that using the tools inside Lightroom. Bear in mind that the lighting is just as important as Lightroom technique. Get the lighting right and the rest should follow easily.
Do you have any questions about the Lightroom techniques used in this article? Let me know in the comments!
If you’d like to learn more about processing your photos in Lightroom then please check out my ebook Mastering Lightroom: Book Two – The Develop Module.
The post How to Create a Dark and Moody Rembrandt-Style Portrait In Lightroom by Andrew S. Gibson appeared first on Digital Photography School.