Collections are one of Lightroom’s most powerful features, giving you a way to bring images from many folders together. Generally speaking, they’re just like boxes you sort your physical stuff into. Nothing goes in unless you put it there, and nothing comes out unless you take it out. What if I told you there was another far more powerful type of collection that can sift through all your photo information and build a collection automatically based on a subset of that information? Well, there is, it’s called a Smart Collection.
Using Smart Collections
You’ll find the easiest way to get to grips with Smart Collections is to begin with a few simple ones and then expand to more complex ones. Let’s start with a couple simple ones.
Creating a Smart Collection
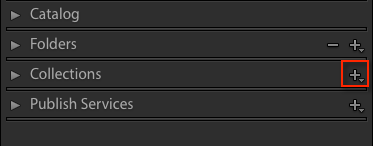
You can create a Smart Collection in a number of ways. First, you can click on the little ‘+’ in the Collections panel header, situated in the Left Panel of the Library Module.
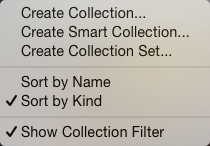
From the flyout menu, choose Create Smart Collection.
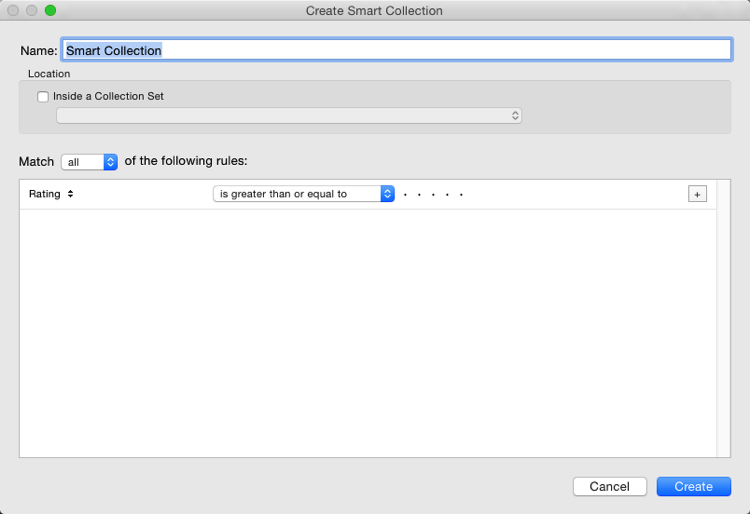
This brings up the default Smart Collection panel (below).
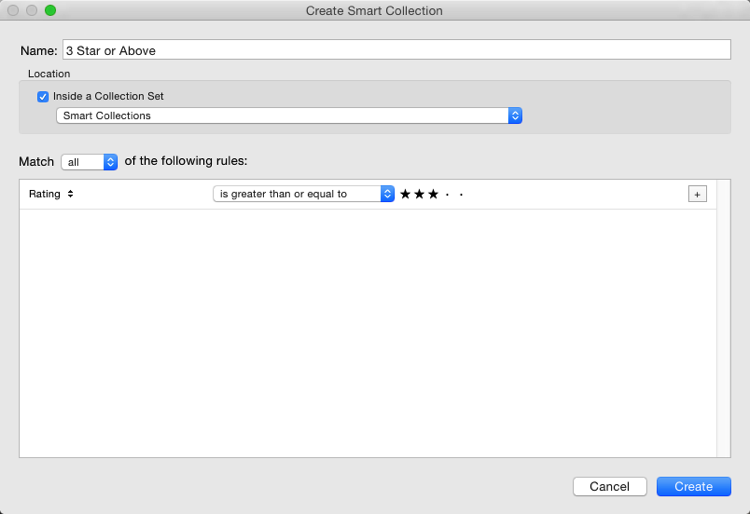
Begin by giving the Smart Collection a name. If you don’t, you’ll end up with a list with Smart Collection, Smart Collection 1, Smart Collection 2, and so forth. Use a name that describes what the collection will contain. For example, you could call this one “3 Stars or Above”. Below this you can choose to add the Smart Collection to a Collection Set (which needs to be created in advance). You could add it to the Smart Collections set, which is a default set created by Lightroom.
Adding the rules
The next part is the key to creating the Smart Collection. It’s the rules section that defines what will be in the collection. In the Match flyout, you’ve three options:
- All: Every rule must match for a photo to be included.
- Any: As long as a photo matches one of the rules, it’s included in the collection.
- None: As long as a photo doesn’t match a rule, it’s included.
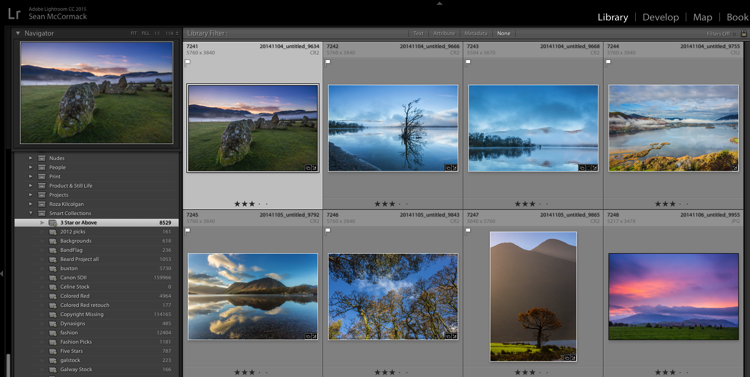
If you’re trying to narrow down to a limited set of photos, you’ll most likely be using the All option. As your first Smart Collection is a simple one, set the Rating to 3 stars, with “is greater than or equal to” applied in the pull-down menu. There are other options in the list including; is, is not, is greater than, is less than, is less than or equal to, is in the range. These all allow you to refine what appears in the collection. Click Create to make the collection.
The newly created collection will appear in the Smart Collections set, already selected, and the Grid View will show all matching photos. If you change the rating of one of the images visible to be a 2-star photo, it would automatically drop out of the collection. Why? Because it no longer matches the collection rules (3 or more stars).
Adding more criteria
Let’s start to narrow down the images you’re seeing. You can either double click on the collection to edit it or create a new one. I’ve double clicked for this example to edit. At the end of the Rating line is a + icon (outlined in red below) which you can click to add another rule. As soon as you do, a minus (-) icon appears, allowing you to remove this rule at any stage. There must always be at least one rule, though.

Let’s narrow down the collection to show only more recent 3-star images.
The new rule has Rating selected by default. You can change this by clicking Rating and choosing from the possible rule options in the pull-down menu. To get recent images, you need to choose Capture Date from the Date menu.
You’ll notice there’s a different set of options for dates in the figure below. As you want recent dates, choose “in the last” from the list. Next, you enter a number, then choose from days, weeks, months and years. For speed, enter 30 with the default “days” option. See below:
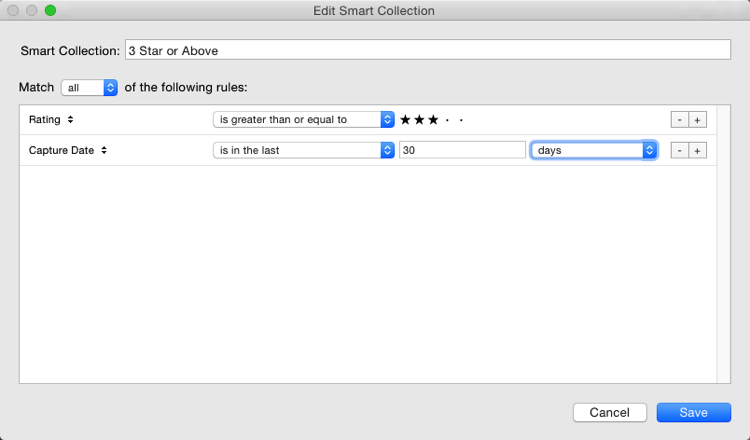
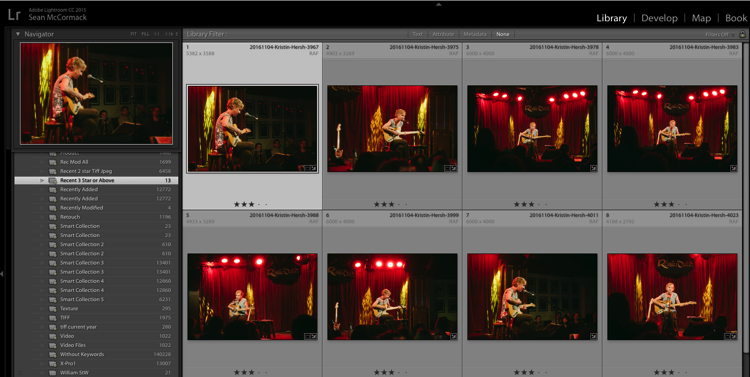
Next, change the name to reflect the new options and click Save. The collection will now display only the most recent photos (taken in the last 30 days) with 3 stars.
Smart Collection uses
Right now, what you’ve just created could be done using the Filter Bar, so what use is a Smart Collection? Well, they’re great for helping you complete workflow tasks such as:
- Add Copyright: Create a Smart Collection with the rule “Copyright Status”, the option “is” and the choice ‘”unknown”. If you use Metadata Presets, generally you’ll have one that sets the copyright information and sets the Copyright Status to “copyrighted”. Add this preset to the files in the Smart Collection to add that information.
- Add Keywords: To sort images not keyworded. From the Other Metadata menu, choose Keywords, then set the option to “are empty”. Use this to add keywords to an image. Just remember that as soon as you hit enter in the keywords panel, the image will drop out of the Smart Collection.
- Event work: For event work, you’re generally delivering most of the image, except blinks or out of focus shots. Usually, this work is edited quickly. Create a Smart Collection with the rules; Capture Date, is in the last, 1 days, and Pick Flag, is, unflagged. Now run through and reject the duds using the shortcut key X. Export the rest for your client.
- Labels for workflow stages: Labels can be used to imply a status with your photos. For example, you could use red to mean “selected, but needs editing”, yellow to mean “processing” and green for “final image”. By creating smart collections for each stage, you can see what needs to be done with each image. Combined with setting a date, you can keep on top on what needs doing!
- Adding Captions: Coupled with a recent date range, you can create a Smart Collection with “Other Metadata>Caption” and “is empty”. This shows recent images in need of a caption. Couple with ratings, etc., to narrow down which images need to be worked on.
Advanced Rules
The Any, All and None route does allow a great selection of options, but it’s missing a trick. What if you need 4-5 rules for sure (All), but also need one or two rules that are more like an Any set? That can’t be done using the method you’ve seen so far.
Rejoice . . . There is a way! It’s a little bit hidden, but if you hold down the Alt/Option key, the + icon turns into a number (#) sign. You can click the # to create a subset of new rules. These allow; Any of the Following, All of the Following and None of the Following – so you can mix in options as well.

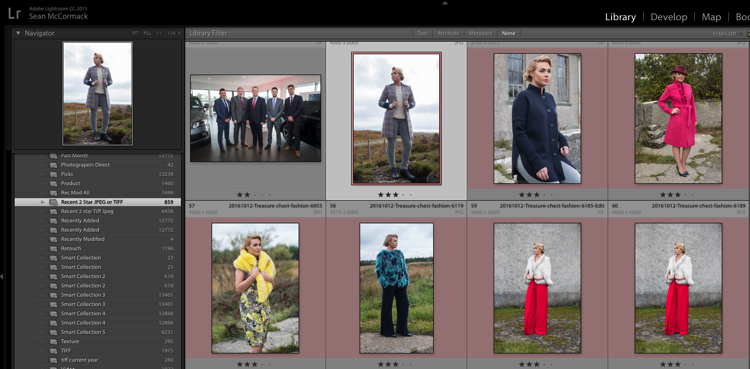
For example, you could specify an “Any of the following” are true and have two options for File Type, one for JPEG, and one for TIFF. This means all the other rules must apply, but either JPEG or TIFF will also apply. (note I’ve changed to 60 days here for a better set of photos to match for the example).
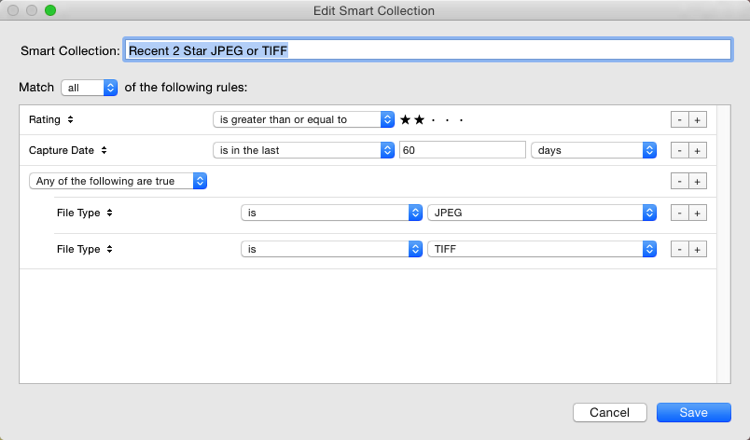
The Smart Collection now shows both TIFF and JPEG images with 2-star or higher ratings, taken in the last 60 days.
Other options you could use are red or yellow labels, or even non-continuous date ranges. Alternatively you could use the option to exclude information. For instance, you could have a date range of “in the last 1 year” and using “None of the following” could have “in the last 1 month” to exclude the most recent month. Combined with ratings/flags or stars, this could help locate older material still in need of editing.
Finally
As you can see, Smart Collections are a great tool in your file management arsenal, helping you drill down to specific sets of photos easily.
The post How to Create and Use Smart Collections in Lightroom by Sean McCormack appeared first on Digital Photography School.