Whether it’s because of a love of seeing what other people do with their homes, or because we’ve got a friend in real estate, loads of us are turning to real estate photography. Of course anyone can run around and shoot a house in a few minutes. It may be useable, but better images command a better price for a house, either for sale or rental. So what can you do to make your interior photography stand out from the others?
Well, quite a lot actually. Some of it just boils down to a basic understanding of what an interior shot requires. Great angles, straight walls, and even light make a massive difference to the shot. We’re not talking about high end, multi-light setups with tilt shift lenses here, just getting better shots.
#1 – Use a tripod
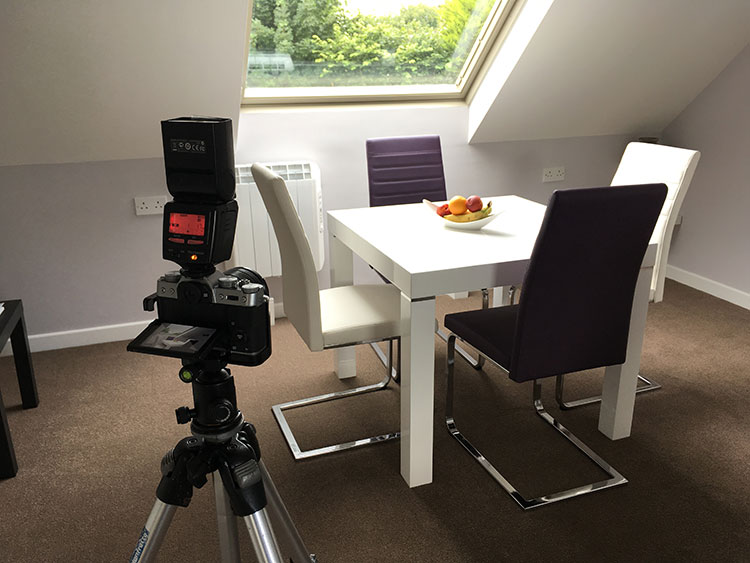
You can nip around and shoot handheld, but for many houses, you may need longer exposures. High ISO will just introduce too much noise, so a tripod is the best option. It does slow you down, but it also makes you concentrate on the shot more. You can use the time to check around the frame for stray cables, or clutter, and create the composition before you hit the shutter button. A few of the other tips benefit from using a tripod as well.
#2 – Use Live View
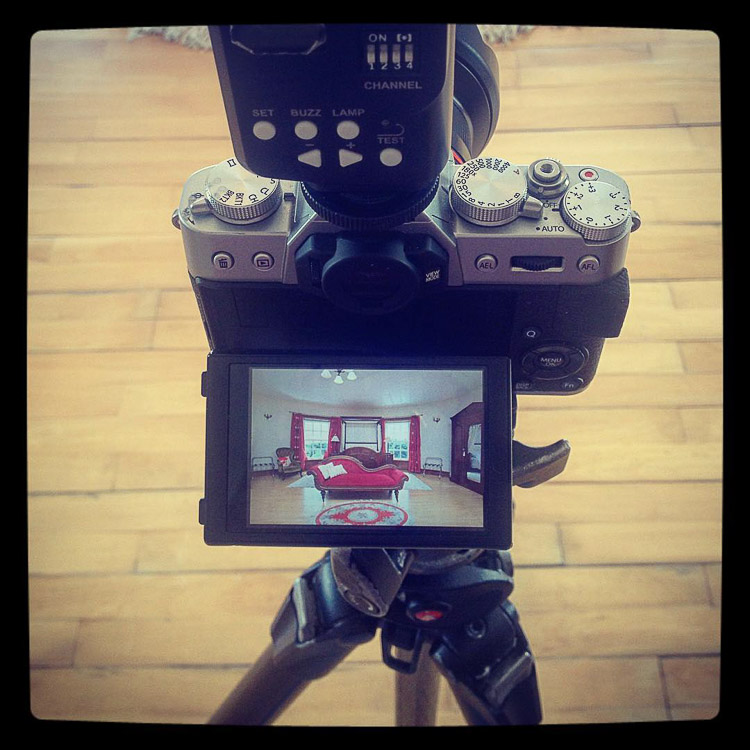
I shoot with a Fuji X-T10, so everything is live view, either by screen or by electronic viewfinder. Most cameras have a Live View option (if your camera has a video mode you likely have Live View), meaning you can see the shot before you take it. It’s even better if the camera has a tilt screen.
#3 – Go wide
Shooting wide can make the room look great, though you need to be careful that you don’t over do it. Sitting tight into one corner while you try to get the other three corners in just looks wrong. Don’t do it. Anything in the 16-24mm range on full frame (or the crop equivalent which equates to 10-16mm approx.) is great. You also don’t need to show everything. Our eyes and brain will fill in gaps, so half a cabinet and the pillows section of a bed work fine in a photo. I use the Samyang 12mm lens (check prices for that lens on Amazon or B&H Photo) for my wide interior work.
#4 – Shot one or two point perspectives
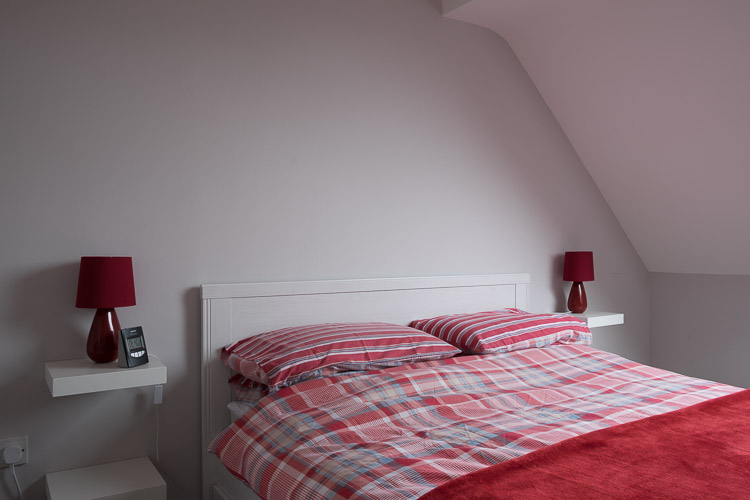
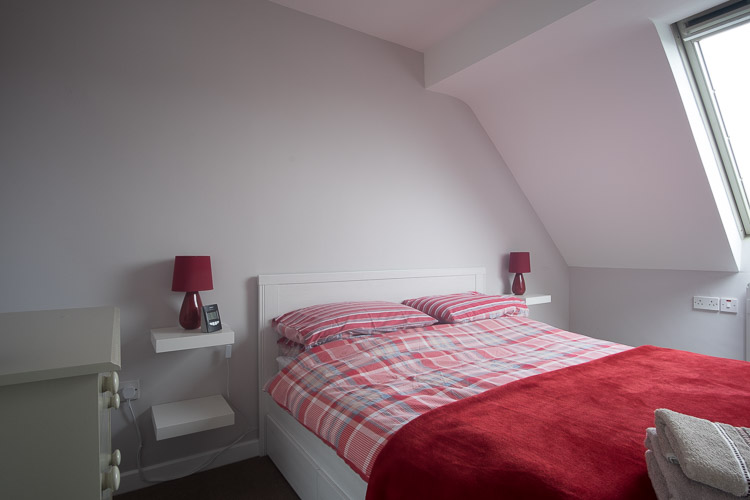
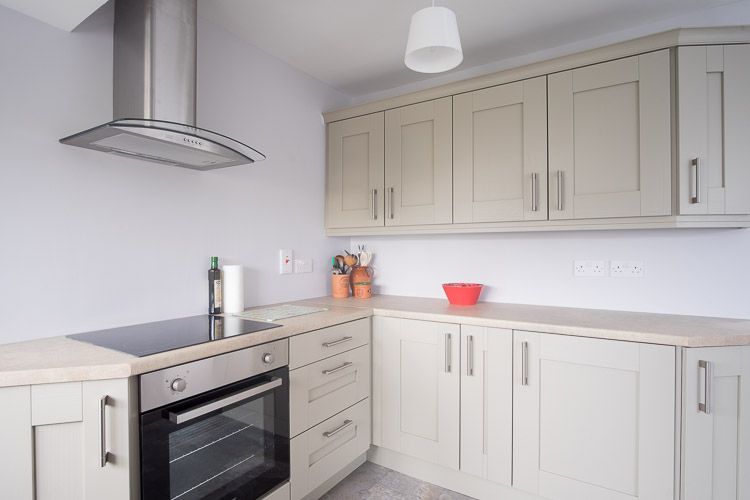
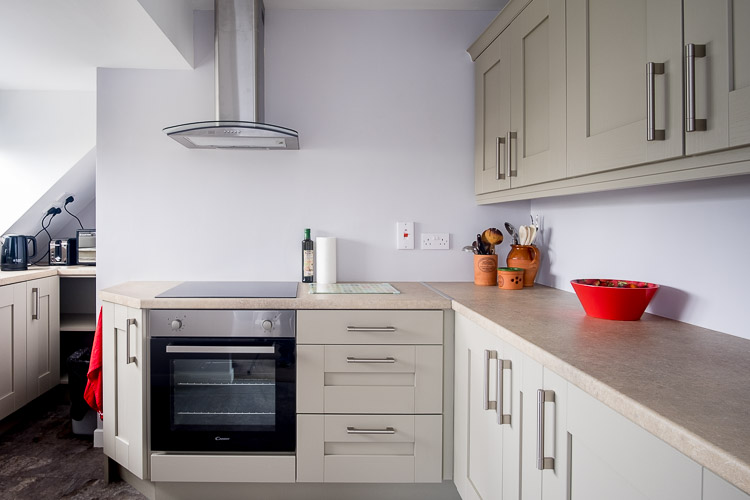
There are standard views you can shoot. A 1-point perspective is shooting so the sensor plane is parallel to a wall. It shows the side wall leading into the back wall and helps set a scene. A 2-point perspective is where you’re shooting into a corner. The corner doesn’t need to be centered in the frame, but don’t try and show three walls.
#5 – Shoot from mid-room height
We can’t all afford a tilt-shift lens to keep perspective in check, so it’s a really good idea to shoot with the camera at or slightly above mid-room height. This means you can keep the camera aimed out straight to keep the walls vertical. While the perspective distortion you get can be corrected in post-production, it’s much easier to get it right in camera. This is another reason to use a tripod as well.
#6 – Use a bubble level
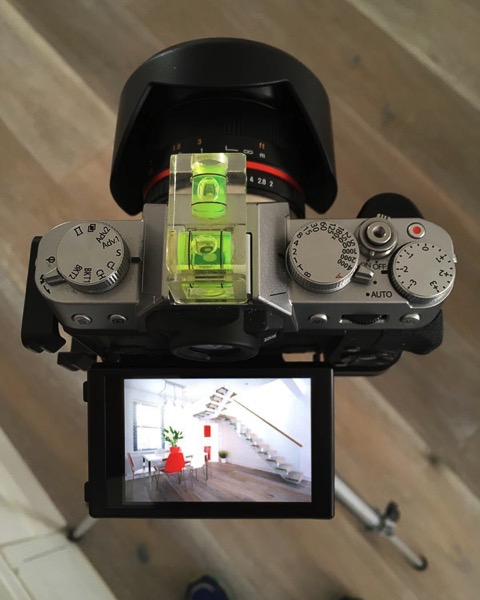
Most cameras have an electronic level, but not all. Even then, some only work for the horizon line, and don’t show tilt. There’s also a question of tolerance too. I find a little hotshoe bubble level to work great, and you see exactly when the camera is level, both side to side and up and down. The latter is essential to keep the walls looking straight.
#7 – Bracket, bracket, bracket
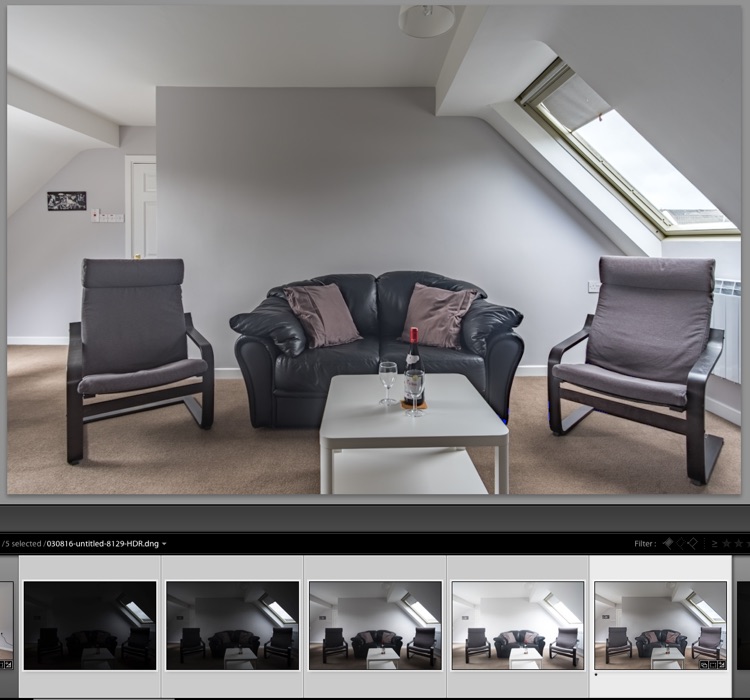
When shooting interiors, there’s often a huge range of light in a room. From the light outside to the darkest corners of a room. Often it’s more than your camera can capture in one shot. Bracketing is your friend here. This means you’re taking a normal exposure, a shot 2 stops underexposed, and one 2 stops overexposed. Lightroom’s Merge to HDR function can be used to combine the shots for more editing leeway. You can also opt to use more shots (4 stops under and overexposed if you want even more latitude) for example, when you want to show the view outside a window.
#8 – Use fill flash
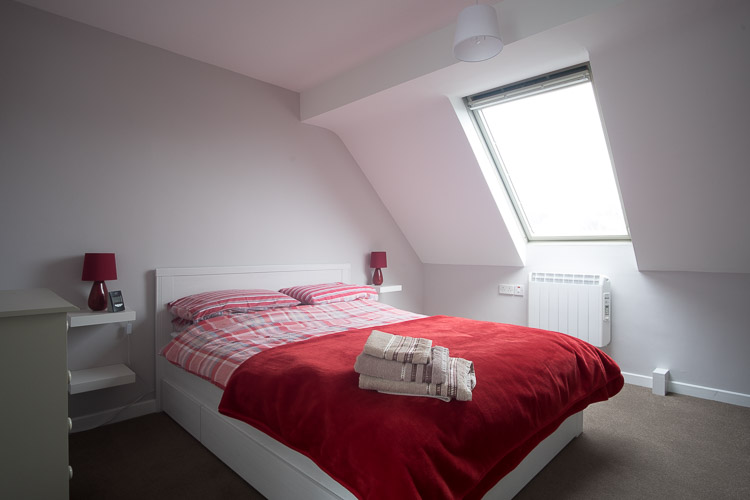
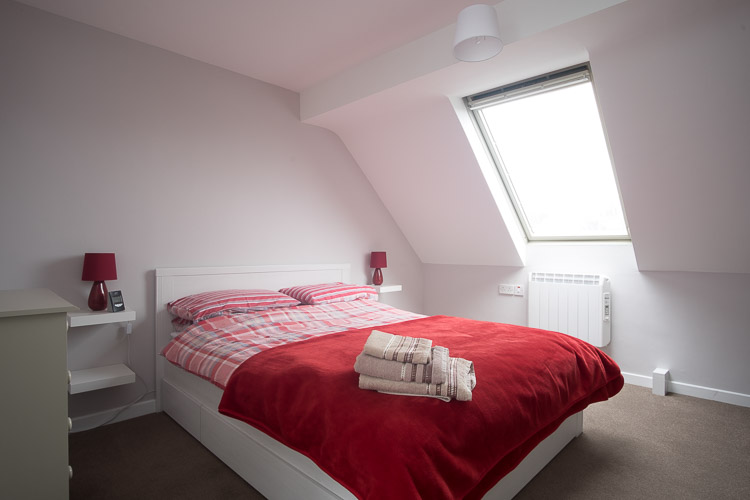
Another way to bring down the dynamic range is to use bounced flash to fill in the shadows. By aiming your flash at the ceiling and walls behind you, you can lessen the shadows in the area in front of you. It’s possible to do this on-camera, but it works well off-camera too. You can even just hold the flash in your hand pointed at the ceiling.
You’ll need a radio trigger for the flash, or a system with built-in triggers like the Cactus RF-60 (price on Amazon and B&H Photo) and V6ii trigger. See the difference in the towels and the near part of the bed in these photos? That’s what fill flash does. It’s subtle, but lifts the light in the room.
#9 – Go vertical for magazines
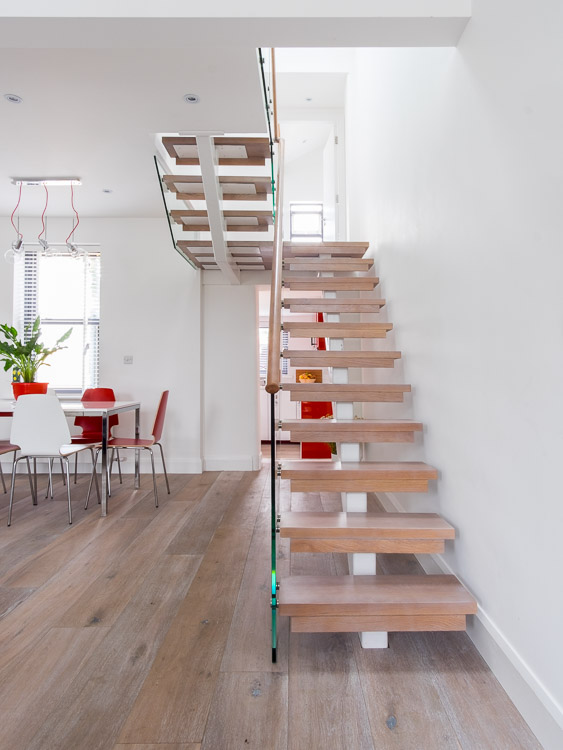
With so much interior work viewed on the web, there’s been a shift towards horizontal images in the interior photography world. But print magazines are still out there, and if you want your work published, you’ll need to shoot verticals for single magazine pages. Verticals usually mean letting the eye fill in gaps, so make use of composition to show hints of the room.
#10 – Post-processing magic
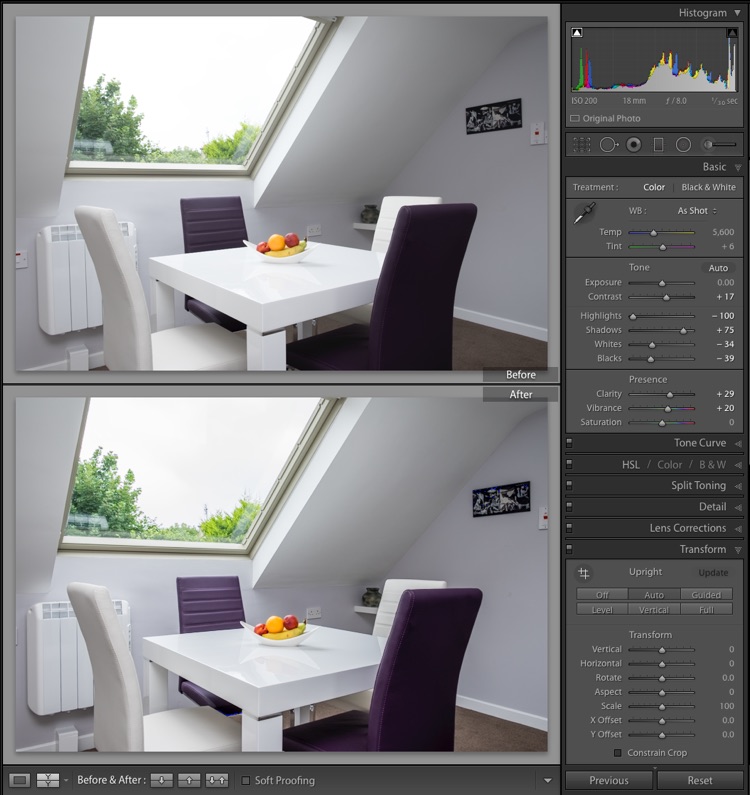
Get as much right in-camera as possible, but do edit your Raw files to bring out their best. When post-processing in a program like Lightroom, you should bring the Highlights down and open up the Shadows. Next bring the Blacks down to ensure that the contrast lost from opening up the Shadows doesn’t impact the image too much. A little Clarity can also help. Find a Lens Profile in Lens Corrections to correct for distortions. Use Lightroom’s Upright tool to fix perspective issues in the image that can happen.
Conclusion
Hopefully you’ve found these tips helpful for getting started doing interior photography. If you have any others to share please do so in the comments below.
The post 10 Tips for Better Interior Photography by Sean McCormack appeared first on Digital Photography School.