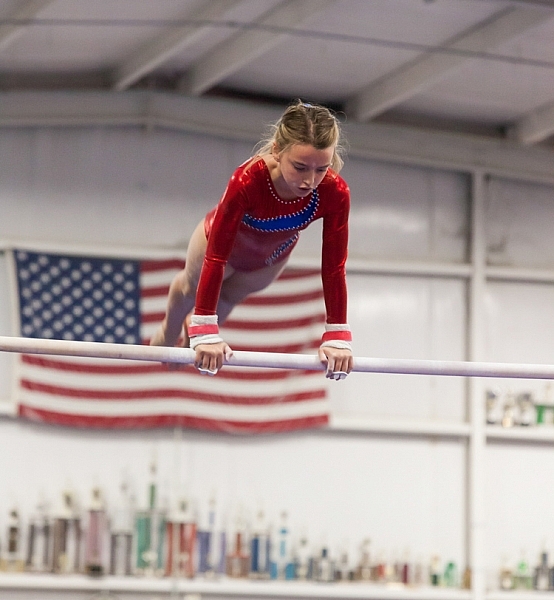
Sometimes I feel cursed. Like any parent I want to take pictures of my kids doing their activities. However, I have a daughter who is a gymnast. For a photographer, that is a toxic combination of very fast action with generally poor light. But then it gets worse. My other daughter is very involved with her school’s theatre program. That means I’m trying to take pictures of her acting, singing, and dancing in the worst light imaginable.
As a result, I spend a lot of my time trying to photograph action in bad lighting. Having done so for a while now, I have a few tips to pass along, so hopefully this will be easier for you next time you find yourself in a similar a situation – shooting action photography in bad or low light conditions.
#1. Use Manual Mode
Before you even think about shooting, make sure your camera is set up for success. Let’s start with the shooting mode. No matter what mode you normally use, in this context you are going to need a large degree of control over your camera’s settings. Manual mode gives you complete control, so it is generally a good choice. If you are not comfortable using Manual, or if you face changing light conditions, use Aperture Priority.
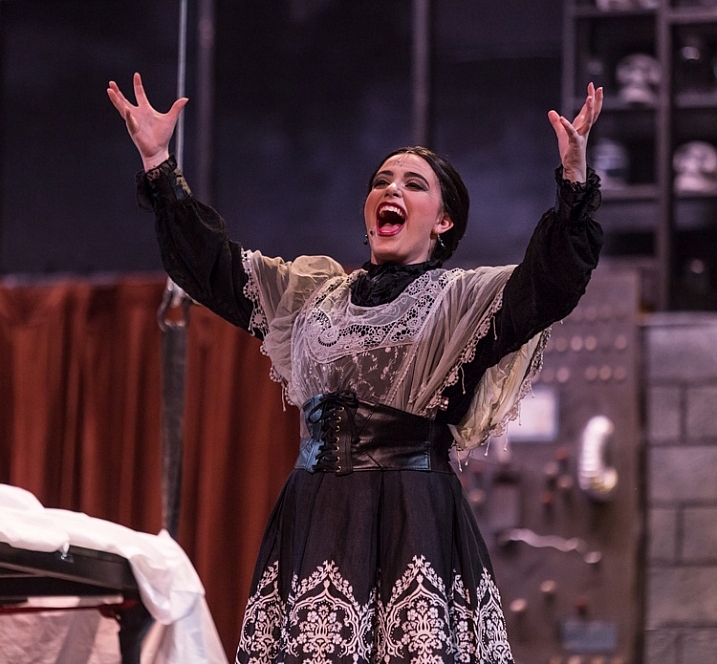
Shutter speed: 1/320; Aperture: f/2.8; ISO 3200.
You will be using very specific exposure settings that the camera probably wouldn’t choose on its own. We will get to those settings in a moment, but using Manual (or Aperture Priority) will allow you to use them.
#2. Use Fast Glass
Next, you’ll need to decide which lens to use. Use your longest and fastest lens (fast glass) here. The low light environment means that you will want a lens with a wide aperture, that lets in a lot of light. The fact that your subject is likely to be rather far away from you means that you will also need a longer focal length. I personally use a 70-200mm f/2.8 and it works great. I could see even using a longer lens than that.
You may be inclined to use a teleconverter to get some extra reach. If you aren’t familiar with teleconverters, they are extensions that fit between your camera and lens, which increase the magnification of the lens, usually by 1.4 or 2 times. In other contexts, they work great – in a low light environment, however, they don’t. A 1.4x teleconverter costs you 1 stop of light and a 2x teleconverter costs you 2 stops of light. If you start with an f/4 lens, it is now an f/8 lens. That won’t work here. There just isn’t enough light. If you need the extra reach, you are better off taking the picture without it and then cropping it later.
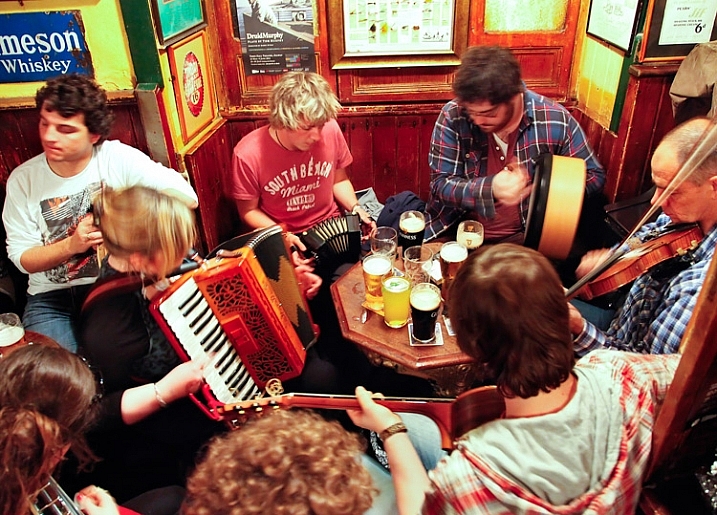
Sometimes a slower shutter speed adds a sense of movement. Shutter speed: 1/10; Aperture: f/4; ISO: 6400.
#3. Shoot Wide Open
Now it is time to prepare the shot. The first exposure setting to make is the aperture. Deciding which aperture to use in this context is easy. Put the aperture at its widest setting, which is the smallest f-number. Doing so lets in the most light. The downside is that you will have a very shallow depth of field. However, in this context that should not matter. You will only want your subject in focus and having some background blur is just fine (sometimes even preferable).
#4. Set a Fast Shutter Speed
Next you will set your shutter speed. The trick here is to make sure you are using a fast enough one. If your subject is not moving, then your minimum shutter speed will be a function of your focal length. The Reciprocal Rule states that your minimum shutter speed for a sharp picture should be the inverse of your focal length. So if you are shooting at 100mm your shutter speed should be 1/100 of a second or faster.
When your subject is moving, things change a bit and you will need to use an even faster shutter speed. I find that 1/200th of a second is a minimum for a moving subject if you want to avoid any blur. Start with that setting, and increase it if you have enough light. Try hard to avoid using a slower shutter speed unless you are trying to add a slight blur to your subject, to show a sense of movement. Otherwise, even if you don’t see any blur when you look at your pictures in the LCD, it might still be there and you will be disappointed when you get back to your computer to find you have a card full of blurry pictures.
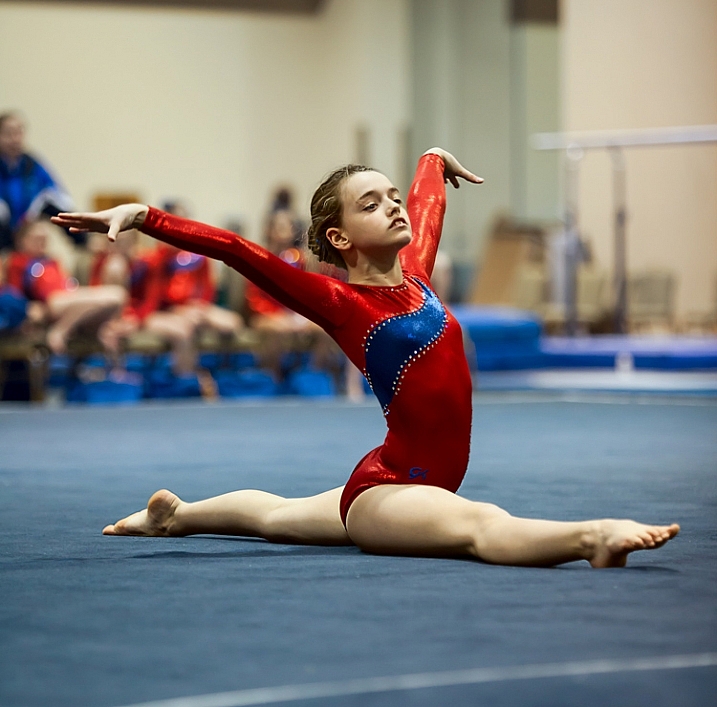
In this picture, I was able to get away with a shutter speed of only 1/160th of a second because my subject wasn’t moving. . . (Shutter speed: 1/160; Aperture: f/2.8; ISO: 2000)
#5. Set the ISO (High)
The final exposure setting to make is ISO. Since you have already set your aperture and shutter speed, the ISO just is what it is. Set the ISO to whatever level is necessary to achieve a proper exposure.
Don’t be alarmed if you need to use a very high ISO to get a proper exposure. I routinely use ISO 1600 or 3200, and sometimes I even need to put it to ISO 6400. These are ISOs I would never even think about using in most other situations, but they are often necessary here.
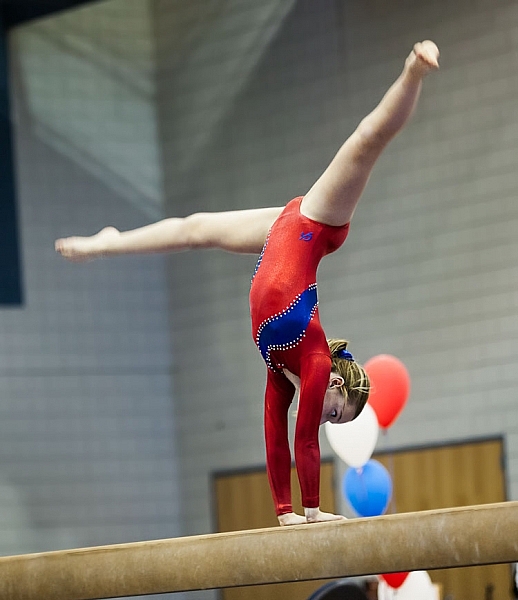
. . . but in this photo where my subject was moving, 1/160th of a second wasn’t quite fast enough. Arguably the blur in the legs implies movement, but it isn’t what I was trying to do (Shutter speed: 1/160; Aperture: f/2.8; ISO 3200).
#6 Test Your Exposure Settings Before the Action Begins
Test your exposure settings before the action starts. Since you are indoors, the light is often unchanging. In that case you can tweak the exposure settings and then more or less forget about them while you concentrate on the action. Where there is changing light, you will need to revisit the exposure settings often. In any case, start by making sure they are right, and do a test.
#7. Zoom In
Now let’s concentrate on the taking pictures part. In composing the picture, the first rule is to fill the frame. Zoom in on your subject. Don’t leave a lot of background. The important part of your picture is your subject, and they should dominate the picture.
#8. Wait for Peak Action
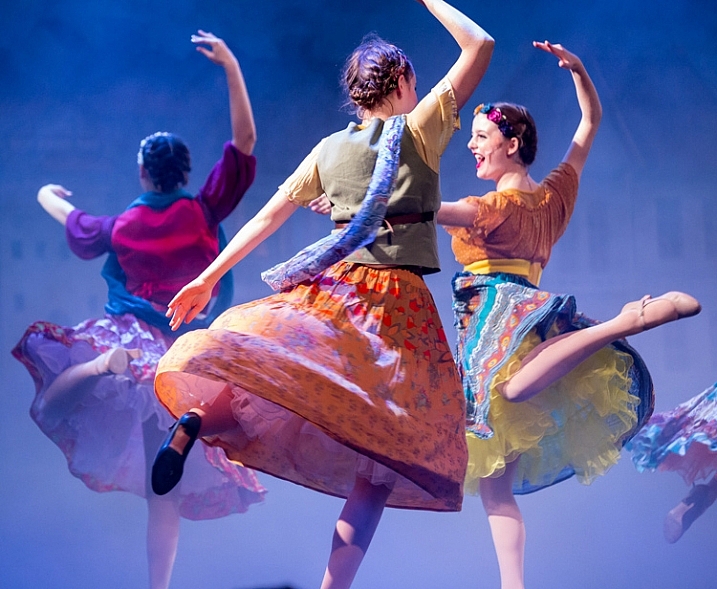
(Shutter speed 1/250th of a second; Aperture f/2.8; ISO 6400).
You may be inclined to machine gun your subject during the action. I know that there are many photographers who do that with great success, but I find it rarely works for me. Instead, anticipate moments of peak of action and prepare for them. When the peak action arrives take 2 – 4 shots very quickly (make sure your camera is in continuous shooting mode) and then recompose. When something else of interest happens, take 2 – 4 more shots, and so on.
Try to anticipate those moments of peak action. When you do so, and you shoot in a quick burst, you are more likely to get the best shots.
#9. Don’t Overlook Breaks in the Action
It may seem odd, but breaks in the action are often great times to shoot. By a break in the action, I mean two things.
The first is a momentary pause during the event. For example, in gymnastics after a difficult move there is typically a momentary pose. The same holds true in singing and dancing, as they hold a pose after finishing a part of a routine. The pose often makes a great shot, plus they aren’t moving so you won’t have as big of a problem with blur.
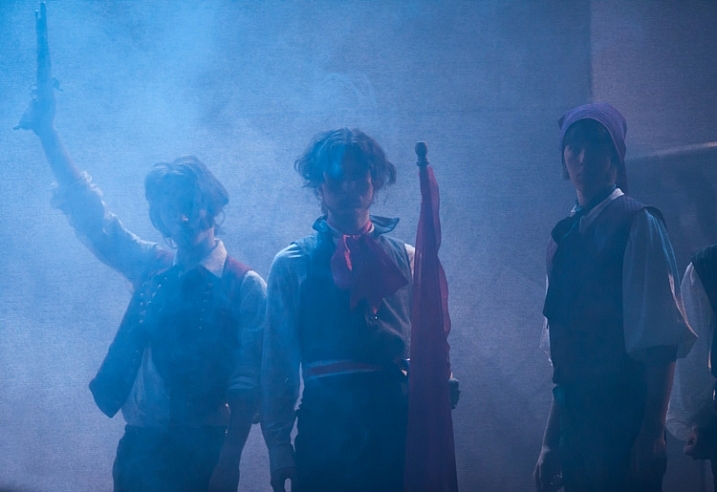
A break in the action will sometimes provide great shots while allowing you to use a slower shutter speed (Shutter speed: 1/50th of a second; Aperture f/2.8; ISO 3200).
The second break in the action I am talking about is an actual break, like the end of a period in sports. There are often warm-up drills going on at that time that lend themselves to great shots. Plus you are typically allowed a bit more latitude in terms of your own movements, and you don’t have to worry about getting in anyone’s way. The best part is that no one will know whether you took the shot during a drill or the real game/match/meet. In fact, after a year or two, you probably won’t remember either!
#10. Nail the Focus
Because you are shooting with your aperture wide open, you will have a very shallow depth of field. That means the focus will be unforgiving and if you miss it there is no leeway.
So what should you focus on? Well, the subject, of course. If your subject is a person, then always focus on the eyes. If the eyes are on different planes, focus on the nearest eye.
This is an area where it pays to be comfortable with your camera’s autofocus modes. Your camera will have a mode designed to focus on stationary points (Canon calls this One-Shot and Nikon and Sony call it AF-S). Your camera will have another autofocus mode designed to track moving subjects, which Canon calls AI Servo and Nikon and Sony call AF-C. In the case of a moving subject, this mode will continuously track your initial focus point and readjust as it moves. Most photographers use this mode in the case of a subject that is moving. I personally almost always use the stationary autofocus, but use whichever one you are comfortable with.
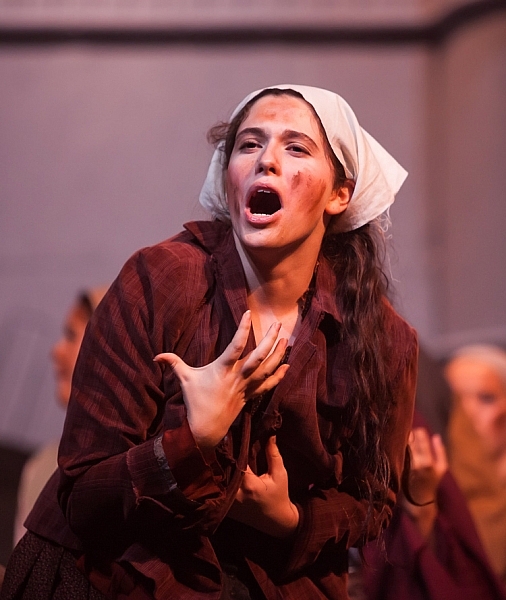
Shutter speed: 1/640; Aperture: f/2.8; ISO 3200.
Another decision you should make to help with your focusing is whether to use back button focus. Normally, your camera focuses when you press your shutter button half way down. You can, however, set your camera to focus when you press a button on the back of the camera instead. I prefer this method because the focus will not automatically reset with each picture, Either way is fine, but back button focus gives you slightly more control over your camera’s focus so you might want to give it a try.
#11. Chimp!
That’s right, I want you to chimp. This refers to the act of looking at your photos on the camera’s LCD screen. Some photographers look down on this practice and referred to it as chimping (supposedly because the people looking at the LCD make “oo oo” noises while looking at their pictures, similar to chimpanzees). I actually think you should look at your LCD in any shooting context, but in this situation it is important to do so. There is just too much that can go wrong, and you need to make sure you are getting the shots. You might have the exposure wrong, your focus might be off, the action might be too fast for your shutter speed, and so on. You do not want to get home and discover you were doing something wrong, that could have been corrected while you were shooting.
#12. Additional Noise Reduction
You will have your own workflow for post-processing your pictures, so I will not dwell on that too much here. There are a few things, however, that are particularly important in this context, that I want to pass along. The first is that you will need to do some noise reduction since you will be using high ISOs for these shots, and you should probably do it in a manner that is a little different than you are used to doing.
Start off by using Lightroom’s noise reduction in the usual manner. Push the Luminance slider under Noise Reduction to the right. There is an equivalent slider in Adobe Camera Raw (ACR), if you use Photoshop or Photoshop Elements. Keep the increase moderate at this point, I find that is usually in the range of 10-15.
After that, reduce the noise in the background further. The background of your picture will usually be blurry because you used a large aperture, so the loss of detail from the additional noise reduction will not hurt anything. In Lightroom, use the Adjustment Brush and push the noise slider to the right, painting in where you want the noise reduction. Photoshop users can do the same thing in ACR or create a new layer with noise reduction, while masking off the subject.
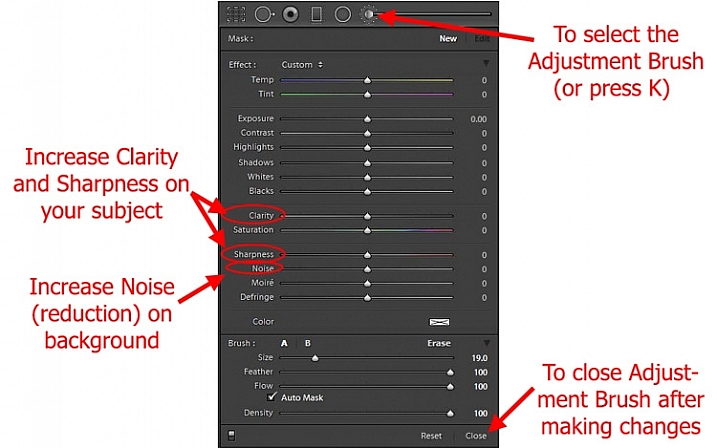
Using Lightroom’s Adjustment Brush to Sharpen and add Noise Reduction – you will need two adjustment brush points added, one for the subject and a second for the background.
Note: you will need to add two adjustment brush points to do this (because you’re making different adjustments to each), one for the subject (to increase Clarity and Sharpness, see below) and a second for the background (to increase Noise Reduction).
#13. Sharpen the Subject
Next, sharpen your photo but, similar to the noise reduction you did above, you should tailor it to this situation. To start off, apply a slight amount of sharpening to the whole image, but not as much as you would usually apply because it will likely also cause an increase in noise.
Then apply sharpening to the subject only. In Lightroom, use the Adjustment Brush again. This time increase the Clarity and Sharpening amounts. Apply the effect only to your subject, while leaving the background alone. In Photoshop you can do the same thing in ACR or create a new layer that you sharpen, and mask off everything but your subject. The extra sharpening will help make your subject stand out a little bit better.
Conclusion
Photographing action in low light is a severe test of your camera equipment and your photography skills. It pays to have fast glass and a camera that performs well in low light. Using the tips in this article, you should be able to set up your camera and make the proper exposure settings. It will take practice to consistently nail the focus. It will take even more practice, and a little bit of luck, to capture the moments of peak action. But when you do, it is priceless.
Do you have any other tips or tricks that you use when shooting action in bad or low light? Please share in the comments below.
The post 13 Tips for Doing Action Photography in Bad Light by Jim Hamel appeared first on Digital Photography School.