One of the first things that new photographers often hear is “your kit lens is garbage.” While there are certainly benefits to upgrading your glass as your budget allows, it’s also important to know that there is so much you can do with your kit lens if you understand how to use it to your advantage! In this case, let’s talk about portraits.
Most photographers quickly upgrade to a 50mm or 85mm prime lens for portraits, and with good reason. These lenses are sharp, and can typically shoot as wide as f/1.4 or f/1.8, which means that it’s easier to achieve that nice blurred background in portraits.

Canon 50mm lens at f/2.0, 1/160th sec, ISO 100.
If you plan to spend any significant amount of time taking portraits, I would absolutely recommend upgrading to at least a Nifty Fifty lens. When it comes to portraits, I almost always find myself reaching for my 50mm prime lens, and I really do think it’s worth the money. That said, when we’re living in the real world, there are a whole plethora of reasons why you might not upgrade lenses right away. Perhaps it’s a budget issue. Perhaps you’re still trying to decide which type of photography really interests you. Or maybe you just opened the camera box for the first time today and want to have a better understanding of your camera before you purchase anything else. Regardless of the reason, I’ve got good news for you–you can take great portraits with a kit lens!
In this article, we’ll explore a couple of limitations when it comes to taking portraits with a kit lens, as well as some tips for working around those limitations and capturing the best portraits possible with the equipment you already have.
1. Use Depth of Field to your advantage
As I mentioned before, one of the benefits of using a prime lens for portraits is the ability to shoot as wide as f/1.4 or f/1.8 to easily achieve that nice blurry background (called bokeh) in almost any location. Most kit lenses can only shoot as wide as f/3.5 (at 18mm) and f/5.6 (at 55mm) which won’t blur the background as much as new photographers are typically hoping. That is unless they understand that aperture isn’t the only important factor in creating that nice blurry background for portraits.
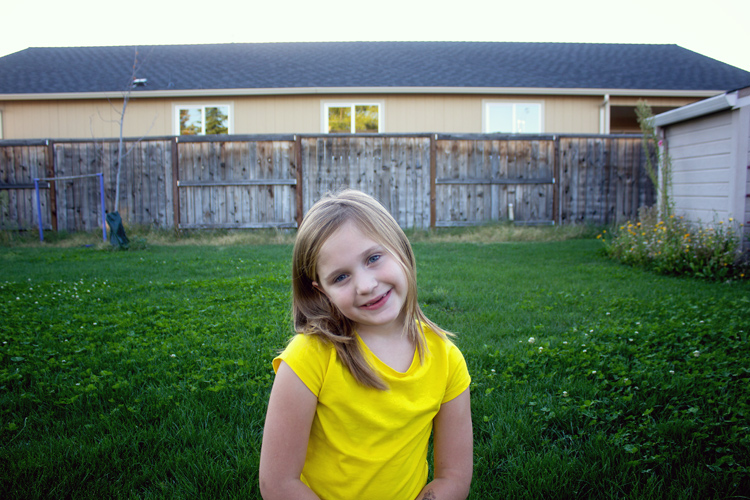
Another key aspect in creating a blurry background is the distance from the subject to the background. The further the subject is from the background, the blurrier the background will be in the photograph. So, to create the blurry background when using your kit lens, one of the easiest things to do is to position your subject as far away from the background as possible.
Typically, when I use a 50mm lens to photograph my kids in the backyard, I have them sit on the grass about two or three feet away from our back fence. When using a kit lens, I have them sit about 30 feet away from the fence, as you can see in the image above. Then, I zoom-in to somewhere between 35-55mm, and shoot at the widest aperture the lens will allow for that focal length, in order to produce the most blur in the background possible.
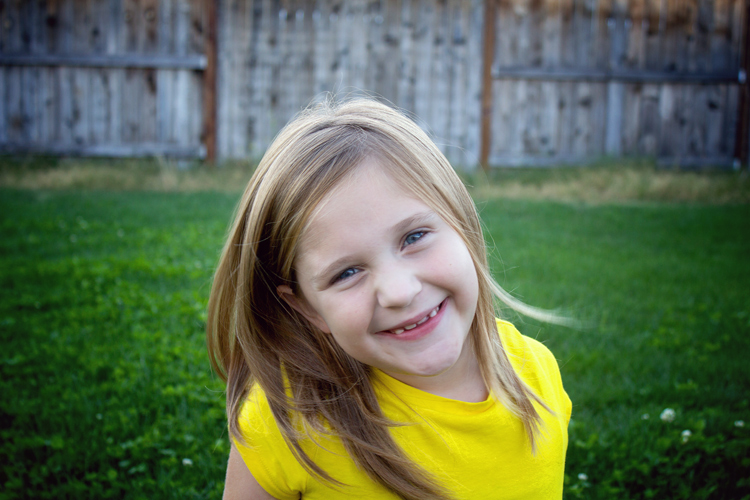
Canon Kit Lens that came bundled with the Rebel XS. This image was shot at 37mm and f/4.5.
2. Change your perspective
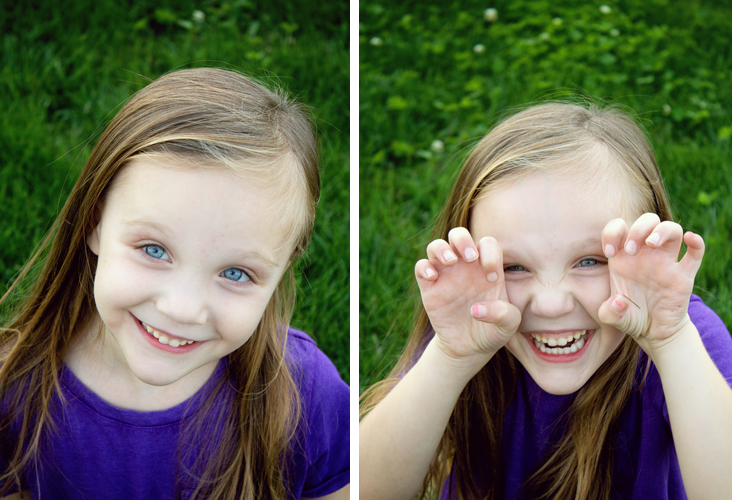
Both images were taken with a kit lens at f/5.6.
If you can’t place your subject far away from the background and/or the background isn’t something you’d like to incorporate into your photograph, another option to consider is to change your perspective. Stand up, and have your subject sit on the ground, photographing them from above. Grass, cement, asphalt, and sand all photograph well from above, and can often be more visually pleasing in a portrait than a background that cannot be blurred as much as you’d like.
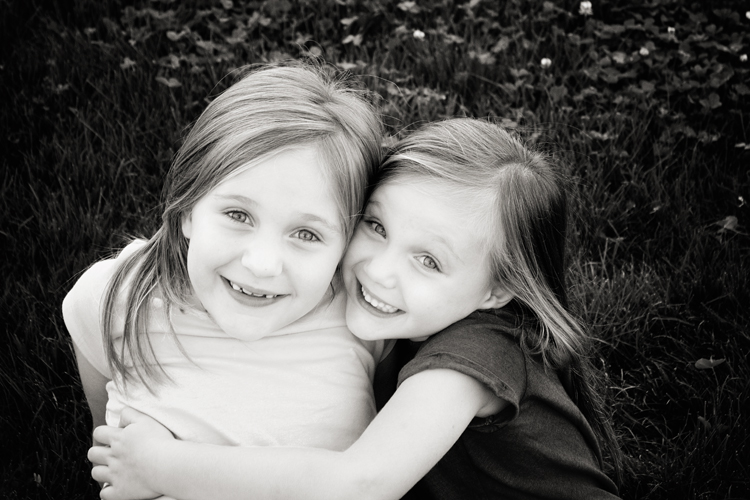
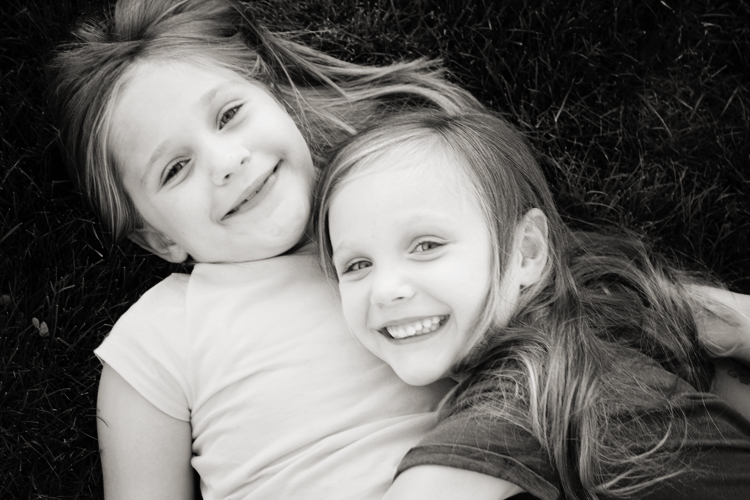
Shot with a kit lens at 55mm, f/5.6.
Bonus Tip: When shooting from above, try converting to black and white! When converted to black and white, grass reads as a dark background that can be a nice contrast for lighter skin tones. Likewise, concrete often reads as a light background that can be a nice contrast for darker skin tones. Converting to black and white when shooting from above can be a great way to work around the inability to blur a background as much as you’d like in portraits.
3. Try candid or semi-posed portraits

Shooting at f/4 or f/5.6 means that more of each image is going to be in focus than it would be if you were shooting at f/1.4 or f/1.8. Rather than consider this a disadvantage, think about the things that are easier to capture at those apertures.
For example, at f/5.6, you have the freedom to capture images with a little more movement without risking a lot of blur from motion. This is a great opportunity to try taking portrait-style images that are candid or semi-posed. Try photographing kids running toward you or siblings mid-hug. Have your subject twirl or jump. Ask mom or dad to tickle their child. Though these images may be slightly different than the head-and-shoulders images that the word “portrait” often brings to mind, they often invoke emotion and movement in a way that is really compelling and valuable in photographs.
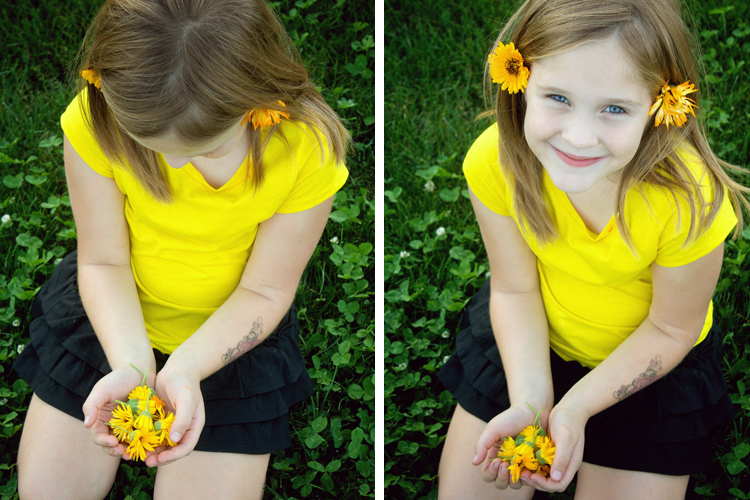
Shooting from a slightly wider angle than just head and shoulders also allows you to incorporate aspects of the surroundings into your images to tell a story. Perhaps it’s a handful of flowers at the park, a bunch of balloons for a child’s birthday, or even an ice cream cone on a hot summer day. The cold hard facts are that the story and emotion make the portrait, not the bokeh in the background.
Using a kit lens in a nutshell
My suggestion to you is to fudge the expectation of head-and-shoulders images when it comes to kit lens portraits. Instead, focus on capturing emotions and telling a story, while getting as close as you reasonably can. If you can move the subject far away from the background in order to create a nice blur, absolutely do so. If you can’t, consider changing your perspective to create a more uniform background that’s reasonably free from distractions so that the viewer will be able to focus solely on your subject.
Does a kit lens have limitations when it comes to portraiture? Absolutely. However, recognizing the limits of a kit lens when it comes to portrait photography isn’t prohibitive. Rather, it allows you to recognize the situations and applications that will be most effective in creating the images you want with the equipment you already have, and that’s always a good thing!
Do you have a great portrait taken with a kit lens? Please share it in the comments below!
The post 3 Tips for Taking Portraits with a Kit Lens by Meredith Clark appeared first on Digital Photography School.