When you’re new to Lightroom, some features of the program aren’t immediately apparent, or easily discoverable. In this article I’ll introduce you to five Lightroom Develop module secrets that will help you get more out of photo editing in Lightroom.
#1 Smarter Virtual Copies
Often when you’re working in Lightroom you’ll edit an image to look one way, and then decide you’d like to try to edit it in a different way – without losing your work. The trouble is, that once an image has been edited, any virtual copy that you create will use the current look of the image as its starting point. So the first entry in the History Panel will be the creation of the Virtual Copy and you can’t, using the History Panel, wind the photo back to how it looked out of the camera.
You can, however, use the Reset button at the foot of the right panel of the Develop module. Click Reset to reset your new Virtual Copy, so it is the original out of camera image with all edits removed. Of course, the edits will remain on your original image (just the Virtual copy will be reset).
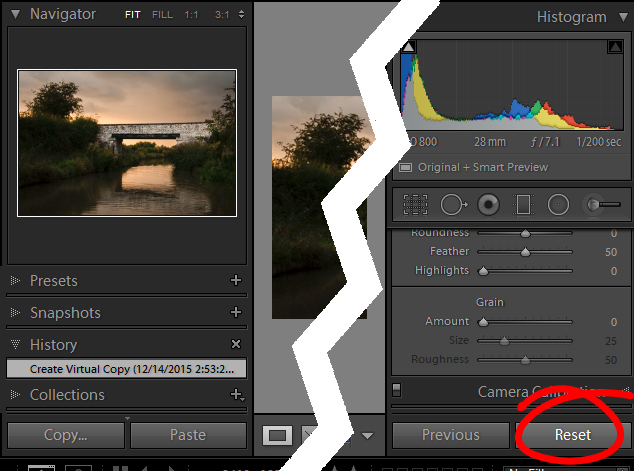
So far, so good. But what if you want to create a Virtual Copy that starts partway through the editing process? Well, that can be done too. Start with the original image, open the History Panel on the left, and click on the entry which shows the image looking as you want for your virtual copy. Note that the most recent edit is at the top of the History panel.
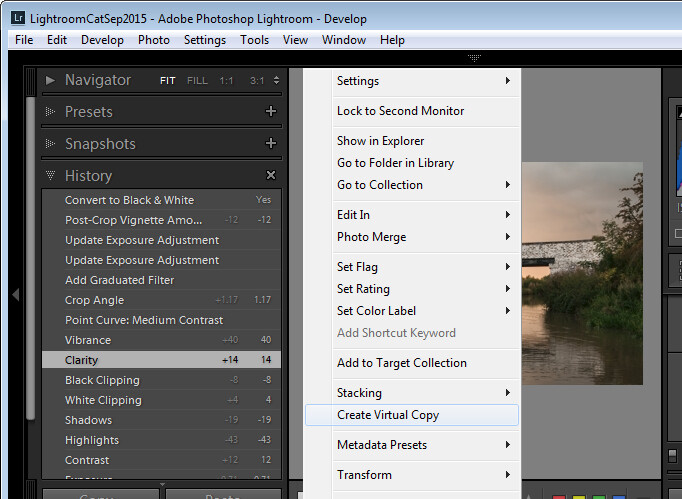
Notice the History panel is opened, and a state other than the current one is chosen to make the Virtual Copy.
Now right click the image and choose Create Virtual Copy – Lightroom will create a new virtual copy and switch to it. Immediately after you do this, click back on the image that you made the copy from – the original image – and in the History Panel, click the topmost entry. This reinstates your edits to the original image, back to your last edit. It’s important to do this before you start working on the new Virtual copy as it is easy to forget to perform this step and, in doing so, you may lose your edits if you subsequently make changes to the original image.
#2 Comparing Before and After
In Lightroom you can compare the before and after editing state for an image by clicking on the image in the Develop module and pressing the backslash key on your keyboard (\). Press once to see the Before state and once again to return to the current edited state of the image.
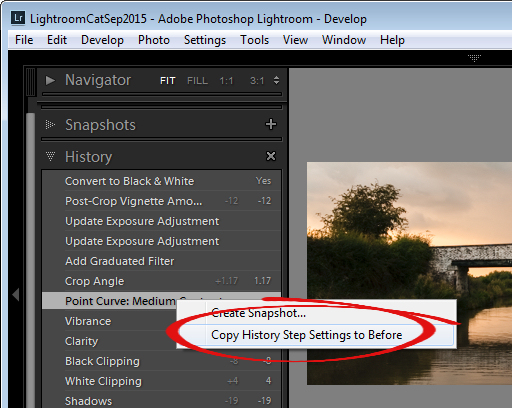
So far, so good. But what if you want to compare the current edited state with an earlier edited state – not with the original out of camera image? You can do this if you open the History panel, then right click the entry in the History list that you want to compare with the current state of the image – you can choose any of the states in the list. From the popup menu choose Copy History Step Settings to Before. Now when you press the Backslash key to compare the before and after, you’ll be comparing a previous state but not the original out of camera image.
#3 Reverse Engineer Presets
A Lightroom preset is a set of slider settings that have been saved in such a way that they can be applied to any image, at any time. That said, there is nothing that can be applied using a preset that you cannot also apply manually to an image, by using the tools in the Develop module. This means that Presets contain valuable information for editing images which you can discover by reverse engineering them. So, if you like a preset that ships with Lightroom, or if you have downloaded and installed other presets that you like, use the process that follows to learn how they work.
Start with an image that is in its original out of camera state, and apply the preset to the image. Now look through the settings in the Develop module panels on the right to see what adjustments have been made to the image.
To see if there are any Graduated Filter or Radial Filter adjustments included in the preset, click the Graduated Filter tool, set the Show Edit Pins setting to Always and see if any pins appear on the image. If so, click to see where they have been applied and what their settings are. Repeat this step with the Radial Filter to see if any radial filter adjustments have been made to the image. As presets cannot contain Adjustment Brush edits there’s no point in checking that tool.
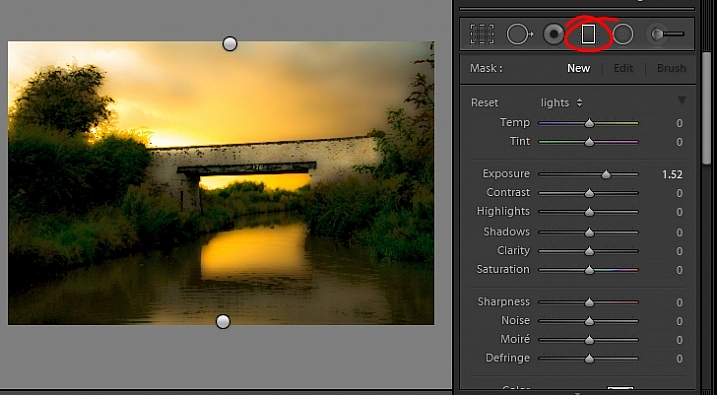
It’s best to study presets without first making any changes to your image, except for applying the preset. This way you will know that all the edits that have been applied to the image are part of the preset, and none of them are your own edits.
#4 The Alt Key works nearly everywhere
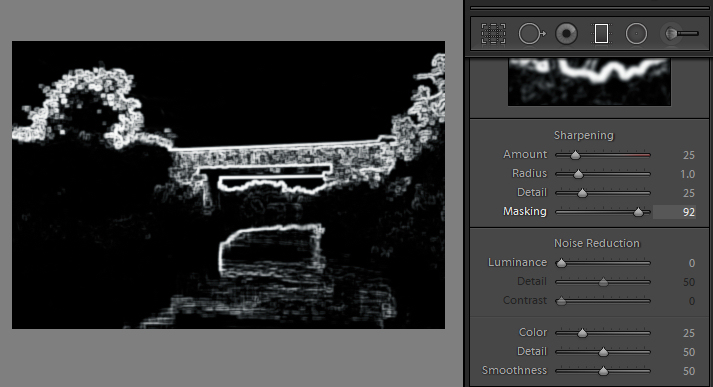
The Alt key is the biggest hidden secret keystroke in Lightroom. When you press it, various things appear on the screen that previously were not visible. For example, in the Basic panel you can use the Alt key to display Reset Tone and Reset Presence options. The Exposure, Whites, Blacks and Split Toning sliders all display visual feedback when you hold the Alt key while adjusting them. So too do the sliders in the Sharpening panel. To learn more about using the Alt key in the Lightroom Develop module, check out this post: Lightroom Tips for the Develop Module – the magic Alt key.
#5 Keyboard Adjustments
If you find it difficult to adjust the sliders in Lightroom using your mouse, then try adjusting them using the keyboard instead. To do this, click on a slider to target it and then use the left and right arrow keys to adjust the slider in small increments. To move in larger increments hold the Shift key as you press the arrow keys. You will find that the Up and Down arrow keys work identically to the Left and Right arrow keys.
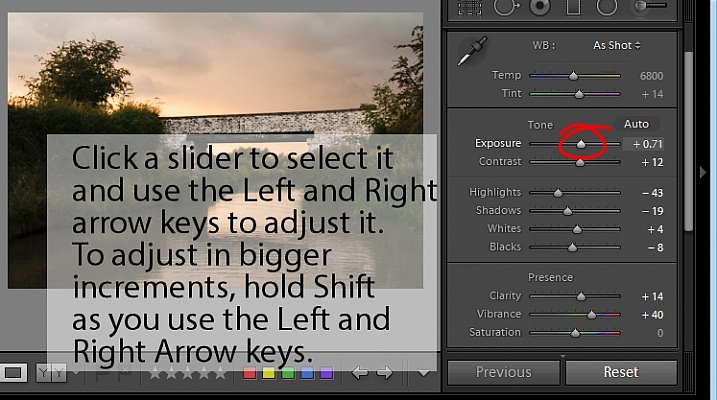
If you want to continue to use the sliders to make your adjustments, but you find that they travel too fast for you to get an accurate adjustment, hold the Shift key as you drag on a slider. This slows its movement down and makes it easier for you to make small adjustments. You can also click on the numeric value that a slider is currently set to and use the Up and Down arrow keys to adjust the value in small increments.
To reset a slider – double click its name and it will return to its default value for that type of image.
Watch the video
Here is a video version of this article so you can follow along as I walk you through each point.
The post 5 Lightroom Develop Module Secrets Revealed by Helen Bradley appeared first on Digital Photography School.