Quick reminder: only a few days left to get the Sunrise/Sunset Recipe Cards at 65% Off
Photography is all about light, and the quality of light can make all the difference between an average photo and a stunning photo. Magic hour — also commonly referred to as “golden hour” — is the time of day when the sun is low and near the horizon, providing a warm glow. It occurs twice a day, in the hours of dusk and dawn. As the sun is either rising or setting, the sunlight appears as flowing gold light that casts a glow everywhere. This hazy, warm light is why most photographers agree that magic hour is the best time of day to shoot.
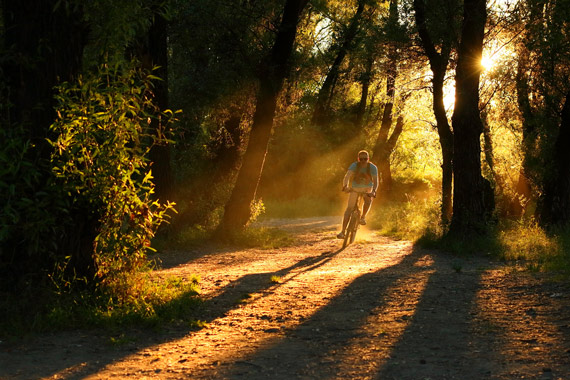
photo by Eugene Romanenko
The direction of light plays a huge part in photography. Thus, this soft and diffused light is preferable for photographing practically any subject. This directional light creates saturated colors and preserves details without creating blown-out highlights. Instead, harsh shadows are replaced with long shadows that provide warmth, texture, depth, and interest to your photograph. These qualities are difficult to attain midday between 10 am and 2 pm, when the sun is overwhelmingly beaming overhead.
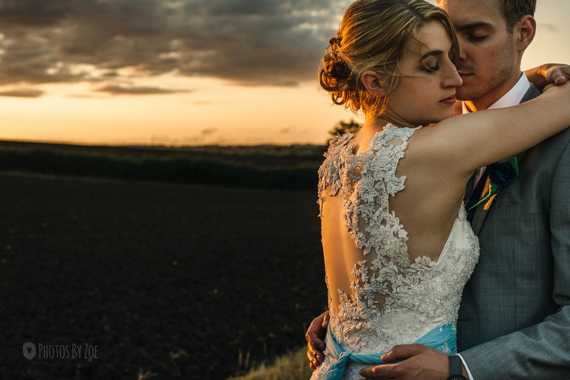
photo by Zoe
Magic hour lighting can be utilized for all sorts of photography, including landscapes, cityscapes, portraits, and still life. If stunning photographs are what you’re after, here are six tricks for making the most out of magic hour.
1. Set the Scene
Always keep in mind that the sun rises in the east and sets in the west. This is important to consider when selecting where to shoot.
Also, determine what effect you want to achieve. Do you want a warm glow to shine on a subject’s face or do you want light streaming through from behind the subject’s shoulders, creating a lens flare? There are many scene options to choose, ranging from warm light cast on a wide-open field to warm light seeping through the treetops of a forest. You can even get the benefits of magic hour indoors by shooting the subject near a large window. Therefore, it is important to envision beforehand what type of image is being captured.
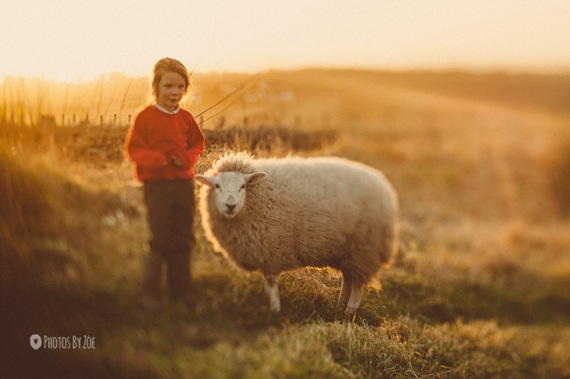
photo by Zoe
As was stated, there are two opportunities throughout the day to shoot during magic hour. Both sunrise and sunset create beautiful directional light, but there is something about morning light that is less hazy and adds a dewy, soft look to photos. The evening light is still beautiful, though, and it casts a saturated hue on its subjects. But if you are going for pure light that produces soft shadows and total transitions, morning light may be the best choice.

photo by Simson Petrol
2. Schedule the Shoot
Magic hour occurs within the first and last hour of sunlight. This time frame can vary based on location and time of year. It’s useful to determine exactly when magic hour occurs in your region. An app called Magic Hour makes this possible by tracking your location and telling you what time magic hour will occur on a given day. There are also many golden hour calculators available online.

photo by John McSporran
Given that you have a rather narrow window to shoot, it is important to plan accordingly. Make sure you factor in the amount of setup time to make the most of this short and sweet, soft light. Also, light sources change rapidly, so the scene may look different between the moment you arrive and 10 minutes later. It’s best to stay the whole hour and shoot photos consecutively to capture as many variations of the light as possible.
You may come across a time when you have scheduled a magic hour shoot weeks in advance, only to find that it’s cloudy. Now what? Like most things in life, not everything can be controlled. The good news is that cloudy weather can actually act as a filter to diffuse the light and create soft, cool, and even light. Even though you won’t get that golden sunlight streaming through, the clouds will still allow you to capture beautiful images.
3. Adjust White Balance
Usually, auto white balance is the best option for shooting. However, when shooting during magic hour, the best white balance setting is Cloudy. This setting avoids the risk of counterbalancing the beautiful warm glow cast by the sun.
4. Experiment with Light Leak Effects
Many artistic effects can be achieved from soft light during magic hour. Lens flare occurs when an excess of light enters the camera and causes the light to be scattered and reflected. This creates the appearance of haze, starbursts, and circles in the image. While lens flare and light leak may not be for everyone, they can be fun to play around with and can add an unexpected flair to your pictures. To produce lens flare, position the shot so that sunlight peeks through the edge of the frame and behind your subject.
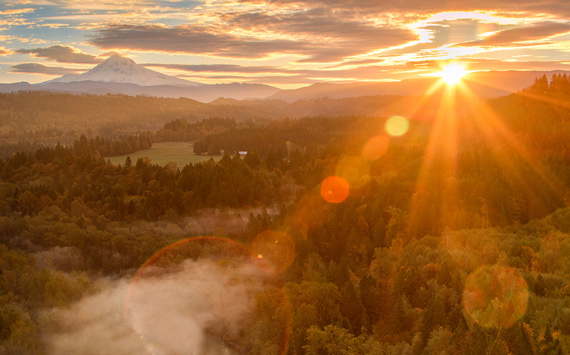
photo by Ilirjan Rrumbullaku
Rim lighting occurs when the sun glimmers from behind your subject. It creates an airy effect surrounding the subject that is exceptionally stunning for portraits and close ups. Bokeh, or light specks, is another effect that can also be achieved by shooting at wider apertures.

photo by Sarah Zucca
5. Try a Tripod
While it is definitely possible to shoot magic hour by hand, a tripod can also come in handy. As the light begins to fade, your shutter speeds become slower. This is especially true when attempting to capture movement in a dimly lit setting. A tripod ensures that the camera remains stable.
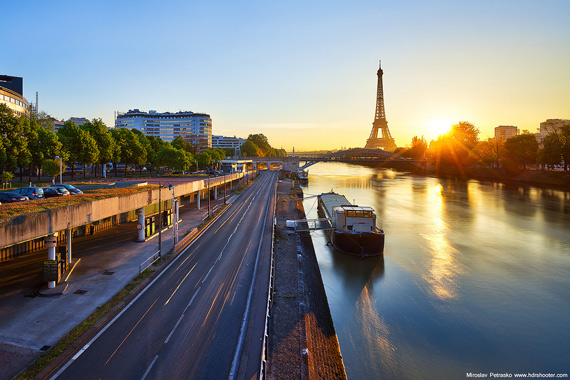
photo by Miroslav Petrasko
6. Making Magic with an iPhone
It is much more common nowadays for someone to have an iPhone handy than a bulky camera in haul. The high-quality lens built into the iPhone is practical for shooting magic hour photos on-the-go. To get the perfect shot, point your iPhone toward your magic hour scene. The picture will mostly likely appear dark on the screen due to the phone’s light balance darkening the picture in an effort to compensate for the sun’s bright light. To fix this, tap on a darker spot of the scene on the phone screen before taking the picture. This balances the light based on the area that was tapped, which brightens up the image. If it brightens up too much, try tapping on a spot that is a little lighter than the last spot. Tap around until you get the perfect balance of lighting.
These sun-soaked images are great for sharing with loved ones via social media or displaying in your home on digital picture frames. However, the magic begins with you and your determination to rise and shine or stay out late. The impacts of shooting during these magical times of day are truly one of a kind. Get out there and try it for yourself and prepare to be amazed.
About the Author:
Daphne Lefran has been producing creative content for many years and currently writes on behalf of Nixplay, the creator of the Nixplay Seed. In her spare time, she enjoys capturing moments through a camera lens, traveling to new places, and cheering on the Florida State Seminoles. Follow her on Twitter @daphnelefran.
For Further Training, Sale Ending Soon:
Just released, Sunrise/Sunset Recipe Cards, like having a professional landscape photographer by your side, telling you exactly what to do to get the perfect shot – anywhere, every time. Proven, step-by-step recipes for 22 different types of sunrise & sunset photo opportunities, so you get the perfect photo every time. Print and carry in your camera bag, or simply save to your phone for quick reference any time. Currently 65% off until the end of the month if you want to check them out.
They contain the distilled secrets of 16 years of sunrise and sunset photography experience, presented in easy-to-follow, quick-glance bullets. Each card is easy to print, laminate, and carry in your camera bag for quick reference in the field. Plus they include a 30 day happiness guarantee so there is no risk in trying them!
Flash sale ending soon: Sunrise/Sunset Recipe Cards at 65% Off
Go to full article: 6 Magic Hour Photography Tricks
What are your thoughts on this article? Join the discussion on Facebook
PictureCorrect subscribers can also learn more today with our #1 bestseller: The Photography Tutorial eBook
The post 6 Magic Hour Photography Tricks appeared first on PictureCorrect.
