I have always had a soft spot for 1940s and 50s Film Noir, where there is always a gorgeous Femme Fatale, whose charms are most likely going to get you killed. The light in those movies is the key to the ambience of mystery and danger, and I love the way the scenes are composed with smoke, shadows, and the black and white high drama with dim light aesthetic.
These movies were mostly low-budget productions shot on location in city streets, with an abundance of night scenes, where crime is the main plot. Low-key lighting is the common thread of Film Noir, with harsh light that create deep shadows, resulting in a high contrast black and white.
As a photographer the actresses’ portraits that were used by the studios for promotion really fascinate me, and I guess it influences a lot of my portraiture work.
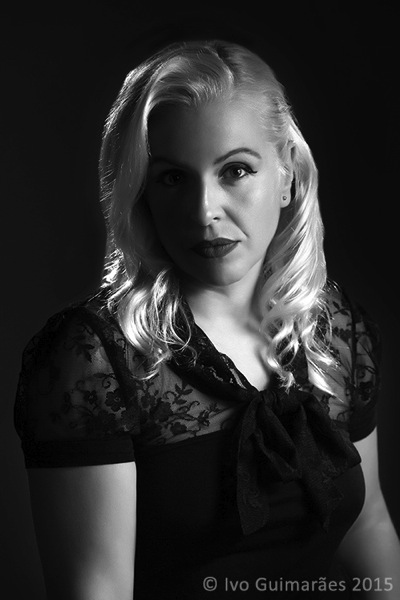
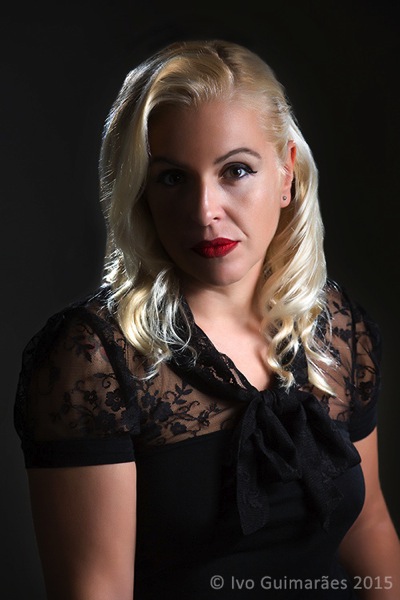
In this article I am going to follow the steps to create this image that is a recreation of a Hollywood Film Noir portrait, done with modern equipment, and digital post-production techniques.
Research
As for every photography work, it is always a good idea to do some research, and look for inspiration. Here I used references from one of my favorite movies of all time, “Touch of Evil”, directed by the great Orson Welles in 1958.
Camera and lens
The choice of equipment is an important starting point. In this particular case I used a Canon 5D III body with a Canon EF 85mm f/1.2L II USM lens. This is my favorite lens when it comes to portrait work, it offers the perfect combination of good sharpness and awesome bokeh.
Lighting equipment
These images were originally lit, in most cases, with incandescent high-power bulbs, and the quality and direction of the light was mostly controlled with barn doors and Fresnel spotlights.
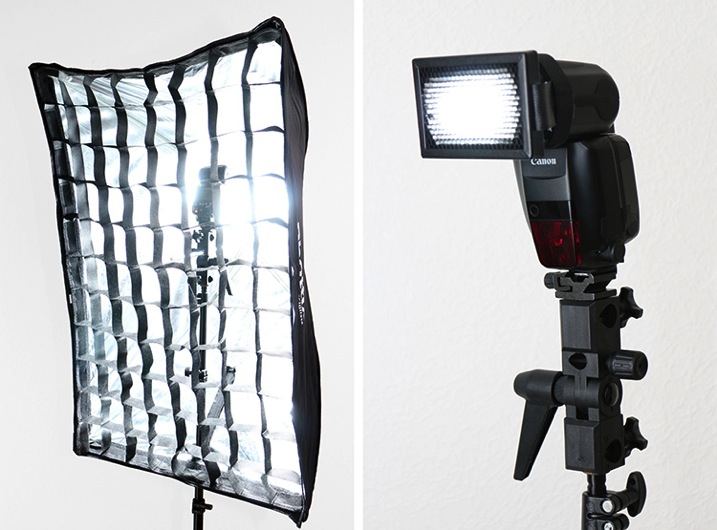
I decided to use two Canon 600EX-RT Speedlites, controlled by a Canon ST-E3-RT Speedlite transmitter. This created a simple setup with a gridded softbox working as a hard key light on the model’s face, and a 20º grid as a hair light to separate the model from the background.
Exposure
Usually in studio portrait images, I try to decide the exposure based on the depth of field I want to create on the image. In this particular case, I chose to use f/8.0, as it gave me enough depth of field in the face area, with the 85mm focal length.
The shutter speed is the second important factor and I chose to use 1/125, as it blocked any possible ambient light, and only register the light from the flash.
The ISO 100 is enough for the flash power available, and offers me a clean and noiseless image.
Lighting diagram
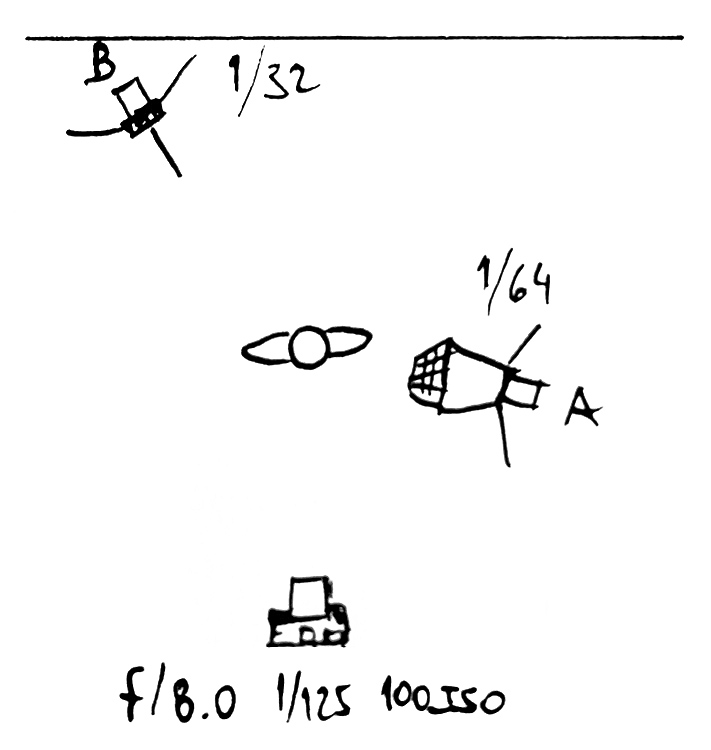
Every time I have an idea for an image I try to put it on paper. Most of the time it is just doodles in my little black book, but it helps me to visualize the setup, and the light ambiance that I want to create. Here is the quick sketch I did for this image, which represents the lighting diagram and technical information for the photo shoot.
Light metering
After setting the starting point values for the camera, it’s time to calculate the light position and power, to create the desired effect.
The background was white so a distance to subject of seven feet was enough to turn it black, which works much better with a blonde model.
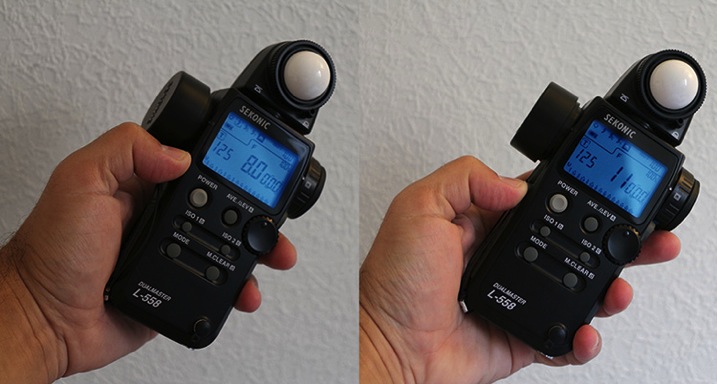
The idea was to have light on half of the model’s face, and a quick fall-off to the other side, creating a mysterious mood in the image. The gridded softbox was ideal for this effect. The 20º grid created a rim light on the hair and a ratio of 2:1 to the main light, so metering was f/8.0 for the main light and f/11 for the hair light.
The click time
Now that everything is set, it’s time to click. Even tough the final image was meant to be black and white, I captured it in color mode as it gives me better choices for conversion in post-production.
Post-production
There are many tools and plugins for black and white image conversion. In this case I used the Photoshop’s black and white tool which is a simple but effective solution.
Image > Adjustments > Black & White
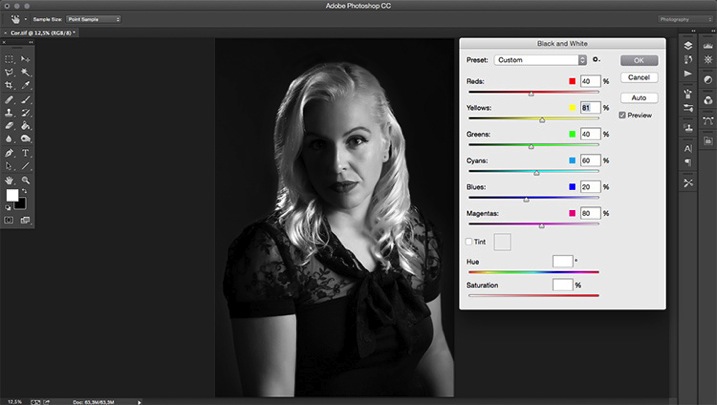
A few adjustments to the red and yellow channel gave me the right contrast on the skin and overall image, creating the dramatic mood.
So, here is my approach to the Film Noir portrait. It sure was fun. If you give this technique a try, please share your results and images in the comments below.
The post How to Create a Hollywood Film Noir Portrait by Ivo Guimaraes appeared first on Digital Photography School.