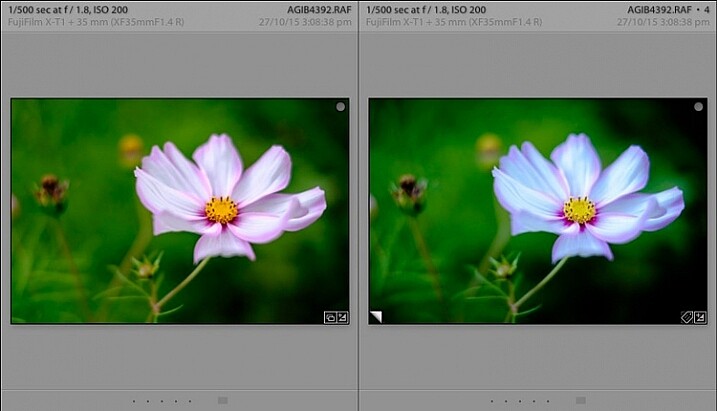
Virtual Copies in Lightroom
Imagine that you have just processed a colour image and you are happy with the result, but you’d also like to experiment with it a little. Perhaps you’re curious to see how it will look if you convert it to black and white. Maybe you’d like to apply a Develop Preset or two, or crop to the square format, or even all three.
It’s easy in Lightroom. All you have to do is make a Virtual Copy and experiment.
A Virtual Copy is an exact replica of the original photo, including all edits made in Lightroom. Once you have made a Virtual Copy you can process it any way you like without affecting the original.
Virtual Copies are a fantastic tool because they let you make multiple copies of a single image, while using very little hard drive space (it only makes a new thumbnail it doesn’t duplicate your image file). You can try out different techniques, and keep all the results. Each Virtual Copy exists as a set of text commands in the Lightroom Catalog, an addition measured in kilobytes rather than megabytes.
You can review this by reading A Brief Introduction to Lightroom if you are unsure how it works.
Are you making the most of Virtual Copies? Here are five ways to use them better in Lightroom.
Creating Virtual Copies
There are four ways to create a Virtual Copy.
Start in Grid View in the Library module (press the G key to go there from any part of Lightroom). Select the image (or images) that you want to make Virtual Copies of:
1. Go to Photo > Create Virtual Copy. Lightroom creates the Virtual Copies and places them in the same Collection as the original images.
2. Alternatively, use the keyboard shortcut. If you’re using Windows press Ctrl plus apostrophe (Ctrl + ‘), on a Mac press Command plus apostrophe (Cmd + ‘).
3. Alternatively, right click on one of the selected photos and choose Create Virtual Copy.
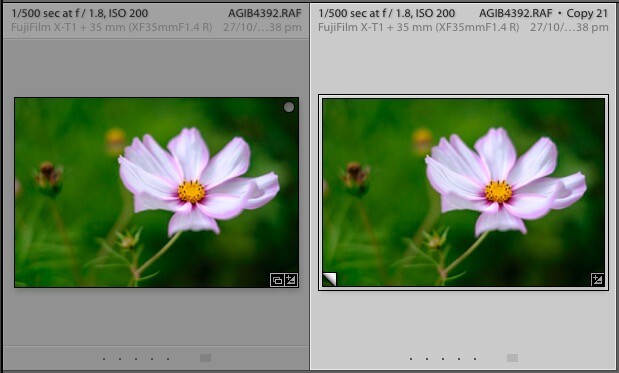
When you create a Virtual Copy it appears alongside the original in Grid View, and is identical in every way. You can make as many changes to the Virtual Copy as you lik,e without affecting the original.
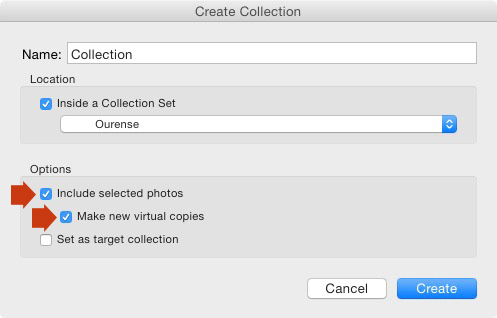
4. The fourth way is to go to Library > New Collection. The Create Collection window opens. Under Options, tick the Include Selected Photos and Make New Virtual Copies boxes. Lightroom creates a new Collection (with the name you give it), and adds Virtual Copies of the selected images.
Using Virtual Copies Better
Now you know how to create Virtual Copies, let’s look at some ways you can use them better in Lightroom.
1. To create multiple versions of the same photo
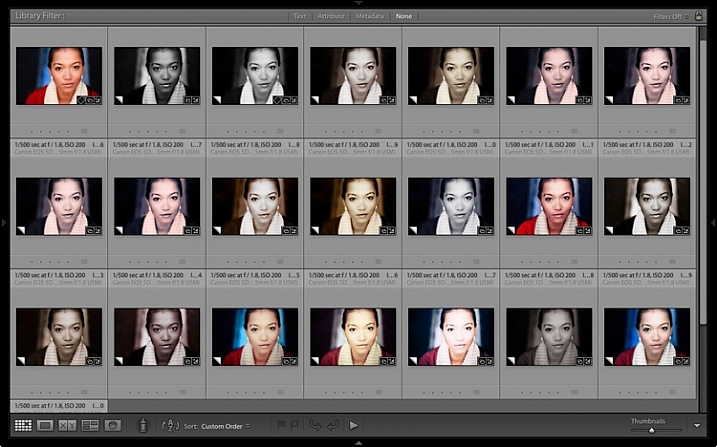
This is the main reason that you would want to create Virtual Copies – so you can process the same photo, a number of different ways. The photo shown below is a great example. I created a colour version first, then made a Virtual Copy and converted it to black and white. Then I made some more Virtual Copies and experimented with different Develop Presets and split tones. I ended up with 22 different versions in a mixture of colour and black and white.
2. Stacking Virtual Copies
You can use Stacks to simplify the thumbnails displayed in Grid View. In this example I’m going to create two Stacks – one containing colour photos, and the other black and white.
- Select the photos you want to place in the same stack. Click and drag thumbnails to rearrange them in Grid View if you need to. Here, I grouped all the colour photos together.
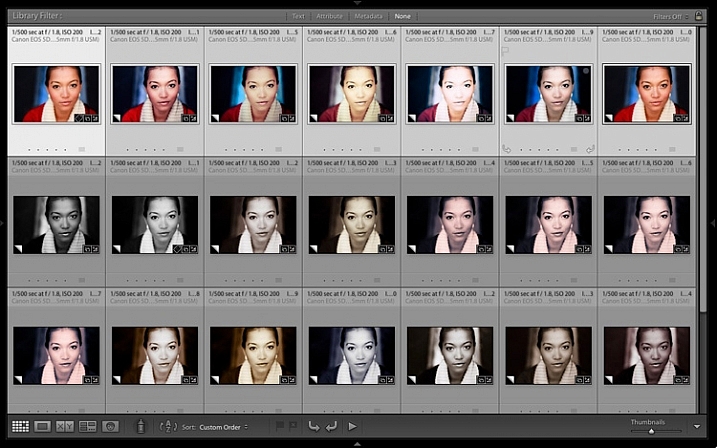
- Go to Photo > Stacking > Group into Stack. You can also find this option by right-clicking a thumbnail. Or use the keyboard shortcuts, Ctrl+G (Windows) or Cmd+G (Mac).
Lightroom places the photos into a Stack. The first photo in the selection is used as the cover image. The Stack icon is displayed in the top left corner of the thumbnail (marked below). The number inside tells you how many photos are in the Stack.
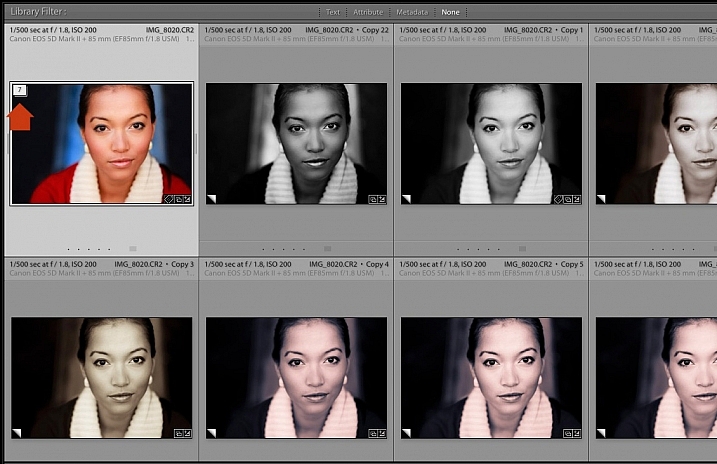
Repeat if you want to group other Virtual Copies into another stack. Below, you can see that I did the same with the black and white versions.
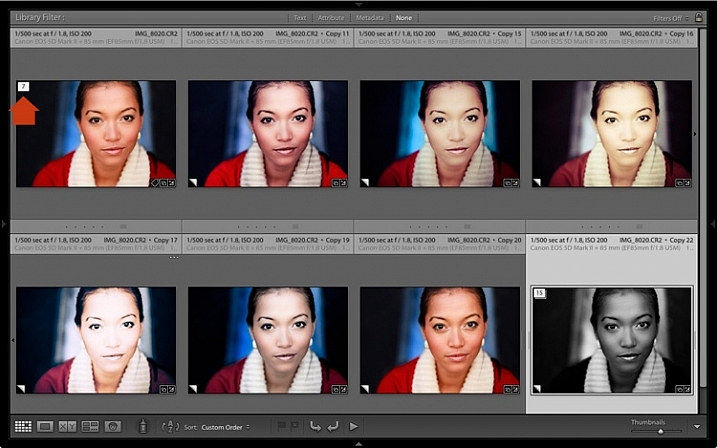
To view the photos in a Stack, click on the Stack icon in the thumbnail. Click it again to hide the stacked photos.
3. For working with plug-ins and Photoshop
If you want to send a photo to a plug-in or Photoshop, the recommended approach is to process it in Lightroom first (applying at least basic settings such as Camera Calibration, Lens Corrections and tonal adjustments in the Basic panel).
Before the export, make a Virtual Copy and send the Virtual Copy to the plug-in or Photoshop. Then, when you return to Lightroom, you can compare the two. You can also make more Virtual Copies from the original to send to other plug-ins, or to work on in Lightroom.
4. Set up View Options to show which images are Virtual Copies
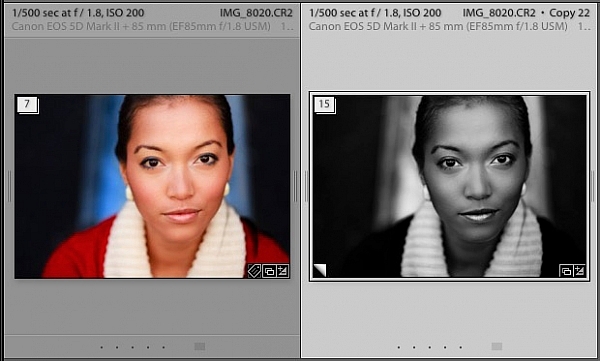
In the screen shot below, you can see that the image on the right is a Virtual Copy as it is labelled Copy 22. The image on the left is the original and just has the file name.
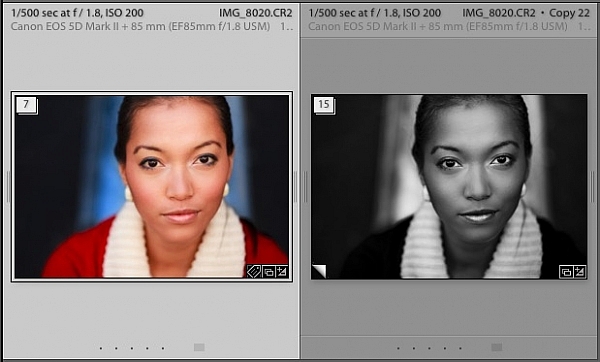
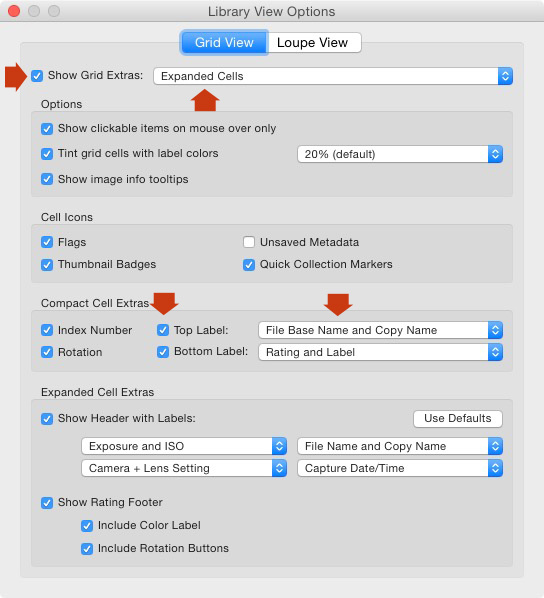
You can set this up in View Options (View > View Options or Ctrl+J/Cmd+J). Tick the Show Grid Extras and Top Label boxes (marked below). Set Show Grid Extras to Expanded Cells and set Top Label to File Base Name and Copy Name (the other options in the same section do a similar thing).
5. Use the Excessor plug-in to create a Collection of photos processed with different Develop Presets
The Excessor plug-in creates Virtual Copies and applies a different Develop Preset to each one. This is how to use it:
- Go to the Capture Monkey website and download the Excessor plug-in. It is available on a shareware model – you can download and use it, and if you find it useful, you are encouraged to pay a one time registration fee of $ 10. Add it via the plug-ins manager (my article Useful Lightroom Plug-ins explains how – scroll to the bottom for instructions).
- Select the photo you want to work with. Go to Library > Plug-in Extras > Excessor.
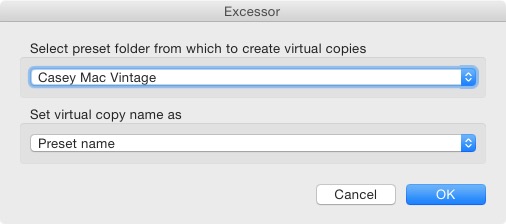
- The Excessor window opens. Use the top menu to select a Develop Presets folder. Select Preset name from the bottom menu to give each Virtual Copy the name of the Develop Preset used to process it. Press OK.
- Lightroom creates a Virtual Copy for each Develop Preset in the selected folder.
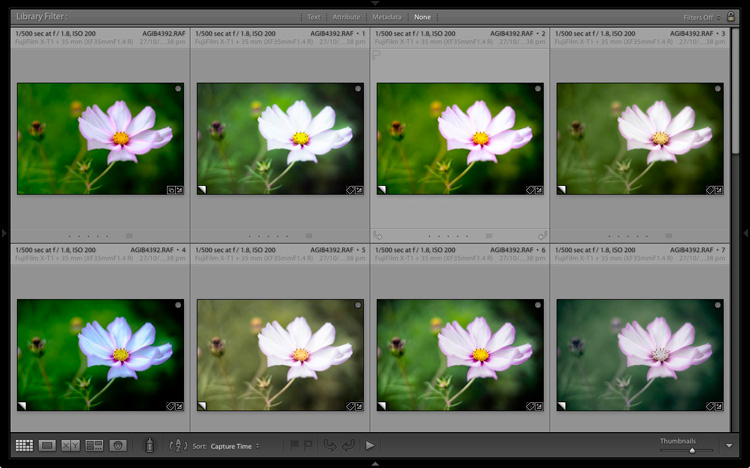
Tip: Create Preset folders containing your favourite Develop Presets. You can create different folders for different subjects: e.g., a folder for portraits, another for landscapes, another for black and white, another for vintage presets, and so on. Then you can use the Excessor plug-in as a shortcut to applying your favourite presets to a photo.
Your turn
These are my five suggestions for using Virtual Copies better in Lightroom, but how do you use them? Have you come up with anything that I haven’t thought of? Let me know in the comments.
The Mastering Lightroom Collection
My Mastering Lightroom ebooks are a complete guide to using Lightroom’s Library and Develop modules. Written for Lightroom 4, 5, 6 and CC they show you how to import and organise your images, use Collections, creatively edit your photos and how to work in black and white.
The post 5 Ways to Use Lightroom Virtual Copies Better by Andrew S. Gibson appeared first on Digital Photography School.