Creating a vintage look for an image is now easy, without having to shoot with an old film camera. Although I would recommend any photo enthusiastic to try! I have a an Agfa camera ISOLA that I use every now and then. I love the contrasty, grainy black and white pictures it allows me to shoot. I usually ask advice regarding the film I can use depending on the sought-after result (contrast- grain – ISO).
With a few easy steps in Photoshop you can make a textured, desaturated vintage look for any of your pictures. I’m going to show you how I did it with a self-portrait, but you can really do it with any picture as this technique really creates a great feeling to any image, whether it is a portrait or a landscape.
Vintage images are usually not so sharp, so I chose an image with some motion blur. You can add some directly in camera playing with slow shutter speeds and creating some motion. To edit this image, we are going to change the color using a gradient map adjustment, add some textures, and finally add a vignette to get a vintage look image.
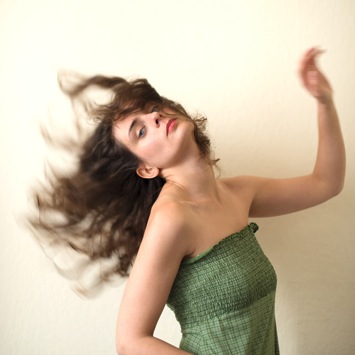 |
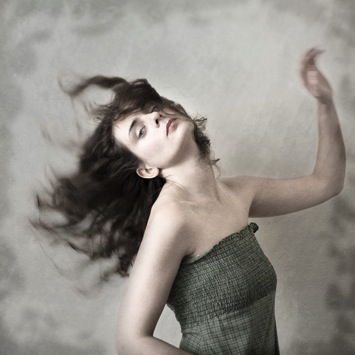 |
Step one: Modifying the color tones using gradient map
There are many ways to desaturate an image. I love the gradient map adjustment because it allows me to desaturate the image, to add some color tones, and also to adjust its contrast. Hopefully, you will love this tool if you haven’t tried it yet.
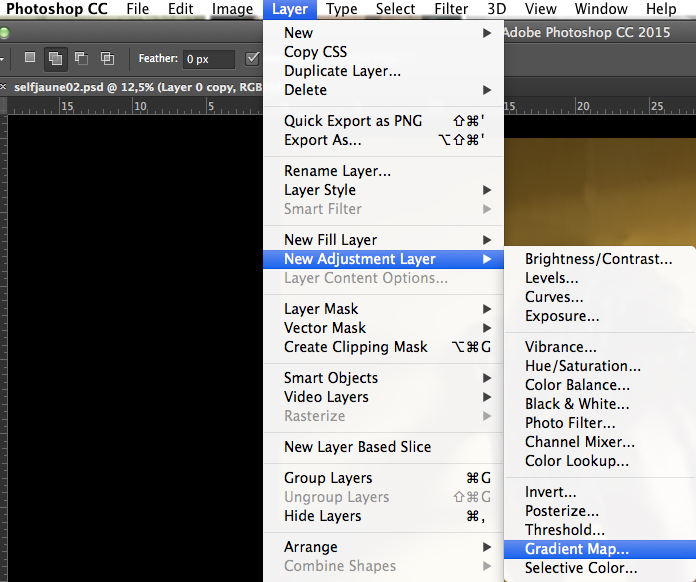
Vintage images are usually desaturated – it could also be sepia. To get the desaturation you can go to Layer > New adjustment layer > Gradient Map (as shown below).
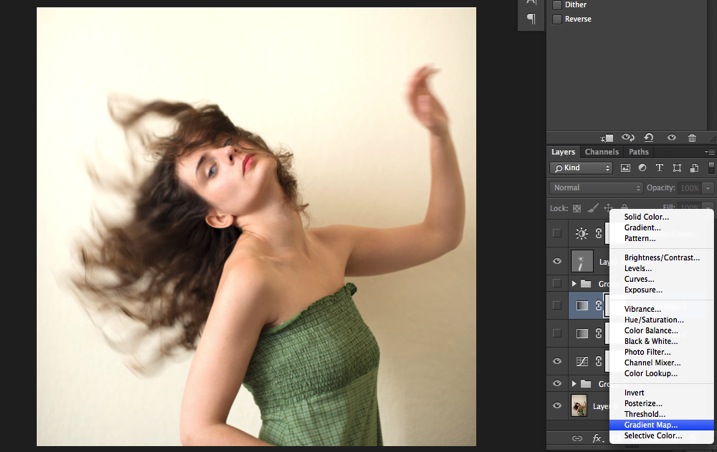
Or you can go to your layer tab and select new Gradient Map layer (as below).
In the properties tab (screenshot below) you can see what gradient has been applied. By default it will be a foreground to background color, so usually black and white (the color squares on the bottom of your tools bar). You can also set the gradient color by changing your background and foreground color.
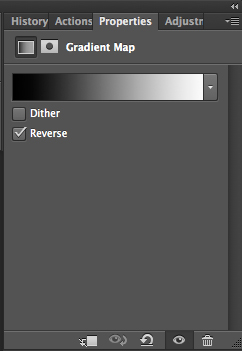
Photoshop then offers you 2 different options:
- The Reverse option will change the gradient and give you a negative of your image, as in this case I add white into the black and black into the white (below).
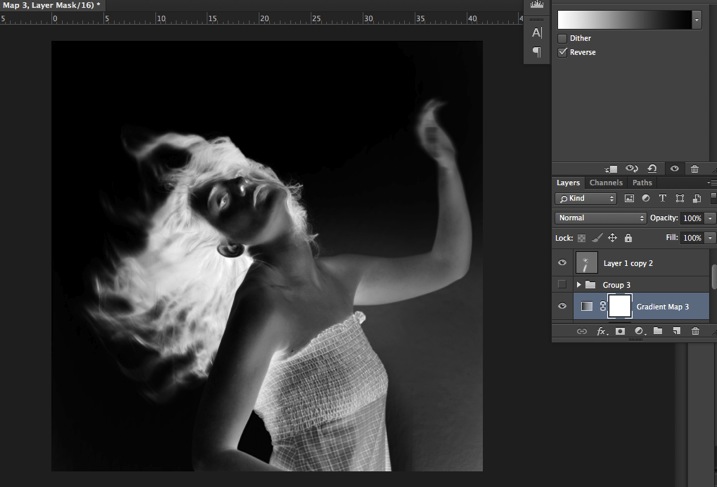
- The Dither option will mix in noise to help blend the gradient more smoothly. So you can check any of those options depending on the effect you want to achieve.
Edit your gradient by clicking on it (click on the gradient color bar); the gradient editor will then open.
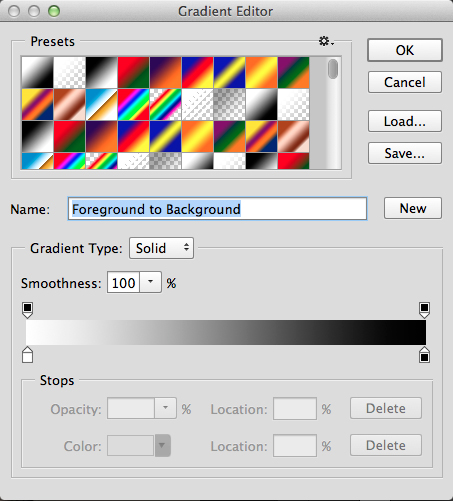
The gradient editor window shows you on the left the color applied to your blacks, and on the right the color applied to your whites. To modify the gradient you have two options:
First option, you choose one of the available presets. You click on a preset to apply it to your image. Second option is to create a custom gradient. Simply double click on one of the color stops, and choose a new color among the color pop-up menu.
You can also create a new color stop/intermediate by clicking below the gradient bar to define another one wherever you want (remember on the left are your shadows/black tone – in the middle mid-tones, and on the right your highlights/white tones). Once the new color stop is set you can also move it so it affects more of your dark or light tones.
In case you want to save the created gradient as a preset, name it, then click New after you have finished. It will then appear in your presets.
This is a powerful tool to adjust any color tone in your images. In this case I will first use the black and white gradient. When using this option the image is then turned into a black and white picture.
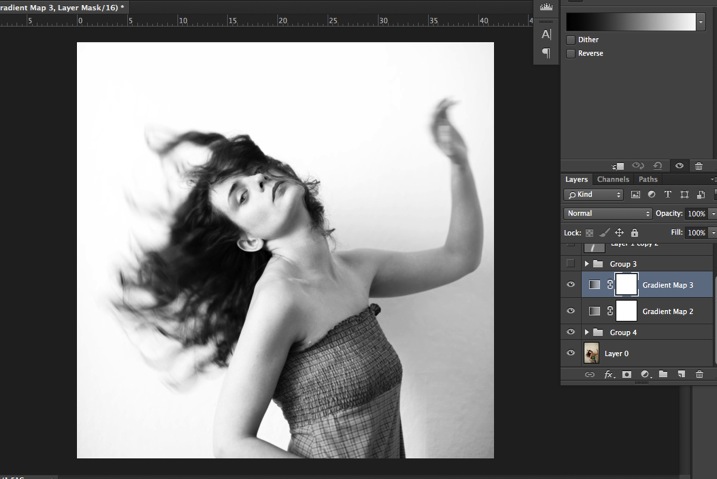
As it is not what we intended to do, lower the opacity of the adjustment layer.
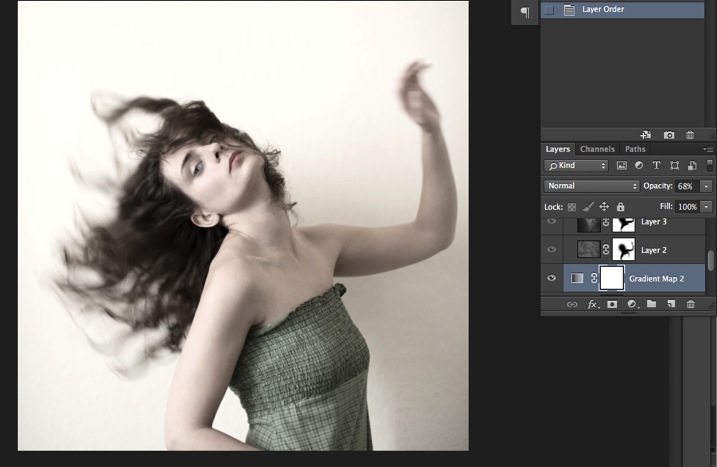
I set it to 68% in this case, but you can choose whatever number gives a nice look to your image – play with the opacity to decide which one best suits the image you are editing.
You can add also a touch of color. Keep it very soft to achieve a vintage look. To bring back some color, you can add a second Gradient Adjustment layer. After you add another layer, click on your gradient and choose a yellowish/brownish option to get a sepia tone, one in the presets or make a custom one.
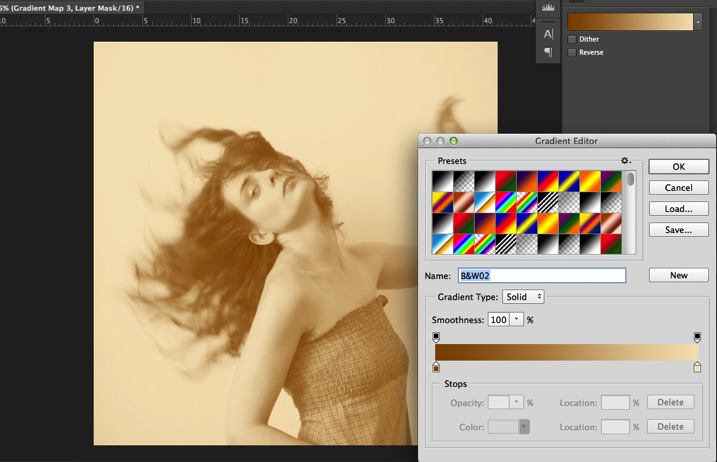
Once again you can lower the opacity of the adjustment layer to have a softer effect.
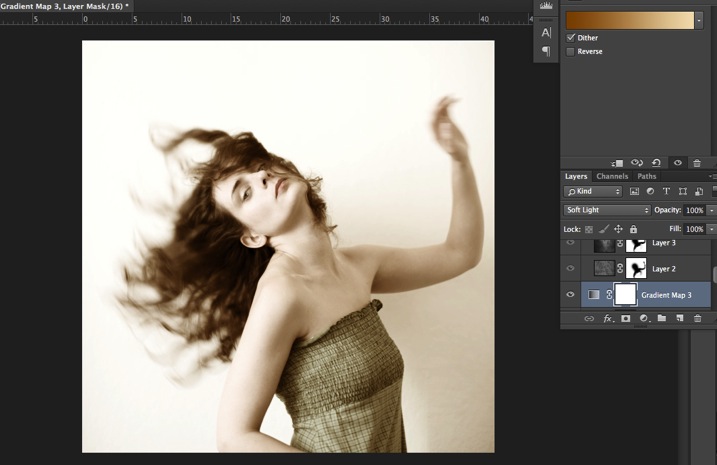
You can also add a different color according to the mood you want to set in your image. In this case I decided not to add further color tones so I added only the black and white gradient.
Step two: Adding texture to give the image a vintage feel
Now that you have achieved the color you want, it is time to add some texture to your image.
Personally I always shoot my own textures, but you can also find great textures on the internet on stock image sites. Or shoot your own pictures: walls, old paintings, grounds, wood, leaves, etc., any textured surface you can find. It is very easy, and can help you find some inspiration.
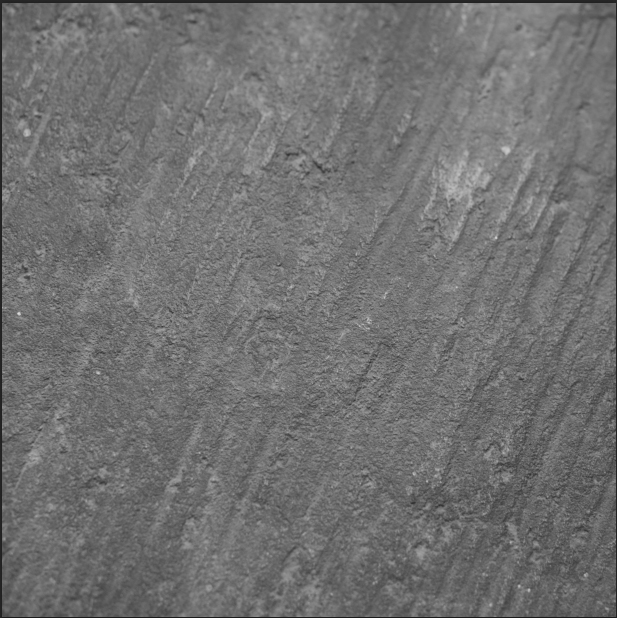
You drag and drop using your move tool or copy and paste a textured photo on top of your main picture. Then mix it by using the layer Blending Mode, try Overlay or Soft Light. I really recommend you to go through all the blending options to see how they blend the texture with your image (each image is different, and each mode can create a different look).
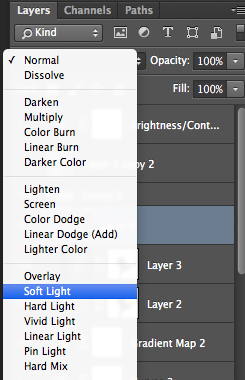
I always add textures to my personal works to give a painterly effect to my images. To have a lighter effect you can lower the opacity of your layer. To have a stronger effect you can repeat this step and add several textured layers.
You can modify the effect by adjusting your texture image. Select the texture in your layer’s tab and go to: Image > Adjustment > Curves/Levels.
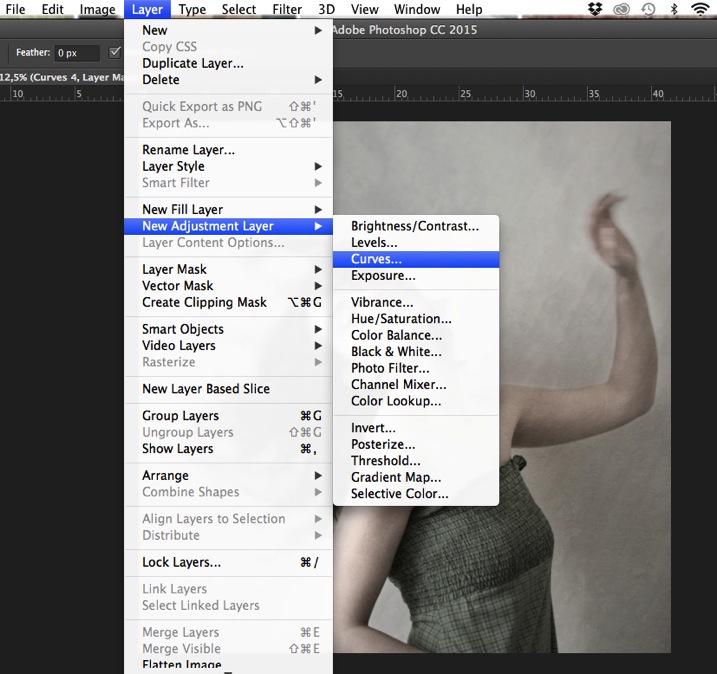
Playing with Curves or Levels will help you to bring back, or soften, some details in the texture. You also can add a Gaussian Blur filter if there are details that are too sharp in your texture image.
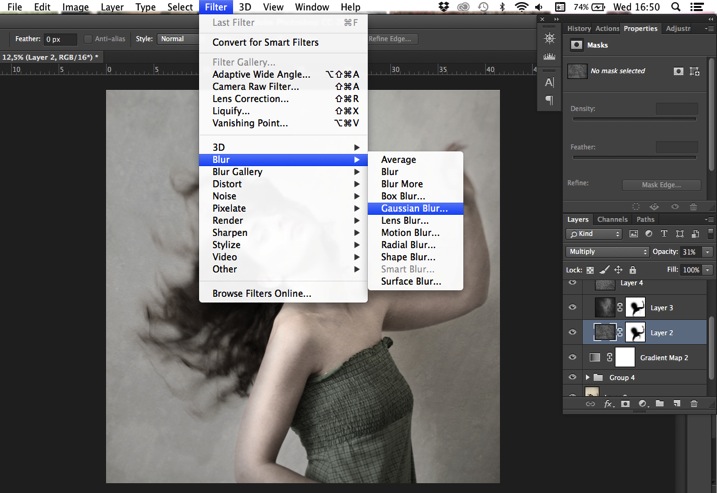
Select the area where you want to show or not show the texture. You can add a layer mask on the texture layer and by painting with black or white on the layer mask, you add (show) or remove (hide) areas where the texture appears.
Select your texture layer and click on add a layer mask. Lower the opacity of your brush tool, and keep its hardness to 0% to get very smooth edges. Now you can start painting in black over the areas where you want less or no texture.
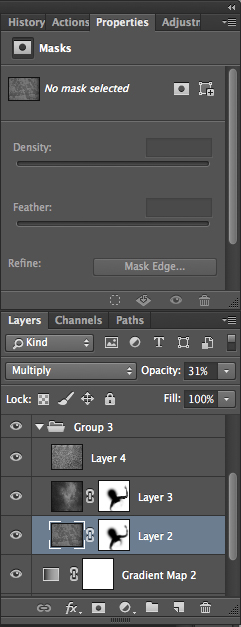
Everything is in the details, and Photoshop allows you a full control over your images. Usually to still have a “clean” image, and not to lose some details, you can mask areas such as skin, eyes, lips, etc., when editing a portrait.
So take your time to play with your textures. Try different types of shapes and contrasts. You can desaturate your textured image, or keep it in color. I find it easier when the texture is desaturated so you can fully control the color tones of your image separately, but it is up to you, and to the image you have in mind. As with any creative exercise, it is a matter of taste and style.
Step three: Finishing your image by adding a vignette
Vignetting can be an unintended, and undesired effect, caused by camera settings or lens limitations. However, you can also introduce it for creative effect, such as to draw attention to the center of the frame. You can choose a lens which is known to produce a vignette, or a filter to obtain the same effect.
Obviously, as we are going to do now, you can also add a vignette by post-processing your image in Photoshop. You have many options in Photoshop to vignette your images. In this case we are doing something very uneven so the vignette also helps to create a strange atmosphere.
Grab your lasso tool and draw very random lines around the edges of your image. It looks weird, but it is quite effective.
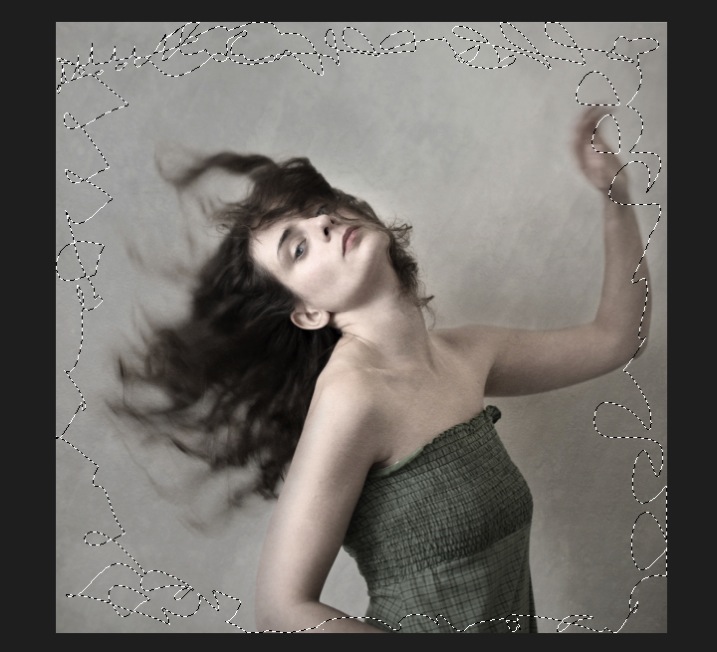
Go to Layer > New adjustment layer > curves. Darken your mid-tones by pulling down your curves to about one third (or to any darker/lighter spot according to your taste).
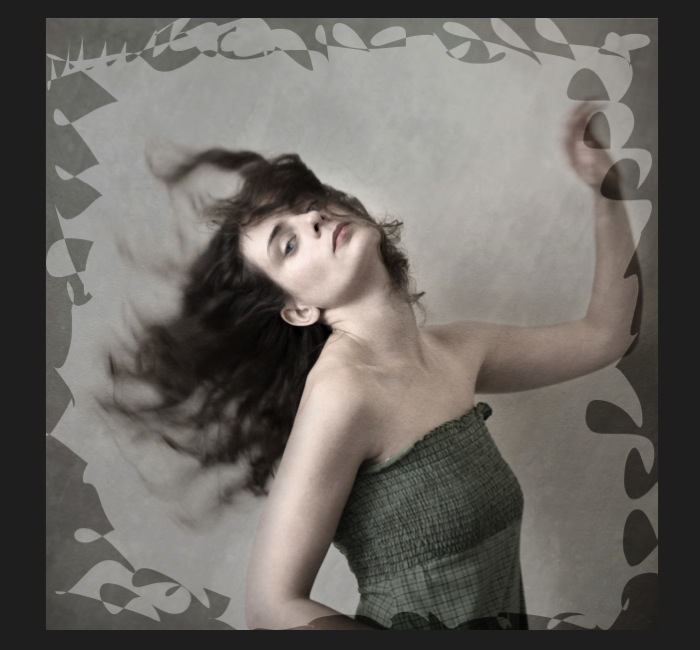
Whenever you select an area of your image, and have this selection active when you create a new adjustment layer, Photoshop automatically creates a layer mask on the new layer from your active selection.
Remember – on your layer mask white is where the effect will be applied, and black where the effect will not be applied. Here you want to apply the effect on the edges of the image, not in the center- if need be invert your layer mask by selecting the layer mask and pressing: CMD/CTRL+I.
Then double click on your Curves layer mask and feather your selection (around 87 pixels here).
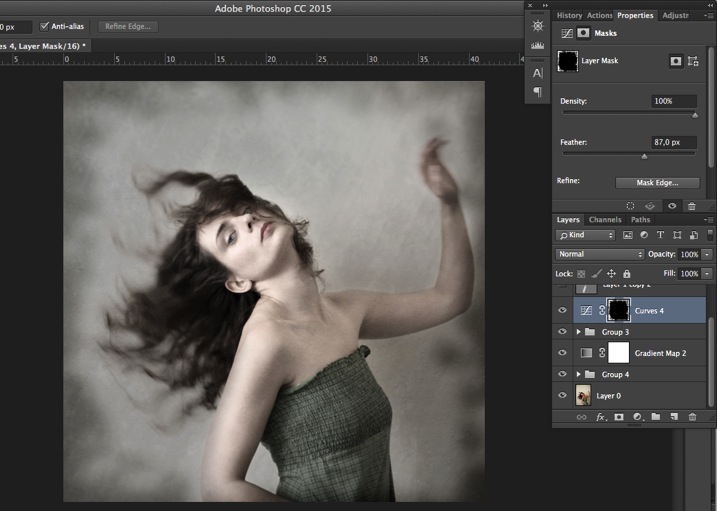
You can once again play with the opacity of your layer to lighten the vignette.
I hope you enjoyed this article. Feel free to share in the comments your usual steps to crete a vintage look to your images. Share your images as well using this technique if you give it a go.
The post How to Create a Vintage Look for Your Image Using Photoshop by Amélie Berton appeared first on Digital Photography School.