Photography doesn’t always have to be serious, sometimes it is nice to do something just for fun. Making a landscape look like it is a little planet is one of those things. There aren’t any uses for it, and you wouldn’t spend your photography career doing this. It is, however, one of those photography tricks that a lot of people like to try.
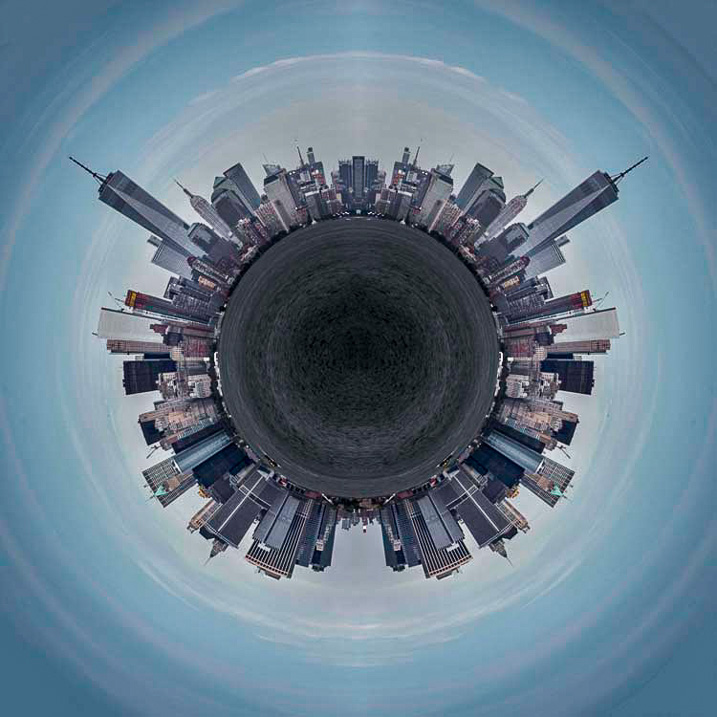
A Landscape turned into a sphere or little planet.
Landscape images work best. The photo should have a foreground, a horizon, and a sky. If you have trees or buidings in the image that go out the top of the image it may not work as well. It is all experimental, so you should try images like that, but it does seem to work best with images that look like the one below.
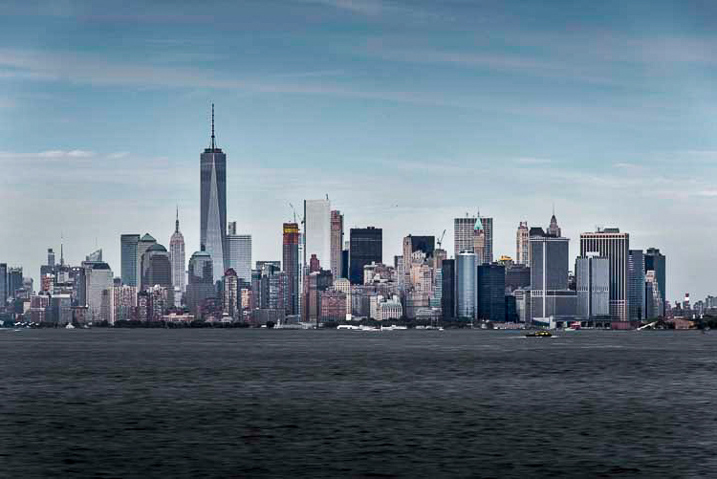
This image was chosen because it has all of those elements; the river is in the foreground, there are buildings along the horizon, and there is a sky. There is also nothing going out the top of the image. As the photo is going to connect from one end to another, it has to be an image that has similar ends.
How to create a Little Planet
Open the photo you want to use in Photoshop.
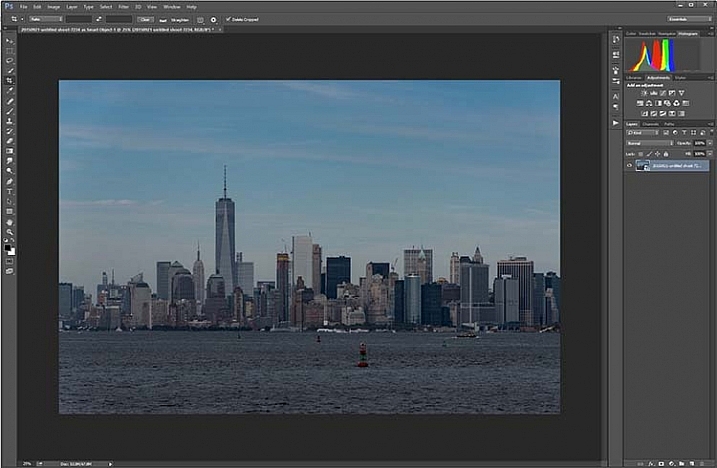
Open photo in Photoshop.
The first thing to do is to duplicate the layer by pressing Ctrl+J (CMD+J on Mac). It can also be done by going up the main menu, clicking Layers > Duplicate Layer.
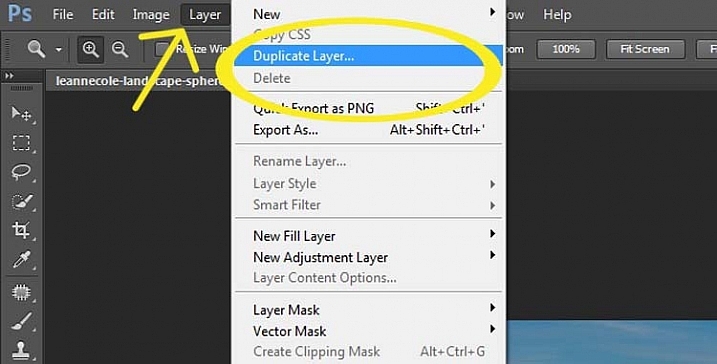
Duplicate Layer
You may need to make the image smaller on the screen using the magnifying tool. Make it small enough to only fill part of your current view, like so:
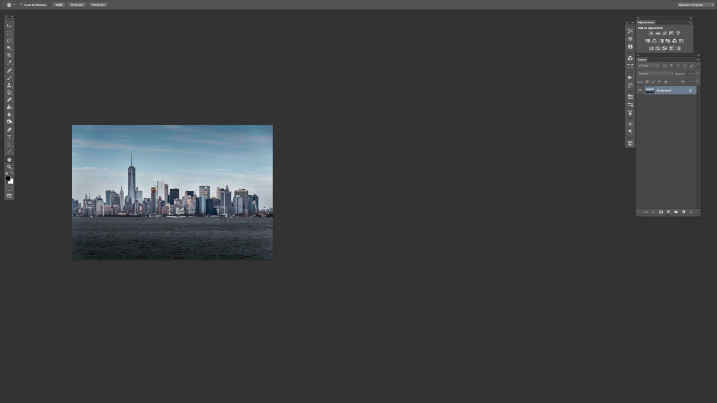
Turn on your rulers (Cmd+R on Mac, or Control+R on PC). Once they appear, right click on one and select percent to display on the rulers.
Make sure you are on the Background Layer, and select the crop tool (keyboard shortcut is C). Click on the image to bring up the cropping frame. Grab the right edge marker, and drag it it to the right to enlarge the frame to twice the size of the image (watch the number as you drag, go until you get to 200%). Look at the following image.
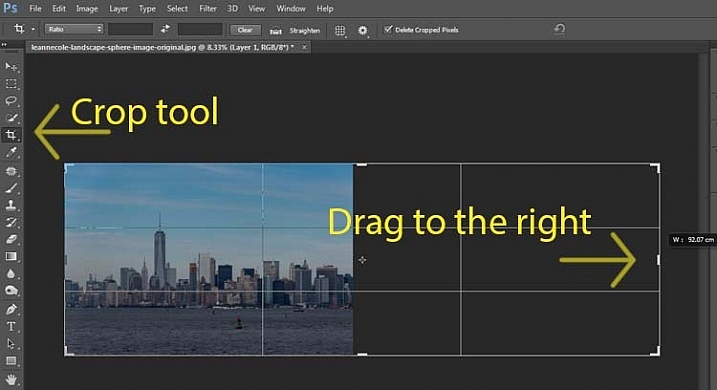
Extending the Image
Next, highlight the duplicated layer in the Layers panel, by clicking on that layer.
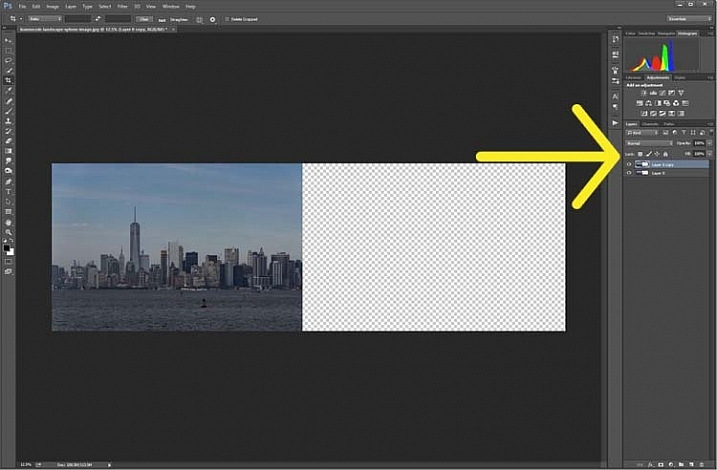
Select the duplicate layer
This duplicated layer needs to be flipped horizontally. Go to: Edit > Transform > Flip Horizontal.
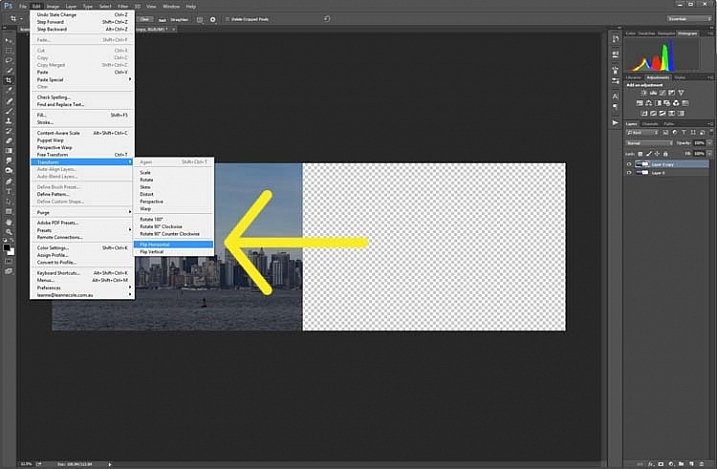
Use Transform to flip the duplicate layer.
Select the move tool (keyboard shortcut is: V) and move the duplicated image over to the right side until you have the two images touching in the middle.
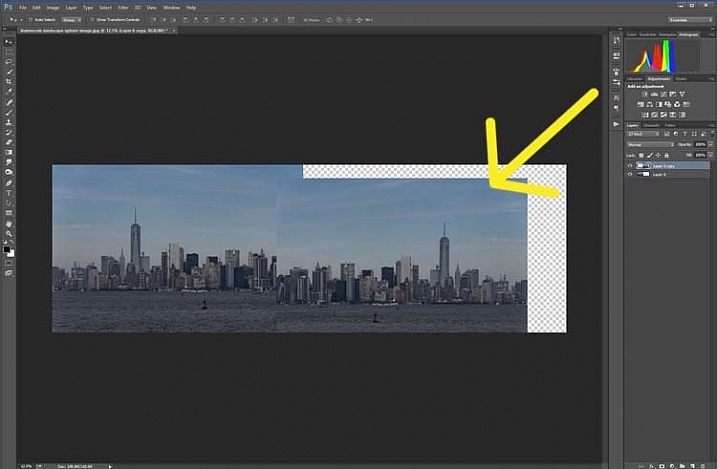
Use the move tool to put the duplicated, flipped image, into place.
Figure out where you want the images to meet in the middle. Sometimes overlapping them can make it look a little better. You will need to crop the image to remove some of the extra area that you created earlier.
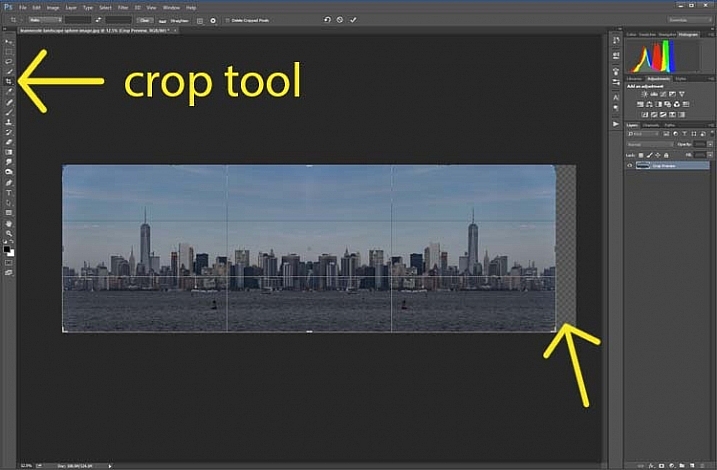
Crop the image to the edges of the image.
To make the sphere, the image needs to be square, so go to the top menu and click Image > Image Size. When the window pops up, you need to unlock the part that automatically changes the height when you change the width (maintains the proportions). Click the lock (chain) icon to unlock it. Make the width the same as the height, and press okay.
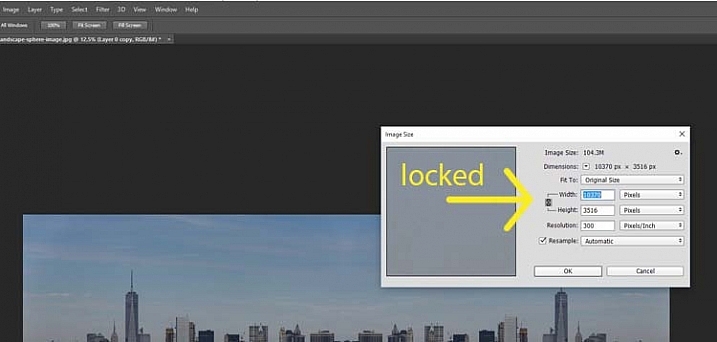
In the Image Size window the height and width are locked.
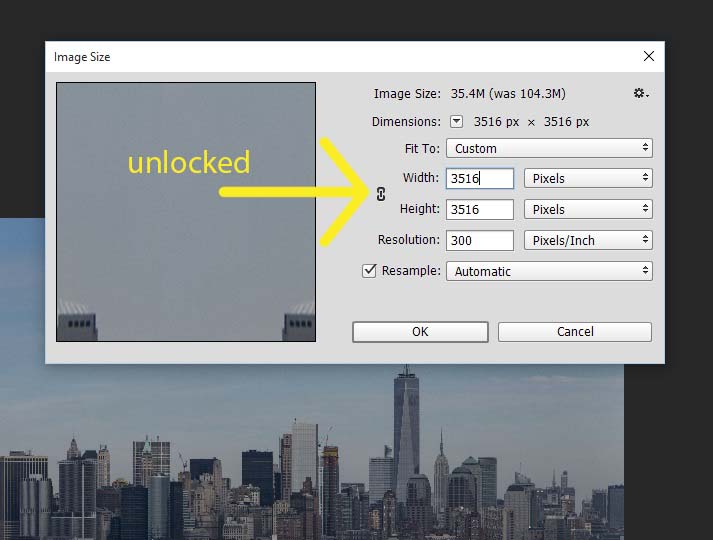
Click on the lock to unlock image to make width the same as height.
Before you can make the sphere you should combine the layers. Go up to: Layers > Flatten Image. An easier way is to press Shift+Ctrl+E (Shift+Cmd+E on Mac), this will make them one layer (it merges all visible layers).
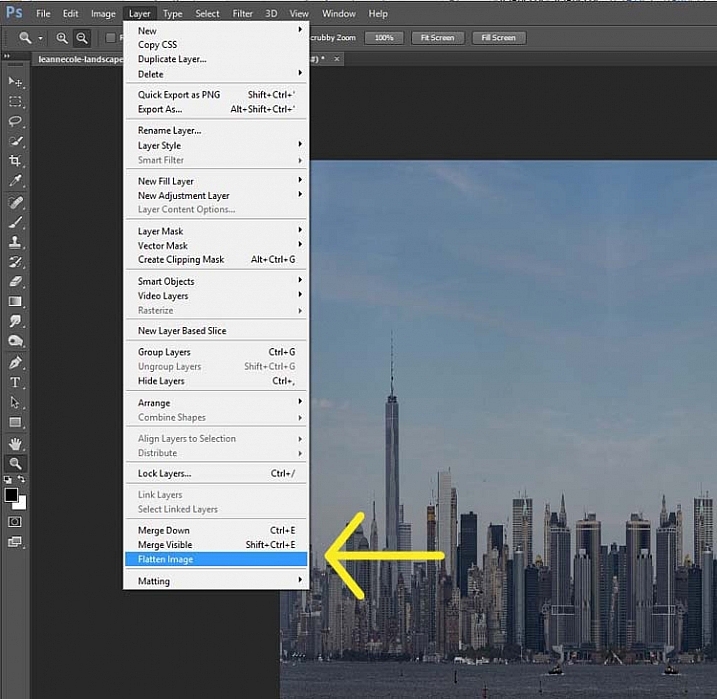
Combine the layers.
You will also need to flip the image vertically. Go back to the main menu, select Image > Image Rotation > Flip Canvas Vertical.
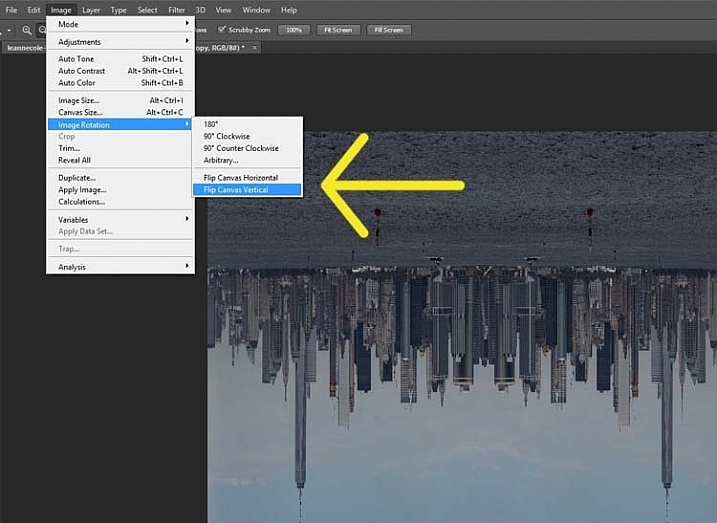
Flip image vertically.
Next, go to Filter >Distort > Polar Coordinates….
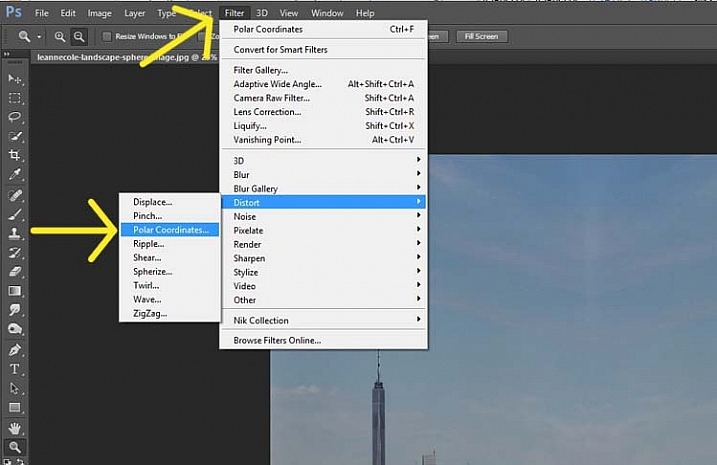
Select Polar Coordinates in the Filter, Distort menu.
When the popup window appears, select the option: Rectangular to Polar. Press OK.
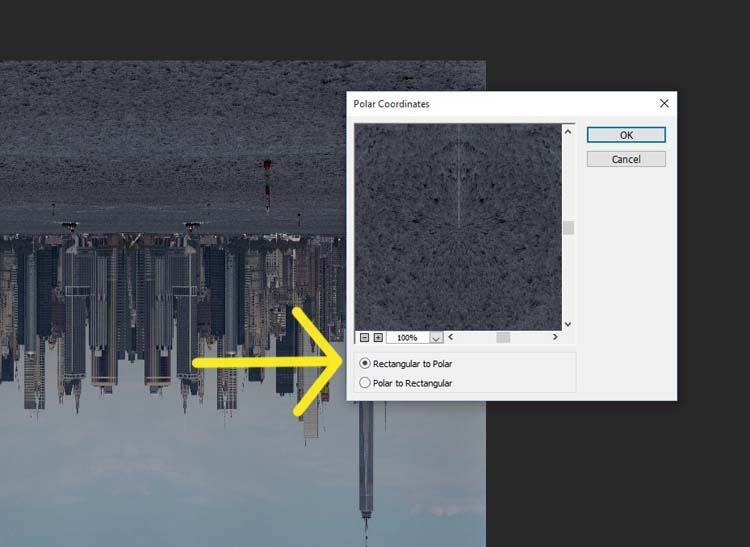
Choose rectangular to polar.
Voila, your landscape sphere, which now looks like a little planet.
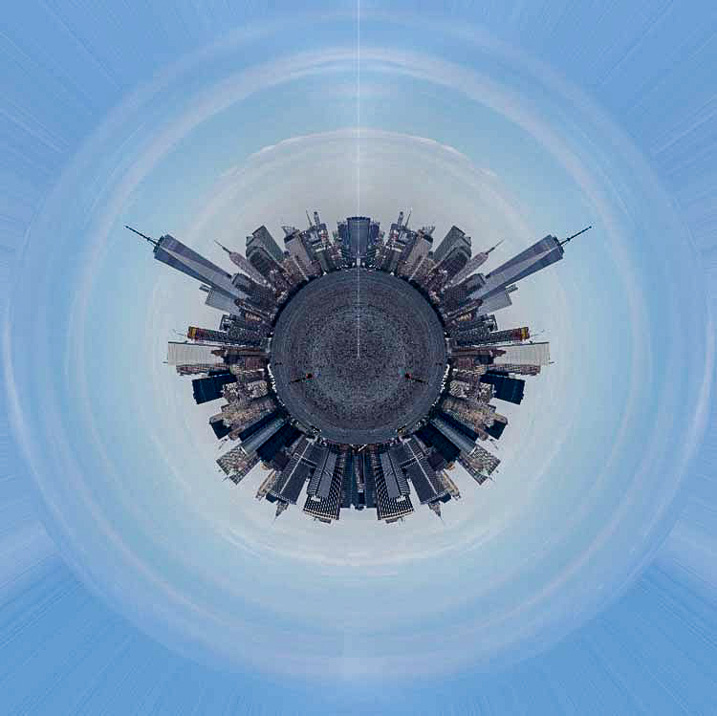
The world turned around.
But, there is a gap where the images meet. This can easily be fixed with the Spot Healing Brush Tool. It is in the toolbox on the left side of the windows panel. Run the tool along where the images don’t quite connect.

Landscape turned into a sphere or little planet.
There you have your landscape sphere, or little planet image.
You may want to crop it a little to make the planet bigger in the image, and to remove any things that have happened in the corners. You may also want to rotate it to get the view you want.
You can do this with other types of images as well. You could try it with a panorama, then you don’t have to do the part where you copy the layer. However, you need to be aware that it may not come out as you expect, it can come out distorted.
If you don’t flip the image vertically before applying the filter it will do the image in reverse. The image that I used for this article would then have the river on the outside, and the sky in the center (see image below).
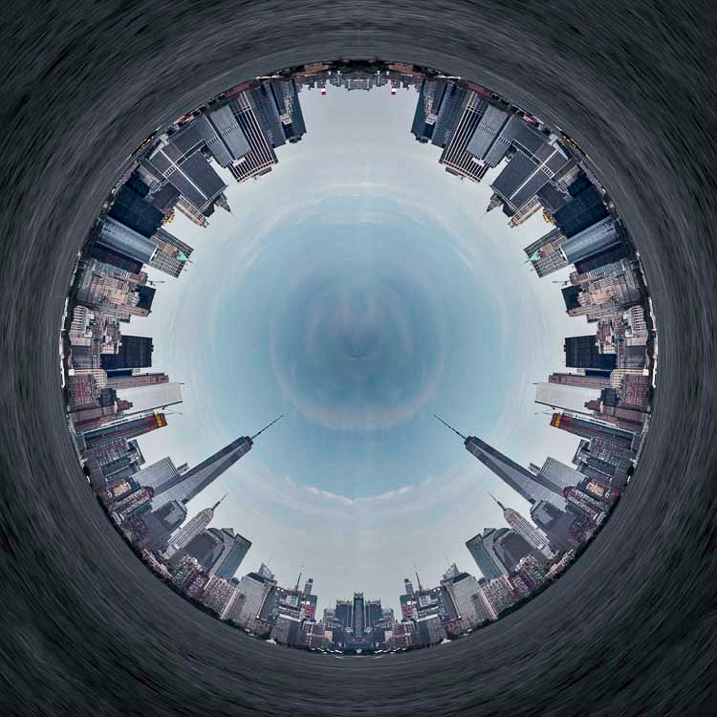
Result done the other way.
As you can see there are no real uses for this except as a fun project. Try it and see what you can come up with, and please share your images in the comments below.
The post How to Make a Little Planet Using Photoshop by Leanne Cole appeared first on Digital Photography School.