Sunflares can make an otherwise dull image, look pretty dramatic. It’s very tricky to get good images of a sunflare in-camera, especially when using natural light only, as the contrast between the light and dark parts of the image is often too great that no amount of Active-D lighting can fix. Thankfully, we have Photoshop and many special effects like sunflares can be magically created, added, or enhanced, using this software’s mind-blowing functionality.
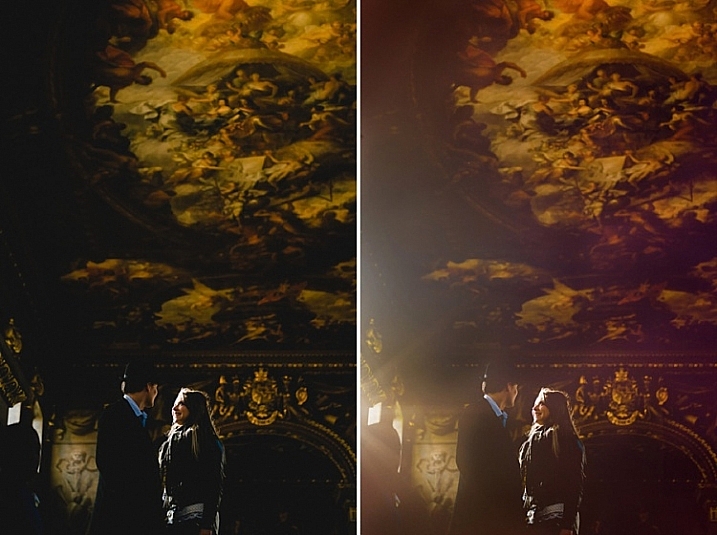
Why add a sunflare?
Special effects, such as a sunflare, ultimately boil down to the photographer’s personal taste. Here are a few reasons why sunflares may be added in post-processing.
- To exaggerate the sun’s rays.
- To enhance contrast and inject drama.
- To hide unwanted clutter.
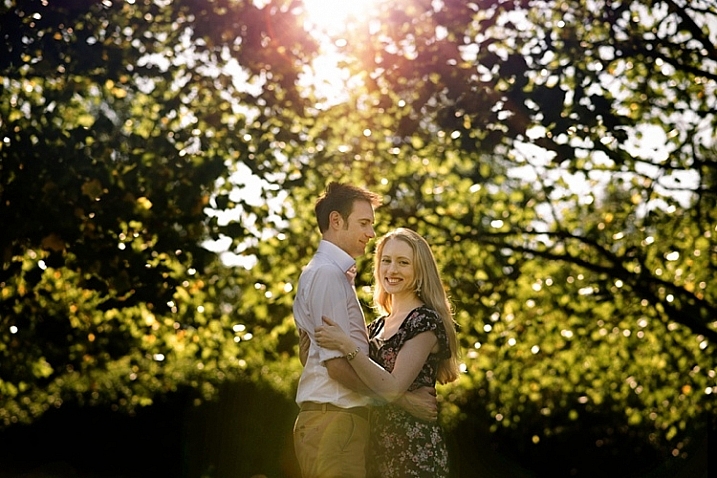
- To achieve artistic effects, for example if you are aiming for a dreamy and romantic effect, or soft and hazy ambience, such as the image above right.
When not to add a sunflare?
When you discover the magic of Photoshop, you can easily get carried away by the excitement of adding special effects, and there’s the danger that you add it on all your images, even when completely out of context, out of place, or totally unnecessary. I suggest avoiding sunflares when:
- There is no sun at all or any large light source, in the shot.
- When it makes the image look completely fake, when you really mean for it to look natural.
How to add flare in Photoshop
As is the usual case in Photoshop, there are always several methods to do something. This tutorial focuses on two ways of adding a sunflare.
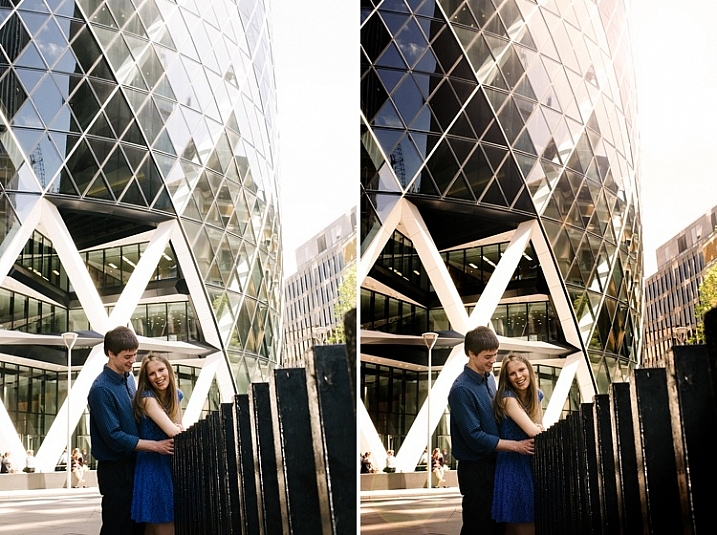
1. Method one: Using the LensFlare filter
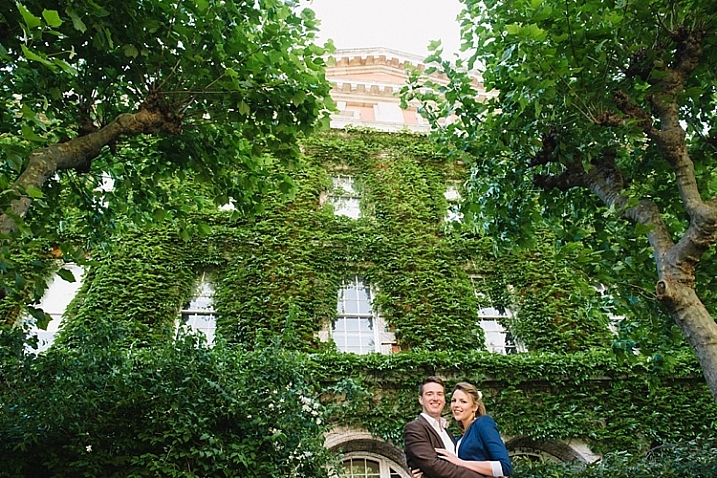
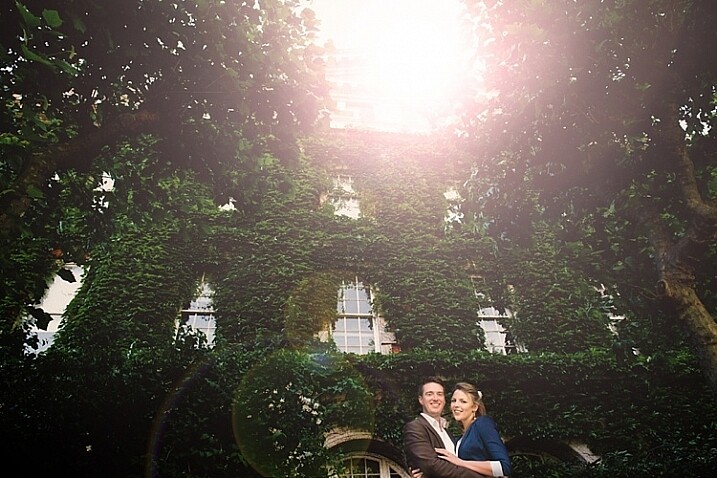
Adding a bright sunflare to the image above won’t make much difference to an already washed out sky and part of the building. First of all you would need to create contrast by darkening the image. Copy the image on a new layer using CMD/CNTRL + J, and darken it using a Levels adjustment layer.
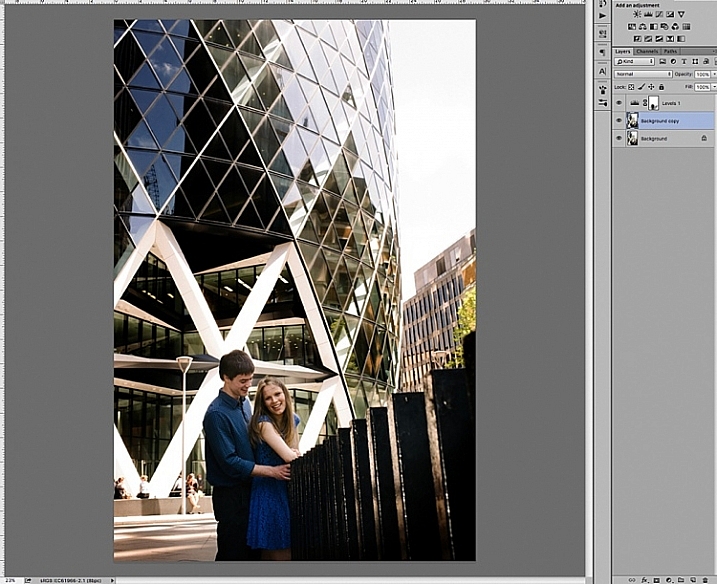
Merge the background copy layer with the levels layer, by selecting both layers and typing CMD/CNTRL + E to merge them. Now you have a new darkened layer. Make another copy of the new darkened layer, then work on this new layer with the sunflare.
When you add sunflare, it is automatically added on the layer as part of the image, and not on a new layer by itself. So to be safe, keep a copy of the darkened layer which you don’t touch. Always work on the new copy with the sunflare, so in case you make mistakes or need to reposition your sunflare, then you won’t need make a darkened layer all over again. You can just delete the layer you are working on, and duplicate your untouched dark layer, to start adding a new sunflare.
In Photoshop, bring up the Lens Flare from the top menu bar using the Filter>Render>LensFlare drop down menu.
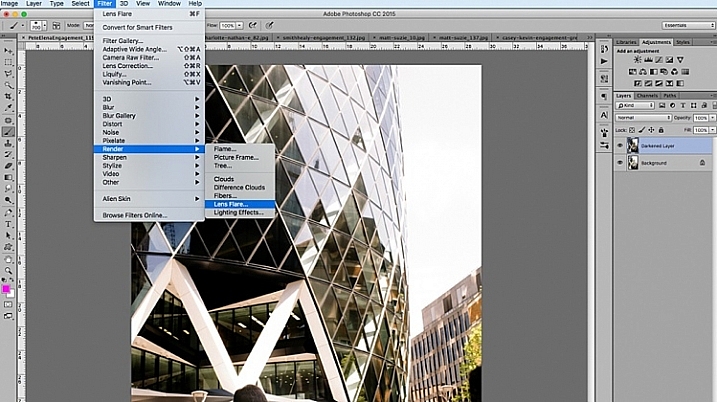
You can experiment which type of lens flare you want to add, by clicking the circles next to the type of sunflare option, and adjusting the brightness intensity by moving the slider. Click OK when you’re happy with your choice, and the sunflare will be superimposed on your image on the same layer.
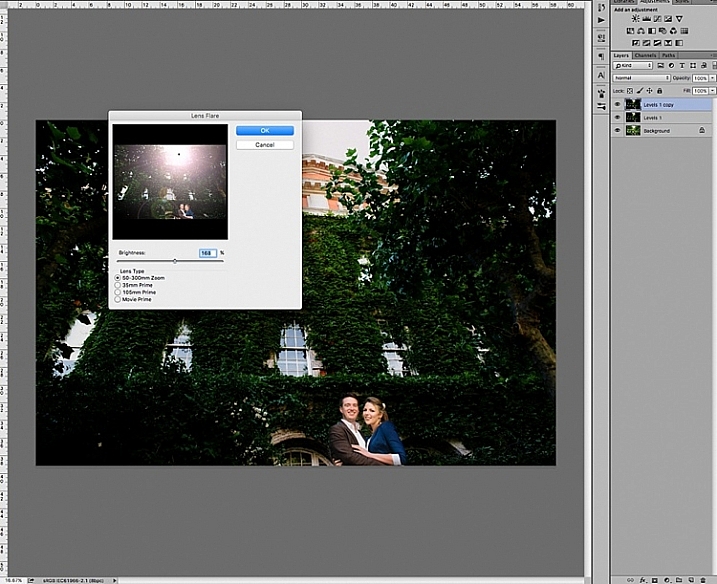
Once the sunflare is applied to the image, add a layer mask, and using a soft black brush, remove some of the sunflare from areas you want to protect such as faces (make sure to paint on the mask, not on the layer).
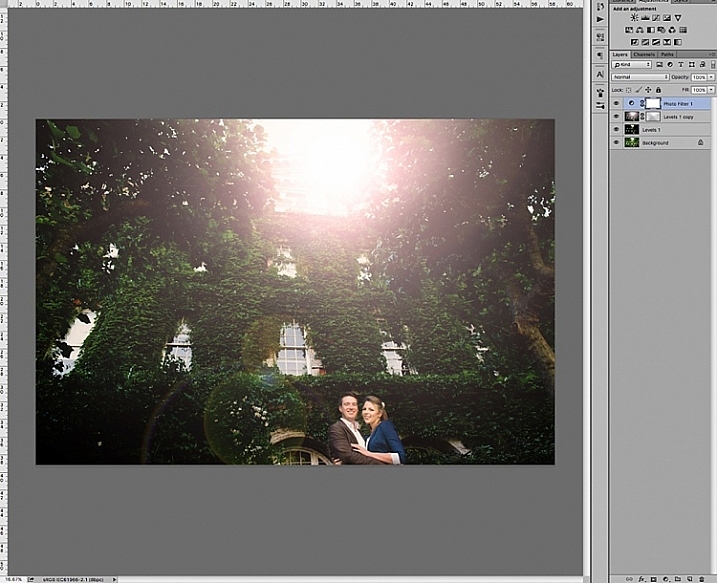
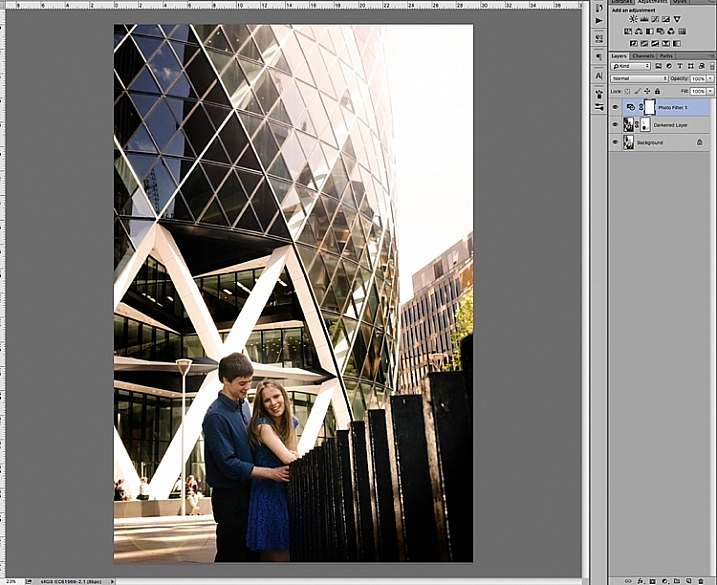
To finish, I added a photo filter on top, to warm up the image. Below is the image before and after the sunflare has been added. It is always a good practice to save the image with sunflare as a new JPG file, and always save your Photoshop file (PSD) with all the layers in tact, in case you need to revisit it again in the future.
2. Method two: Using overlays
The built-in sunflares in Photoshop have very limited choices, as you have seen above. There are far more interesting sunflares of all shapes and colours available, in the form of overlays.
Below is an example of an image with a faint sunflare added in Photoshop, using one of the built-in choices above. I don’t think this is dramatic enough. In this example, I am exaggerating the sunflare by adding a sunflare overlay.
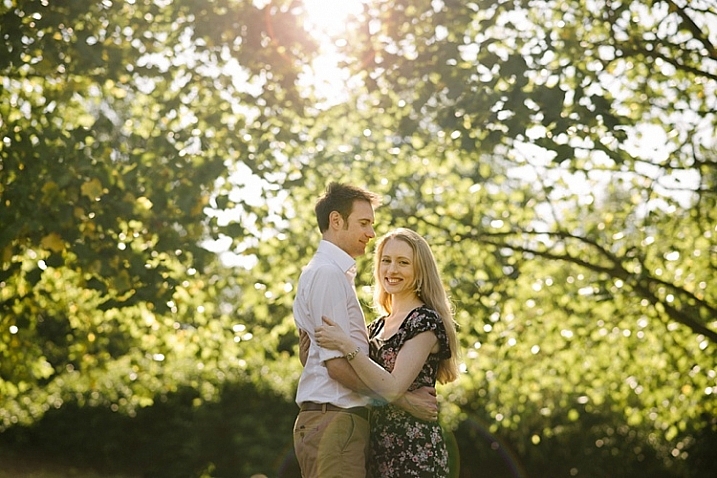
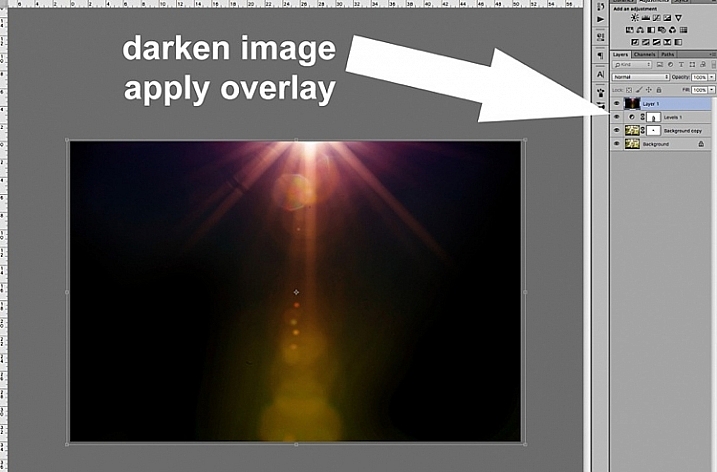
First darken the image with Levels, as in the first method above, using a layer mask to protect areas you don’t want to be darkened. Then apply the overlay on the entire image, as shown below.
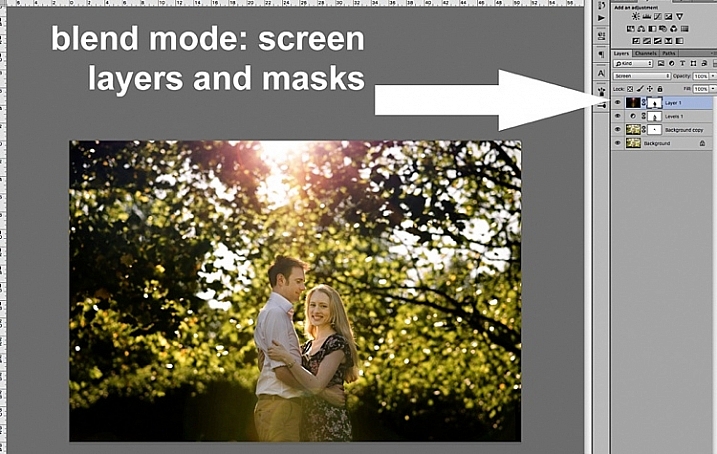
Change the layer blend mode to Screen, which makes all the dark areas of the overlay disappear, and you will only be left with the light areas superimposed on your image.
Below is the final JPG image with the new sunflare overlay, with the whole image darkened for more contrast.
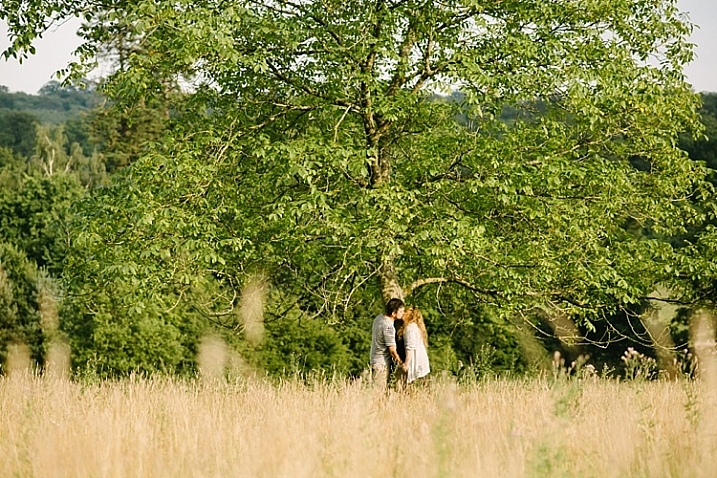
Below is another image about to be treated with a sunflare overlay, but this time way more exaggerated than the example above.
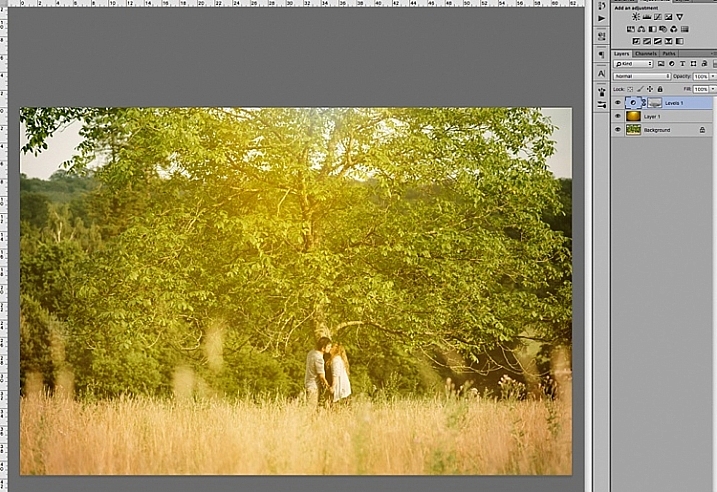
The overlay is so strong, as you can see on Layer 1 below, I have applied a levels layer to brighten it a little, and a layer mask to gradually remove some of the overlay from areas I wanted to protect.
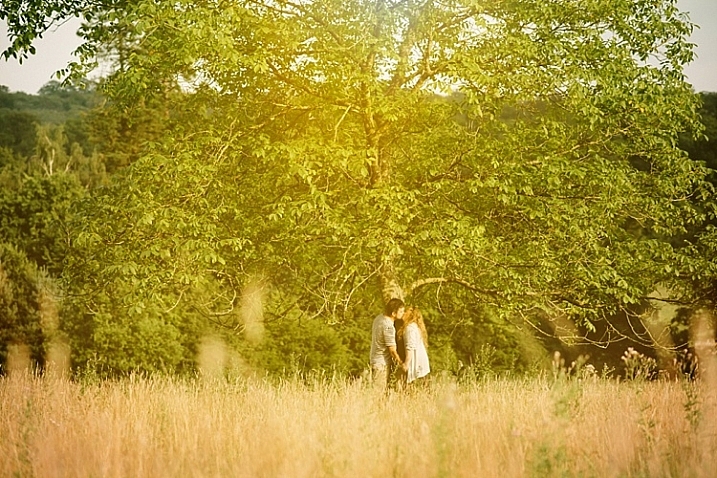
Below is the final image with an exaggerated sunflare overlay, that looks like it has been photographed through a warm filter over the lens.
A few things to note when applying special effects
- Be subtle and experiment with the opacity to achieve the desired effect.
- Darken surrounding areas to emphasize flare, especially on a very bright image.
- Mask off special effects from faces, and areas that clearly do not need it. The built-in sunflares in Photoshop have circular flares that appear too perfect and hard-edged. You can always mask some of this away to take the edge off, and soften the flare effect.
I hope you have enjoyed this little tutorial in adding a sunflare special effect in Photoshop. Do you have other tips and ways to add sunflares in post-processing? Please share them in the comments below.
The post 2 Quick Ways to Add a Sunflare in Photoshop by Lily Sawyer appeared first on Digital Photography School.