One of the secrets to good landscape photography is the way in which you capture various elements of the scene. Sure, you can let your camera do the heavy lifting and figure out the exposure. But a landscape photo doesn’t have to be a literal interpretation of what you see, or of what your camera sees when left to its own devices. While post-processing can help make adjustments to an image so that it’s less literal than what you saw, making certain adjustments at the time of capture is more important, giving you something special to work with when the time comes to edit the image in post. Using filters such as polarizers, neutral density, and graduated neutral density filters can help you capture the scene in more creative ways. These tips for using filters can help you start making these adjustments and creating more dynamic images.
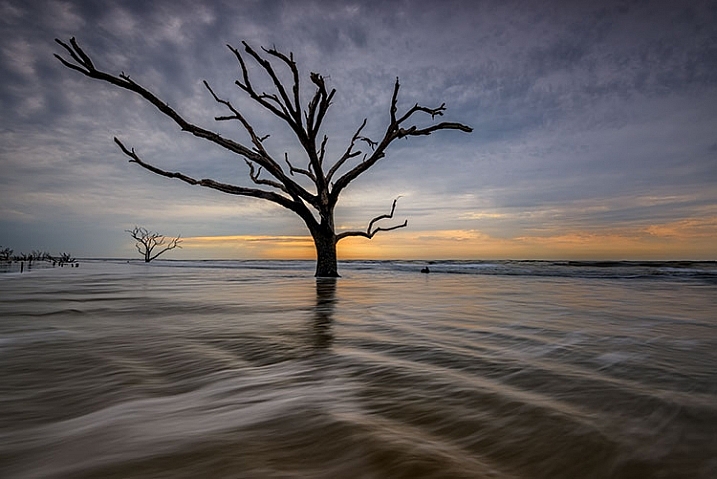
The following tips can help you start making these adjustments and creating more dynamic images.
1 – Use a polarizer to improve the sky
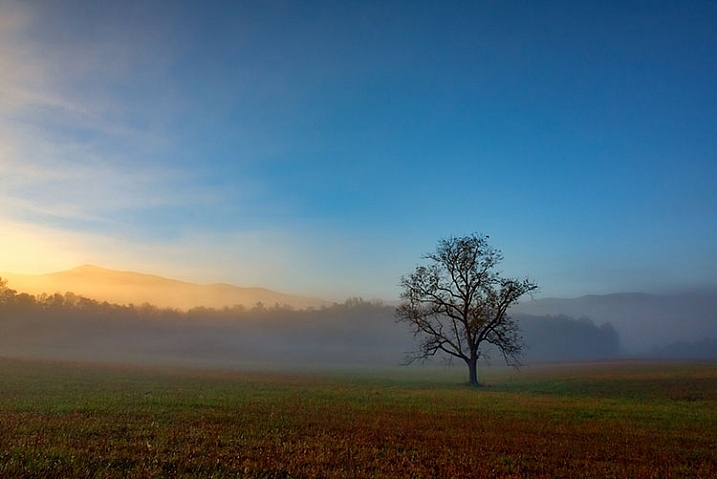
A polarizer cut through the morning mist to reveal blue sky in this shot of Great Smoky Mountains National Park.
I believe every photographer should have a polarizing filter in their camera bag because of how useful they can be. Polarizers work by filtering out light that is reflected directly toward the camera at specific angles. When photographing a landscape with a blue sky, haze can occasionally cause the sky to be less vibrant. Using a polarizer, you can minimize the haze and reveal the true blue of the sky. This will work best when aiming the camera at a 90° angle from the sun; in other words, with the sun to your side.
By rotating the polarizing filter while composing your shot, you can see the effect the filter will have. Be sure you don’t go too far. It is possible to over polarize the scene, creating a darker blue splotch in the sky that will make the use of the filter obvious and the image appear unnatural. This is especially possible with ultra-wide angle lenses that take in a huge expanse of the sky. In the image above, a polarizer was used to reduce the amount of morning mist in the valley and show the blue sky behind the mist.
2 – Use a polarizer to reveal what’s underneath the water
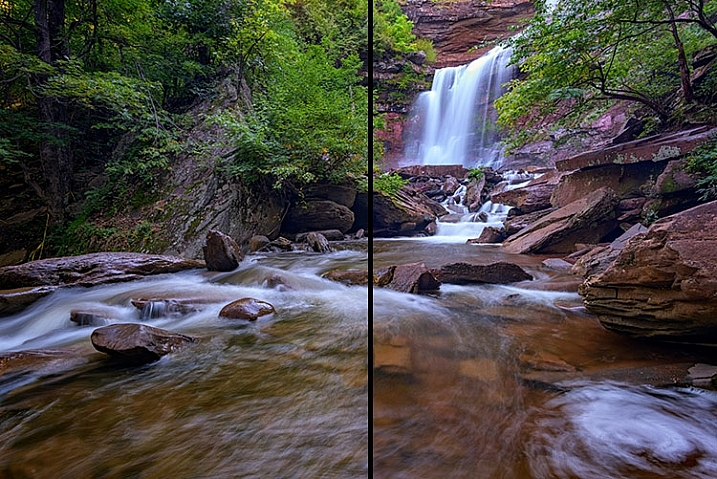
A polarizer can reduce reflections on the surface of the water to allow you see what’s beneath the surface, and add visual interest to a scene.
Often when photographing a stream or lake, the light may reflect off the water’s surface to such a degree that it’s impossible to see what’s below. However, there may be times when there is something of interest underneath the surface, such as rocks, fish, or logs from fallen trees. Using a polarizer, you can reveal as much or as little of what’s beneath the surface by eliminating the reflecting light.
It doesn’t have to be all or nothing either. You can nuance the effect by rotating the filter just a little bit, to retain some reflecting light while still seeing beneath the surface. In the image above, on the left, no polarizer was used and the reflected light prevents you from seeing below the water’s surface. On the right, a polarizer was used to reduce the reflected light on the water’s surface, allowing you to see the rocks beneath the surface.
3 – Use a polarizer to reduce reflections on wet rocks
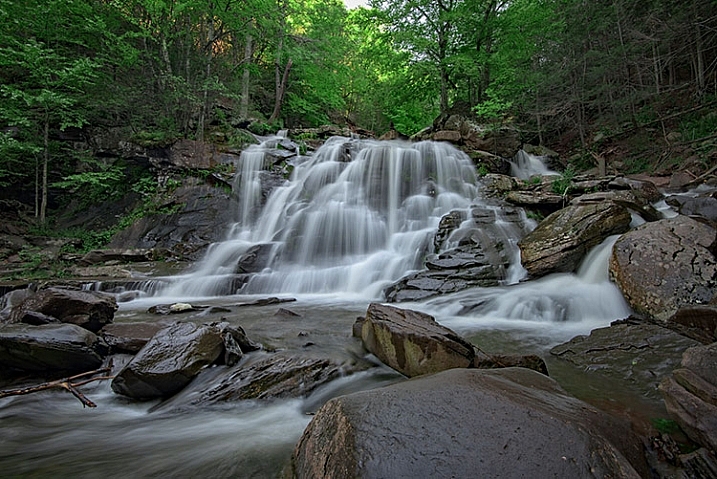
In this image, light reflects off of the wet rocks by the waterfall.
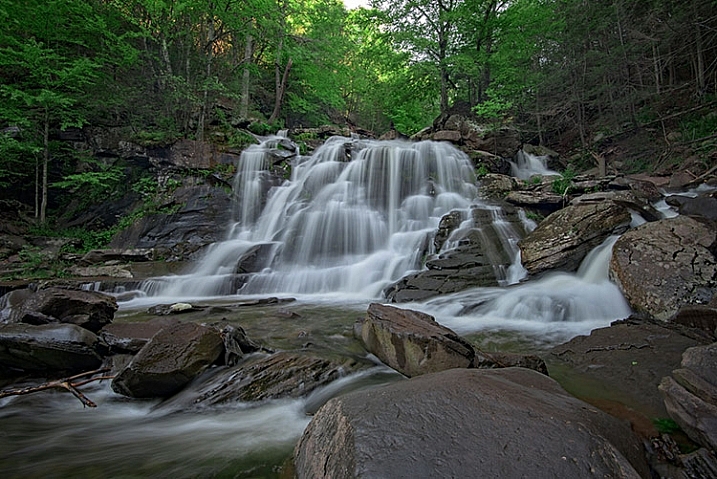
In this image, a polarizer was used to reduce the reflected light from the wet rocks.
When photographing a waterfall, where there are generally a lot of wet rocks, light can reflect off of them, making them appear shiny. On occasion, that reflected light may be so strong that it detracts from the image. Using a polarizer can reduce the reflected light and reveal more detail in the rocks, adding interest to the image.
As with the water reflections discussed above, you can nuance the effect by rotating the filter to get the right balance of reflected light and detail underneath. In the images above, you can see how the highlights on the rocks can be reduced if desired by using a polarizing filter. Again, by rotating the filter as you look through the viewfinder, or on the live view screen, you can watch the effect happen and adjust it to your liking.
4 – Use Graduated Neutral Density Filters to darken the sky
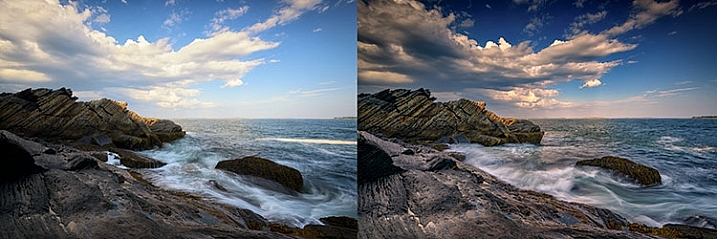
The difference when using a graduated neutral density filter can be very apparent, as seen in the comparison of these two images.
When photographing the landscape, especially at sunrise or sunset, there is often a high amount of contrast between the sky and the foreground. That forces you to make exposure choices to determine what will be exposed properly. While digital cameras are much improved with regards to dynamic range in recent years, nature can still push your camera to its limits in terms of how much can be captured in a single image.
Graduated neutral density filters can help to reduce the dynamic range of an image, by darkening the brighter areas, like the sky, so that it falls within the range of what the camera can capture. Use Live View on your camera to see the positioning of the filter over the lens, especially when using a hard-edged ND graduated filter. Watch the way the foreground exposure changes in relation to the sky, as it is possible to overdo a good thing. If the sky gets too dark in relation to the foreground, try a less dense filter, for instance, a 2-stop ND grad rather than a 3-stop grad. Above, the image on the left was taken without the use of a graduated neutral density filter. On the right, a 3-stop,
Above, the image on the left was taken without the use of a graduated neutral density filter. On the right, a 3-stop, soft-edged graduated neutral density filter was used to darken the sky. Notice it also has the effect of brightening the foreground in relation to the sky, bringing out more detail in the darker area in the bottom left.
5 – Control the motion of water
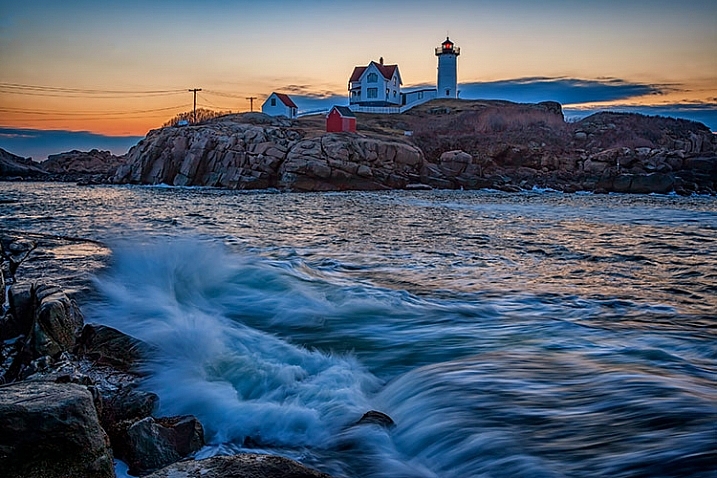
A neutral density filter can be used to help capture the motion of water in a scene.
Because of its nature, moving water is often the most dynamic part of an image. You can create a different mood simply by changing the way you capture water. Longer exposures tend to be more calm and peaceful, while shorter exposures can capture the violence of a crashing wave, or the power of a river going over the falls.
Since shutter speed controls the effect of motion, by using neutral density filters you can evoke both moods by limiting the amount of light that enters your lens. Thus, you can adjust the shutter speed to give you the effect of motion that you want. You may not need a filter for faster shutter speeds, but if it’s a bright day and you want to slow things down, you’ll need a neutral density filter to do that.
Using a 3-stop ND filter is usually fine for waterfalls to slow them down just enough to get a nice creamy look to the falls, but when capturing waves on the ocean, it may not be enough to get the effect you need. Sometimes four or even five stops of neutral density is needed to get the exposure you need to slow it down to capture water the way you want. Adding a 10-stop neutral density filter will allow you to slow down your shutter speed to a minute or more, eliminating waves completely, creating a calm scene that feels quiet and peaceful as opposed to the crashing waves pounding the rocks or beach.
In the image above, a 3-stop neutral density filter was used to slow down the exposure just enough to allow the water’s motion to be captured as it crashed on the rocks. In the image below, a 10-stop neutral density filter was used to slow down the exposure further, to a full 2-minutes, creating smooth water and a calmer looking scene.
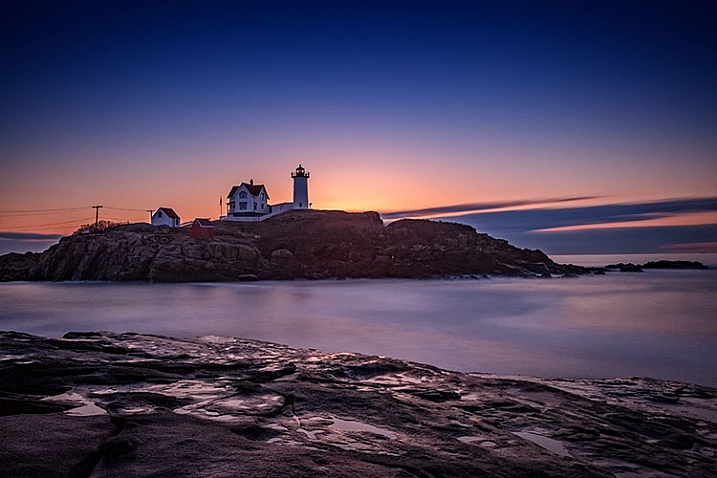
Using a 10-stop ND filter, you can make water appear calm by using a long exposure. This is a two-minute exposure.
6 – Create motion in clouds
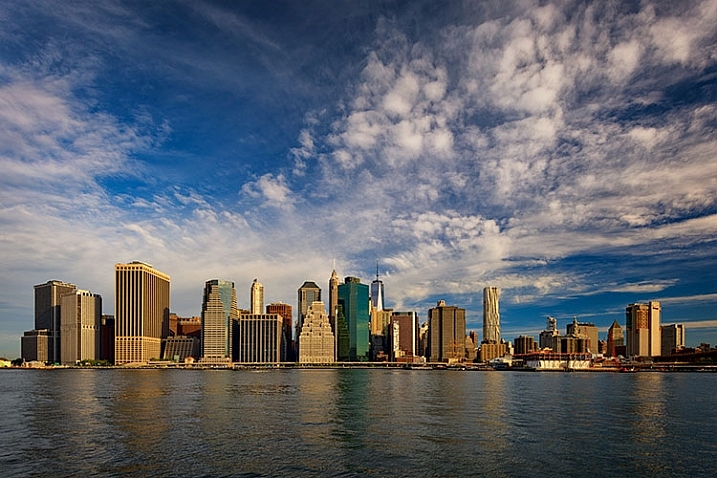
When no neutral density filter is used, clouds are captured as we see them.
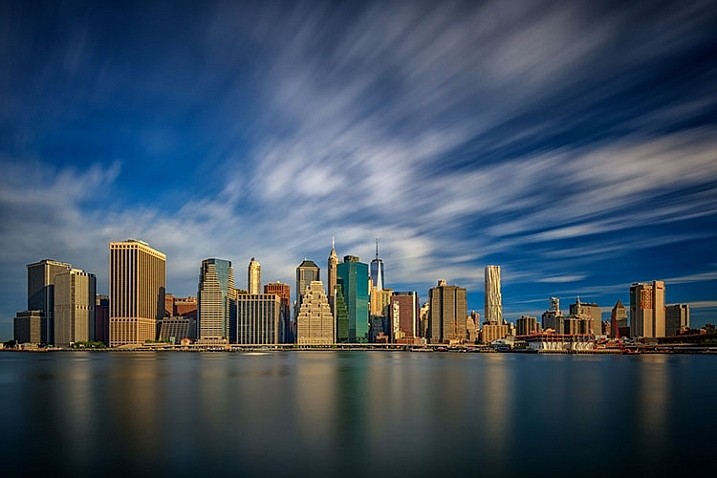
Using a 10-stop ND filter to achieve a slower shutter speed of 60 seconds, I was able to capture the motion of the clouds as they passed over New York City.
As a landscape photographer, clouds are often the focus of an image or at least a strong component in the composition. Clouds add depth and drama to a good landscape, creating background interest. But you can also manipulate the clouds to your creative advantage as well, capturing their movement and blurring them to create a sense of flight and speed in your scene. By using a strong neutral density filter, such as Lee’s Big Stopper 10-stop ND filter or Vü Filter’s 10-stop offering, you can slow down your shutter speed to allow the motion of the clouds to be captured.
The proper shutter speed to capture cloud movement will vary, depending on how fast the clouds are moving. The longer the exposure, the more movement you will capture. An exposure of 30 seconds to one minute for fast moving clouds, such as in the image above, will result in a motion blur where the clouds still resemble clouds. An exposure of two or three minutes will result in the clouds becoming streaks of color across the sky, unrecognizable as clouds anymore.
Conclusion
One of the complaints I hear about using filters is that it takes too much time to put them on the lens, or it slows you down. I prefer to think of it as being deliberate about the shot I am trying to capture, and making sure that my camera captures exactly what I want.
Do you use filters? What’s your favorite technique using on-camera filters? Please share in the comments below.
The post Six Tips For Using Filters to Improve Your Landscape Photos by Rick Berk appeared first on Digital Photography School.