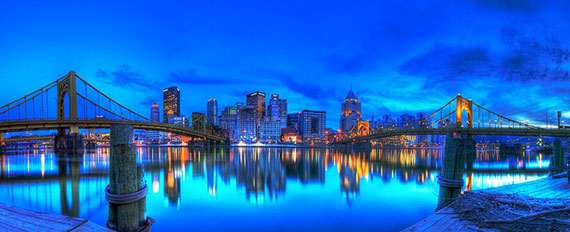
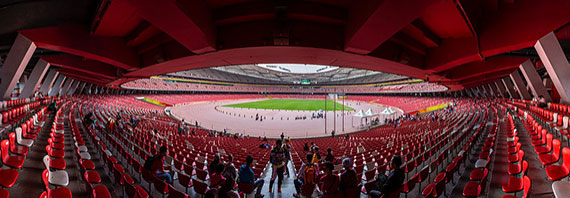
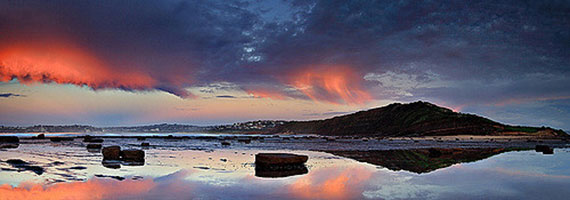
Capturing and creating panoramas can be as easy as following three simple steps or can become a nightmare if done wrong. Great panoramas will be created if you decide to spend the extra time and follow some recommendations. Photoshop will stitch your images together, without your intervention, simply by using the function ‘Photomerge’.

Photo by Brook Ward
So let’s start. Shooting panoramas is not that difficult, just follow these rules and Photoshop will do the rest:
- Always use your tripod. (I guess you’re getting the idea; they’re not fun to carry, but they’re handy, useful, and sometimes necessary.)
- Do not use automatic white balance. If you do, your panorama is going to look patched. The best option is to set your camera’s white balance to ‘Cloudy’, or if shooting in a different environment use the matching white balance.
- Shoot using portrait format, rather than landscape. You’ll have to shoot more images to cover the same space, but it will pay off with less edge distortion and a better looking panorama.
How to Shoot for a Panorama
Okay, so we covered three fundamental steps, now let’s capture the images.
- The first thing that you have to do is set the exposure. Select the area that you believe has the correct exposure, press your shutter button halfway down, and make note of the f-stop and shutter speed.
- Set your camera to Manual Mode and use the settings recorded in the last step, by doing this, it should mean that all the exposures will match during the stitching process. If you shoot in Automatic Mode, you run the risk of having different exposure settings in each segment—a nightmare trying to correct using Photoshop.
- The next step is to set your focus. Focus on your main element using auto-focus, then turn it off so that your camera doesn’t refocus on each shot. You are now all set; start shooting your panorama.
- Shoot the first image, using either a cable release or at least your camera’s timer. Continue shooting, making sure you overlap each image at least 25 percent. This is very important for Photoshop to work properly. All the images have to overlap at least 25 percent—better if it is close to 50 percent.
- Continue shooting, and shoot as fast as you can—you don’t want conditions to change (light, movement, clouds, etc.).
- The final step is the easy part. If you followed all the necessary steps, Photoshop will do the job for you. Go to Photoshop’s File menu, choose Automate, and then Photomerge. Select the images and click on Attempt to Automatically Arrange Source Images, and finally click OK. A couple of minutes will go by, and you will end up with a seamless panorama.

Photo by See-ming Lee; ISO 640, f/8.0, 1/30-second exposure.
Tips for Better Panoramas
Take note of the following tips if you want to even create better looking panoramas:
- Even though Photoshop can accommodate a wide range of focal lengths, it works at its best if you stay away from the wide angle end of your camera’s zoom range. Play it safe and use a range between 35 and 80mm. Photoshop will have difficulties matching up edges if you shoot, for example, at 20mm.
- Shoot left to right or right to left—just be consistent. The easy part is that if you shoot left to right, when you check your photo organizer you can easily tell that you have a set of photos to be used for your Panorama. Here is a simple trick, before starting to shoot, take a shot of your finger and when you are finished take another shot of your finger.
- Close-ups don’t work for panoramas. The closer you capture images for your panorama, the curvier the straight likes will look—long straight roads tend to curve as if you were using a fish-eye lens. So try to keep your distance from your scene with a constant uniform distance.
- Photoshop creates a wide angle image while stitching shots together, which in some cases will make cropping a difficult task. When shooting, remember to shoot more of the scene than you are trying to create. The more the better, since your final image will always tend to curve.
- The best panoramas are taken outdoors. This doesn’t mean you can’t shoot great looking indoor panoramas, just that you have to be more careful when doing so, since you are shooting closer when you are indoors and objects and furniture will appear to shift and move. There are two solutions to this challenge. The first one is using a specialized tripod head, which can be expensive. The cheap option, which takes patience and practice, involves adjusting the position of your tripod. After the first shot, pick a near object on the side of your viewfinder and note its position relative to the background. When you turn to take the next shot, adjust the tripod so that the object keeps the same position—tricky but effective.

Photo by Tim Donnelly
Shooting panoramas can be fun, and the end result spectacular. Try it—you’ll be amazed!
About the Author:
This article was written by Joaquin Duenas. PhotoBlog: theduenitas.blogspot.com. The Duenitas Digital World is based in Miami, Florida and covers South Florida, the Caribbean, Mexico and Central America.
Go to full article: How to Capture and Stitch Panoramas
What are your thoughts on this article? Join the discussion on Facebook
PictureCorrect subscribers can also learn more today with our #1 bestseller: The Photography Tutorial eBook
The post How to Capture and Stitch Panoramas appeared first on PictureCorrect.