Watchmen episode two guide: all the moths, flashbacks, and UFOs explained

The Watchmen TV series is now dropping episodes weekly, with Season One Episode Two now having aired on HBO – with a slight delay to those watching in UK or Australia. (Not seen the first one yet? Find out how to watch Watchmen online.)

The TV adaptation / sequel (brought by show creator Damon Lindelof) to the 1980s Watchmen comics certainly has more masked heroes, sci-fi elements, and more information about the world

But, as ever, the follow up Watchmen episode contained as many questions as it did answers, and so we've put together the key questions from episode two that you might have after watching the episode (or just to get a head start beforehand).

If you still feel like you're in too deep, with no idea what's going on, we recommend this Watchmen beginner’s guide for a run-down of the key events and figures from the original comics. Otherwise, read on for the most important – or bewildering – things we saw in Watchmen episode two.

And yes, there are spoilers ahead.

Letters from the sky: what were they about?

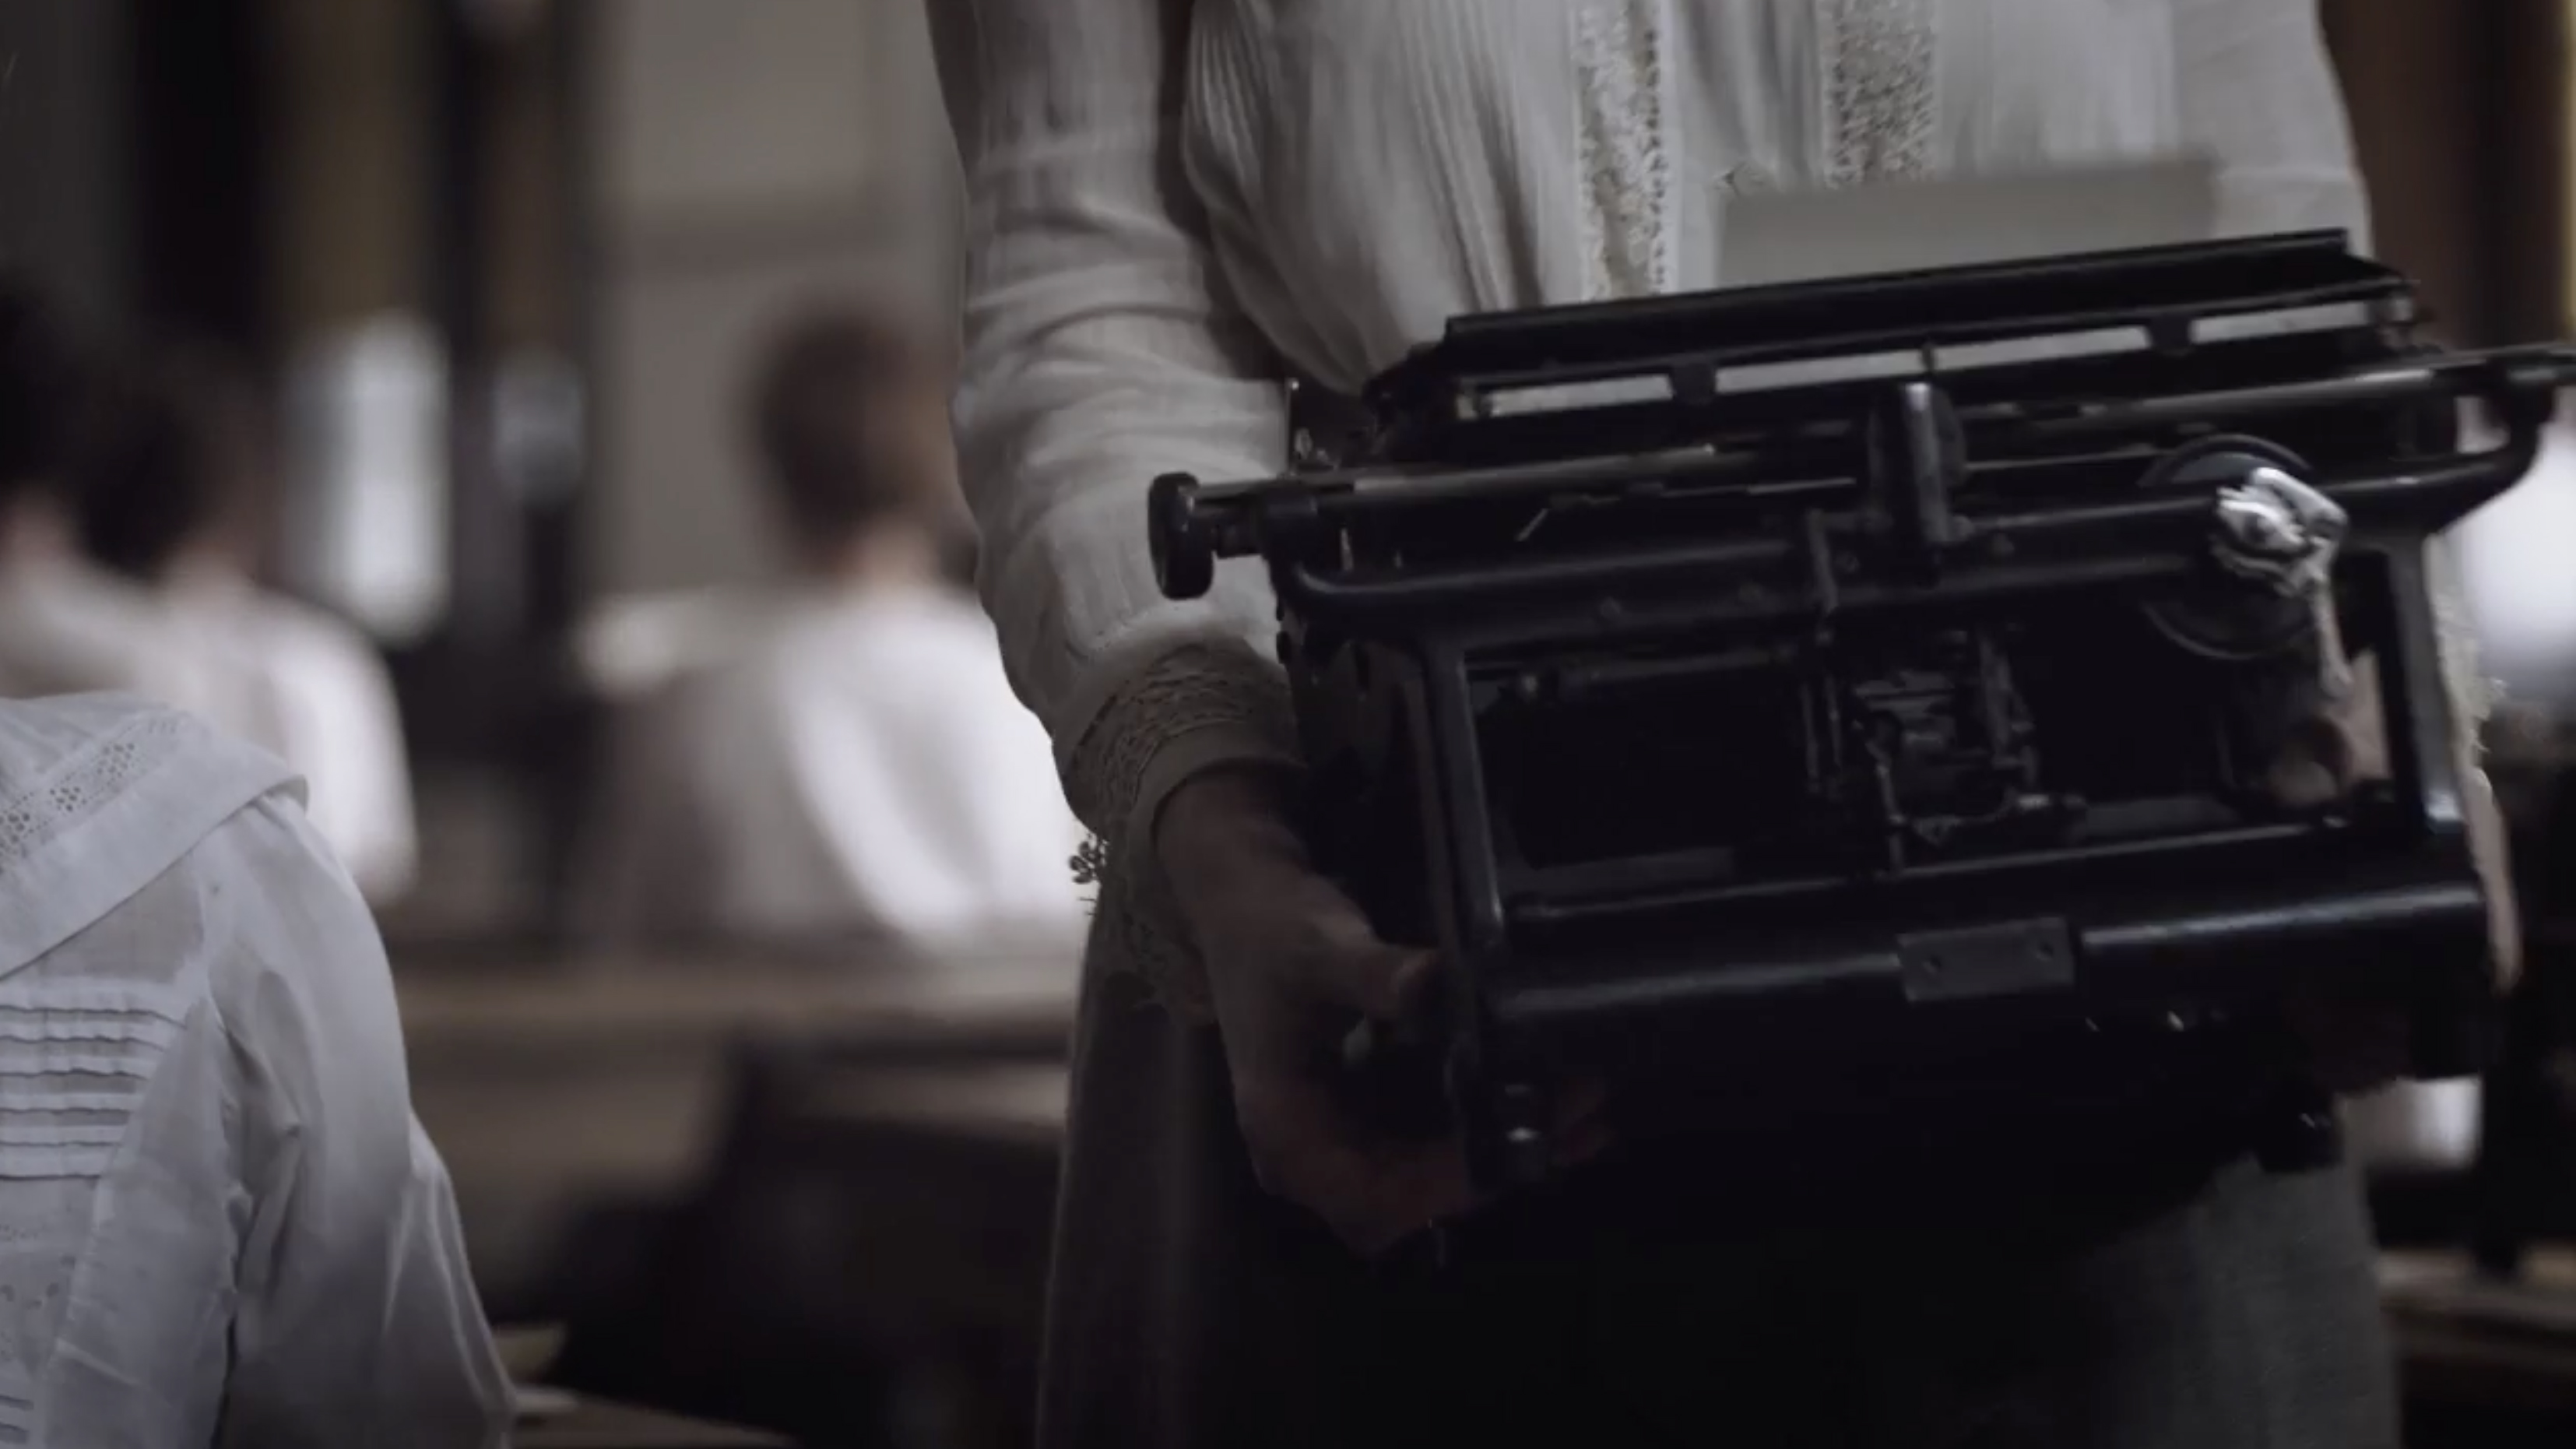
While Watchmen episode two doesn’t revisit the events of the Tulsa race riot directly, we do see an earlier scene set during World War One, when William’s father is serving in the US military. 

Anti-US propaganda is dropped out of air vehicles, with messages questioning the US’ treatment of persons of color as second-class citizens – in order to demotivate soldiers or attract defectors to the German cause. 

It’s one of these sheets of paper on which he writes “WATCH OVER THIS BOY” when sending his son to safety out of Tulsa.
Why is Angela hiding what happened?

One of the curious character choices in the episode is how Regina King’s Angela doesn’t turn in William straight away, despite him claiming credit for the death of the police chief.

It’s clear there’s more going on than meets the eye, and the idea of the chief (a close friend of hers) having “skeletons in his closet” is clearly enough to keep her from turning him in immediately – and that’s well before she finds out William is her grandfather.

Indeed, when Angela goes to check Crawford’s closet, she finds a Ku Klux Klan outfit, suggesting he may have been involved in some of the Seventh Cavalry’s plans.
Wait, did you say grandfather?

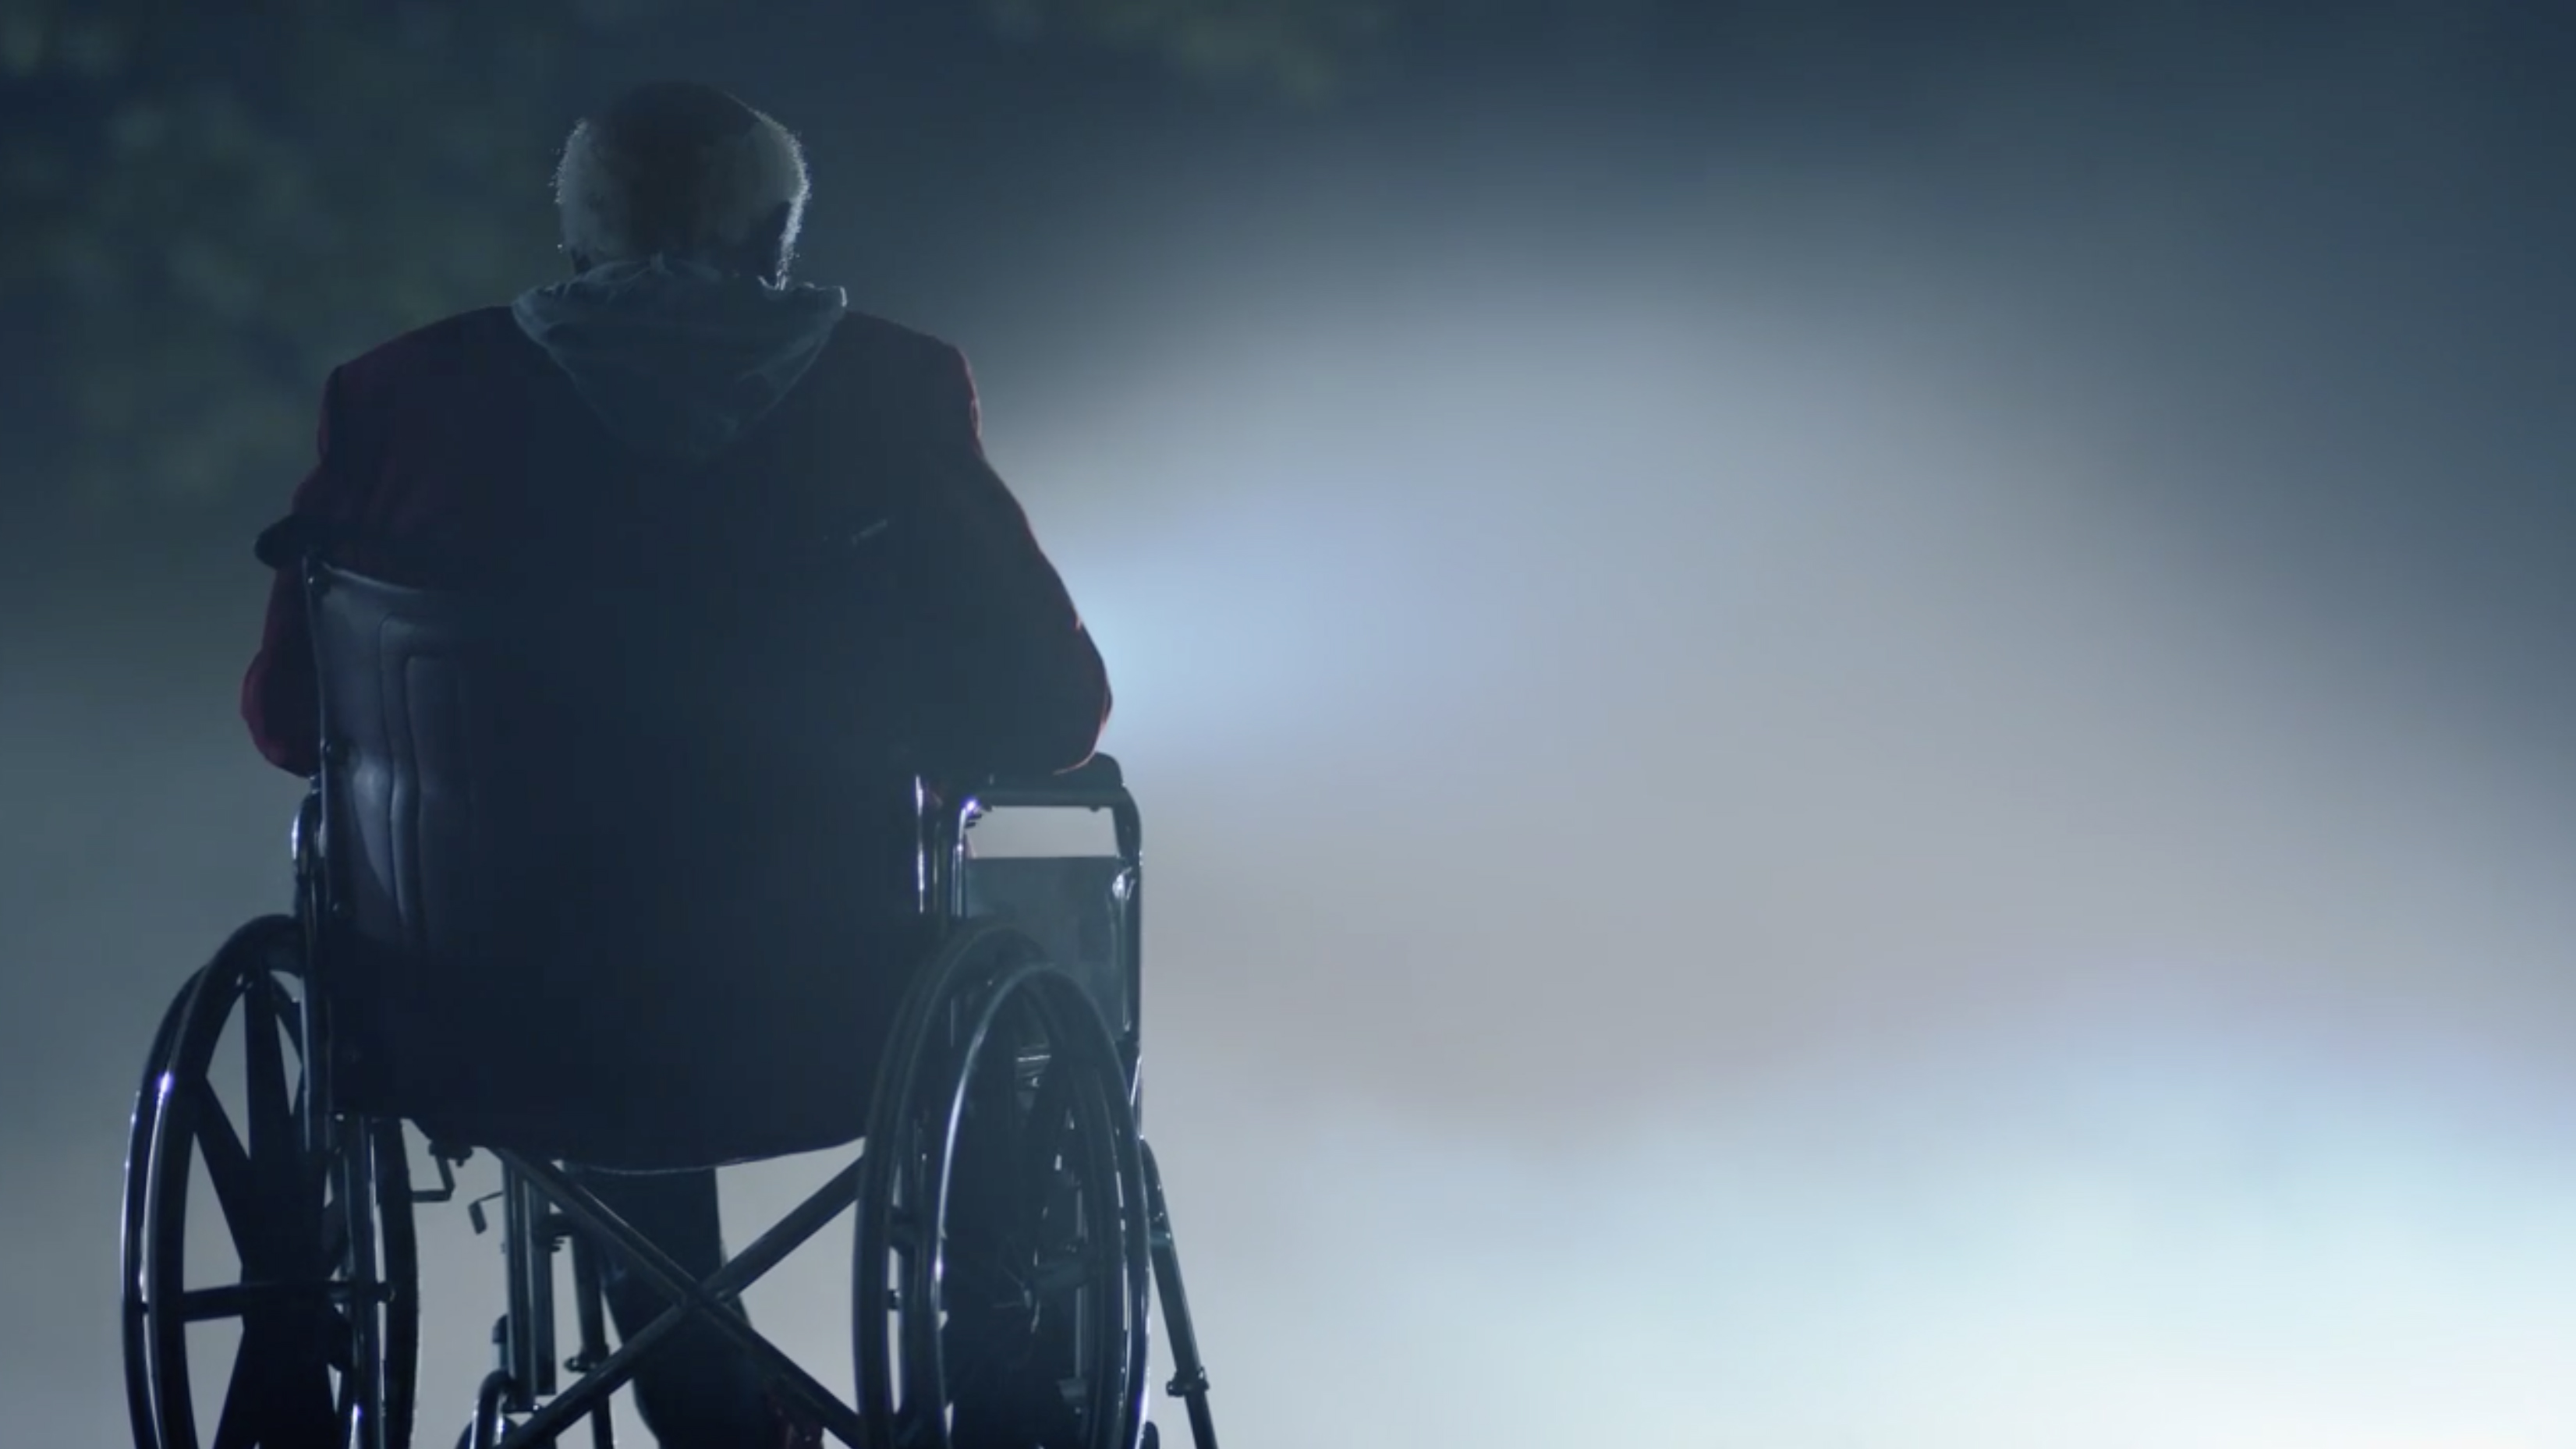
Yup. Angela takes William’s DNA – from a mug of coffee – to the Greenwood Centre for Cultural Heritage, a museum dedicated to (seemingly) those affected by the Tulsa race riots and similar acts of racial violence in American history, and finds out that William is her biological grandfather. Twist!

Was that Mothman?

As the police investigate the scene of Crawford’s death, various moth-themed characters flit and fly about the scene with cameras, attempting to get a close eye at what’s happening. 

From the remarks of Red Scare (“F***ing moths!”) and their replies (“I have a right to see what’s happening here!”) we’d assume that they’re either journalists or voyeurs trying to capture and sell footage of high-interest crime scenes, like Jake Gyllenhaal in the movie Nightcrawler.

Mothman was one of the original ‘Minutemen’, the first band of masked heroes in the Watchmen comics, and this little interaction shows another way the legacy of those vigilantes has been shaped in modern day.

What was that Christmas scene?

One tense scene is set on Christmas Eve, when Angela and her husband – played by Yahya Abdul-Mateen II – are attacked by members of the Seventh Kavalry, after which the (now deceased) police chief visits her in her hospital bed. 

This is a flashback to “White Night”, the night when many police officers were murdered in their own homes.

Who is Topher – and what is he building?

One thing we learn in this episode is that Topher – one of the children under Angela’s care – was a child of a police officer killed on White Night. She also refers to the police chief Judd Crawford as Topher’s “uncle”, though Topher reminds her there wasn’t a biological link.

When Angela goes to tell Topher that Crawford is dead, he seems to be building a medieval castle out of magnetic blocks – like a futuristic version of Lego – that mirrors the castle inhabited by Jeremy Irons’ Adrian Veidt.

Tomato trees?

One of the weirder moments of a consistently-surprising series: Adrian Veidt appears to pluck a tomato from a tree, though they grow on runners in our own reality. 

More signs that something isn’t quite right where he is, though whether it’s something transdimensional, virtual, or otherwise is yet to be revealed.

Did Veidt kill his servant?

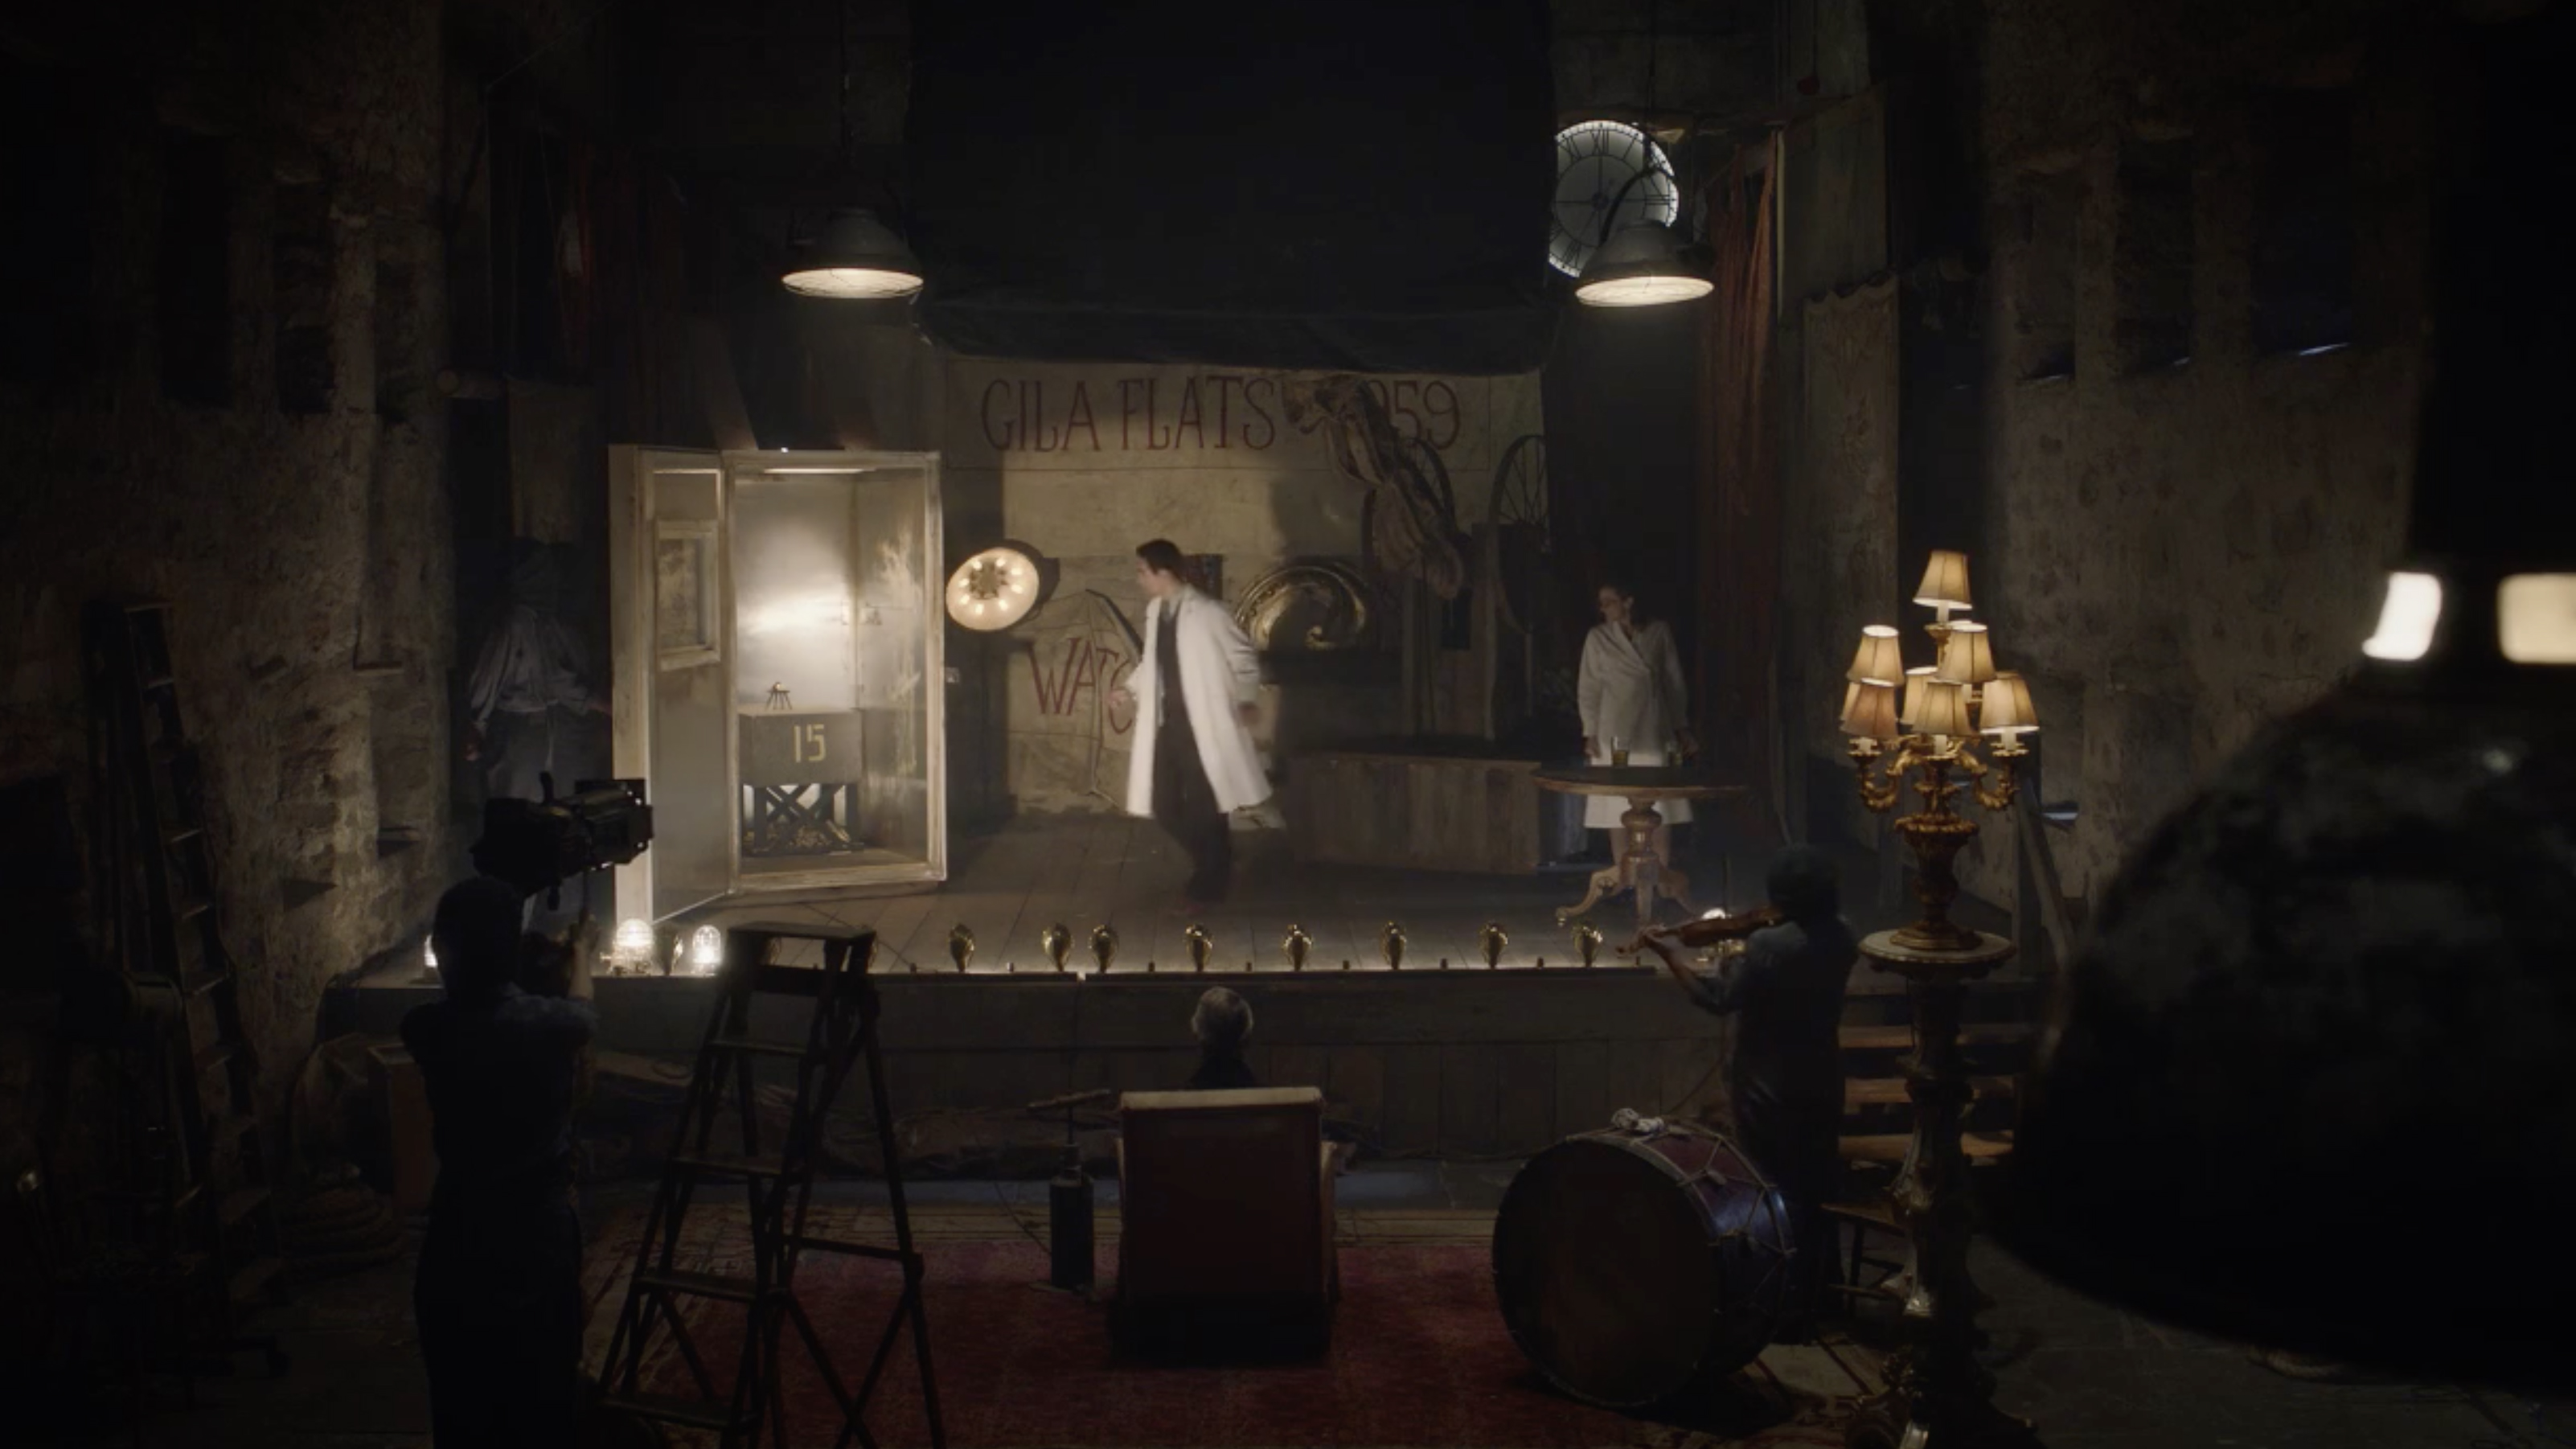
Yes and no. We see a stage play, The Watchmaker’s Son, written by Veidt in his castle and performed by his two servants.

Except, he actually has a lot more servants, as the two characters we’ve seen, Mr Philips and Ms Crookshanks appear to have numerous doubles or clones, one of which is burned to death during the staging of the play. 

More on this as the story progresses – though it’s worth mentioning that Dr Manhattan could make duplicates of himself in the comics, and that title of “The Watchmaker’s Son” certainly refers to the blue superhero himself.
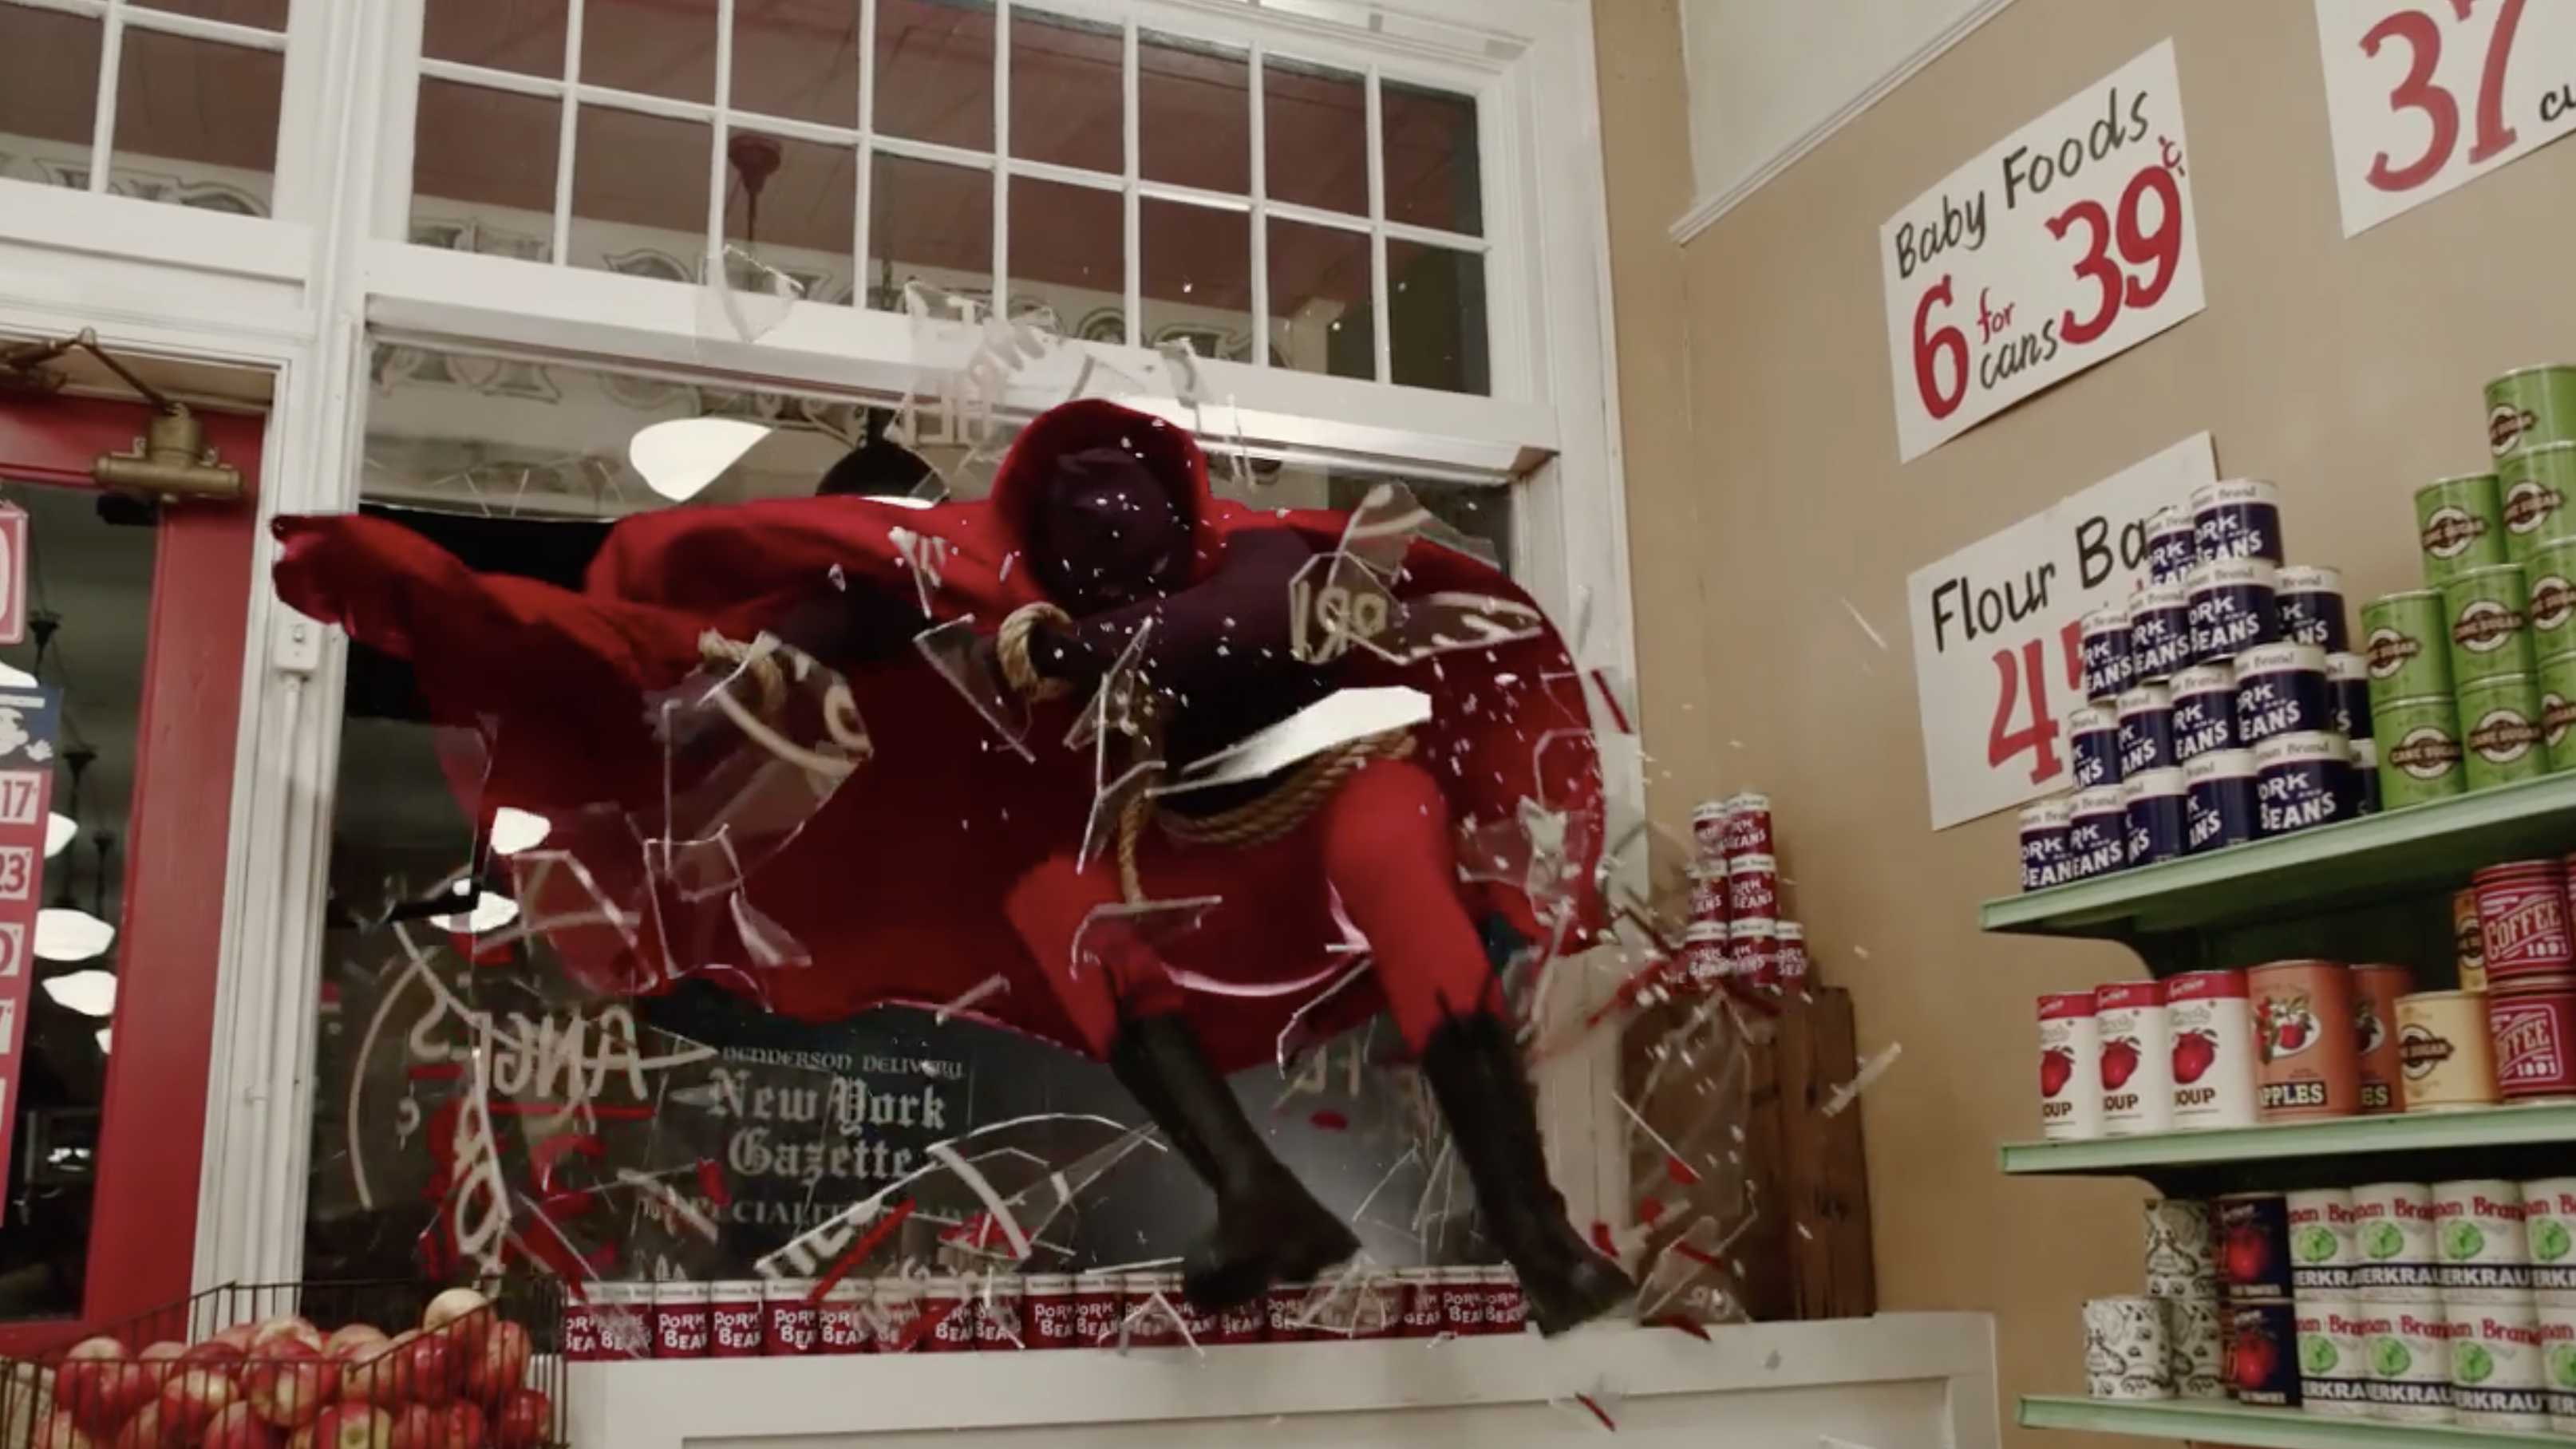
What was that grocery store all about?

The grocery store is shown in a section of the American Hero Story TV-show-within-a-TV-show. We see Hooded Justice, the first-ever masked vigilante, crash through a window and assault various criminals attempting to hold up the store.

This points to more potential clips from the show in the episodes ahead, and a way of revisiting classic characters despite the 30-year time jump from the comics.
There was a UFO?

Certainly a bold ending for the episode, possibly matching that of the first. We see William, now being arrested by his granddaughter, lifted into the air by a flying machine that connects magnetically to Angela’s car and drags it out of shot. 

Aliens didn’t play a part in the Watchmen comics – other than perhaps the so-called ‘alien squid’ – and knowing the technology available to the likes of Nite Owl and Veidt, it’s likely this was a terrestrial kidnapping.

Martial Feats of Comanche Horsemen

The title of the episode is an intriguing one, especially as it’s also the title of the painting shown in Crawford’s home. 

The painting is an 1834 work by the artist George Catlin, and depicts Native American warriors on horseback – specifically concealing themselves on one side of the horse to prevent being seen or struck, which is also shown in the Ballad of Buster Scruggs mini-series starring Tim Blake Nelson (Looking Glass in Watchmen).

The weight given to this painting suggests something is being hidden, or even that a character thought to be dead may have more of a part to play than first thought…

You can look forward to more confusion – maybe with some answers – next week at the same time. Head to our how to watch Watchmen online piece for more details.


TechRadar: Photography & video capture news

Posted in Photography | Tagged , , , , , , | Leave a comment

10 Awesome Photoshop CC Tricks You Wish You Knew

The post 10 Awesome Photoshop CC Tricks You Wish You Knew appeared first on Digital Photography School. It was authored by Kevin Landwer-Johan.

photoshop-cc-tricks

All photographers want their photos to look fantastic and part of the path to great images is the post-processing. You can do so much with the right tools if you know how to use them well. Photoshop is such an amazing tool for photographers. The more you use it the more you find that it can do. The more you realize you have to study to be able to make the most of it. In this article, I will share with you ten cool Photoshop CC tricks I love using when I work on my photos in Adobe Photoshop.

1. Photoshop search

10 Awesome Photoshop CC Tricks You Wish You Knew

Photoshop articles like this or video tutorials often suggest tools to use that you may not be familiar with. It’s easy enough to remember the tool but forget its location within photoshop. This is where the Photoshop search comes in helpful.

Up in the top right of the main photoshop window, you will find a search icon. Click on it to search not only to find that tool you want but other things too. You can also search for tutorials, Lightroom and Adobe stock images.

2. Manage keyboard shortcuts

10 Awesome Photoshop CC Tricks You Wish You Knew

When working with any complicated software, it pays to learn at least some of the keyboard shortcuts. Knowing the shortcuts for the tools you use the most will help speed up your workflow.

In photoshop you have the capacity to customize your keyboard shortcuts. It’s easy enough to do. If you’ve been using photoshop for a while you will know which tools you use often and will want to know the shortcuts.

To find them, all you need to do is go to the top menu and select Edit->Keyboard Shortcuts. This opens up a window where you’ll see all the information you need to learn the shortcuts and change them.

Most keys and many combinations have shortcuts assigned. These can be customized to suit your working style.

One key that has no default shortcut assigned is the ‘n’ key. You can assign your favorite tool to it without disrupting any of the other shortcut keys.

3. Temporary tool select

Another helpful trick that aids smooth workflow is being able to temporarily select a tool.

Say you’re working on an image with the Burn tool and you see a small blemish you want to remove with the Clone tool. You can simply press and hold the ‘s’ key to select the Clone tool. Once you’ve removed the blemish, release the ‘s’ key and your cursor will revert back to the Burn tool.

This can be used with most keyboard shortcuts.

4. Open the same image in two windows

Photoshop-CC-tricks

Opening the same image document in two windows gives you some great flexibility. You can have one instance of the file zoomed and be working on the details and the other showing the entire frame. This lets you see the changes you make in the detailed view as they happen in the full-frame window also.

To open two image documents, go to ‘Window’ in the top menu and select Arrange->New Window for [the file name of the opened file]. Click on this file, and a new instance of the file will open. Now you can select Window->Arrange and select the display option you prefer. Here I have selected to show 2-up Vertical.

This trick is very cool if you are working with two or more monitors.

5. Creating selections of Highlights and Shadows

Photoshop-CC-tricks

Selecting only the highlights or dark areas of an image can give you more control when making certain adjustments.

To do this, choose the type of adjustment you want to make. For this example, I have added a Curve Adjustment Layer. This is from the menu at the bottom of the Layers panel. Once I have the new adjustment layer, I then delete the layer mask.

Here’s where the magic happens. Press Ctrl+Alt+2 (Cmd+Opt+2 on Mac) and all the bright pixels will be selected. When you click on the Curves icon in the Layers panel, you will not only be making adjustments to the brightest pixels. In the Properties panel of the mask, you can choose to invert the selection and work on the darker pixels.

6. Pen tool tips

Photoshop-CC-tricks

Learning to use the Pen tool in photoshop is frustrating for many people. At first, it can be difficult to make the line go where you want it to. Here are some tweaks you can make so your learning curve is not so steep.

When you have the Pen tool selected, click the Cog icon on the top menu. Here you can alter the settings for how the line looks and responds. You can determine the weight and color of the line. This can be helpful in allowing you to see where you’re drawing more easily.

Probably the most helpful aspect of the Pen tool settings is the Rubber Band checkbox. With this setting active, you can see where your line is as you draw. This allows you to see where your line will be in real-time. Without the Rubber Band box checked, you will not see where your line will be drawn until you click on a point.

Two more helpful tips with the Pen tool are:

  1. Use the spacebar as you click. Hold the spacebar to allow you to place the point precisely where you want it to be.
  2. Once your line is complete, use Alt+Click to modify the handles on a point so you can alter the curve of the line.

7. Select colors from any application

10 Awesome Photoshop CC Tricks You Wish You Knew

Matching a color you want to use in photoshop with a color in another program or app is easy and can be very useful. Pulling the same color and applying it to text, a brush or fill means you can precisely color match what you are working on.

Shrink your photoshop window and place it over the area you want to select the color from. Simply select the tool for how you want to apply the color. In my example, I want to fill the background of my logo with a specific color from a photo on my website. Click and hold the Alt key as you drag your mouse to hover over the color you want to match.

When you release your mouse, Photoshop will use it as the selected foreground color. Now you can apply it as you wish.

8. Control Color Luminosity

Photoshop-CC-tricks

By creating a new black and white Adjustment Layer and setting the Blend mode to Luminosity, you can darken or brighten each color in your image. Simple drag the slider for each color you want to adjust until you are satisfied with its luminosity.

9. Transparency using ‘Blend If’

10 Awesome Photoshop CC Tricks You Wish You Knew

The ‘Blend If’ mode is a powerful tool when you know how to use it. Selecting and manipulating layers using the Blend If functions allow you to alter the luminosity or color channel of a layer.

In this example, I wanted to eliminate the black background from my logo and replace it with an image. The image is on the layer underneath my logo. Bring up the Layer Style panel by double-clicking on the layer you want to work on. With the Blend If mode set to Gray, use the slider below it to remove the darker or lighter pixels. In this example, I have moved the slider on the left towards the right to take out the black background of the logo.

Making the altered layer a Smart Object will make those hidden pixels transparent for even more flexibility.

10. Non-destructive Spot Healing Brush

10 Awesome Photoshop CC Tricks You Wish You Knew

Adding a new layer above the image you are working on allows you to work non-destructively with the Spot Healing Brush. Often with highly textured images, the Spot Healing Brush provides an unsatisfactory result. Adding an extra blank layer gives you more flexibility.

The key to making this work is to ensure you check the Sample All Layers checkbox in the top menu bar.

Conclusion

I hope there are a few new tips and tricks on this list of Photoshop CC tricks that you can find helpful. As with all things Photoshop, everyone works differently. There are also many ways to reach the same end result.

If you know of some other cool Photoshop CC tips or tricks let us know what they are in the comments below.

The post 10 Awesome Photoshop CC Tricks You Wish You Knew appeared first on Digital Photography School. It was authored by Kevin Landwer-Johan.


Digital Photography School

Posted in Digital Photography | Tagged , , , , | Leave a comment

AirPods 3: everything we know so far

The Apple AirPods 3 (or AirPods Pro if recent rumors are anything to go by) so far remain elusive in 2019, and our ears, in desperate need of noise-canceling true wireless earbuds, hang in wait.

Admittedly, the new AirPods (2019) do have some cool new features, like the ability to charge wirelessly. Still, they aren't quite the all-out AirPods 3 reimagining we were hoping for, and they don't beat rivals like the Sony WF-1000XM3 Wireless Earbuds and the Cambridge Audio Melomania 1s in terms of noise-cancelation and audio quality. 

The good news is that the next-generation of Apple AirPods could be right around the corner. We've heard rumors about noise-canceling and even waterproof Apple earbuds for nearly a year at this point, and now some analysts are saying that they'll arrive by the end of the year or, at the very latest, early on in 2020.

Noise-canceling AirPods could launch before October is out. A new report claims that an upgraded AirPods model – called the AirPods Pro, in the manner of the iPhone 11 Pro – may be about to release to market. We've seen hints about a new charging case and also some new colors.

An incoming AirPods Pro release was cited in a report by China Economic Daily, which said the new AirPods were expected to launch before the end of October, meaning the claim could be proved (or dismissed) very soon.

Most recently, the design of the so-called AirPods Pro might have just been leaked by phone accessories manufacturer ESR. Spotted by MacRumors, a listing on the site for an 'AirPods Pro Cover' shows a wider carrying case than we've seen for previous AirPod models. 

One of the best sources of Apple AirPods 3 rumors comes from a 2018 report from TF International Securities’ analyst Ming-Chi Kuo. He said that we could be getting two more headphones before 2020 – an updated version of the original Apple AirPods (check) and the brand new AirPods 3. 

Apple's WWDC 2019 keynote took place on June 3, but it was too soon for Cook and co. to announce the new AirPods 3 then – after all, the updated AirPods (2019) only came out two short months before and Apple used WWDC to announce a pair of significant new features coming to the true wireless buds.

There was no mention of the AirPods 3 at Apple's iPhone launch event in September either, which saw in the iPhone 11, iPhone 11 Pro and iPhone 11 Pro Max.

We're not totally surprised, as it wouldn't make sense for Apple to release the AirPods 3 so soon after it brought out the upgraded model. So with a late 2019 / early 2020 release looking more and more likely, what do we actually hope to see in the AirPods 3, and how will they improve on Apple's bestselling earbuds?

Apple AirPods 3: Cut to the chase

  • What are they? The long-awaited AirPods 3 (not to be confused with the recently updated AirPods (2019) true-wireless earbuds.)
  • When are they out? Our best guess is early 2020, but nobody knows for sure. 
  • How much will they cost? Probably similar to the AirPods (2019), which start at $ 159 (£159/AU$ 249) – though they could jump to $ 199.

Apple AirPods 3: release date

We've been hearing rumors about the Apple AirPods 3 all year, and until recently, it looked as though the new true wireless earbuds wouldn't be coming out until at least 2020. 

However, a spate of leaks over the last couple of months is making a late-2019 release more likely.

Kuo's predictions have been pretty accurate, right down to the AirPods 2019 connectivity upgrade, so we're betting on an early 2020 release for the AirPods 3, especially as we didn't see them at the iPhone 11 launch.

We originally expected the upgraded 2019 AirPods to be significantly different from their predecessors thanks to trademark and Bluetooth SIG filings, but we now know that's not the case. 

That doesn't mean we won't ever see these features in the next version, however. We wouldn't be surprised if Apple was saving features like biometric sensors, new color schemes, and waterproofing for the AirPods 3.

AirPods 2

The original Apple AirPods and the AirPods (2019) (Image credit: Apple)

AirPods 3 price and availability

Our best guess is that the AirPods 3 will be priced similarly to the current AirPods, which cost $ 159 / £159 / AU$ 249 / AED679 with the standard charging case, and $ 199 / £199 / AU$ 319 / AED829 with the new Wireless Charging Case bundled in. 

According to Bloomberg, the new AirPods are "likely to be more expensive than the current $ 159 model," but we'd be very surprised if they exceed $ 200. 

The final price will likely come down to the features that the new AirPods 3 sport. Before we go into the features we're expecting from the AirPods 3 in 2020, let's take a look at what's new with the current AirPods…

What's new with the AirPods (2019)?

Apple hasn't changed much in terms of design in its latest update to the AirPods – instead, the next-gen improvements seem to be largely under-the-hood.

Inside the buds there's a newly-designed H1 chip which Apple has built specifically for the headphones. It improves connectivity pairing times, the efficiency of the battery life, and allows for hands-free 'Hey Siri' functionality.

New for the AirPods 2019 is the wireless charging case for the earbuds, which means you can use Qi-compatible charging mats to power the case without having to stick a cable in. 

As for sound quality, the 2019 upgraded AirPods are no different from the ones you could get in 2016. 

AirPods 2019

AirPods (2019) (Image credit: Apple)

Apple AirPods 3: rumors

Rumors around the new Apple AirPods 3 have been circling since the originals were released in 2016, but the release of the iOS 13.2 beta may have revealed what the buds will look and sound like. 

After delving into the beta, 9to5Mac discovered an icon that could show Apple's upcoming true wireless earbuds.

The new Apple AirPods 3 will reportedly come with noise cancelation and a comfier fit, with silicone or rubber tips giving listeners more choice when it comes to their Apple earbuds.

The design of the so-called AirPods Pro might have just been leaked by phone accessories manufacturer ESR; a listing on the site for an 'AirPods Pro Cover' shows a wider carrying case than we've seen for previous AirPod models.

We've also heard that black and green could join white in a choice of up to eight colors for the next-generation AirPods.

Apple's recent iPhone 11 launch event left us bereft of the long-rumored Apple AirPods 3, but a new leaked image could give us a glimpse of the new Apple earbuds. 

SlashLeaks has shared a hazy image from contributor Leakspinner that it says shows the AirPods 2 "in the wild".

If this leaked image is genuine, we could be in for an even more compact Apple AirPods charging case – and potentially smaller earbuds. It would make sense, as true wireless earbuds are getting smaller as the technology improves, and the AirPods' long stems was subject to ridicule when they were first revealed in 2016. 

We're not totally convinced though – the image is so blurry, there's no way of confirming whether its a legitimate Apple prototype. You can check out the image below and decide for yourself.

airpods 2

Previous trademark filings suggest that the second generation AirPods would be a health and fitness device, in addition to being a pair of true wireless earbuds. Now we know that the updated AirPods don't have these features, we think we will see them in the AirPods 3 in 2020. 

Back in July 2018 Apple filed a patent for biometric sensors, which would allow the AirPods 3 to take on fitness tracking capabilities like those seen in the Jabra Elite Wireless. This followed another patent filed in March, which further fueled the rumors.

We also heard separately that the AirPods 3 would come in black and white, be both waterproof and offer active noise-cancellation, features that have similarly been predicted by Bloomberg. Another patent from July suggested that Apple was working on some pretty nifty tech for how the earbuds handle outside noise as well as dissipating pressure from inside the ear canal. 

The patent outlined a valve system that would allow sound to escape your ear canal to avoid that weird reverberating effect that occurs when you speak with earbuds in your ears. 

It then goes on to describe how the earbuds would handle ambient noise, using a microphone to filter in noise from the outside world so that you can remain aware of your surroundings while still hearing your music.

One rumor that did prove to be accurate however was wireless charging and Bluetooth 5.0 – but instead of being an improved thanks to an updated W2 chip, Apple has designed a brand new H1 chip, which is made for headphones specifically.

AirPods 2 release date price rumors

Image credit: Apple

Apple AirPods 3: what we want to see

Noise-cancelation

Only a couple of years ago, companies were struggling just to get true wireless earbuds working, but now the goalposts have already shifted to packing more and more functionality into their shells. 

The stunning Sony WF-1000XM3 manage to include noise-cancelation technology inside their diminutive shells, and we were hoping see similar functionality make it to the second generation of AirPods. 

Apple’s fancy ambient noise technology outlined above suggested the company is thinking along these lines, and as it didn't make the cut for the 2019 upgrade, we're expecting to see noise-cancelation in the AirPods 3.

Better audio quality

Companies like Sony and more recently, Cambridge Audio, have proven that true wireless earbuds can sound just as good as their wired, and even their over-ear counterparts.

If Apple can harness the audio quality offered by the Cambridge Audio Melomania 1 true wireless earbuds, as well as keeping the cost down, the company could be on to a real winner.

Sony WF-1000X earbuds

The Sony WF-1000X feature noise-cancellation technology (Image credit: Sony)

More physical controls

Apple isn’t much of a fan of buttons, but there are some cases where they save you a lot of time and effort, and headphones are one of these instances. 

On-board controls have become an almost essential feature in headphones in recent years, allowing us to control music playback and volume without having to struggle to get our phones out of our pockets. 

Now the 2016 AirPods did allow you to control music in a sense, but they relied entirely on Siri, Apple’s voice assistant. 

New to the 2019 upgraded AirPods is the ability to double tap the right earbud to start your music up if it’s paused or skip to the next track if you’re currently playing a track…and that's it. 

We'd like to see the AirPods 3 take this further, allowing you to skip backwards and forwards more easily. What would be really great, would be to put those long stems to use and add in some swipe volume controls. 

B&O Beoplay E8

The B&O Beoplay E8 feature touch-sensitive controls to allow you to control your music (Image credit: TechRadar)

Changeable ear tips

Apple likes to rely wholly on sleek white plastic, but we aren’t a fan of the lack of rubber tips on the AirPods, especially when there’s no cable to catch them if they fall.

We want any true wireless earbuds to feel nice and secure in the ears, and including a number of changeable ear tips so we can select those that perfectly fit our ears would be the ideal way of achieving this. 

One individual in the TechRadar office even went to the length of fixing some rubber tips from an alternative pair of headphones onto their AirPods to make them feel more secure. 

We weren't expecting Apple to change it's rather rigid design aesthetic with the 2019 update, but here's hoping it will for the AirPods 3. 

Better Android pairing

Given that Apple likes to ensure all its products are designed to work as a family this has little chance of happening, but we’d love to see the AirPods play slightly nicer with Android phones. 

On iPhones, pairing is a dream. You simply hold the AirPods near your phone and they connect more or less automatically. 

However with Android the process is a lot more complicated and involving jumping into settings menus to select the AirPods manually. We’d love to see Apple simplify this process for the AirPods 3, though we're not holding our breath.

Beats Solo 3 Wireless

Beats’Solo 3 Wireless come in a number of flashy colors other than white (Image Credit: Beats)

Different designs and colors 

We get it, Apple likes white things. But in an era where iPhones and iPads are available in a range of different colors we’d love to see this same courtesy extended to the AirPods. 

We just want our headphones to match our phone and our Apple Watch; is that so much to ask?

Although Apple has experimented with different colors for its various devices, its earbuds have always stayed the same iconic white. Still, the AirPods 3 are rumored to be coming in a second black option as well. 

Longer battery life

When the original AirPods were released way back in 2016, their five-hour battery life was rather impressive; now, it's lagging behind the competition. 

With the Cambridge Audio Melomania 1 true wireless earbuds, you get nine hours from the buds themselves, and a further 36 hours of juice contained within their charging case. 

It's clear that true wireless technology has moved on since the AirPods were first released – and so far, Apple hasn't moved on with it.


TechRadar: Cameras and camcorder reviews

Posted in Camera Reviews | Tagged , , | Leave a comment

Halloween Roller Derby Denver

It’s Halloween time here in Denver, the Vampires and Zombies are out to play.  Or in the the case of these two teams, slam and crush each other. This was my first time attending a roller derby event…  also my first time photographing one.  I liked it a lot.  Once I got my mind wrapped…

The post Halloween Roller Derby Denver appeared first on Big Sun Photography.


Big Sun Photography

Posted in Photography | Tagged , , , | Leave a comment

Tips to Achieve Memorable Getting Ready Photos at Any Wedding

The post Tips to Achieve Memorable Getting Ready Photos at Any Wedding appeared first on Digital Photography School. It was authored by Jackie Lamas.

memorable-getting-ready-photos-at-any-wedding

Even though every wedding is unique, each wedding photographer knows that the timeline of photos is pretty much the same, beginning with the getting ready photos.

Learn how to successfully photograph the bride and groom getting ready, what you’ll need to prep for beforehand, and why it’s important to capture this part of the day during a wedding.

wedding-day-getting-ready-photos

What are the getting ready photos exactly?

The getting ready portion of a wedding day is when the bride and groom begin to get dressed for their wedding celebration.

wedding-day-getting-ready-photos

Getting ready photos are to include both the actual getting ready portion and the details of the day like shoes, florals, dress, rings, etc.

It’s usually when the bride is getting her makeup done, getting into her dress, putting on her jewelry, and all of the other final details that go into her complete look. The same goes for the groom; photos of him getting into his tux or suit, putting on his watch, tie, and shoes.

Image: The getting ready portion of the wedding day lets you get photos of the important details of...

The getting ready portion of the wedding day lets you get photos of the important details of the day.

Sometimes, getting ready photos will include more people during the shoot. For example, the bride might want to get ready with all of her bridesmaids and have her maid of honor help with putting on her veil.

Tips to Achieve Memorable Getting Ready Photos at Any Wedding

Other times, you might get the bride and groom getting ready together in the same space. Either way, it’s a crucial moment during the day that leads up to all the festivities. It tells more of the story of how the wedding day unfolded.

Prep for the getting ready

wedding-day-getting-ready-photos

Inform your clients during a pre-consultation

A pre-consultation is where you meet with your clients and go over the details of the wedding day. It is important to find out if the couple will be getting ready in the same location or different locations.

Tips to Achieve Memorable Getting Ready Photos at Any Wedding

If at all possible, advise your clients to get ready in the same location but in separate rooms. That way, you can bounce between both of your clients and capture the getting ready shots.

However, sometimes it isn’t possible. But don’t worry, sometimes you can re-create some of the getting ready moments before the ceremony and still get those beautiful getting ready photos to go with the narrative of the day.

Tips to Achieve Memorable Getting Ready Photos at Any Wedding

Advise your clients to tell their key people (those helping with the brides or grooms outfit) to be ready, too, since they will also be photographed during the getting ready stage. This goes for the mother of the bride, father of the bride, bridesmaids, and groomsmen.

wedding-day-getting-ready-photos

Make sure the key people are dressed and made up for the getting ready photos so everyone looks great in the final images.

Tell your clients to make sure florals are ready during this time so that you can photograph them before the wedding day begins.

Prep your gear bag

There are a few items you should have handy for the getting ready portion of your day. They aren’t required but do make the getting ready photos more streamlined and easier to photograph.

Tips to Achieve Memorable Getting Ready Photos at Any Wedding

One handy tool is a Command Hook. This will help you stick the hook where you want, hang the dress or suit, and photograph it virtually anywhere at the location of the getting ready photos. It also helps hang other details that are important to the wedding day.

Bring a small poster board or some fabric to style a flat lay of the details. This could include things like the rings, shoes, garter, bouquet, or special details like vow books. It can give you a cohesive look to the detail photos. That way, you’re also not limited to the surfaces in the getting ready room, if there are any available spots.

Tips to Achieve Memorable Getting Ready Photos at Any Wedding

PlayDoh or similar putty can help keep rings styled or from falling over. Roll a tiny ball and place it under the rings, ring boxes, jewelry, and other items to keep them in place. Then simply remove it after you’ve achieved your shot.

wedding-day-getting-ready-photos

Use a video light or flashlight from your phone to light the details if you need a little boost in light. Some getting ready rooms, like bridal rooms, are tiny and don’t offer much light, so having a video light or using your flashlight from your cell phone, can help give you the light you need. It can also help you to get interesting photos of the details like rings or shoes.

Tips to Achieve Memorable Getting Ready Photos at Any Wedding

While these items aren’t a must, they do help with styling the details of the getting ready portion.

What to photograph during the getting ready portion of a wedding day

The getting ready part of a wedding day isn’t just about photographing your clients getting into their dresses or suits – it’s much more than that. It’s about capturing a part of the day that begins all of the events that everyone is excited about!

wedding-day-getting-ready-photos

When photographing the getting ready, mix different style shots like full length and close-up shots of the same scene.

When you photograph a getting ready, make sure to get photos either styled or depending on your photography style, the following:

  • Rings, ring boxes, ring pillows or carrying cases
  • Florals: bouquets, boutonnieres, hairpieces, and corsages for others
  • Shoes
  • Accessories like jewelry, watches, gifts of the bride and groom
  • The something blue, something old, something borrowed if they are part of the wardrobe/attire.
  • Getting ready: Makeup and hairstyling, adjusting their dress/suit, putting on the dress/suit
  • Putting on shoes
  • Detail photos of the dress/suit alone and on the bride/groom
  • Invitation set
  • Portrait of your client alone
  • Portrait of the client with their bridal party or others who are in the room with them
  • Anything else that is considered special or important
  • Key people in the background or with your client

Tips to Achieve Memorable Getting Ready Photos at Any Wedding

How to get the most out of getting ready photos

The getting ready photos are somewhat of a photojournalistic approach to the day. Besides the detail shots that you style, most everything else is photographed as it unfolds during this time.

wedding-day-getting-ready-photos

To get the most out of the getting ready photos, try and get different focal length shots of the events like the makeup and hair. Get a wide shot of the room but also get close-up photos of the makeup as it’s applied. Capture real emotions from the people in the room with your client.

Tips to Achieve Memorable Getting Ready Photos at Any Wedding

When your client is ready to get dressed, ask them to clear out the portion of the room that you’d like to use. For height, consider getting on the bed if your client is using a hotel room.

Tips to Achieve Memorable Getting Ready Photos at Any Wedding

If you can, choose a location with nice lighting and a calm vibe. It will help set the tone of the getting ready portion of the photos.

Remember, during this time, clients are usually feeling a mixture of emotions. They also have to attend to tasks, questions, and anything that might come up that is related to the planning of the wedding.

wedding-day-getting-ready-photos

So a calm setting can really set the tone for the rest of the day while you photograph your client as they get dressed.

Also, don’t worry about moving furniture if you need to, or other items to get the best photo possible. Try different areas of the getting ready room to choose the best photos of the details, dress, and your client.

Tips to Achieve Memorable Getting Ready Photos at Any Wedding

Photograph a portrait of your client after they are dressed alone

As mentioned above, setting the tone for the rest of the day can make all the difference for your client. This is why, after your client has gotten dressed, that you take them to a calm location and photograph a portrait of them alone.

wedding-day-getting-ready-photos

During this time, don’t ask anything of them. Don’t mention the wedding, planning, or anything that is related. Just help them to feel calm by using a soft tone, directing them to get the best angle, and show them a photo or two so that they get excited by how great they look!

Tips to Achieve Memorable Getting Ready Photos at Any Wedding

This will also build a nice rapport with how you handle the stress of the day. It will also help your client to feel less saturated or anxious about their wedding day.

How to photograph getting ready photos after the fact

Sometimes you don’t have time to take getting ready photos of both of your clients due to logistics, being the only photographer, or otherwise. Other times, time slips away and cuts time for getting ready photos altogether. Or, your client might have opted to set the hours of coverage to cover more of the reception than the getting ready portion.

wedding-day-getting-ready-photos

You can take portraits like this later in the day to re-create the getting ready photos.

If this is the case, don’t worry, you can recreate the getting ready photos after the fact! For example, before the ceremony, while your client waits to come out and down the aisle, you can get a few getting ready photos of them in the suite or empty hallway/walkway. Simply ask them to fluff their dress, have their key person adjust their veil, or pretend to tie their dress or suit.

Tips to Achieve Memorable Getting Ready Photos at Any Wedding

You can get action shots like having your clients look into the mirror and pretend to put on their jewelry or suit jacket or shoes. While you might not have been there during the actual getting ready, you can always pretend like you were by styling and directing your clients in between other wedding day events.

wedding-day-getting-ready-photos

Why are getting ready photos important?

Getting ready photos are important to a wedding day because, as the photographer, you’ll have time to get the important details of the day photographed. The rings, vow books, bouquets, and most importantly, the dress or suit that your clients wear.

wedding-day-getting-ready-photos

Each of these items was thought about, and chosen with the utmost care and attention to the details. Anything that your clients poured their hearts into is worthy of photographing. It also makes for a nice retelling of the wedding day in an album or publication after the wedding day has ended.

Tips to Achieve Memorable Getting Ready Photos at Any Wedding

Most importantly, photographing getting ready photos allows you to set the tone for the day and reassure your client that you are there for all of it. That you are there for the best moments of the day and to help them feel confident, beautiful, and excited about the rest of the wedding events. It’s like you’re there as their personal cheerleader on what is usually a stressful day.

Tips to Achieve Memorable Getting Ready Photos at Any Wedding

Having this time with your client also helps you to get to know them a bit more. You can try different angles during the individual portraits, and also get to know who the key people are that need photographing during family formals and bridal party photos.

In conclusion

Tips to Achieve Memorable Getting Ready Photos at Any Wedding

Telling the story of a couple during their wedding day is truly an honor for any photographer. The getting ready portion of the day sets the tone and begins the story of how the day unfolded. These tips will help you successfully capture your clients during the start of their most important day as a couple.

Do you have any additional tips for capturing the getting ready photos of any wedding day? We’d love you to share them with us in the comments!

The post Tips to Achieve Memorable Getting Ready Photos at Any Wedding appeared first on Digital Photography School. It was authored by Jackie Lamas.


Digital Photography School

Posted in Digital Photography | Tagged , , , , , , | Leave a comment

Finally! You can post to Instagram from your desktop computer

“Hey Gene, what’s your Instagram address?”  “Sorry, my friend but I don’t post on Instagram.”  “What? But you are a photographer right?” Do you have that conversation?  Maybe not, seems like everyone and their brother is on Instagram and has been for a while.  But much to the dismay of many, I have not been. …

The post Finally! You can post to Instagram from your desktop computer appeared first on Big Sun Photography.


Big Sun Photography

Posted in Photography | Tagged , , , , , | Leave a comment

Hot Deal: Canon EOS 5D Mark IV, BG-E20 Grip, 4TB WD Drive, SanDisk 64GB SDXC – Only $2,499.00

We’re not sure how long this deal will last: B&H has a great Canon EOS 5D Mark IV Bundle available for only $ 2,499.00 with free next day shipping. These items are individually priced at $ 2,934.44 before the huge $ 500.00 instant rebate currently available on the 5D Mark IV for a total savings of $ 935.44.
 
Bundle Includes:

Canon, Nikon, and Sony News, Deals and What’s New at The-Digital-Picture.com

Posted in Photo Equipment | Tagged , , , , , , , , , , | Leave a comment

Understanding Color in Photography

The appropriate use of color in photography adds a dynamic element to your images that is very pleasing to the eye. The correct use of it will allow you to create photographs to be proud of. Bold colors and bright composition in your photos result in images that sell. So use color to your advantage.

learn about color and its effect on photography

Photo by Isabelle Gallino; ISO 320, f/4.0, 1/125-second exposure.

I have always used strong colors in my images to good effect, allowing the image to speak to the viewer. We think and feel in color, which makes it obvious that well utilized color draws the eye of the viewer. Here are some keys to understanding and using color more effectively in your photos.

1. Dominant color

At one stage I thought that filling the frame with lots of bold colors would make a dramatic image. Not so. Colors that clash cause confusion to the eye and result in a poor image. Too many clashing colors create multiple focal points, causing the eye to dart around the image not sure what to look at first or what to focus on. Rather, choose one dominant color that becomes the focal point of the image and draws the eye of the viewer to it immediately. The greater the intensity of the color, the more it’s going to dominate so be careful that your subject in an image has the dominant color, otherwise a secondary subject could overshadow it because it has a dominating color.

2. Color isolation

It’s very important to isolate colors when trying to create a dramatic image. Using a telephoto or zoom lens will allow you to isolate a particular part of a scene that has a striking color or combination of colors. Another technique is to use your feet and change the angle of view so that the color is isolated from its surroundings. Getting in closer helps and allows you to combine colors that are more interesting and work well together, e.g. contrasting or complementary colors.

how to effectively use color in your photos

Photo by Bernard Spragg. NZ; ISO 400, f/6.3, 1/125-second exposure.

3. Advancing colors

This was an interesting concept the first time I read about it. Colors at the warm end of the color spectrum stand out and demand more of our attention. They are said to be advancing colors. Take red for example, it is strong and bold and when viewed in an image tends to dominate through its boldness and rich color. You’ll notice how strong it is when you have a scene that has only a little red, like a postbox, and yet it still has a dominating effect on the overall image. Yellows and oranges have a similar effect although they aren’t as strong as red. So be aware of advancing colors so that they work for you and don’t upset an image. Another example would be a bridal scene where a red object is part of the image. It will take the attention off the bride so be aware of this.

4. Receding colors

This concept is opposite to advancing colors. They take a background role and are more like supporting actors in a film cast. They like the background and add to the scene creating beautiful images. This is why blues and greens, the more cooler colors, work so well as backgrounds. They recede into the distance and help other colors stand out. Large areas of blue sky do this together with rolling green hills. Use them effectively and you will have great photos.

using color to improve your photos

Photo by Joshua Mayer; ISO 400, f/11.0, 1/640-second exposure.

If you are prepared to take these techniques and incorporate them into your photography on a regular basis as you learn digital photography more effectively and the resulting images will improve dramatically. Happy shooting!

About the Author:
Wayne Turner has been teaching photography for 25 years. Passionate about photography, radio and video. He is a Radio CCFm producer and presenter in Cape Town.

Go to full article: Understanding Color in Photography

What are your thoughts on this article? Join the discussion on Facebook

PictureCorrect subscribers can also learn more today with our #1 bestseller: The Photography Tutorial eBook

The post Understanding Color in Photography appeared first on PictureCorrect.

PictureCorrect

Posted in Photo Techniques | Tagged , , | Leave a comment

Olympus OM-D E-M1 MARK II – documentation of menus and options

The Olympus OM-D E-M1 mark ii is a real beast to understand. I have created a detailed item by item breakdown of this camera’s very complex menu system. Find a quick and easy explanation of camera options, tips and recommended settings. If you have purchased this camera recently (or still find it confusing) this menu documentation will save you a great deal of headache and allow you to start using your camera more efficiently.

The post Olympus OM-D E-M1 MARK II – documentation of menus and options appeared first on Big Sun Photography.


Big Sun Photography

Posted in Photography | Tagged , , , , | Leave a comment

RAW or JPEG: A Game Of Formats! [video]

The post RAW or JPEG: A Game Of Formats! appeared first on Digital Photography School. It was authored by Caz Nowaczyk.

In this great video by Nicolas Doretti, he explains the differences between using RAW and JPEG formats.

RAW or JPEG?

If you have struggled to understand the need to shoot in RAW format over JPEG, this video goes into great detail exploring and explaining why you can obtain so much detail from RAW files.

Nicholas explains the differences in BIT depth and how pixels are composed of 3 layers.

He also explains how to arrive at 16 million colors in an image.

This is how the bit depth corresponds to the number of colors it holds.

  • 8-bits: 16 million colors
  • 10-bits: 1 billion colors
  • 12-bits: 68 billion colors
  • 16-bits: 281 billion colors

Photos taken by your camera are around 12/16 bits of information. All of these values – that’s the RAW file. It’s not really an image; it’s the raw data taken by the sensor.

When you record your image in jpeg, your camera takes the raw information from the sensor and compresses it into an 8-bit format. As there are not as many spaces, it also applies a treatment to the image. It adjusts the contrast and saturation of colors.

The processing values depend on the selected image profile on your camera.

If you record in RAW, the camera does no editing to your image at all. It retains the 12/16-bits of information (68-281 billion colors). It is then up to you to process your images and get the most from all of that information.

The RAW image you see on your computer screen is simply an interpretation of the raw data that your camera records. Each change you make in your editing software reinterprets this data.

RAW is not an image format, as such. Each brand has it’s own version of RAW. CR2 for Canon, ARW for Sony, NEF for Nikon, RW2 for Panasonic, DNG, and other extensions exist.

Using RAW allows you to search for information, whereas there is no information in the jpeg.

Nicolas uses an image example in both jpeg and RAW formats to show you the possibilities of editing with both formats. You will notice how much more information can be gained in the shadow and highlight areas of the RAW file.

Nicolas also touches on the argument of professional photographers not needing to shoot RAW because they should be good enough to get a perfect exposure in-camera. He has an interesting take on this. He talks about retouching and uses examples of photos dating back to 1861 that were retouched.

Watch and see what your thoughts are here! Share any comments on this information in the comments below!


You may also find the following helpful

The post RAW or JPEG: A Game Of Formats! appeared first on Digital Photography School. It was authored by Caz Nowaczyk.


Digital Photography School

Posted in Digital Photography | Tagged , , , | Leave a comment

Giant Isopod Close-up Photograph

Did I travel to Mars for this shot?  Nope,,, So where does one find such a creature as this?   The Giant Isopod  “genus Bathynomus;  B. giganteus”  is a deep water ocean crustacean.   If you saw the whole body (sorry, I only photographed the head) you would see that it looks a lot like a big ‘ol 18″ rolly…

The post Giant Isopod Close-up Photograph appeared first on Big Sun Photography.


Big Sun Photography

Posted in Photography | Tagged , , , | Leave a comment

Google is about to get a lot better at understanding your search queries

Google has announced its rolling out a major upgrade to its search engine, which should mean it gets better at understanding your queries in context – rather than just matching keywords, it'll actually figure out what you're trying to say.

Thanks to a new machine learning process, Google says, you won't have to try and stuff your searches with keywords to try and get the right results up first. Instead, you can be more natural and conversational.

"Particularly for longer, more conversational queries, or searches where prepositions like 'for' and 'to' matter a lot to the meaning, Search will be able to understand the context of the words in your query," says Google's Pandu Nayak.

"No matter what you’re looking for, or what language you speak, we hope you’re able to let go of some of your keyword-ese and search in a way that feels natural for you," adds Nayak.

Seek and you will find

Let's give you some of Google's examples to show how the changes work. Previously, in a "2019 brazil traveler to usa need a visa" search, Google would ignore the "to" because it's so common, and return results for US citizens going to Brazil. Now it recognizes the "to" and that the query is about travelers going from Brazil to the US.

On a search like "do estheticians stand a lot at work", Google previously wouldn't understand the context "stand" was used in (i.e. relating to the physical demands of the job). With the new update, it'll realize what you're trying to say.

These improvements are substantial enough that Google is calling this its most important search upgrade in five years. To begin with the new technology is only being applied to searches in US English, but it will expand to more languages over time.

For a more detailed look at the neural network innovations underpinning this improvement – specifically a training model called Bidirectional Encoder Representations from Transformers or BERT – head over to Google's blog post on the changes.


TechRadar: Cameras and camcorder reviews

Posted in Camera Reviews | Tagged , , , , , | Leave a comment