How Would Your Photography Change if you Couldn’t use any Auto Functions on Your Camera?

The post How Would Your Photography Change if you Couldn’t use any Auto Functions on Your Camera? appeared first on Digital Photography School. It was authored by Kevin Landwer-Johan.


camera-auto-functions

What if your digital camera had no auto exposure ability? How would you manage? Do you think you’d adapt and learn to make good and creative exposures? I’m sure you would. And you’d enjoy your photography a lot more once you realize it’s not so difficult.

Learn to control your exposures in Manual Mode

I learned on a camera with no auto modes. It was completely mechanical. It only required a battery for the simple exposure meter. My Nikkormat FTN, however, was a film camera, so I had no monitor with which to preview or review photos. There was also no metadata recorded to help me understand the exposure choices I was making. I had to write my settings in a notebook.

camera-auto-functions-using-manual-mode

© Kevin Landwer-Johan

How much do you rely on any of the auto exposure modes? When you’re learning how to use your camera these modes are helpful. They allow you to capture photographs easily. Not having to think about exposure settings can free you up to pay more attention to other aspects of picture taking.

You can better achieve composition, timing, and relating to your subject when using an auto mode. But what if you didn’t have this option? Do you think you’d learn to manage to set your exposures by yourself, only with the help of a built-in light meter? I think you would.

Image: © Kevin Landwer-Johan

© Kevin Landwer-Johan

Once you commit to understanding light and exposure, making manual adjustments is not so difficult. You can become more accurate with them over time. If you are only sometimes bold to use manual settings, you’ll take a very long time to master them, if you can at all.

To be successful at using manual exposure mode you must commit to learning how it works. You need to have an understanding of light and how your camera records different tone values. Using manual mode does require you to slow down at first. But once you’re practiced, you’ll become faster and more accurate.

Image: © Kevin Landwer-Johan

© Kevin Landwer-Johan

Discipline is required to learn to photograph in Manual Mode

Learning any creative artform requires discipline. If you want to paint or sculpt you must spend time studying. Making ceramics or wood carving takes time and practice. When learning to play a musical instrument, you must go over and over the basics many times.

Most kids don’t like playing scales ad nauseam when learning a musical instrument. But they are foundational and so beneficial in helping a young musician grow and understand their craft. Photographers are rarely so disciplined.

camera-auto-functions-using-manual-mode

© Kevin Landwer-Johan

Taking time to practice the essential functions of your camera will allow you to become more proficient. If you are relying on the built-in artificial intelligence, you will often struggle to reach your full creative potential.

By making a point of frequently using manual mode, you’ll be on a journey towards a deeper creative expression. But you have to be disciplined to make it most effective.

Many people who enroll in my photography workshops tell me they use their cameras in an auto mode. They admit to occasional manual use. I encourage them that unless they commit to using it, manual mode will remain difficult.

Image: © Kevin Landwer-Johan

© Kevin Landwer-Johan

Slow down and feel the freedom

Often, photographers who prefer using an auto mode express their concern for missing the moment if they are using manual mode. I appreciate this as a genuine concern. However, you can’t always catch great photos on the spur of the moment. They take planning and patience.

Taking time to learn manual mode will also help you develop what you want to photograph. You will look at the world around you in different ways. You will begin to anticipate more when you choose to take photographs, rather than looking for snapshots.

camera-auto-functions-using-manual-mode

© Kevin Landwer-Johan

Every genre of photography requires patience on the part of the people with the cameras. Whether your photographing landscapes, sports or birds, it’s best if you are not in a hurry. Take the time to study your subject. Know your camera well and how you can control it. Be most familiar with it, and observe and predict when the best opportunity for a photograph will happen.

Landscape photographers can wait for months for the right conditions. Sports photographers must develop lightning-fast reflexes. But these take time to perfect. They are developed with the study of the game and frequent practice photographing it.

Image: © Kevin Landwer-Johan

© Kevin Landwer-Johan

Practice often

The more often you practice anything, the better you will become.

Many years ago, I had accreditation to photograph the world cup cricket matches played in Auckland, New Zealand. I was working for a newspaper back then. I had no experience with cricket, other than watching some matches on TV. I turned up on the morning of the first match with my camera fitted with a 2X converter and a 400mm lens.

That day, I hardly managed to capture a single frame with the ball in it. I felt disheartened. I did realize, though, that I had lots of opportunities to practice. Over the next month that the tournament played out, I improved. Each match managed a higher percentage of good photos.

I started with what was simplest – the batsman swinging at and, hopefully, striking the ball. These were not the most impressive photos to aim for, but it was a good place to start. I was envious when I saw the published pictures of more experienced photographers. They showed more dynamic action. However, as I became used to working in the environment with an 800mm focal length, I was able to capture more interesting photos.

I focussed manually, due to using the 2X converter. My exposures were also manually controlled. But this was not so challenging when the light was constant. The repetitive action allowed me to grow used to the flow of the game. I became better at predicting when the best photo opportunities were.

camera-auto-functions-using-manual-mode

© Kevin Landwer-Johan

Explore and experiment with your photography

If you can discipline yourself to use manual mode and practice photographing the same subject material over and over, you’ll improve. Once you are more confident using manual exposure settings, you’ll become faster.

Doing the same routine many times, you’ll build up your ability to understand your camera. You can reach a level of competence where you make good exposure changes without being fully conscious of your actions.

When the light changes, you will be more aware of it. You will change your aperture or shutter speed a few clicks without having to check your exposure meter. Once you are doing this, you’ll be able to give more of your attention to other aspects of taking photos.

Difficult lighting conditions will no longer be so challenging. Many people who prefer to use auto exposure settings don’t like taking photos in the middle of the day. Especially when the sun is out. Learning to control your camera will help you see the light and make your exposures to manage well in these conditions.

Image: © Kevin Landwer-Johan

© Kevin Landwer-Johan

I took this photo at around 2 pm on a sunny day and tweaked it only slightly during post-processing. The basic light and dark effect was created when I took the photo. Being able to see when the light is right and control your camera gives you more freedom. You will be able to create better photographs.

Conclusion

I know there will always be photographers who prefer to stick to using auto modes. The most common argument is using exposure compensation to override the camera’s choice. I always think if you are taking this extra step, you may as well be using manual mode.

camera-auto-functions-using-manual-mode

© Kevin Landwer-Johan

I know from experience, learning on a camera with no auto exposure options helped me to understand more about light. It also meant I had to learn the relationships between the exposure settings. I was responsible for getting it right and making my photos look the way I wanted them to.

If you discipline yourself to use your camera in manual mode, you will have a far easier time learning than I did. With digital cameras, you have the advantage of being able to preview and review your photos in real-time. You also have tools like the histogram, highlight indicators, and spot metering. These all make it easier to capture well-exposed photos in manual mode.

The post How Would Your Photography Change if you Couldn’t use any Auto Functions on Your Camera? appeared first on Digital Photography School. It was authored by Kevin Landwer-Johan.
Digital Photography School

Posted in Digital Photography | Tagged , , , , , , | Leave a comment

Wi-Fi 6 routers: the best Wi-Fi 6 routers you can buy in 2019

Just when we were getting used to Wireless-AC, there's a new standard creeping its way onto the market. Thankfully, the Wi-Fi Alliance has realized how confusing the 802.11b/g/n/ac/ax nomenclature is for consumers. So, now you'll be looking for the best Wi-Fi 6 router instead of trying to figure out what random letter combination is the latest and greatest.

So what's Wi-Fi 6, and why should you care? Well, Wi-Fi 6 is the successor to 802.11ac (commonly branded as Wireless-AC) and promises lower latency, greater range, and faster speeds. While older devices can't benefit from these advantages, newer ones, like the iPhone 11 and Galaxy 10 lines – not to mention Ultrabooks equipped with Ice Lake processors – come equipped to use Wi-Fi 6. Additionally, many of these newer modems feature great non-Wi-Fi features, like multiple 1 Gbps ethernet ports, MU-MIMO, great hardware, and web interfaces that offer both ease-of-use and plenty of options for power users.

If you're in the market for a new router, there's really no reason not to future-proof your home network and get the best Wi-Fi 6 router you can afford. Since the technology is still new on the market, you'll pay a bit more, but you won't have to worry about upgrading a year or two down the road to take full advantage of your new device's capabilities.

We haven’t had a chance to test all of these routers ourselves, but don’t worry – we here at TechRadar are Wi-Fi experts, and we’ve used our tech expertise to find the best Wifi routers on the market right now. And, because we’ve included our exclusive price comparison tool, you can be confident that you’re getting the best Wi-Fi 6 router deal on the internet. 

Asus RT-AX88U

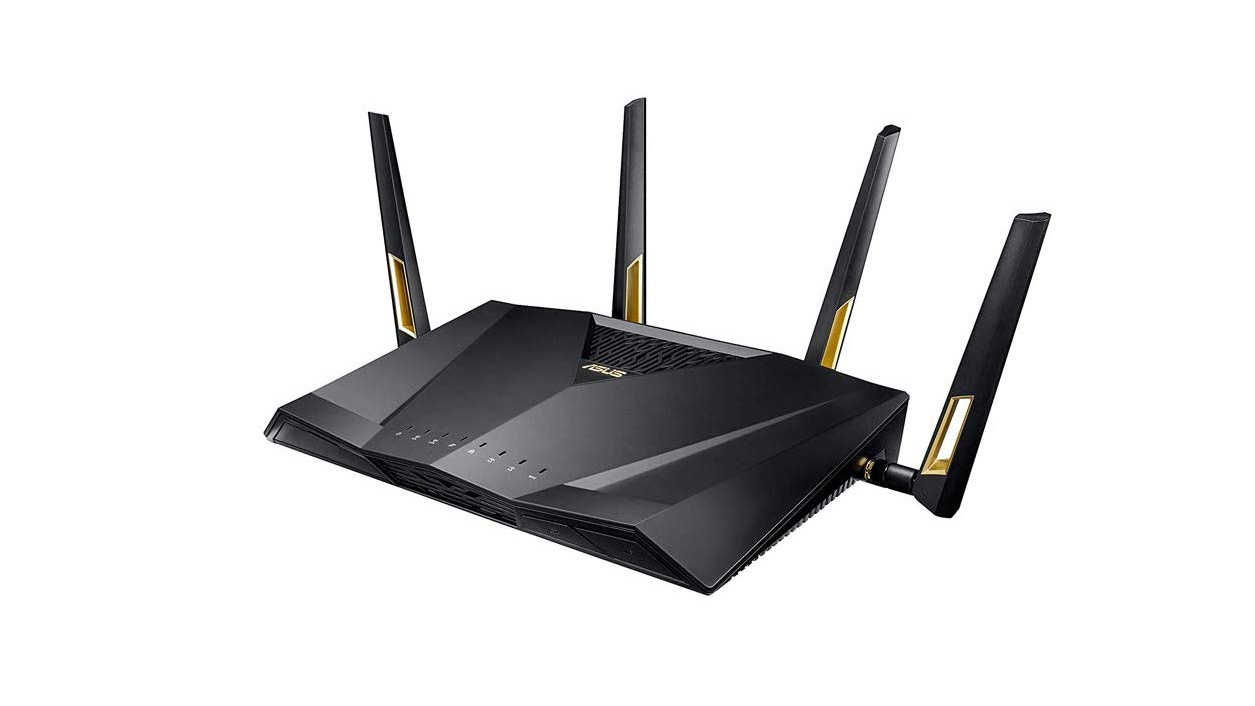
The Asus RT-AX88U has all the bells and whistles that you could want out of a router, including Wi-Fi 6 compatibility. It's our favorite on our list because it offers so much while resting on the lower end of the current Wi-Fi 6 router price range. One advantage of this router over others on the list is the 8 LAN ports. At twice the amount the most other routers carry, the RT-AX88U can save you from having to buy an ethernet switch. Combine this convenience with the excellent web interface and gamer-friendly features and you have one of the best Wi-Fi 6 routers available right now. 

Asus ROG Rapture GT-AX11000

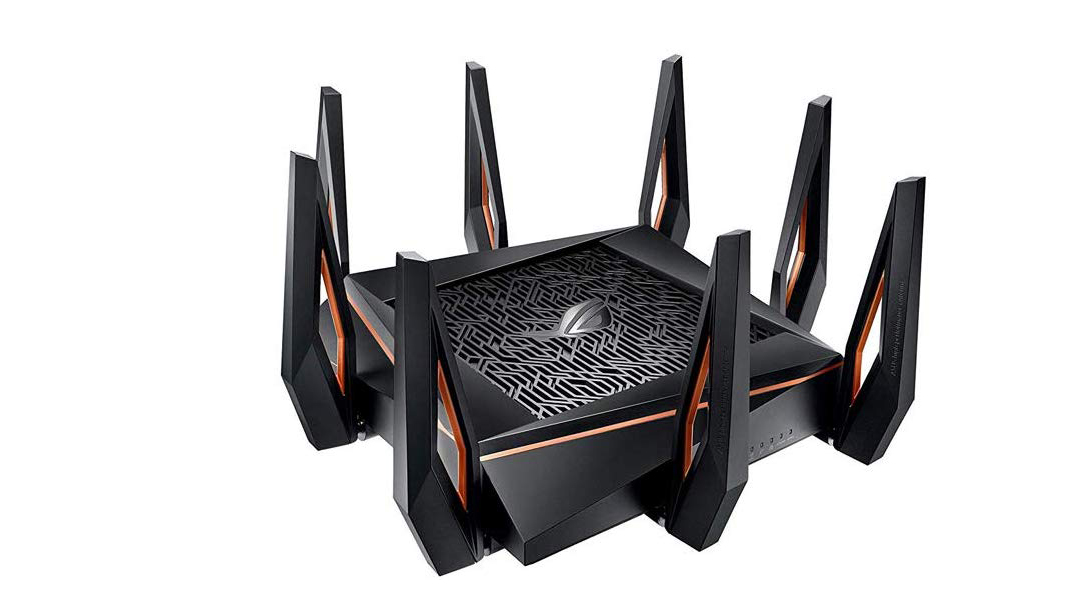
Sometimes running ethernet cable just isn't an option, and if you're a gamer, that can be disastrous. If you're stuck in this situation, the Asus ROG Rapture GT-AX11000 can help ease your pain. With 8 antennas, MU-MIMO, and options to prioritize gaming traffic, this router can help reduce the latency that makes gaming via Wi-Fi a pain. This router has the same great, easy-to-use interface as the RT-AX88U, but only has 5+1 LAN ports. One of those LAN ports is a 2.5 Gbps line, though, which is great for connecting a NAS or other device that needs a lot of available bandwidth on demand. 

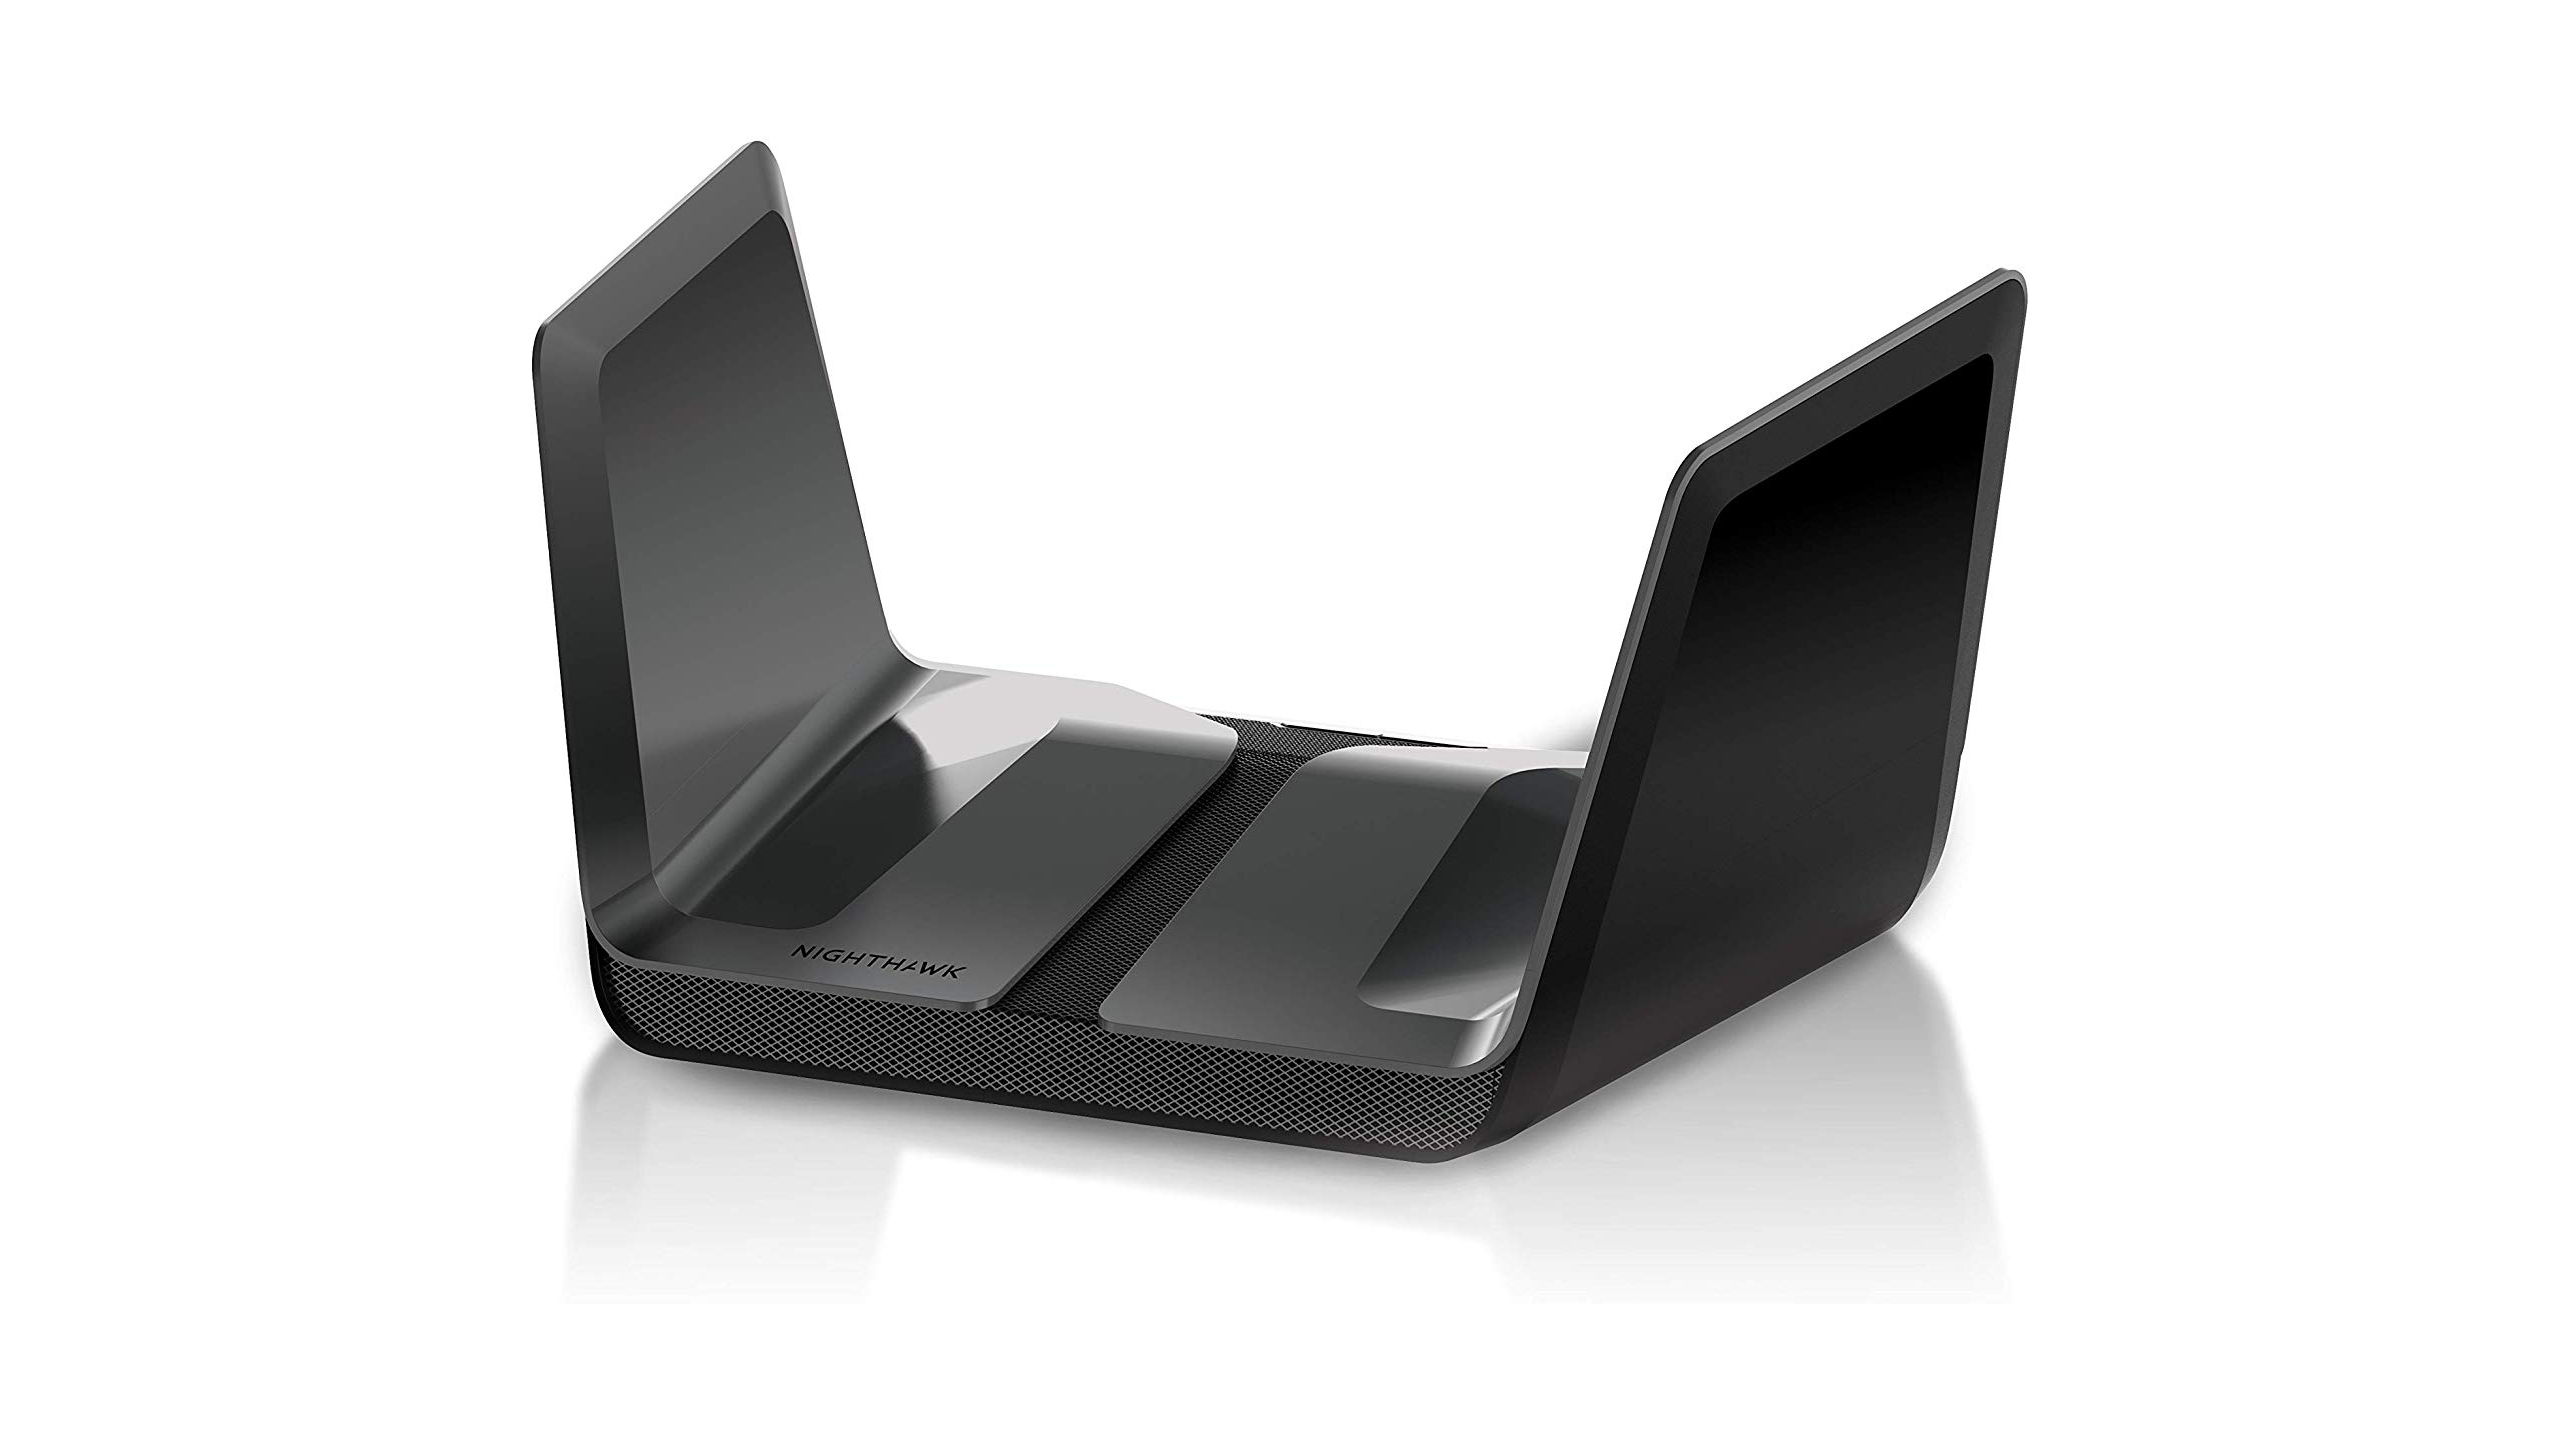
NETGEAR Nighthawk AX8 RAX80

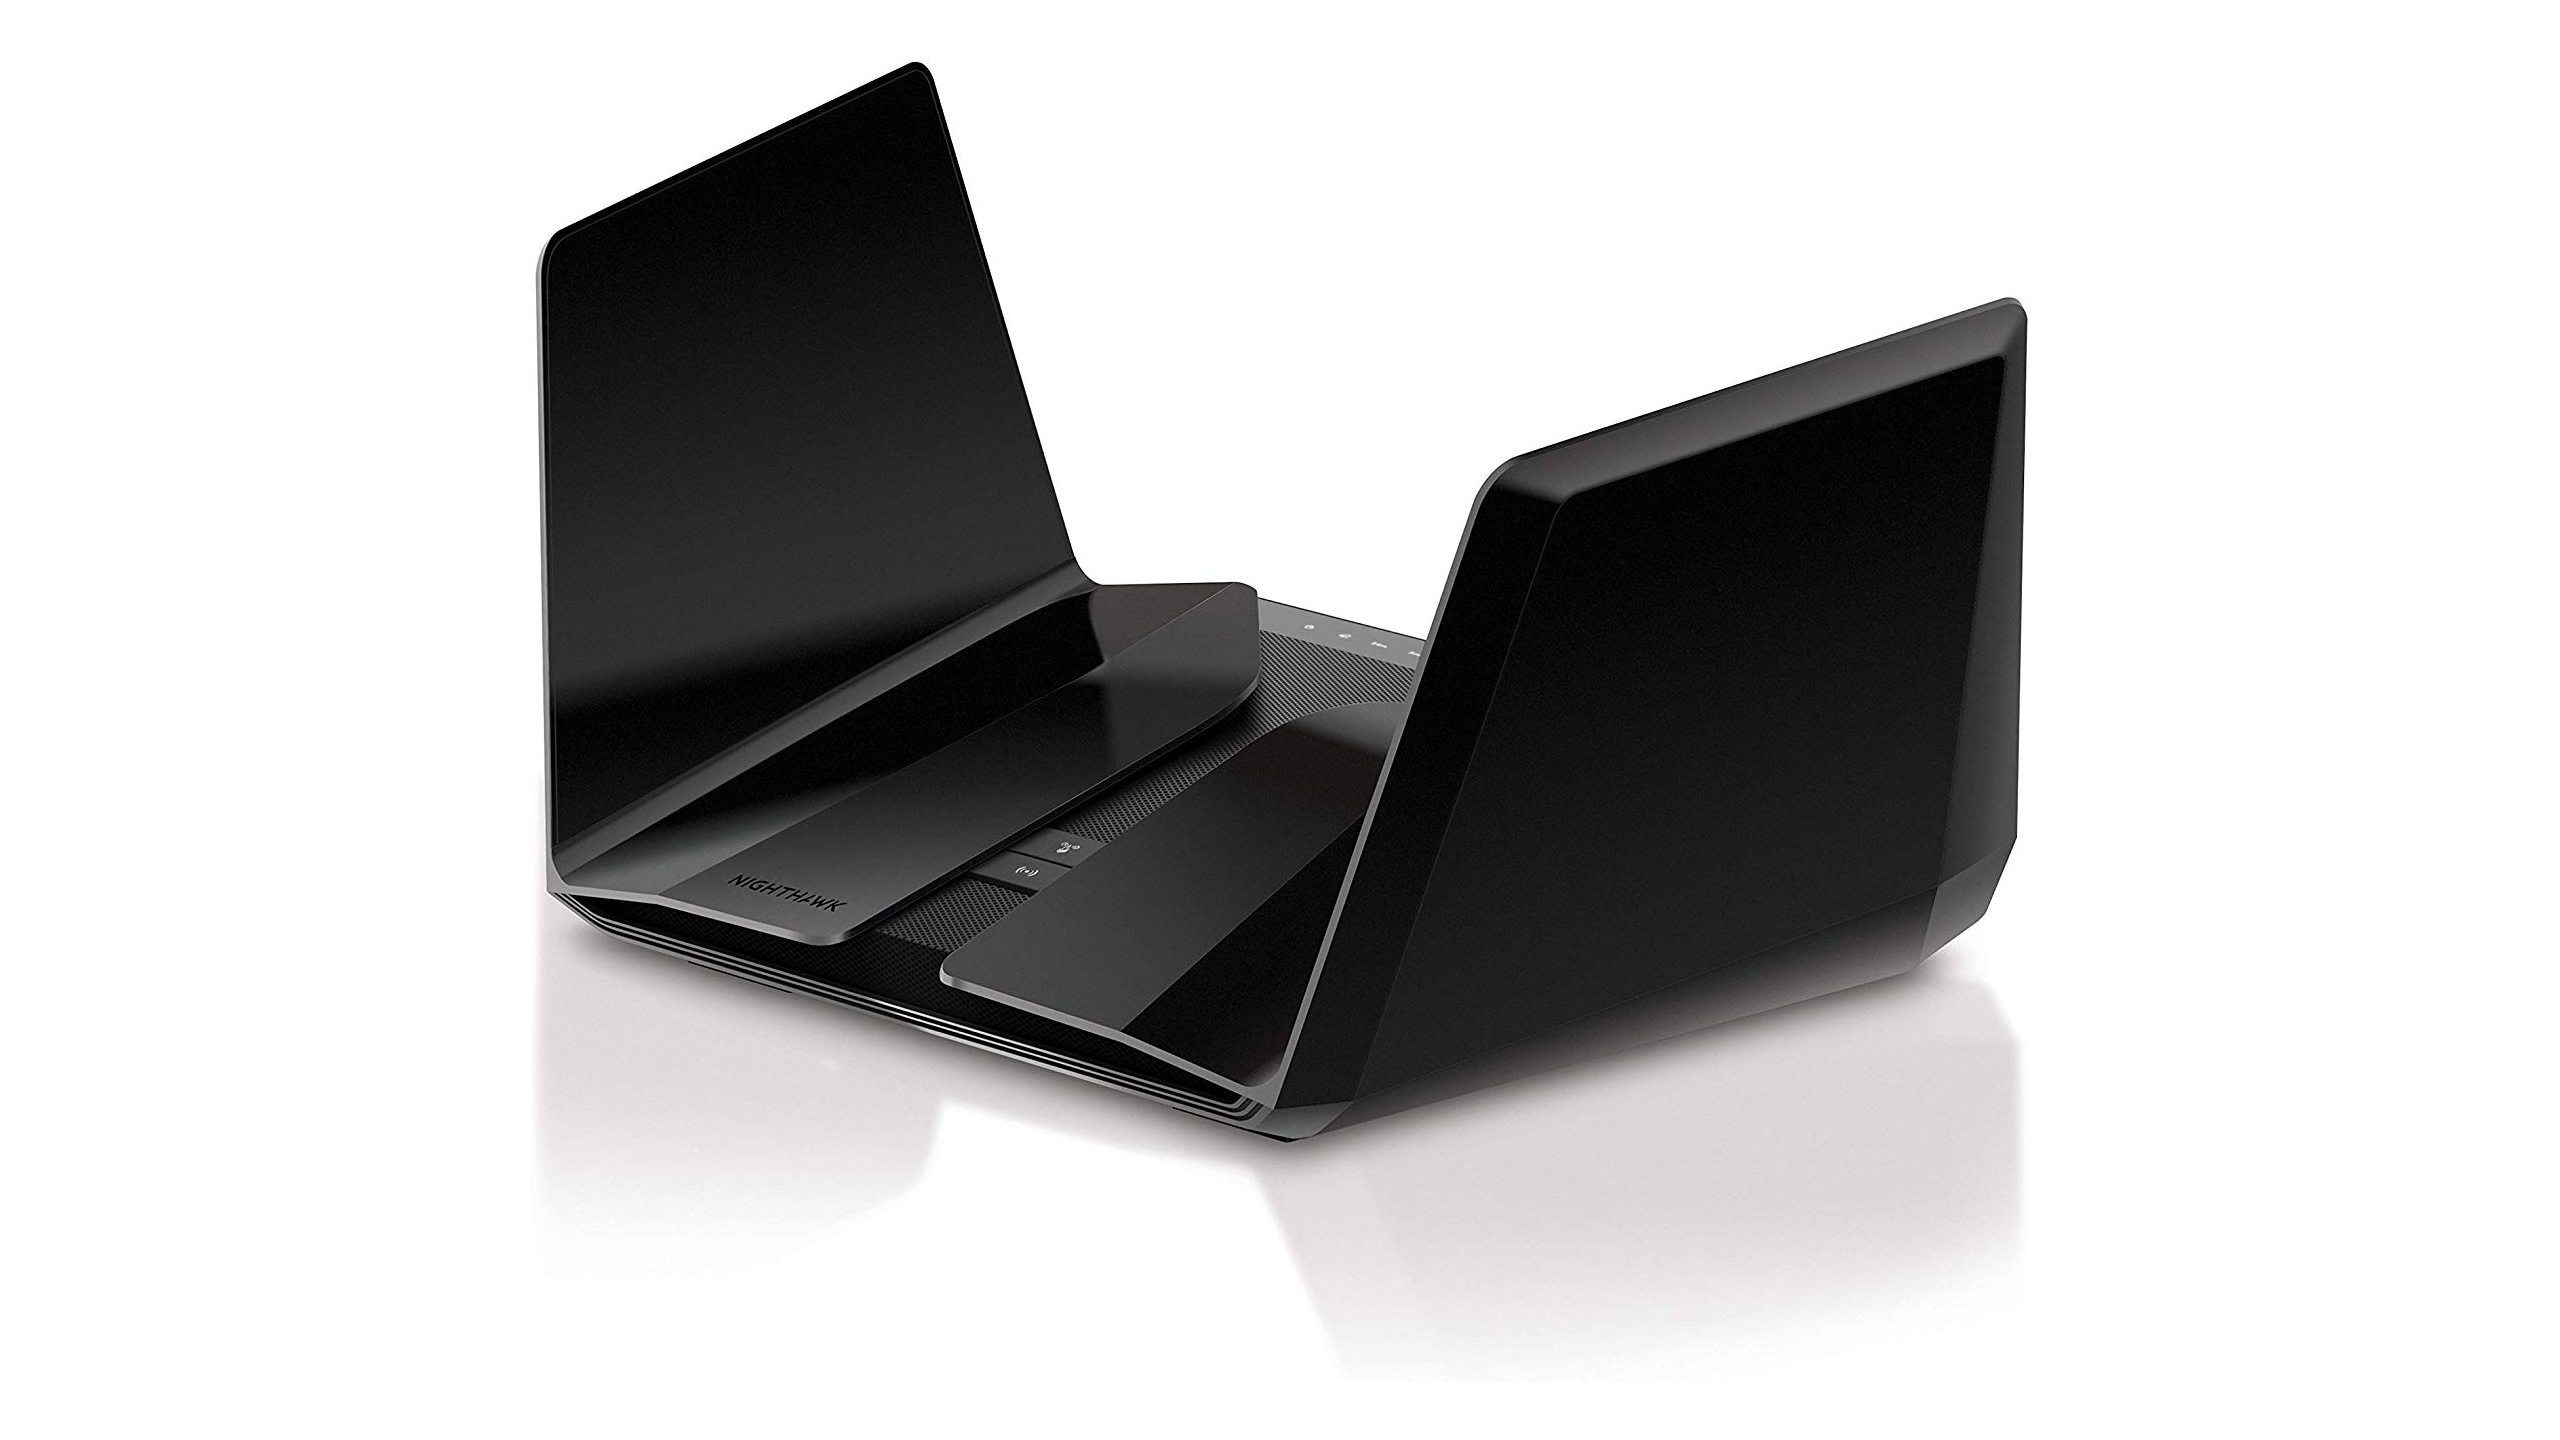
Netgear's Nighthawk routers have always come highly recommended, and the Wi-Fi 6 models are no different. This is another Wi-Fi 6 router that ticks a lot of boxes when it comes to features, and surprisingly is on the cheaper side of the market. The one thing that made the RT-AX88U beat out the AX8 is the fact that it only has 5+1 LAN Gigabit LAN ports. Otherwise, this router is a good alternative for ASUS's model. 

NETGEAR Nighthawk AX12 RAX120

The Nighthawk AX12 is Netgear's analog for the Asus ROG Rapture GT-AX11000, and as such it a great alternative. Inside the Batwing-looking appendages on the side are eight antennas for increased range and high-performance even when multiple devices are connected. This is another great router if you have a device that needs high bandwidth on demand. One of the 5+1 LAN connections is a 5 Gigabit port, which once again, is great if you have a NAS. 

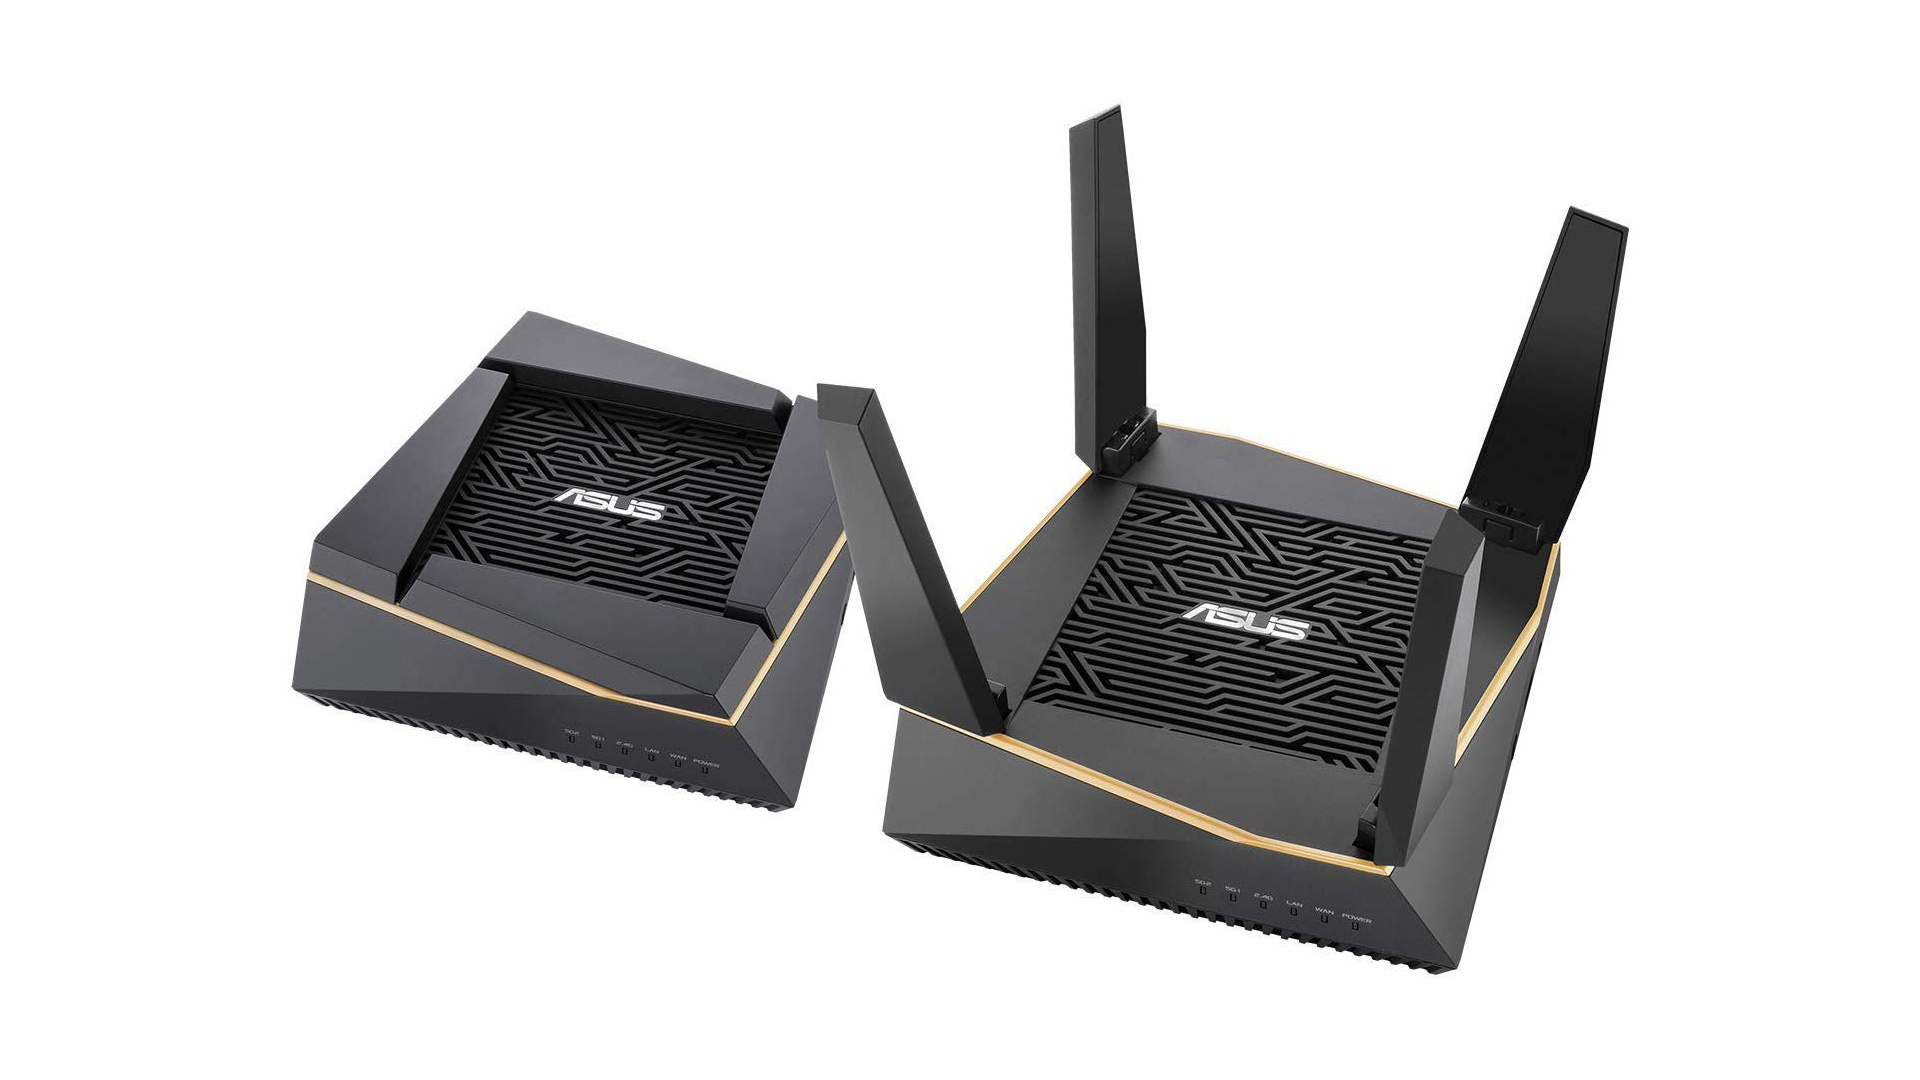
Asus RT-AX92U

This package is for those who have a large area they need Wi-Fi in, but still want Wi-Fi 6 connectivity. The RT-AX92U isn't quite as feature-packed as most Wi-Fi 6 routers, but with this bundle you get two routers for the price of any one of the others on our list. Since these are designed to work as mesh routers, it's easy to get them going. You hook up one like as normal, then use the second as an extender. It's a perfect package for multi-story or sprawling households that one router just can't cover. 


TechRadar: Photography & video capture news

Posted in Photography | Tagged , , , | Leave a comment

Get Your B&H Orders Placed ASAP!

B&H will be closed for one day this week but much more impacting will be their closure during the following two weeks. Plan ahead — place your orders ASAP!
 
SuperStore & Offices
 
B&H will be closed Tue Oct 8 through Wed Oct 9. We will reopen at 9am Thu Oct 10.
 
Online Orders
 
Checkout will be unavailable from 6:15pm ET Tue Oct 8 until 7:45pm Wed Oct 9.
 
Shipping
 
Any orders placed after 6:15pm ET Mon Oct 7 will be processed after we reopen on Thu Oct 10.
 
Buy Online – Pickup in Store
 
Store Pickup orders placed before 7:30pm Mon-Thu will be available for pickup within 30 minutes until 8pm, same day. Orders placed after 8pm will be available the next day at 8am, Mon-Fri (Sun at 10am).
 
Place your B&H now. We are grateful for your support of this site by using our links to place your order (for anything)!

Canon, Nikon, and Sony News, Deals and What’s New at The-Digital-Picture.com

Posted in Photo Equipment | Tagged , , | Leave a comment

This is what happens when you cross a tablet with a 1980s phone

If you're looking for a new desk companion that offers unbridled connectivity and a retro design, then the Poptel V9 4G could be the device for you. 

At just under $ 163 at Gearbest, it looks like a bargain with its throwback look combined with a modern twist, as there’s no cables between the handset and the base unit, and also no physical buttons on the latter.

Instead, this is an Android tablet with a Bluetooth handset sporting a 4G SIM incorporated – meaning you won’t need a telephone line anymore. The rest of the configuration is also not too shabby; quad core CPU from Spreadtrum, 2GB of RAM, 16GB onboard storage, a 5-megapixel front facing camera (but none at the back), a large 8-inch 1280 x 800 pixel touchscreen, Bluetooth 4.0, Wi-Fi and a 1,800mAh battery.

When showed to one of our fellow TechRadar team members, her immediate reaction was “I want that for work! If it can record calls and you can make notes while you're chatting, and you can get your calendar on there, it would be fantastic!”

Back to the future

Since it runs Android 8.1, users will be able to download and install any communication apps onto the Poptel V9. 

The stand at the rear is foldable but not detachable and the Bluetooth handset is universal, has a built-in battery and four physical buttons just like in yesteryear’s telephones.

There's even a microSD card reader, a speaker for hands free functionality and an earphone socket, giving a wide range of options just in case you need them. However there’s no RJ11 port, so you won’t be able to plug in a landline from your phone provider. We’d wish for a dual-sim model which would allow it to be far more versatile especially for small businesses.


TechRadar: Cameras and camcorder reviews

Posted in Camera Reviews | Tagged , , , , , | Leave a comment

Five Foot Lens and 3.2 Gigapixel Camera Produced for Night Sky Photos

The post Five Foot Lens and 3.2 Gigapixel Camera Produced for Night Sky Photos appeared first on Digital Photography School. It was authored by Jaymes Dempsey.

Image: L1 Lens of the camera polished and coated with a broadband antireflective coating by Safran-R...

L1 Lens of the camera polished and coated with a broadband antireflective coating by Safran-Reosc. LSST Project/NSF/AURA.

Last month, engineers packaged up the largest optical lens ever created, before shipping it 17 hours from Tuscon, Arizona to the SLAC National Accelerator Laboratory in central California.

The lens is five feet in diameter and four inches thick; it required a truck to transport it. It was attached to an additional (3.9 foot) lens element when shipped, and it will soon be followed by another.

Together, these three lens elements will be mounted to a camera that, when finished, will be the largest digital camera in existence. And the camera-lens duo will ultimately be attached to a telescope: the Large Synoptic Survey Telescope, which is over ten years in the making.

Note that the camera itself is constructed out of 189 sensors which, when combined, will create pictures of an astonishing size: 3.2 gigapixels. It’s still in production at the SLAC National Accelerator Laboratory, but will likely be finished in 2021. The cost of the camera alone is a whopping $ 168 million dollars.

The purpose of this huge setup is to capture detailed photos of the night sky. The full telescope will be placed on Cherro Pachon mountain in Chile, where the camera will take exposures at 20-second intervals.

As explained in a press release by one of the laboratories involved in the lens construction:

This data will help researchers better understand dark matter and dark energy, which together make up 95 percent of the universe, but whose makeup remains unknown, as well as study the formation of galaxies, track potentially hazardous asteroids and observe exploding stars.

We recently reported on Xiaomi’s 108-megapixel smartphone, with its wrap-around screen, but a 3.2-gigapixel camera blows this out of the water. Even a recently announced security camera, which made waves when it was unveiled at the China International Industry Fair, topped out at 500 megapixels. Equipped with facial recognition technology, there are major privacy concerns when it comes to how this may be used in a country that already heavily monitors its citizens.

But, the high resolution of these cameras does bring to light something that is conveniently forgotten by tech advertisers: More megapixels will only produce greater detail if you have a lens that can resolve that detail. If your lens can only resolve 12 megapixels worth of detail, then you’re not going to gain from slapping a 108-megapixel sensor onto the camera. That’s why the Large Synoptic Survey Telescope requires ultra-precise optics if scientists want to gather meaningful data.

Of course, you don’t need a lens costing millions of dollars to produce highly-detailed 108-megapixel photos. But my suspicion is that the current optics used by smartphones (Xiaomi, but also Huawei, Apple, and Google) just aren’t up to the task of generating 108-megapixel photos.

So don’t fall prey to the megapixel myth. And keep your eye out for photos from the Large Synoptic Survey Telescope!

What are your thoughts on these new lenses and cameras? Share with us in the comments!

The post Five Foot Lens and 3.2 Gigapixel Camera Produced for Night Sky Photos appeared first on Digital Photography School. It was authored by Jaymes Dempsey.


Digital Photography School

Posted in Digital Photography | Tagged , , , , , , , | Leave a comment

Camera Settings and the Function Wheel

Camera manufacturers continue to invent new ways to make photography easier for us. One of these ways is to have a wheel of preset functions to dial in when we encounter varied photographic situations. For most people, they either don’t fully understand what the wheel symbols mean or they simply misunderstand what they mean.
tips for camera wheel settings

Photo by Ben Alman; ISO 3200, f/3.2, 1/100-second exposure.

Let’s explore each of them so you can be more confident when using your camera and achieve the exact results you’re looking for.

What Do the Symbols on My Camera’s Function Wheel Mean?

First, I’d like to give you a quick tutorial on the basics of an exposure. This remains the same for film as well as digital cameras. The physics of photography require two things to achieve a proper exposure. Yes, both. Not one or the other. The law of physics require they both to work in conjunction with one another.

  • The first is an aperture. An aperture can be explained as how large the hole is when it opens up to allow light into the camera. Think of it in the same way the human eye functions. Aperture sizes range from very small to very large. Large apertures are used in low light conditions to increase the amount of light coming into the camera. Conversely, small apertures are used to limit the amount of light coming into the camera. Apertures are expressed as “F”, followed by a number. For example, F2.8, F4, F5.6, F8, F11, etc. The SMALLER the number the LARGER the hole. The LARGER number, the SMALLER the hole. This seems counter-intuitive but true.
  • The second is a shutter. Shutter speeds are explained as how long the aperture stays open. It is expressed in fractions of a second. For example, 1/1000 of a second, 1/500 of a second, 1/250 of a second all the way down to whole seconds, which are rarely ever used. The larger the number the faster it opens and closes. The smaller the number, the slower it opens and closes. The longer your shutter stays open, the more light will collect on your image. By the way, some cameras display these fractions with the denominator only (bottom number) such as 1000, 500, 250, etc. Some cameras display both the numerator and the denominator, such as 1/1000, 1/500, 1250, etc.
The functions below are taken from a Nikon Digital SLR camera. Even if you don’t own a Nikon, many of these functions are very similar with most camera brands. I suggest you have your camera while reviewing these functions.

  • “S” – Represents “Shutter Priority”, NOT “Sports” as some people assume. Shutter Priority means you control the speed of the shutter – how long the shutter stays open. While the shutter is open, it will record anything it sees. When you keep your eyes open, you see continuous movement of objects. If you open and close your eyes very fast, you’ll tend to see a freeze frame of that object. Think of a strobe light in the dark. With a strobe, you don’t see movement, only a collection of still images, even when the subject is moving. Therefore, if you use a slow shutter speed, you can get blurry images for this reason. However, when you use a fast shutter, you can stop action. Generally speaking, you would choose a fast shutter speed for sports, speeding cars, dancing, etc. If you don’t want to freeze action, slow your shutter speed down and you may see the hem of a dancer’s dress moving (or blurring) to communicate movement in your images. This function will allow you to control how much movement you see in an image. Flash can also freeze images under certain circumstances, but that’s another lesson. The other function a slow shutter speed will offer is to pick up ambient light in the background when using flash. Have you ever taken a picture in a church but the background is so dark that no one knew where you were? Go to “S” and slow your shutter down. You’ll find the background begins to develop on your image. Practice dialing in “S” and find an index finger or thumb wheel close by and watch the numbers change. Practice taking the same image with different shutter speeds and observe the differences. In this function, you control the shutter, but the camera will choose the corresponding aperture to achieve a proper exposure.
  • “A” – Represents “Aperture Priority”, NOT “Automatic”. This controls how large or small the aperture will be. Aperture controls how sharp or blurry a background will appear. If you’re creating a portrait, you want the background to be somewhat blurry (or “soft”) to draw attention to the subject matter. However, if you’re visiting the Grand Canyon, you don’t want blur you want the entire image, from the foreground to the background, to be sharp. In that case, you would select a smaller aperture of F11 or F22. The number of feet in focus is referred to as “Depth of Field”. Dial your camera to “A” and practice changing the F-stops. Sometimes, you will not see the “F”, but only the number following it. In this function, you control the aperture, but the camera will choose the corresponding shutter to achieve a proper exposure. Just a note to clarify that zooming out or in with a zoom lens can also increase or decrease depth of field respectively.
using camera function wheel

Photo by Christine und David Schmitt; ISO 100, f/16.0, 1/10-second exposure.

  • “M” – Represents “Manual” mode. Manual means the camera is handing over complete control of the exposure to you. This means you control the aperture AND shutter. This is a function that can be extremely dangerous for the average person and is usually reserved for professionals. The only way for you to receive information as to the proper exposure settings (aperture and shutter) for your lighting situation is to have a separate, hand-held meter, independent from your camera. This meter will display which shutter and aperture you need to use. Professionals can use this mode because they have a separate meter packed among their equipment.
  • Green Camera Symbol (Auto) – Represents “Automatic” mode. Automatic means the camera is in complete control of the exposure. It will choose whatever aperture and shutter it pleases and you’re stuck with the results – good or bad. As you now know, handing complete control over to the camera is not always the best choice. If you know very little about photography but have still recorded some great images in “Automatic”, the honest truth is you were probably lucky. It was a luck of the draw and you were pleased with the aperture and shutter speed the camera chose for you. The reason you’re sometimes unhappy with your images is because you are unhappy with the settings your camera chose. This is why people who are serious about their photography must challenge themselves to understand and use other functions. By the way, “Automatic” also doesn’t allow you to control your pop up flash unit. The camera will pop it up at any and all times it sees fit – even when you don’t want it to. Basically, in this mode, the camera locks you out of all the camera’s other function buttons.
  • “P” – Represents “Program” mode – think of it as Automatic Plus. Program means that the aperture and shutter are still on automatic, but you now have access to the camera’s other function buttons such as ISO (the old ASA) “exposure compensation”, “exposure lock”, “auto-focus lock”, and others that Automatic mode didn’t allow.
  • A Circle with a Lightning Bolt Slashed – Dialing in this function tells the camera that you want to be on Automatic mode, but want to suppress the flash from firing. This is a great way to disable the flash when you want all your images to be exposed with only natural light.
  • Scene – “Scene” mode is a collection of several other conditions (baby, party, sunset, candlelight, beach/snow, silhouette, etc.) that are located in the menu. They placed the others in the menu because they couldn’t fit them all on the wheel.
  • Lady in a Hat – This symbol represents “Portrait” mode. This will enlarge your aperture to soften your background to make your subject pop.
  • Mountain – This is “Landscape” mode. It will choose a smaller aperture to increase the range of what you’ll see in focus. Do you remember the term? Depth of field. It will increase your depth of field so most everything in your image will be in focus. In landscape photography, everything in the scene needs to be sharply in focus.
  • Sport – The “Sport” mode will increase your shutter speed to freeze action so your son’s arm is not as blurry when he swings his bat. If it’s still not sharp, go to “S” and increase the speed.
  • Child – This function will speed up the shutter speed because children move quickly. This is similar to “Sport”, however, “Sport” has a much higher shutter speed.
  • Macro – “Macro” makes adjustments for close up photography for flowers, details, etc.
  • Night – “Night” mode slows your shutter down to bring out the details of a dark background. Remember, once your shutter slows down, blurriness can result. This is limited if you use a flash on your subject and I suggest a tripod with any night photography.

Now that you understand your camera’s function wheel, you will be more confident in your photography and achieve the exact results you’re looking for!

About the Author:
Betsy Snow (betsysnowcom) is a 17-year Photographic Artist who has won local, state and national awards for her work. In 2001, she earned the distinguished Florida Degree of Photographic Excellence.

Go to full article: Camera Settings and the Function Wheel

What are your thoughts on this article? Join the discussion on Facebook

PictureCorrect subscribers can also learn more today with our #1 bestseller: The Photography Tutorial eBook

The post Camera Settings and the Function Wheel appeared first on PictureCorrect.

PictureCorrect

Posted in Photo Techniques | Tagged , , , | Leave a comment

Nokia’s 800 Tough feature phone will take a mauling and keep on calling

Sick of dropping and breaking expensive phones? HMD Global feels your pain, which is why the Finnish company is bringing its first rugged feature phone to Australian market this Thursday, the Nokia 800 Tough.

Both dust and water proof (IP68), the Nokia 800 Tough is said to "withstand drops and extreme temperatures", boasting "military grade MIL-STD-810G" compliance, allowing it to brave weather conditions as low as -20º or as high as 55º Celsius.

According to HMD Global, the Nokia 800 Tough should be able to shrug off a 1.8m drop onto concrete and continue to function normally, making it ideal for use on worksites.

Practical and affordable

Much like the Nokia 3310 (2017) and Nokia 8110 4G before it, the Nokia 800 Tough is a feature phone with a small screen and physical keypad, meaning it lacks full smartphone functionality on purpose. 

That said, Google Assistant, WhatsApp and Facebook will be preloaded on the 4G LTE device, with the ability to download additional apps from a growing app store.

In terms of utilities, the handset also has a dedicated flashlight on top and a built-in loop at the bottom, making it easy to attach the Nokia 800 Tough to a belt, lanyard, backpack or wristband.

Priced at AU$ 189, the Nokia 800 Tough will be available for purchase from Harvey Norman (in-store and online) and JB Hi-Fi (online only) from Thursday, October 10, 2019.


TechRadar: Photography & video capture news

Posted in Photography | Tagged , , , , , , , | Leave a comment

You can get a cheaper Roku Soundbar and Subwoofer at Walmart on Black Friday

Roku and Walmart are partnering up to release cheaper versions of the Roku Smart Soundbar and Roku Wireless Subwoofer under Walmart’s Onn brand of electronics, the companies announced today. 

These versions of Roku’s products will be slightly lower-spec’d than the regular versions and look slightly different – but at $ 129 apiece they will be around $ 50 less than the standard versions going out to other retailers.

According to information sent to TechRadar, the Onn Roku Smart Soundbar features 40W of peak power versus the Roku Smart Soundbar's 60W, as well as a different set of drivers, and a Roku IR remote with TV power controls. 

The Onn Roku Wireless Subwoofer features a 10-inch driver like the Roku Wireless Subwoofer, but is slightly smaller and features 150 peak watts of power versus the Roku Wireless Subwoofer's 250 peak watts of power – meaning that it won’t be as powerful as the regular version.

Audio products for audiophiles on a budget

That said however, the Onn versions will be mostly on par with their respective Roku counterparts: Both soundbars will be able to stream HD, 4K UHD, and HDR video, while the Roku Wireless Subwoofer will be able to connect to either the Soundbar or the Roku TV Wireless Speakers to bring some extra oomph to the low-end.

And, again, they're $ 50 cheaper than the regular versions that would cost $ 179 each.

According to the companies, both the Onn Roku Smart Soundbar and Onn Roku Wireless Subwoofer will be available in the coming weeks, arriving just in time for the annual Walmart Black Friday rush. 


TechRadar: Cameras and camcorder reviews

Posted in Camera Reviews | Tagged , , , , , , | Leave a comment

Getting to Grips with Fill Light in Portrait Photography

The post Getting to Grips with Fill Light in Portrait Photography appeared first on Digital Photography School. It was authored by John McIntire.

Image: Using fill light is an essential skill that will allow you complete control over the contrast...

Using fill light is an essential skill that will allow you complete control over the contrast and tonality in your images in any type of lighting situation.

It should be no secret to any photographer that one light is all you need to achieve great results. While one light setups (in this context, specifically those that don’t involve the use of a reflector) are both well discussed and incredibly useful, sometimes it’s good (or even essential) to go beyond the basics. The next step in your progression is probably going to be to add fill lighting.

Fill light is one of those essential skills that every photographer should have a good grasp of no matter what type of light they are using.

Image: One light setups are powerful, and the results can be great. However, sometimes it’s us...

One light setups are powerful, and the results can be great. However, sometimes it’s useful to be able to take even more control over the contrast in your images.

This article will help to get you started with two types of fill lighting. The first of these is the use of the humble reflector. The other is to use a second dedicated light source. Both of these methods are very different in how they are implemented and what they can achieve. Mastering both will give you a more complete skill set with which to use in your photography.

What is fill lighting and what does it achieve?

Image: In the image on the left, the lack of fill lighting has left most of the details in the back...

In the image on the left, the lack of fill lighting has left most of the details in the back of the subject’s dress as pure black. Adding fill light (right) has brought those details back.

The concept of fill lighting is quite simple.

The idea is that you use it to light the shadows in your frame. What this does is:

  • Brings up the exposure of the shadow areas in your image.
  • Reduces overall contrast in your frame (much like landscape photographers use graduated ND filters to reduce contrast in their images).
  • Brings your final images more in line with how the eye sees the world, rather than the limited range of your camera’s sensor.

While really dark and contrasty images definitely have their place (I love them myself), images (especially portraits for clients) will benefit from a more even contrast ratio. I once heard it described (I’m sorry, I don’t remember where) that in lighting for TV and cinema, the shadows are always lit. This was a lightbulb moment for me as I had always wondered how cinematographers seemed to show a lot detail while still retaining a good amount of contrast. The answer was controlled fill lighting.

Two types

Reflectors

Image: Reflectors are a powerful and versatile tool that allows you to be as subtle or as bold as yo...

Reflectors are a powerful and versatile tool that allows you to be as subtle or as bold as you like with your fill lighting.

The most basic type of fill lighting is that provided by the ever so basic, yet powerful, reflector. You probably have at least one of these already (or you’ve made a few). Reflectors provide fill light by reflecting light (go figure) from your key back into the shadows of your frame. In a lot of cases, reflectors will be your first foray into fill lighting. However, they will also be one of your most-used pieces of kit altogether.

Secondary lights

Image: Using a secondary light source as fill is going to be your most versatile option.

Using a secondary light source as fill is going to be your most versatile option.

You can also use a second light (or third and beyond) as your fill light. A dedicated fill light will do the same basic job as a reflector, but it is infinitely more controllable. You can fine-tune the exposure and shape of your fill light with a precision that reflectors just don’t allow.

Contrast ratios – The very basics

Image: Left: The shadows are filled heavily and the fill light is metered one-stop below key. This r...

Left: The shadows are filled heavily and the fill light is metered one-stop below key. This results in a low contrast image with shadows retained. Right: the fill here is four stops below key. The contrast is high and the shadows are deep, but all of the detail is present.

The very concept of a contrast ratio can seem technical and daunting, I know. However, it is not at all that difficult of a concept and it’s just not that technical. At the most basic level, a contrast ratio simply tells you how bright one light is in relation to one another in terms of the aperture of your camera.

If your key light is metering at f/8, that means that if you set your camera to f/8 and an appropriate shutter speed (lower than your camera’s max sync speed) you will achieve a correct (subjective) exposure in-camera.

Fill lighting will always be underexposed in relation to your key light. If it’s even to your key light, you will get flat, no-contrast images as a result. For a contrast ratio that provides low contrast, you will want your fill light to be at least one stop darker than your key light. Since our hypothetical key light is f/8, that means the key light in this instance needs to meter f/5.6. This is a ratio of 2:1 (which is more advanced and you definitely don’t need to know to get started).

In short, if you want less contrast, your fill light should be one to two stops under your key light. If you want more contrast, try three to four stops.

Metering

If you want to be as precise as possible with these ratios, you will want to consider a light meter. That way you can measure any light falling on the scene with the press of a couple of buttons. This is the easiest way to go about it and works in the studio and natural light. You can also meter the light bouncing off a reflector.

Image: A light meter is the easiest and most accurate way to read what your light is doing. However,...

A light meter is the easiest and most accurate way to read what your light is doing. However, they don’t tend to be cheap.

That does not at all mean that you have to use a light meter, though. While more difficult (especially if you’re new to lighting like this), you can do it with your histogram on the back of your camera. Take a test shot with just your key light on. Now take one with only your fill light on. (Note: you won’t be able to do this if you are using a reflector.) Because fill lighting should be raising the exposures on your shadows, the shadow area of the histogram of your fill light test shot should be further to the right than that of your key light test shot.  If the shadow areas on both histograms line up, you need to increase the exposure of your fill light. If the shadow areas of your fill light’s histogram line up with the mid-tones or highlights of your key light’s histogram, you need to decrease the exposure of your fill light. (I did say it was trickier.)

Image: Left: Without fill light, you can see the shadows are underexposed. Right: With subtle fill l...

Left: Without fill light, you can see the shadows are underexposed. Right: With subtle fill light, you can see the shadows are brought up quite a lot.

Of course, you don’t have to do either of these things. You can always eyeball the whole setup and try to adjust things on the go. I would say this is perfectly fine with experience, but as you start out, I encourage you to at least have a go with the previous methods. It will drastically reduce the amount of time it takes you to get to grips with the technique and fully understand what is going on with your light. The more you understand, the easier you will find it to adjust things on the fly. You will also be able to learn new techniques faster.

Fill light with reflectors

Image: Reflectors can be subtle or bold when used as fill and are pretty versatile for what they are...

Reflectors can be subtle or bold when used as fill and are pretty versatile for what they are.

Reflectors are:

  • Cheap
  • Easy to setup
  • Easy to use
  • Very effective

Getting started with reflectors as fill lighting

Image: Reflectors are powerful, yet accessible, tools for fill lighting.

Reflectors are powerful, yet accessible, tools for fill lighting.

Before you start to think about fill, you will want to decide what your key light (main light source) is going to do. Set up your key light so that it is shaping and lighting your subject the way that you want. Meter so that you have the exposure settings that you desire.

Image: A small(ish) softbox placed in front of and above the subject creates soft light with shadows...

A small(ish) softbox placed in front of and above the subject creates soft light with shadows underneath the subject’s features.

Now, evaluate the shadow areas that your key light is creating. If you’re using natural light, or strobes fitted with modeling lights, you can do this by eye. Alternatively, you can take a test shot and review it on the back of the camera.

Image: Here you can see that while the light is soft, the shadows are a prominent part of the image.

Here you can see that while the light is soft, the shadows are a prominent part of the image.

Place your reflector so that it is roughly opposite your key light. Evaluate what the reflector is doing (either by eye or test shot again).

Image: Adding a reflector beneath the key light serves to raise the exposure in the shadow areas of...

Adding a reflector beneath the key light serves to raise the exposure in the shadow areas of the image.

What you are aiming for is for you shadows to be brought up in exposure, but not eliminated altogether. If you want low contrast, bring your reflector in as close as possible. If you want more contrast, move it away.

Image: With the reflector used as fill, the shadows are still present, but the overall contrast in t...

With the reflector used as fill, the shadows are still present, but the overall contrast in the image has been reduced.

It can take quite a lot of practice before you learn to see the subtle changes a white reflector provides. The key is to get as much practice in as possible.

Set up an object and light it. Put your reflector wherever you want and start taking shots, being sure to move the reflector into different positions each time. Review each shot and try to notice the behavior of the light in each instance. This exercise will give you a pretty good idea of how a reflector is going to behave in any given situation. Do this exercise often and you will find you can see even the most subtle shifts in light where it was difficult before.

Another quick tip to help you see the difference in contrast in a scene is to squint. It sounds ridiculous, but squinting reduces your vision to blocks of value and you will be able to see the contrast in the scene more easily.

A second light

Image: A second strobe serving as fill gives you the most control over how you manipulate your shado...

A second strobe serving as fill gives you the most control over how you manipulate your shadows.

Like reflectors, using extra lights as fill is a fundamental skill, albeit one with a slightly steeper learning curve. That said, unlike reflectors, using a dedicated light source allows you full control over the power output, making it much easier than a reflector to control how the light is going to behave.

Image: Varying degrees of contrast between your shadow and highlight tones are possible just by adju...

Varying degrees of contrast between your shadow and highlight tones are possible just by adjusting the power of your fill light.

To get started using a dedicated fill light, place your key light in your desired position and set the power for your desired aperture. Let’s return to that hypothetical of f/8.

Image: Here, a softbox is placed at 45 degrees to the subject.

Here, a softbox is placed at 45 degrees to the subject.

Knowing your aperture, place your fill light where it will affect the shadows in the manner you would like and set the power output so that it will be underexposed in relation to your aperture. How much you underexpose for is entirely up to you. If you want, say, two stops of fill in this scenario, then you will want your fill light to meter at f/4.

Image: A 7′ parabolic umbrella with diffusion was added about 10-feet away to serve as fill. I...

A 7′ parabolic umbrella with diffusion was added about 10-feet away to serve as fill. It was set to meter 2-stops under the key light.

Take a test shot and see if you have your desired effect. Adjust as required and there you go.

Image: In this before (left) and after (right) you can see how the shadows on the right side of the...

In this before (left) and after (right) you can see how the shadows on the right side of the image are lifted and filled in with the fill light.

Taking it further

Image: You can design fill lighting however you like. Feel free to use multiple sources of different...

You can design fill lighting however you like. Feel free to use multiple sources of different sizes and shapes if it works.

Of course, you are not limited to a single fill light. You can have multiple fill lights lighting your subjects from both sides. You can also mix lights and reflectors for different strengths of fill lighting from various angles. You can pretty much do whatever you want in terms of designing a light set-up. You are only limited by the equipment you have at hand and what you can dream up.

Image: Using multiple fill lights allows you to control every aspect of contrast in your images.

Using multiple fill lights allows you to control every aspect of contrast in your images.

An idea is only crazy if it might work and you don’t try it.

Tips for fill lighting

1) It’s often better to retain the shadows rather than fill them in completely. This is not a rule, but images that retain some amount of contrast are often more natural and pleasing to the eye.

2) Pay attention to the catchlights in portraits – Extra light sources mean extra catchlights. When you are setting up your lights (reflectors included), be sure to watch the catchlights in your subjects’ eyes. Catchlights can make or break a portrait, so make sure you are controlling them as much as you are the lighting itself.

3) Big light sources at a distance work very well as fill light.

Image: This is by no means a rule, but big light sources (like the 7′ umbrella to camera right...

This is by no means a rule, but big light sources (like the 7′ umbrella to camera right) from a distance work really well as fill lighting.

4) Don’t be a slave to the ratios – While using the ratios as a starting point can, and will, be a useful springboard, that doesn’t mean you should adhere to them rigidly. If something isn’t right, adjust as you see fit. Nobody cares in the end if your ratios are exactly 4:1, but they do care if your photos look right. Use your best judgment and change things up if you need to. Sometimes only the tiniest of power adjustments will completely change the end result.

5) Think outside the box – Any light source can be your key and your fill. You’re probably aware that you can use flash to fill-in shadows in natural light, but you can also use natural light as fill where your main lighting is provided by flash.

Image: Here, the key light is a large window to the camera right. The fill light is provided by a st...

Here, the key light is a large window to the camera right. The fill light is provided by a strobe. You can mix light sources however you want to achieve your fill lighting.

That’s it

Hopefully, that’s served as a primer to get you started and demystify fill lighting. Being able to control the contrast in your images with lighting is a fundamental skill that you will be able to use across multiple disciplines. It will allow you to bring a new level of depth to your images straight out of the camera.

Get out and practice, start simple and go slow, and you will master the basics in no time at all.

Try out some of these tips, and share your photos with us in the comments!


fill-light-in-portrait-photography

The post Getting to Grips with Fill Light in Portrait Photography appeared first on Digital Photography School. It was authored by John McIntire.


Digital Photography School

Posted in Digital Photography | Tagged , , , , , | Leave a comment

One Day Left and Selling Like Crazy: Get 5DayDeal’s Highly Popular Complete Photography Bundle 2019

5DayDeal’s The Complete Photography Bundle 2019 is available only until Oct 8th (tomorrow) at 12:00 PM (noon) PDT.
 
A great value: this bundle provides nearly $ 3000 worth of photography resources for only $ 89. The inclusion of Skylum Software’s Aurora HDR 2019 ($ 99.00) is a highlight of this bundle.
 
Over $ 90,000 has been raised for charities so far! A great part of this event is the impact on those in need with ten percent of the bundle revenue ($ 8.90 per sale) going directly to charities.
 
The 2019 5DayDeal resource bundle has proven extremely popular, so be sure to check it out.
 
Also, please share our link with those in your network, for their benefit and for the benefit of the charities.

Canon, Nikon, and Sony News, Deals and What’s New at The-Digital-Picture.com

Posted in Photo Equipment | Tagged , , , , , , , , , , | Leave a comment

Best Samsung TV: your guide to the top Samsung television for 2019

If you're looking for the best Samsung TV, look no further. We've brought together a conclusive list of the latest and greatest Samsung televisions available for you to buy. 

Chances are, if you're buying a new TV, it's from Samsung. The Korean manufacturer has been the top TV manufacturer for the last 10 years – selling as many television sets as Sony and LG put together. (For that reason, you'll likely find a lot of Samsung sets in our Black Friday TV deals guide in the coming weeks.)

One of the driving forces behind Samsung's success – and probably the reason you're here – is that Samsung puts out a huge number of TVs each year. We already have word of a huge number of Quantum dot (QLED) models, upgraded Designer TVs, and more still to come in 2019, though the list below is pieced together from the best sets currently on the market.

Whatever you're looking for in a television, there should be Samsung TV out there to meet your needs – though telling the difference between their long and iterative product names can be confusing work.

Don't worry though – we're here to help. Whatever it is you're looking for and whatever your budget, we’ll help you pick out the best Samsung TV.

 Why Samsung over LG or Sony? 

Considering you've landed on this page, we're sort of assuming you had Samsung in mind – why else shop for the best Samsung TV? But maybe you’re still in that research phase where you’re not quite sure on Samsung, and would like to know why so many other people – reviewers and enthusiasts alike – ride Samsung’s hype train. 

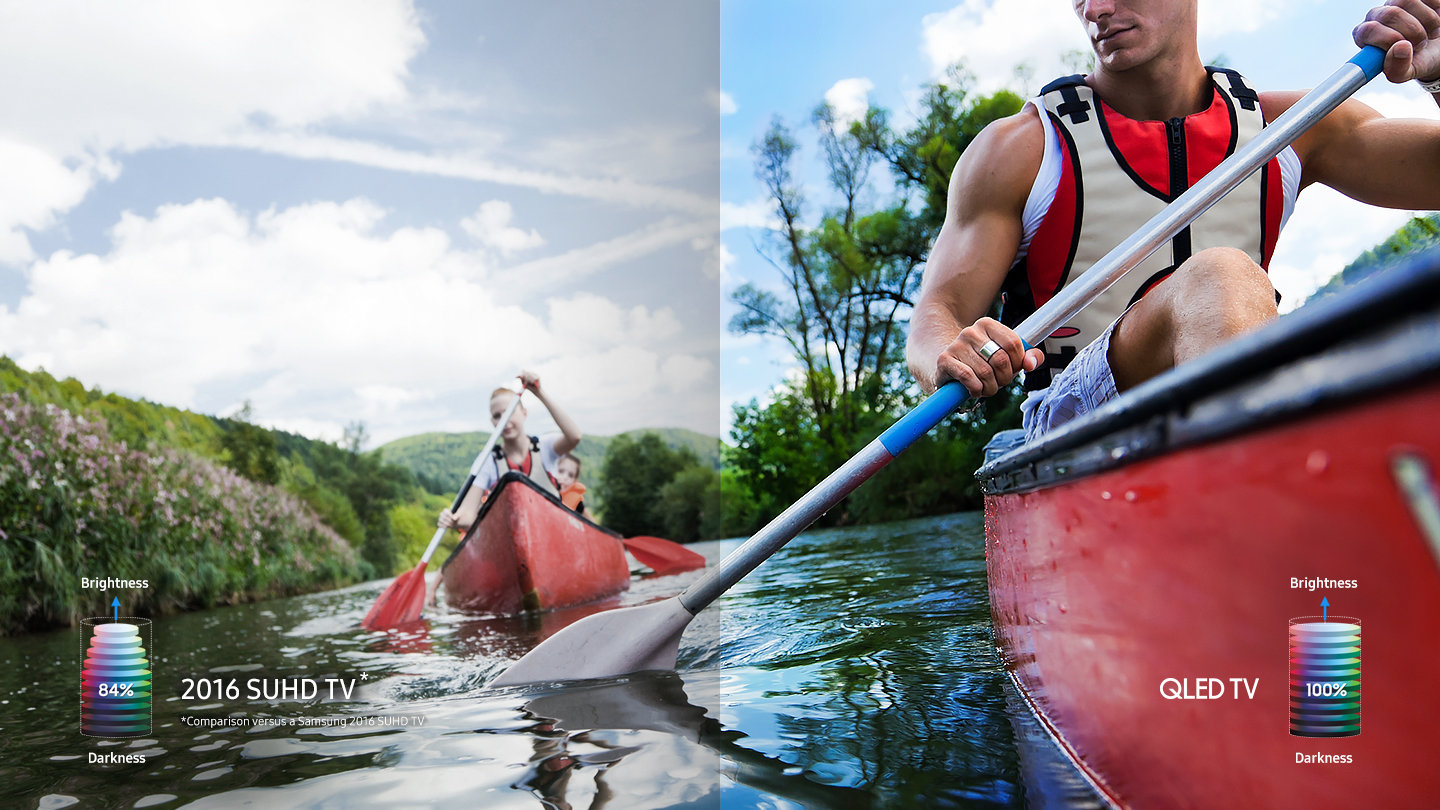
Samsung holds such strong sway with these folks because its TVs are generally more colorful and much brighter than the competition, especially in the QLED range. 

Also important to the discussion: Samsung TVs typically do a great job with upscaling (turning HD into 4K), and usually perform better than LG sets when handling scenes with fast motion. They offer a technology called HDR10+ that makes colors look super vivid, and input lag is generally pretty low, too, which is great for gamers looking to use the TV with the Xbox One X or PS4 Pro.

On the downside, Samsung TVs are generally more expensive than those made by their rivals, and aren’t always incredibly long-lived. I’m not sure if you know this, but Samsung has a bit of a reputation for creating some… explosive products.

The other problem with Samsung TVs is that they don’t support Dolby Vision – an HDR format that delivers higher brightness and better colors than HDR10. 

All that being said, the good often outweighs the bad, and here at TechRadar we recommend Samsung screens to folks who have a little bit more to spend and are looking for the most picturesque TVs (though there are some good budget and mid-range options too, as you'll see below).

Best Samsung TV

  • How's Samsung's Tizen operating system? See our smart TV guide to find out

Best Samsung TV: naming structure explained 

Before we dive into specific models, let’s spend a second taking apart Samsung’s naming convention. Once you understand how it works, you’ll be able to read the obfuscated labels just as well as any electronics employee – which is a huge advantage if you’re heading out on Black Friday or Cyber Monday in search of some deals.

We mentioned the Samsung UN55MU7000FXZA up above, so let’s use that as an example. 

The UN signifies that you’re talking about the American model of the TV. If you’re in the UK, you might be more familiar by seeing a ‘UE’ before all of the other numbers while Australian or Asian readers might have seen a UA prefix before. 

Of course, if you’re buying a new QLED TV from Samsung, you’ll find QN, QE or QA in this spot instead. 

If you buy a TV in one region and move to another, that could present some issues but as long as you buy a TV for your region you’ll be OK. 

The number after the UN/UE pr QN/QE prefix is the screen size. A ‘55’ means the TV is 55-inches. A Samsung UN49MU6500 is an American 49-inch TV, while a Samsung UN65MU6300FXZA is an American 65-inch TV. 

After the MU and the first two numbers come a second letter pair. This pairing helps indicate which year the TV comes from. An M- or an MU- means the TV is from 2017, as are all of the QLED TVs (the Q9F, Q8C, Q8F, Q7C and Q7F). 

If you see KS or KU in the title, the TV was made in 2016. JU and JS TVs were made in 2015. HU was 2014, the F-series from 2013, so on and so forth.

The last four numbers are the series. In 2017, Samsung produces TVs in five main series: the 5-Series, 6-Series, 7-Series, 8-Series, 9-Series, alongside QLED TVs and the more lifestyle-centric The Frame and Serif TVs. 

The higher up the series is, the more functionality it has. It’s pretty hard to break it down by series, as some larger screen sizes have different feature sets than smaller screen sizes, but the higher series TVs have features such as HDR, 4K, higher brightness settings, better motion handling and better operating systems. 

The typical rule of thumb is that higher is better, but also generally more expensive, too. 

Last but not least you have the FXZA – a letter combination that denotes region (the A stands for America) and, for some odd reason, inventory tracking. This last part largely can be ignored unless you’re entering the TVs into a database.

The best Samsung TVs at a glance

  1. Best Samsung TV: Samsung Q90 QLED
  2. Best reasonably priced: Samsung Q80 QLED
  3. Best on a budget: Samsung NU7100

 So, what is the best Samsung TV? 

Best Samsung: Q9FN (QN65Q9FN)

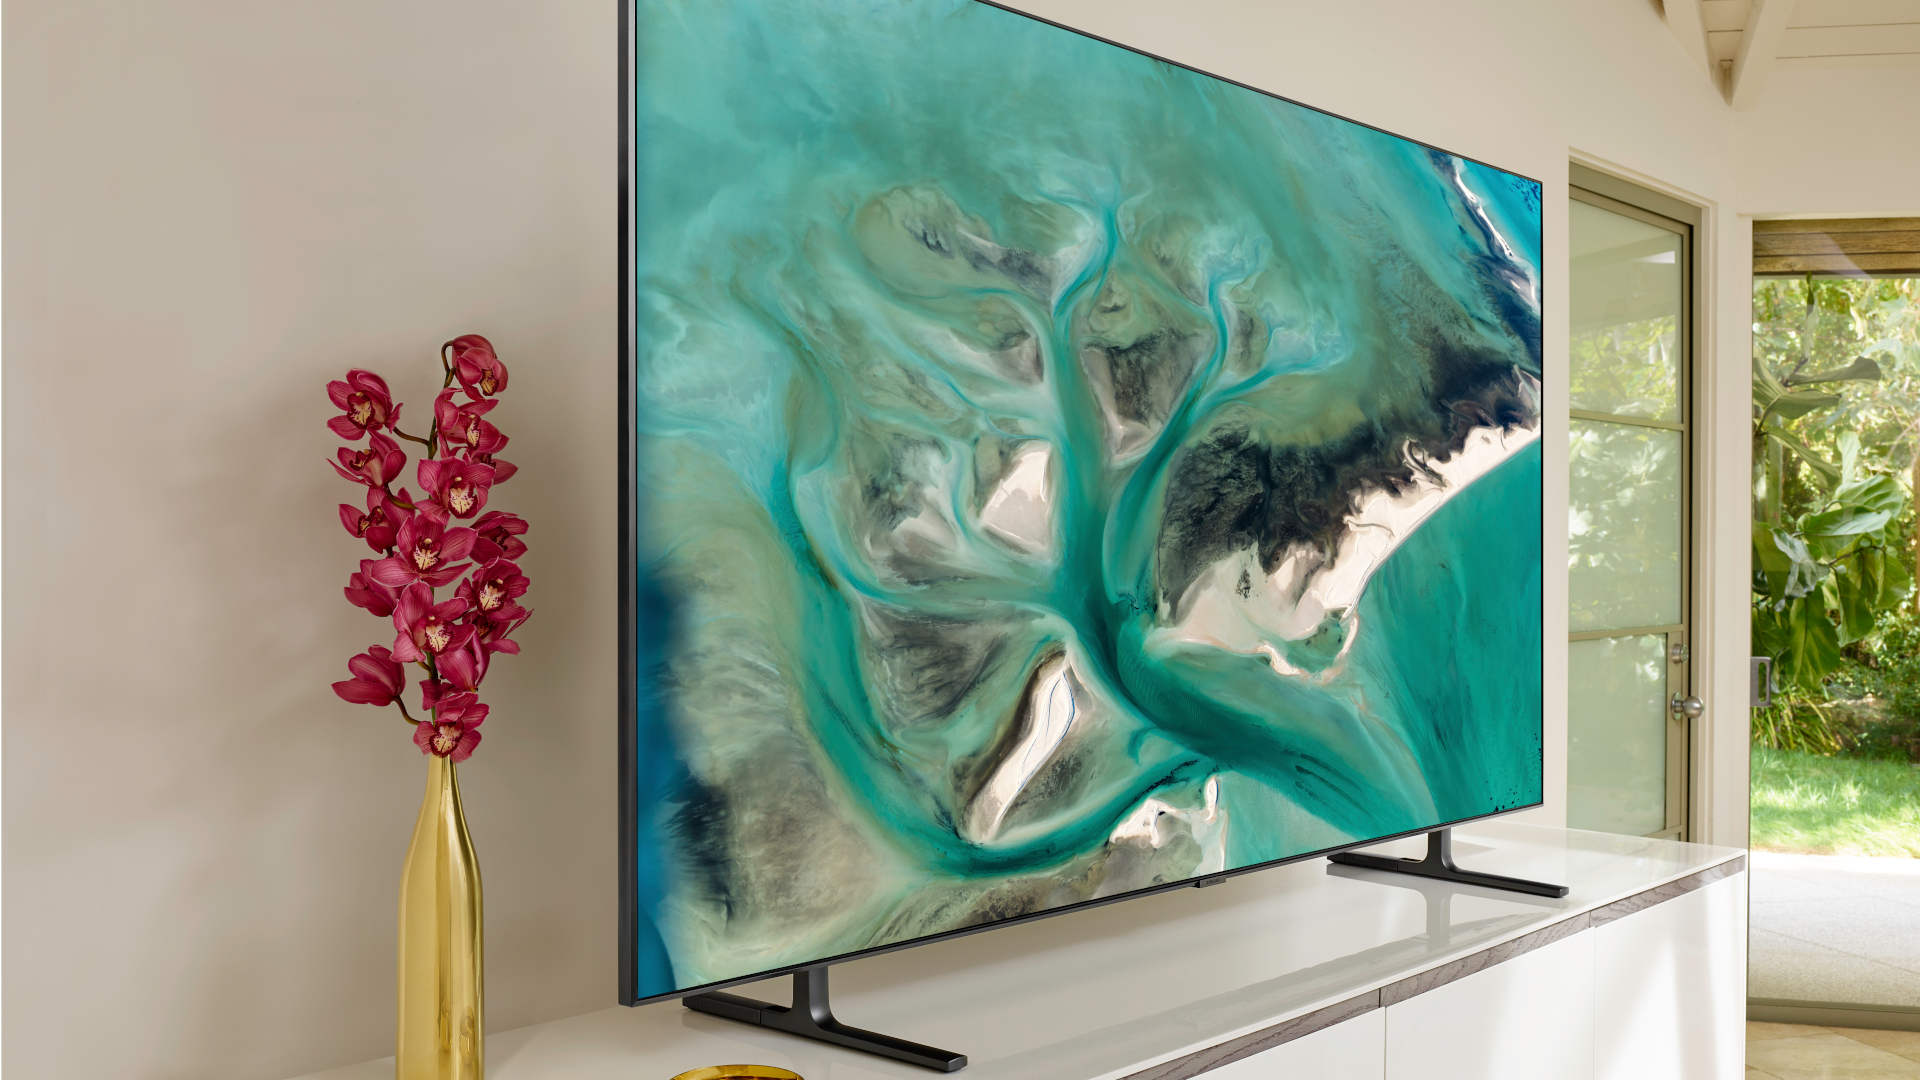
Samsung Q9FN (QN65Q9FN). Image Credit: Samsung

Samsung's flagship 4K QLED for 2019 has somehow managed to outdo last year's Q9FN, which previously held the top spot on this list.

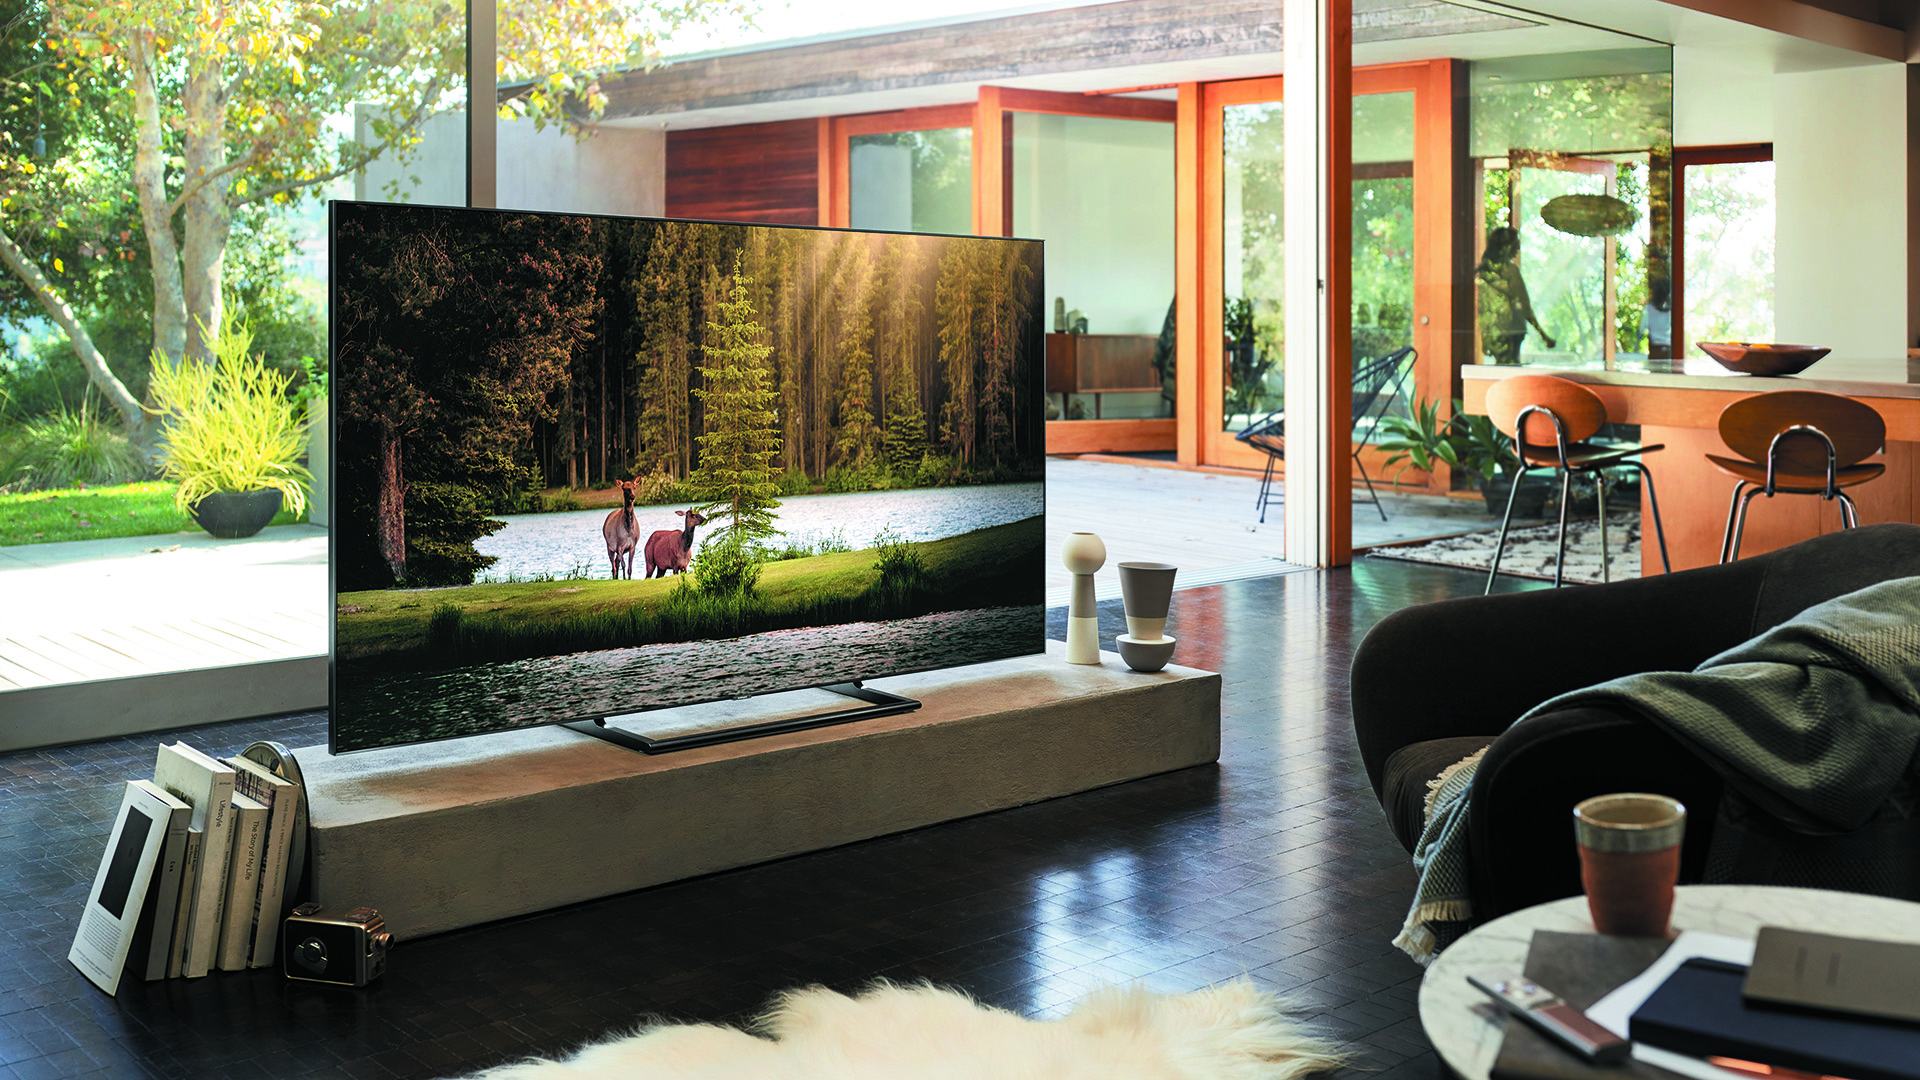
As the top model in Samsung's QLED range – 8K models like the Q950R aside – the Q90 offers a truly dynamic picture with market-leading picture processing and incredible HDR images. Not to mention a dazzling peak brightness of 1,600 nits (double that of most OLEDs). And with a sleek, bezel-less design, and the OneConnect box to tidy away all your cables, the Q90 is as nice to look at when the TV is off as well.

But one of the most impressive innovations with the Q90 is the viewing angles: something that LCD panels traditionally struggle with, given that backlighting usually faces directly forwards. Samsung has tackled the problem admirably, with its Ultra Viewing Angle technology meaning that contrast and color are as strong off-axis as they are head-on.

Add to that the built-in Bixby voice assistant and comprehensive smart platform, and you have a top-class television full able to compete with any OLED TVs.

If you want the absolute best Samsung TV, the Q90 most certainly is it.

Read the full review: Samsung Q90 QLED TV

If the price tag is making you gape, don't worry: there's an extensive Samsung TV range and plenty of cheaper models to contend with, without needing a big drop in quality.

Instead, let's set the budget at something a bit more reasonable. 

What's the best reasonably priced Samsung TV?

Image Credit: Samsung

The Samsung Q80R QLED TV isn't the flashiest QLED put out this year – in fact, it's third in the line-up after the Samsung Q90 and Samsung Q85. The difference between each one might be incremental, but by the time you've got the the Q80R, you've got a substantial price saving from the higher-end models.

The Q80R still packs in everything that makes a QLED a QLED in 2019: a dazzlingly bright display, a direct full array backlight, and Samsung's new Ultra Viewing Angle technology (which keeps colors looking rich even from off-axis). Not to mention voice control through Samsung's Bixby voice assistant, and Airplay 2 functionality.

But you get all that for only £1,999 / $ 1,999 (around AU$ 2,900) RRP for the 55-inch model, with prices already dropping to £1,699 / $ 1,599 (around AU$ 2,300) through most retailers. Buyers in the US also have the option of some massive 75-inch and 82-inch sizes alongside the regular 55- and 65-inch models.

As it's Samsung, there's no Dolby Vision support – meaning you won't get the best of dynamic HDR through Netflix and the like – opting instead for HDR10+, which is used by Amazon Prime.

If you're after a compromise between price and performance in your hunt for the best Samsung TV, you're looking at it.

Those in the UK, be warned though: you won't get the Freeview Play UI, though you should be able to access most domestic channels' catch-up services individually.

Read the full review: Samsung Q7FN QLED TV

OK, but what's the best cheap Samsung TV?

Best Samsung: NU7100 Series UHD TV

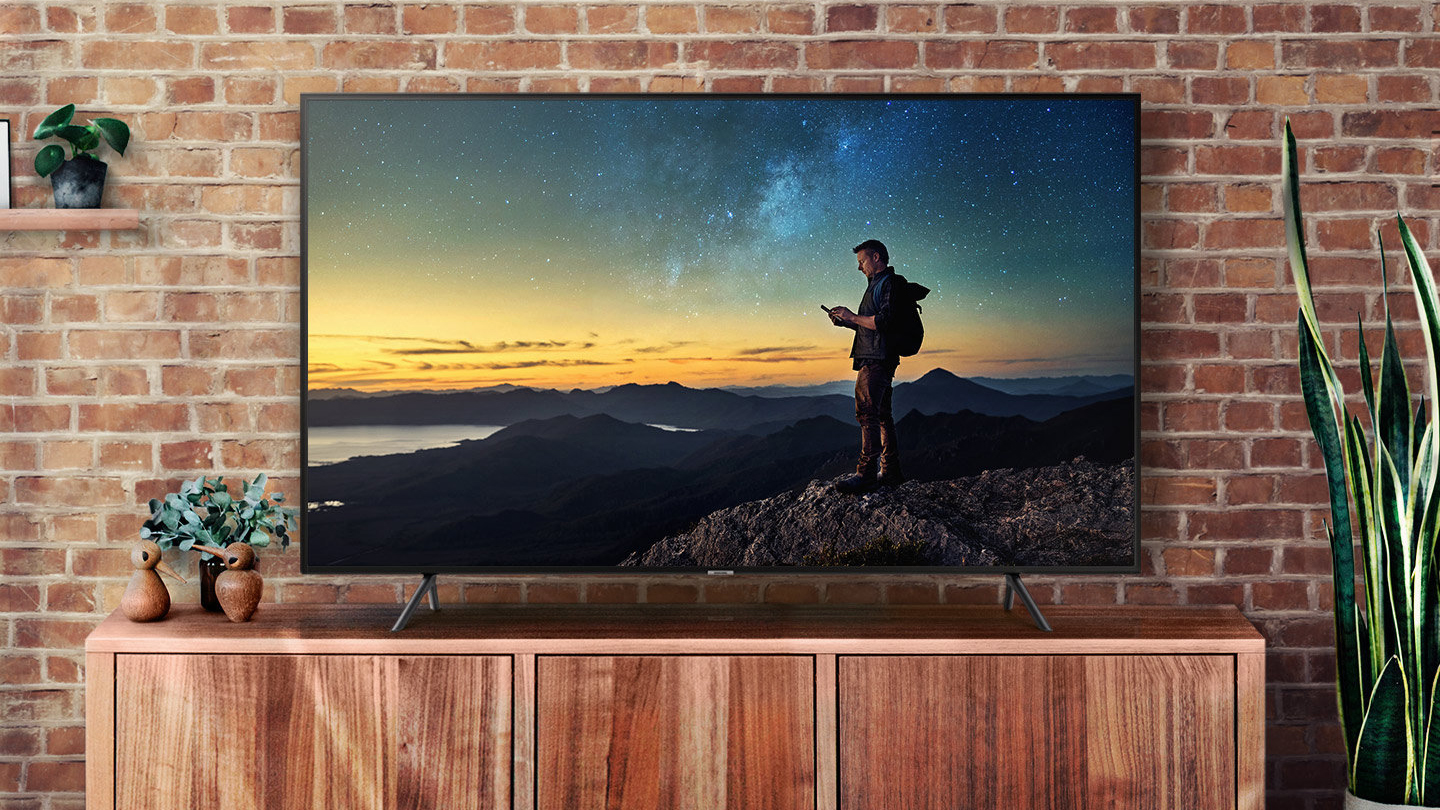
Samsung NU7100 Series UHD TV (Image Credit: Samsung)

If Samsung's Q9F is a Ferrari and the Q7FN a Camaro, the NU7100 is a Honda: It's affordable and gets around just fine. It might not be the most premium machine on the market – and can certainly stand to learn a few tricks from the higher-tiered competition – but it's hard to complain about a TV that, most of the time, costs in the region of $ 400 / £400.  

Called the Samsung NU7120 in the UK, this TV offers almost all of the smart functionality as the top-tier models in a cheaper-but-still-good package. It's not going to blow you away if you're a cinephile – while it supports HDR / HDR10+, you're only getting a very basic version of high dynamic range. The edge-lit panel and low brightness don't hinder the picture much though, even if it can't compete for visuals with the more premium models listed above.

However, if you're a gamer looking for low input lag, or someone angling for 4K without breaking the bank, this is a contender for the best Samsung TV as such a high-performing television at a low, low cost.

Read the full review: Samsung NU7100

  • On the lookout for a secondary screen or bedroom TV? See our guide to the best small TVs


TechRadar: Photography & video capture news

Posted in Photography | Tagged , , , , | Leave a comment

Sigma 45mm f/2.8 Lens for Sony Review

The post Sigma 45mm f/2.8 Lens for Sony Review appeared first on Digital Photography School. It was authored by Suzi Pratt.

The Sigma 45mm f/2.8 DG DN (sony, Leica) is the latest addition to Sigma’s Contemporary lens line. Launched in July 2019, this lens is available as Sony E-mount or Leica L-mount. The latter mount is of particular interest as the new L-mount is compatible with Panasonic and Leica full-frame cameras, plus Sigma’s own forthcoming L-mount mirrorless cameras. I got my hands on an E-mount version and tested the lens with my Sony A7RIII. Here are my thoughts.

Sigma 45mm f/2.8 Lens for Sony E Mount

Specs

The Sigma 45mm f/2.8 lens has a maximum aperture of f/2.8, which may be a disappointment for photographers used to having at least an f/1.8 on their prime lenses. It also is a fairly expensive lens given its $ 549 price tag. However, this lens makes amends when it comes to size and the build quality.

Size

Compared to other Sigma prime lenses such as the Sigma 35mm f/1.4 Art (Nikon, Canon, Sony), this lens is significantly smaller and more lightweight. It weighs 7.5 ounces (half of the aforementioned 35mm) and comes in at less than 2-inches long. This makes the 45mm much more portable and discreet when compared to Sigma’s other Art lens primes that all have an f/1.4 aperture, but are significantly larger and heavier.

This compact size is closer to that of the Canon 50mm f/1.8 and 40mm f/2.8 pancake lens. Both were my longtime favorite prime lenses when I shot with Canon DSLRs. The beauty about this size is that it feels very balanced when attached to a full-frame camera, whether it be my old Canon 5D Mark III or my new Sony A7RIII. With that said, this lens puzzles me when I compare it to other similar lenses that I’ve owned.

Sigma 45mm f/2.8 Lens for Sony E Mount

Sigma 45mm f/2.8 (left), Fujifilm 35mm f/2 (center), and Sony 55mm f/1.8 (right).

Build quality

It’s hard to ignore the design of this lens, which is both visually eye-catching and functional. There are two physical rings – the outermost ring controls the focus and the innermost ring selects the aperture, similar to how a Fujifilm lens performs. Choosing the aperture via the lens can take some getting used to, but it’s a wonderful way to interact with your camera. There’s also a switch to toggle autofocus or manual focus. The lens itself is made mostly of metal, and it includes a lens hood that is also made of metal. There is also weather sealing on the mount of the lens to keep dust and dirt at a minimal.

Shooting experience

45mm is an interesting focal length. It sits comfortably between two of the most popular focal lengths out there: the 35mm and 50mm. Not too wide or too narrow, 45mm gives you a range that feels natural, yet intentional. Autofocus on this lens is fast, accurate, and very quiet thanks to a fast-stepping motor.

If you shoot on a Sony full-frame mirrorless camera, you may also be familiar with the feature of flipping between shooting in full-frame and APS-C mode. While the latter does crop and shrink your images, it gives you the ability to shoot at a slightly zoomed-in focal length. This, in turn, gives you at least two focal lengths to shoot from, and it is one of my favorite features of my Sony A7RIII.

Sigma 45mm f/2.8 Lens for Sony E Mount

Image quality

The images captured by the Sigma 45mm f/2.8 lens result in very consistent color, tones, and sharpness. This lens has a rounded seven-blade diaphragm that renders a smooth, shallow depth of field. There is a minimum focusing distance of 9.4 inches, giving this 45mm decent macro capabilities.

In Conclusion

Overall, I had a very positive experience shooting with this Sigma 45mm f/2.8 lens. The compact size complemented the Sony A7RIII perfectly, making it a very portable unit. I usually have a 24-70mm f/2.8 or 55mm f/1.8 glued to my camera when shooting in low lighting scenarios. Thus, the 45mm’s f/2.8 aperture did not hinder me much. However, there is something to be said about having a faster aperture, especially in low light conditions.

If you enjoy shooting with a versatile prime lens that is reasonably fast but very portable, this Sigma 45mm f/2.8 lens might be the lens for you.

What are your first impressions of the Sigma 45mm f/2.8 lens? Would you purchase it? Why or why not?

Sample photo gallery

Sigma 45mm f/2.8 Lens for Sony E Mount

Sigma 45mm f2.8 for Sony E Mount

Sigma 45mm f2.8 for Sony E Mount

Sigma 45mm f2.8 for Sony E Mount

Sigma 45mm f2.8 for Sony E Mount

Sigma 45mm f2.8 for Sony E Mount

Sigma 45mm f/2.8 Lens for Sony E Mount


Sigma 45mm f/2.8 Lens for Sony

The post Sigma 45mm f/2.8 Lens for Sony Review appeared first on Digital Photography School. It was authored by Suzi Pratt.


Digital Photography School

Posted in Digital Photography | Tagged , , , , , | Leave a comment