Cryptic tweet by Raja Koduri points at Intel Xe June 2020 release

We might start seeing Intel’s Xe graphics cards in the summer of 2020. At least, that’s what Raja Koduri, Intel chief architect, was hinting at in his tweet on October 3.

The reigning processor (CPU) manufacturer is entering the discrete graphics cards market with its forthcoming Intel Xe cards, and for the first wave of these Xe graphics cards, it’s already committed to a 2020 schedule.

Intel Xe

Raja Koduri teases an Intel Xe date

Raja Koduri’s tweet, which Tom’s Hardware reported on, is a photo of what we’re assuming is the rear of his Tesla Model S bearing a custom license plate with the words ‘THINKXE,’ ‘June’ and 2020’ on it. And, it seems to confirm Intel’s target date.

Intel is no stranger to cryptic messages such as this, having teased the Coffee Lake chips’ release date with a coffee cup bearing the word ‘October’ and the numbers ‘10’ and ‘2017’ a couple of years back. Seeing as this photo came straight from the horse’s mouth, so to speak, we’re going to take it as gospel.

However, whether or not it’s the date for the unveiling or the release itself, we have no idea. We’re betting on a release, but since Computex is a June affair, it might be that the manufacturer will announce it at the event and release it a few days later.

A third contender in the GPU race

Just when AMD has finally caught up to Nvidia in the graphics cards game, Intel is throwing its chips – or rather, graphics cards – in the pot, which could only mean good things for us.

These Intel Xe graphics cards, which will be based on the Gen 12 graphics architecture, will come in two variants – one for consumers and the other for the data center. They will also be comprised of everything from entry-level mobile graphics to gaming GPUs to general purpose GPUs for exascale supercomputers.

How Intel’s cards will measure up against their AMD and Nvidia rivals, we’ll have to wait and see. But, with Raja Koduri himself sharing weirdly specific, albeit enigmatic, information regarding the cards, we’re sure we’ll start seeing leaks churning through the rumor mill in the next few months leading up to June 2020.


TechRadar: Cameras and camcorder reviews

Posted in Camera Reviews | Tagged , , , , , , , , | Leave a comment

Review of PhotoWorks: a Fresh and Fast Photo Editor for PC

The post Review of PhotoWorks: a Fresh and Fast Photo Editor for PC appeared first on Digital Photography School. It was authored by Glenn Harper.

PhotoWorks is an image editor with a fresh, clean interface and a set of tools that work intelligently to get the best from your photos. It helps you turn drab files into spectacular pictures within a few clicks – sometimes only one! The software’s Portrait Magic technology uses face recognition to add expert retouching edits to your photos. A host of other handy features make the PhotoWorks photo editor for PC an enticing proposition.

PhotoWorks interface

The histogram is a constant when you edit in PhotoWorks. It’s good to see a program that knows its value.

Who’s it for?

Automatic photo editing is the forte of PhotoWorks, but the software doesn’t do everything. It doesn’t offer the huge toolbox that many other programs do, with so much thrown in that you have to rummage endlessly to find what you want. It’s designed for ease of use and speed, which will appeal to beginners and casual photographers but might catch the eye of a few veterans, too.

photoworks-photo-editor-for-pc

The clean, minimalistic interface of PhotoWorks. All edits are memorized by the software, so they’re non-destructive.

In this review, I’ll look at everything PhotoWorks has to offer. I feel like I’ll enjoy it because this photo editing software for PC isn’t an unwieldy monster with innumerable needless features. PhotoWorks seems knowable from the first time you open it. You can jump in without facing a steep learning curve, though there are good tutorials available online if you need help. Let’s see what it can do.

Opening raw files

Raw files are always an obvious place to start when reviewing a photo editor for PC. Can PhotoWorks handle them? It’s not billed as a raw processor, but it does open most proprietary raw files in addition to Adobe’s standard DNG files.

When you open raw files in PhotoWorks, you have the option of applying one of six profiles to them: Default, Auto Enhancement, Landscape, Portrait, Sunny Day or Black & White. With the Default profile, all the settings in PhotoWorks are zeroed when you open the file, whereas the others are Presets with adjusted sliders.

photoworks-photo-editor-for-pc - raw conversion

You’re presented with six starting points when opening raw files. The default conversion opens automatically on the page.

PhotoWorks is really a pixel editor. It converts individual raw files quickly and the quality is okay – good, even – but problems like chromatic aberration (CA) and chroma noise are present if you examine images at 100%. Should you view images at 100%? Only if you’re creating big prints or trying to impress third parties with technical quality. And if you’re doing that, you may not belong to the target market for this software, though PhotoWorks has potentially wide appeal.

chomatic abberation - CA

PhotoWorks does not currently fix chromatic aberration or purple fringing. If you’re the type of photographer who scrutinizes image quality and needs impeccable files, you could run them through a dedicated raw converter first.

By pairing PhotoWorks with a separate raw processor (e.g. RawTherapee, Darktable), “serious” photographers could have the basis of an efficient workflow. That’d be good for, say, wedding photographers, who would also benefit from the software’s intelligent retouching capabilities. We’ll look at those in more detail later, but for now, it suffices to say they’re good.

Saving the PhotoWorks way

Not long after firing up PhotoWorks, you’ll notice there’s no way to close images. This is unusual, to say the least, but it’s another form of streamlining. You can save edited files and move onto the next image. Your edits are stored, even if you move on without saving, and you have the option of resuming them or starting afresh when you go back to the file. This is true even if you close the program. Edits are non-destructive.

Both Save and Fast Export let you export a separate copy of the edited file in the format of your choice, the main difference being that you choose the format beforehand with Fast Export. You can select from JPEG, TIFF (8-bit compressed), PNG and BMP.

Enhancement

The Enhancement tab is where you make changes to color and tone in your image. It includes an Auto Correction feature that aims to transform your photos in a single click, but you can alter its effect if you want. For instance, let’s say you’re already happy with the tonal range but would like more color, you could switch off the dynamic range and add vibrance to Auto Correction. Plus, there’s a slider that adjusts the strength of the auto effect.

PhotoWorks image enhancement

PhotoWorks includes a blue sky enhancement, which makes it easy to deepen the blue of the sky whilst also warming the photo up. Those two edits are normally at odds with each other.

Most of the color and tone sliders you’d expect to find in top-end software are in the Enhancement section of PhotoWorks under the Main tab. They give you as much manual control as you want. The workspace is so tidily laid out that it puts some established photo-editing brands to shame. The design is thoughtful and user-friendly, and it makes you want to linger. You even get to suggest features you’d like to see.

Two more tabs under Enhancement are Colors and Sharpness. The first lets you adjust hue, saturation, lightness (HSL) and color balance. The Sharpen tool is basically an unsharp mask, and there’s a blur section where you could create dreamy soft-focus effects or counteract over-sharpening. It’s all useful stuff, and the confusing terminology is notably left out.

photoworks-photo-editor-for-pc-sharpening-the-blur-tool

A slightly de-sharpened image focuses attention on form rather than detail. That’s where the PhotoWorks Blur tool is useful. It works well with busy compositions.

Tools

Move along to the Tools tab in PhotoWorks and a carefully selected set of powerful tools reveals itself to the right of the screen. There are not a hundred little tool icons as with complex programs. Some of the tools, like Curves or Tone Mapping, offer an alternative and perhaps more advanced way of working with your pictures. Seasoned photographers will be familiar with these features.

Crop

The PhotoWorks crop tool includes a modern set of aspect ratio presets that fit today’s devices or social media pages perfectly. Of course, you can also use the original aspect ratio, choose a different ratio or crop the photo freely. There’s nothing much missing here. You can rotate the picture, which helps get horizons level or to achieve the most effective composition.

AMS Software, the creator of PhotoWorks, also offers a choice of grid overlays to assist you with composition when cropping. For example, you can choose a Rule of Thirds or Golden Ratio grid to help you decide what to include and where. My only slight gripe here is that the grid lines are often a little hard to see: maybe a different color or opacity control would help.

the golden spiral crop composition

The Golden Spiral crop grid in PhotoWorks.

Geometry (correcting perspective and distortion)

You can correct the perspective of architectural photos using the Geometry tools in PhotoWorks. Like in most photo editors for computers, there’s no auto adjustment, so you have to alter the vertical and/or horizontal perspective yourself using the sliders, but this is generally an easy task.

correcting lens distortion

In this pic, you can clearly see the effects of lens distortion on the window frame. In the inset, I’ve corrected it using the distortion slider.

Correcting optical aberrations such as pincushion or barrel distortion is also possible in this section. Some programs will do this for you with the help of lens profiles, but you can do it easily yourself with the assistance of the included grid and distortion slider.

Change background

PhotoWorks makes it easy to change the background of your photo, so if you want to transplant a better sky or create a composite picture, you can. The process of separating the subject from its background is simple. You draw a green line with the object brush, a red line with the background brush, and then you let the software work its magic. Typically, you need to refine the edge a bit using the same brushes, which could become labor-intensive with intricate subjects. For many photos, the process works fine. There’s even a choice of free-to-use pictures you can add as backgrounds, or you can upload your own.

PhotoWorks - change background

The Change Background feature in PhotoWorks separates subjects from their background with ridiculous ease. I’m not sure there’s enough finesse for complex selections (e.g. fur or fine strands of hair), but there’s a lot of fun to be had.

Vignetting

The vignetting tool lets you correct vignetting that occurs naturally with your lens. You can brighten edges and corners for even exposure. It also lets you add a vignette as a creative effect, focusing the viewer’s attention more on the subject of the picture. This photo editor for PC provides all the controls you need to fine-tune this edit.

3D LUT Color Correction

Color LUTs might just as accurately be called “special effects” since they remap the color of your photos to create a different look. PhotoWorks offers a nice built-in selection of them as well as letting you upload your own in the form of cube files. You can’t save your own LUTs within the software, hence you can’t preview them either, but I’m glad to see this feature in PhotoWorks.

PhotoWorks review - color LUTs

This is the “Drama” color LUT. Interestingly, it compresses the tonal range. In doing so, maybe it makes the viewer feel more hemmed in and on edge.

Tone Mapping & Curves

PhotoWorks includes tone mapping and curves tools for controlling color and tone. Tone mapping lets you overlay a color or texture. You could apply a color to a black-and-white image here for a duotone effect. The curves tool adjusts contrast, changes color temperature, and tint and even corrects color if you use the individual RGB curves.

PhotoWorks - tone mapping

A black & white photo turned into a duotone (i.e. a mix of black and blue) using the Tone Mapping tool in PhotoWorks.

Noise Reduction and Grain

There are tools for reducing digital noise or adding film-like grain in PhotoWorks. This photo editing software for PC doesn’t separate color noise from luminance noise, which would be a nice feature for more advanced photographers. But it will smooth and improve the look of high ISO photos.

The film-grain effect is generally better looking than digital noise in photos. You can add that to give your photos an authentic retro look from the days of analog photography.

Retouch

Some of the headlining features of PhotoWorks fall under its Retouch section. The software harnesses the power of face recognition technology to automatically enhance portraits. You can use its Portrait Magic or Face Sculpt technology to retouch faces and show your subjects at their best.

Portrait Magic

A remarkable feature of PhotoWorks is its Portrait Magic feature, which lets you automatically or manually remove blemishes and enhance portraits. Its toolset includes the following:

  • Skin smoothing
  • Control over redness (improve blotchy skin)
  • Skin tone
  • Eyes (sharpness, contrast, remove dark circles)
  • Eyebrows (sharpness, contrast)
  • Lips (sharpness, contrast, hue, saturation, luminance & glare)
  • Teeth (whiteness)
PhotoWorks portrait magic

It may be hard to see the difference here, but Portrait Magic is good at damping down glare on the skin (aka “face shine”). There are many quick fixes to choose from as well as full manual control. (Image: Pexels)

Even if you know how to fix these things already, this technology saves time. It’s easy to imagine it being useful to pro portrait and wedding photographers. The best results are achieved by addressing issues one-by-one, but there’s a set of quick-fix buttons available to speed things up. You have to be careful with it because the software isn’t infallible. For instance, a pair of glasses get in the way of removing dark circles accurately.

Portrait Magic is so good that you could buy this software for that alone. It’s a great photo editor app for pc or laptop.

Face Sculpt

Just when you thought you’d seen amazing things with Portrait Magic, along comes Face Sculpt. Move a slider and watch the software identify and alter a specific part of the face. You can do these things manually in Photoshop using warp tools and the like, but boy is it easy with PhotoWorks: a deft picture editor and retoucher in one.

PhotoWorks - face sculpt

I’ve done nothing to this photo except turn a hint of a smile into a stronger hint. Like Portrait Magic, Face Sculpt is a powerful tool that can totally transform a portrait. The technology behind it is remarkably precise. Subtle edits often work best. (Original image: Pixabay)

Maybe we should all just accept the way we look, but contrary to popular belief, the camera does lie. It’s easy to take an unflattering portrait because of technical reasons, whether it’s an unflattering camera angle, harsh lighting, poor timing or lens distortion. PhotoWorks lets you remedy such problems.

Face Sculpt enables you to reshape or resize eyes, noses, mouths, eyebrows, and the face itself. You can even turn a frown into a smile. Used subtly, it creates different versions of the truth rather than outright lies. And if it helps the subject feel good about themselves, that can’t be a bad thing.

Healing and Cloning Tools

Healing and Cloning tools in PhotoWorks are also first rate. The clone stamp auto-samples from a similar area and gives you the option of changing the sample location. It’s quick and efficient, and no intervention is usually necessary. The Healing Brush is even faster for fixing small blemishes (e.g. dust spots).

Adjustment Brush

There aren’t any layers in PhotoWorks, but you can carry out local edits with the adjustment brush. Users of Lightroom will be familiar with the concept. Color, tone, and sharpness can all be selectively adjusted anywhere on the image. You can also deal with chromatic aberration by brushing neatly over edges and turning Saturation down, though a dedicated tool would be better.

PhotoWorks - adjustment brush

It’s out of fashion, I know, but here’s a quick demo of selective coloring with the Adjustment Brush on PhotoWorks. This Lightroom-style feature offers infinite possibilities without being as daunting to beginners as layers are.

Graduated Filter and Radial Filter

The Graduated Filter and Radial Filter offer alternative ways of making local adjustments to one or more parts of an image. Whether it’s tone, color or sharpness you’re adjusting, these retouching tools make it easy to emphasize your subject. You can also even up your exposures (e.g. the classic dark foreground and bright sky) and bring out shadow detail. Characteristically, these features are neatly designed and easy to use in PhotoWorks.

graduated filters post processing

Two graduated filters are in play here – one to brighten and warm up the lower half of the photo and another to reduce exposure in the sky a little.

Special Effects

With over 150 special effects to choose from, PhotoWorks gives you plenty of ways to interpret each photo. In the Special Effects section of the software, you can add any effect you like and then adapt it to suit your tastes if you want. Hitting the “Apply” button takes you over to the Enhancements area of the software, where you can tweak color, tone, and sharpness.

Image: A quite pleasing special effect to my eye (Faded Photo -1) and one of over 150 special effect...

A quite pleasing special effect to my eye (Faded Photo -1) and one of over 150 special effects available in PhotoWorks.

I personally like adding textures to photos, so it was good to find a few textured effects among the collection. There is also a Quick Enhancements selection, which gives further opportunity for one-click fixing. You can favorite effects so they’re easy to find later on.

A Photographic Films section attempts to replicate the look of various classic films. It’s fun to play around with these effects, which you could find yourself using again and again in some cases.

Captions (add text and stickers)

Whatever you normally do with your photos, there might come a time when you want to add text to them. Maybe you’re making a Christmas card or designing a flyer. You could be creating memes for social media and entertaining your friends. PhotoWorks photo editor app for PC includes a versatile set of tools to help you create the text you want in the font, color, and style of your choice. A sticker collection lets you add cartoon-like captioning for extra fun.

Review of PhotoWorks: a Fresh and Fast Photo Editor for PC

Conclusion

Beneath the minimalistic surface, PhotoWorks offers a powerful set of tools that are easy to use regardless of your level. The way the software exploits face recognition technology is magical, indeed.

There are a few nuts-and-bolts things I would like to see in PhotoWorks, such as chromatic aberration removal, more nuanced noise reduction and an exposure warning to help with histogram adjustments (aka levels). The ability to export 16-bit TIFFs would be nice. At some point, though, if you keep adding stuff, the program ends up complex like many others and loses its streamlined appeal.

Design-wise, PhotoWorks positively gleams. It has a beautifully clean interface, uses simple terminology that everyone can understand, and gets a lot of work done with minimal effort. Whether you use it alone or alongside other photo editors for PC, it’s definitely worth a look.

You can download a free trial version and explore the features of the program yourself. Or use the exclusive coupon for dPS readers to purchase PhotoWorks at a 50% discount now!

Disclaimer: PhotoWorks is a paid dPS partner.


dps-photoworks-photo-editing-for-pc

The post Review of PhotoWorks: a Fresh and Fast Photo Editor for PC appeared first on Digital Photography School. It was authored by Glenn Harper.


Digital Photography School

Posted in Digital Photography | Tagged , , , , , | Leave a comment

Cryptic tweet by Raja Koduri points at Intel Xe June 2020 release

We might start seeing Intel’s Xe graphics cards in the summer of 2020. At least, that’s what Raja Koduri, Intel chief architect, was hinting at in his tweet on October 3.

The reigning processor (CPU) manufacturer is entering the discrete graphics cards market with its forthcoming Intel Xe cards, and for the first wave of these Xe graphics cards, it’s already committed to a 2020 schedule.

Intel Xe

Raja Koduri teases an Intel Xe date

Raja Koduri’s tweet, which Tom’s Hardware reported on, is a photo of what we’re assuming is the rear of his Tesla Model S bearing a custom license plate with the words ‘THINKXE,’ ‘June’ and 2020’ on it. And, it seems to confirm Intel’s target date.

Intel is no stranger to cryptic messages such as this, having teased the Coffee Lake chips’ release date with a coffee cup bearing the word ‘October’ and the numbers ‘10’ and ‘2017’ a couple of years back. Seeing as this photo came straight from the horse’s mouth, so to speak, we’re going to take it as gospel.

However, whether or not it’s the date for the unveiling or the release itself, we have no idea. We’re betting on a release, but since Computex is a June affair, it might be that the manufacturer will announce it at the event and release it a few days later.

A third contender in the GPU race

Just when AMD has finally caught up to Nvidia in the graphics cards game, Intel is throwing its chips – or rather, graphics cards – in the pot, which could only mean good things for us.

These Intel Xe graphics cards, which will be based on the Gen 12 graphics architecture, will come in two variants – one for consumers and the other for the data center. They will also be comprised of everything from entry-level mobile graphics to gaming GPUs to general purpose GPUs for exascale supercomputers.

How Intel’s cards will measure up against their AMD and Nvidia rivals, we’ll have to wait and see. But, with Raja Koduri himself sharing weirdly specific, albeit enigmatic, information regarding the cards, we’re sure we’ll start seeing leaks churning through the rumor mill in the next few months leading up to June 2020.


TechRadar: Photography & video capture news

Posted in Photography | Tagged , , , , , , , , | Leave a comment

Refurb. Nikon D750 DSLR Camera – Only $1,049.95 Shipped (Compare at $1,496.95 New)

Huge savings: Adorama has the Refurbished Nikon D750 DSLR Camera for $ 1,049.95 with free expedited shipping. Compare at $ 1,496.95 new after $ 200.00 instant rebate.
 
Product Highlights
 

  • 24.3MP FX-format sensor and EXPEED 4
  • FX-format
  • 3.2-inch 1,229 dot tilting Vari-angle LCD display
  • Built-In Wi-Fi
  • 6.5 fps continuous shooting
  • Same AF and metering technology as D4S and D810

Canon, Nikon, and Sony News, Deals and What’s New at The-Digital-Picture.com

Posted in Photo Equipment | Tagged , , , , , , , , , | Leave a comment

Window Portrait: Photography Activity

Don’t miss it! Only 2 days left for The 5 Day Photography Deal

Need some inspiration for indoor photos? Try this window light portrait technique.

tips for taking portraits in window light

Photo by Send me adrift.; ISO 100, f/1.8, 1/40-second exposure.

This is a basic indoor portrait with soft window light from one side. You’ll need:

  1. A window that does not face the sun (or it is overcast outside)
  2. Daylight
  3. A willing model

Camera Setup

  • Mode: Aperture Priority (Often shown as Av on the mode wheel)
  • ISO: 100-400, as low as possible
  • White Balance: Custom
  • Aperture: As low as your lens will go. Lower f-numbers mean a larger opening which creates nice fuzzy backgrounds.

Shutter Speed

Watch out for the shutter speed. With a low-f-stop, you should not have low shutter speeds (below 1/60 second), but your ambient light and ISO setting will determine that. You may need to stabilize your camera if the shutter speed is lower than 1/60 second.

White Balance Setup

Put the white paper in front of the subject. Take one image of the paper, and make sure it is more white than grey than in the playback. Then go to your menu, and choose Custom White Balance, and select that image to use as a reference. What you are doing is telling the camera to use the paper (which is grey/white) as the source of the definition of “white”. It will then translate all of the other colors to show them correctly in the images taken. This is always preferable to a canned white balance setting, or the brainless “Auto” setting.

The Pose

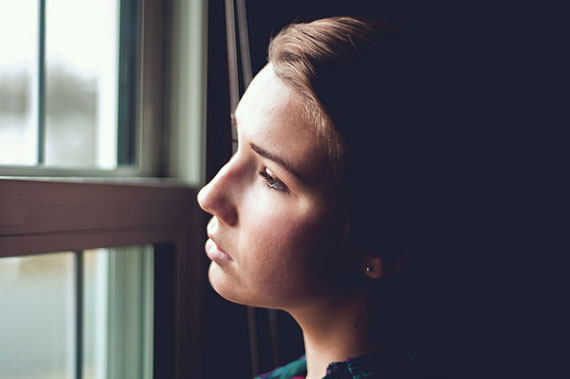
Position your subject back from the centerline of the window, so a little light falls on the “dark” side of their face. Have them turn their head to look slightly out of the window.

window light portrait method

Photo by Oleg Afonin; ISO 640, f/3.5, 1/200-second exposure.

Framing the Image

If you have a zoom lens, you can either be close and “zoomed out” or farther away and “zoomed in”. With people portraits, it’s usually better to be back and zoom in, as it reduces the size of the nose and other features in the middle of the face. Turn the camera to portrait (tall) orientation, half-press the shutter, and look at the read-out. You should get a focus blip where the camera thinks the focus point should be. Move the center point to the closest eye to the camera, and half-press again. Once you get a focus lock, move the camera to recompose the image. You’re doing this to cause the tightest focus point to be on the eye closest to the camera. If your camera has live view, ignore it and use the viewfinder. Using the live view encourages poor camera holding technique.

Take the Image

Play back and look for blown-out highlights in the subject’s face. Some cameras have the ability to show blown-out highlights as blinking white/black. If the background (out the window) has some, don’t worry, but you don’t want the face blown out. If you do have white highlights, use the Exposure Compensation to reduce by ½ stop to 1 full stop and re-shoot.

Analyzing and Improving

Look at the image. Is it exposed well? The window side of the face should be nicely lit, and as it is facing slightly away from the camera, is called the “short side”. This is an example of short lighting, where the short side gets the light and the broad side (facing the camera) gets the shadow. If the shadow side is too dark, get a bit of reflective material, be it aluminum foil or white cardboard, and hold it just off of the camera on the dark side.

It will reflect a bit of light from the window back to the shadow side and will reduce the contrast or shadow level. Experiment with the subject looking out the window (I call that the “dreamy shot”), and looking at the lens (but still not straight on).

Advanced Tricks

Pull this image into your editor and try converting to black and white using the Channel Mixer tool. Choose 70% red, 15% blue and 15% green, and you’ll see a very nice BW image with the skin tones nicely highlighted!

About the Author:
John Huegel is a photographer in the Erie, Pennsylvania area who specializes in Seniors, Dance Studio, Families and other groups. He operates a blog for professional photographers at http://newphotopro.blogspot.com. He is active in many charitable and volunteer activities in the Erie area.

For Further Training, Deal Ending Soon:

The 5 Day Photography Deal includes over $ 2,800 worth of the best photography products online from dozens of world-class photographers. Tutorials eBooks, photo editing presets, software and much more. At 96% off for only a few more days.

photo bundle

The 5 Day Photography Deal (See What’s Inside)

Leading photography educators & brands have been selected to contribute products to the bundle. It’s one of the best photography deals of the year so you may want to check it out.

Deal found here: The 5 Day Photography Deal

Go to full article: Window Portrait: Photography Activity

What are your thoughts on this article? Join the discussion on Facebook

PictureCorrect subscribers can also learn more today with our #1 bestseller: The Photography Tutorial eBook

The post Window Portrait: Photography Activity appeared first on PictureCorrect.

PictureCorrect

Posted in Photo Techniques | Tagged , , , | Leave a comment

Just Dew It – Fun with Macro Dewdrop Photography

The post Just Dew It – Fun with Macro Dewdrop Photography appeared first on Digital Photography School. It was authored by Rick Ohnsman.

Some things are practically guaranteed to make great photo subjects – dewdrops in the grass sparkling like diamonds in the morning sun, flowers and foliage wet with the rain, a closeup of dewdrops suspended in spiderweb-like pearls on a string or the crystal-ball look of a drop with a refracted image inside.  You can seek out such scenes in nature, or you can create your own miniature macro world.  However you do it, dewdrop photography will test your skills plus give you the reward of pleasing images, not everyone can make.  So let’s take a look at what, where, and how to “dew it.”

Image: When the morning light hits the dew-covered lawn it can be like searching for diamonds in the...

When the morning light hits the dew-covered lawn it can be like searching for diamonds in the grass.

Going natural

I’ve spent more than a few mornings lying in the grass with a macro lens mounted on my camera searching for the perfect dewdrop. I’ve also been out after the rain, looking for images where the drops have added a clean, fresh look with increased saturation to a subject. While often the subjects are found in nature, drops beaded on the surface of a freshly waxed car and other human-made objects can make for some great shots too.

Image: Many leaves will naturally bead water like the raindrops on this daylily. Raindrop photograph...

Many leaves will naturally bead water like the raindrops on this daylily. Raindrop photography is the “larger cousin” of dewdrop photography with no macro lens needed .

Image: A little spritz with a sprayer makes this rose look fresh and adds interest.

A little spritz with a sprayer makes this rose look fresh and adds interest.

Image: The fine hairs on a lupine leaf naturally beaded the water sprayed with a garden hose. 1/160...

The fine hairs on a lupine leaf naturally beaded the water sprayed with a garden hose. 1/160 sec. f/3.5 ISO100 with Tamron 90mm macro.

Image: Just add water to take a nice photo to the next level. Raindrops on the hood of this freshly-...

Just add water to take a nice photo to the next level. Raindrops on the hood of this freshly-waxed Jaguar add some extra pizzaz.

Hunting for such subjects is fun.  Like much of photography, it’s a matter of getting out with your camera when the conditions are right, often early in the morning in the case of dew or right after a rain shower.  Sometimes you’ll find some great subjects where the drops, the light, and the subject all come together.  I’ve not yet made the classic dew-drop-festooned-spider-web shot, but I’m still looking.  Luck plays a certain part in getting such shots. The fun is in the search. But sometimes when you want to leave it less to chance, that could be the time to…

Fake it to make it

You realize in those great movie rain scenes it wasn’t really raining when filming took place, right? So is it cheating when we as artistic photographers “enhance” our shots with the addition of raindrops or dewdrops? I think not. I guarantee the photographer created the vast majority of great dewdrop photos you’ve seen. Take two otherwise identical flower photos; the only difference being one is covered with dewdrops. The wet one will win the prize almost every time.

Drops sparkle, shimmer, refract light in interesting ways, and can take an image from “meh” to “wow!”  So if you haven’t already done so, consider adding a little spray bottle to your camera kit with some “magic juice” inside.

“Magic Juice?”

You can often use plain water to enhance your shot. If you’re simulating raindrops that might work okay. Spraying the foliage with the garden hose often works too. But when you want smaller, more rounded beads that hang where you place them and stay for a longer time without moving or evaporating, get some glycerine.

Image: Here’s the special ingredient for making photographer’s “Magic Juice....

Here’s the special ingredient for making photographer’s “Magic Juice.”

Often found in the baking section of the grocery store, glycerin is very transparent, much thicker than water, and just plain works better for photography. Use it straight from the bottle and apply where you like with an eyedropper, or mix one-part glycerine to two parts water for use in a spray bottle.

You can enhance the look of flowers and foliage, simulate condensation on glassware or other objects, give subjects a wet-look, enhance your food photography or even simulate sweat on human subjects if you need that look. Great stuff!

Image: Using the Live View mode of your camera can really help in getting critical focus.

Using the Live View mode of your camera can really help in getting critical focus.

Equipment needs

For more distant shots of things like raindrops, you might get by with standard, close-focusing lenses and also be able to work hand-held.  But dewdrops are tiny. When it’s time to get close, closer, and ultra-close, you’ll be entering the world of macro photography.  You will definitely need a tripod and one of several ways to get up close to your tiny subject:

Image: Here all three Kenko extension tubes (Canon, Nikon, Sony), plus a Canon 25mm tube, are all co...

Here all three Kenko extension tubes (Canon, Nikon, Sony), plus a Canon 25mm tube, are all combined with a Canon “nifty fifty” 50mm f/1.8 lens.  This gives 93mm of extension.  You can combine tubes in any sequence or combination depending on how close you need to get to your subject and how much magnification you’re seeking.

Standard Macro Lenses

Many lenses may state they have macro capability, but to truly be a macro lens, they should be able to create a 1:1 image. That means the image rendered on the camera sensor is the same size as the physical object or bigger. Full-frame cameras are called that because their sensor size is roughly equivalent to a full-frame of 35mm film, (24mm X 36mm), so if the lens you’re using can fill the frame with an object that’s about 35mm wide, it’s a true macro.

Here’s a quick test you can try: a U.S. quarter is 24.26mm in diameter. So, if you can focus on and fill the frame top to bottom with an uncropped shot of a quarter, you have a macro lens. On a crop sensor camera where the sensor is 14.9×22.2mm (Canon), a 1:1 shot of a quarter would more than fill the frame.

Image: Catching the light source in the drops with a small aperture produced a star effect. 3 tubes...

Catching the light source in the drops with a small aperture produced a star effect. 3 tubes plus Tamron 90mm macro. 1.6 sec. f/16, ISO 800

Extension Tubes/Bellows

Increasing the distance between your lens and camera sensor will have the effect of allowing you to focus closer than with the lens alone and thus appear to magnify the image.  Stacking multiple tubes or making the bellows longer will get you in even closer.  You can also get into macro territory with something simple like a 50mm prime lens plus an extension tube set.  Much less money than a dedicated macro lens!

Image: You can just see the end of the reversed Vivitar 28-105 zoom in this shot. Note how close I...

You can just see the end of the reversed Vivitar 28-105 zoom in this shot. Note how close I’m able to get the lens to my subject.

Image: Here’s what the reversed lens zoomed out to 28mm produced. Thinking backward helps here...

Here’s what the reversed lens zoomed out to 28mm produced. Thinking backward helps here – Wider zoom settings allow closer focusing than more zoomed settings.

Reversed lenses

Mount a lens backward on your camera and you will be able to get in much, much closer than you would otherwise.  I did a whole article on this technique which allows you to use even inexpensive old film camera lenses for great macro effects.

Image: A focusing rail like this simple Neewer unit can be especially helpful when working to get go...

A focusing rail like this simple Neewer unit can be especially helpful when working to get good focus with sliver-thin depth of field. It’s also excellent for making focus-stacked images where you take a shot, adjust focus slightly, make another shot, and repeat getting multiple focus points on the subject which are later combined to get more depth of field than is possible with a single shot.

Focusing rail

Working with tiny subjects and macro lens techniques, you will quickly find your depth of field is sliver-thin, sometimes only a few millimeters. Often rather than trying to focus as usual, (and forget about using auto-focus when making shots like this), physically moving the camera forward or back is the way to focus.

A focusing rail is a finely-geared device which, with the use of knobs, allows you to move the camera in and out in tiny increments. Like most camera gear, you can spend a lot on the sophisticated rails, and there are even computer-controlled versions for doing macros that focus-stack.

If you’re just entering the world of macro however, very serviceable versions can be had for under $ 50.00 US.

Image: With a depth of field only a few millimeters, sometimes focus stacking will be required to ge...

With a depth of field only a few millimeters, sometimes focus stacking will be required to get what you want in focus. This shot is a 5-image stack.

Lighting

With your lens so close to your subject, you will often be in your own light, and shading your subject. There are many ways to light macro subjects and no single “right” way. It’s simply a matter of what works.

Do you know that things like extension tubes and bellows reduce the light reaching the sensor? Most often, you will be stopping down your lens, seeking more depth of field. Adding more light or increasing the exposure time will often be required. One advantage of the latter is that a several second exposure can sometimes allow you to “light-paint” your subject.

I did many of the really close-up images in this article that way. I light-painted during the exposure with a simple LED flashlight.

macro-dewdrop-photography

Note the difference aperture makes. The shot at left is at f/22 while the one on the right is at f/5.6. The background is affected more that the refracted image in the drops.

In practice – a look at some samples

The following images show a tabletop session with glycerin “dewdrops” hanging from a strand of sewing thread. I used a combination of a macro lens (a Tamron AF 90mm f/2.8 Di mounted on a Canon 6D camera), as well as a combination of extension tubes and a reversed old Vivitar 28-105mm zoom from my old Pentax ME Super film camera.

Some of the images used a combination of those devices stacked together in a quest to see just how close I could get. 

macro-dewdrop-photography

This is about as close as the Tamron 90mm macro alone could focus. The drops are tiny, so this probably is the 1:1 ratio the lens is capable of.

Image: Using this combination allowed the three-drop shot below.

Using this combination allowed the three-drop shot below.

Image: 3 extension tubes plus the Tamron Macro. 1.6 sec. f/16 ISO 800

3 extension tubes plus the Tamron Macro. 1.6 sec. f/16 ISO 800

Image: Combining the Tamron 90mm macro with all three extension tubes (for a total of 68mm of extens...

Combining the Tamron 90mm macro with all three extension tubes (for a total of 68mm of extension).

macro-dewdrop-photography

The reversed Vivitar film lens plus a 36mm extension tube focused close enough to fill the frame with two drops. The long exposure also allowed time to light-paint the sunflower. 15 seconds, f/22, ISO 100.

Bear in mind that the drops in the shot are really tiny, around 2-3mm, so filling the frame with a single drop was way more than a 1:1 magnification ratio.  If calculating the magnification factor is your bag, there are places with calculation tools to do that.  For example, for one image I used all my extension tubes, (a Kenko set with 12, 20, and 36mm tubes plus a Canon 25mm tube = total 93mm extension) and a Canon 50mm f/1.8 “nifty 50” prime.  Per the calculator, that produced about a 2:1 magnification ratio, filling the frame with about 3 of the drops.  I achieved the closest shot (below), with the reversed Vivitar at 28mm with the three Kenko tubes attached.  I figure it’s over 3:1, uncropped and almost filling the frame with a single drop.

macro-dewdrop-photography

To get this close with no cropping took all three (12mm, 20mm, and 36mm) extension tubes combined with the reversed Vivitar film lens at 28mm. The drop is only about 2mm wide.  This is also a 2-image focus stack, one for the drop and the other for the flower inside.

Take note of how in the images the drop acts like a tiny lens, refracting and inverting the image inside it.  If you want the image inside to be right-side-up, be sure to invert the real physical object before you snap the shot.  Also, with such limited depth of field, even a small aperture may not give you the range of focus you need.  Making shots like this will also give you a reason to learn focus-stacking techniques.

The captions on the shots reveal what I used to achieve each dewdrop photography image.  So, see what you can learn here, get your camera, maybe buy some entry-level macro gear and then… just go “dew” it!

Share the images you make with us in the comments section!


macro-dewdrop-photography

The post Just Dew It – Fun with Macro Dewdrop Photography appeared first on Digital Photography School. It was authored by Rick Ohnsman.


Digital Photography School

Posted in Digital Photography | Tagged , , , | Leave a comment

The Pixel 4 may introduce ‘raise to talk’ for Google Assistant

Right now you can get the Google Assistant to start listening to you with a button push, or by saying "hey Google", or by squeezing the sides of your phone – but the Pixel 4 series is being tipped to introduce a new way of activating the app.

According to 9to5Google, a new 'raise to talk' option is in development, where you only need to lift up your phone and start talking to use Google Assistant.

The voice interaction will need to happen right after you lift the phone, apparently, and the necessary voice match processing is carried out on the device itself – so other people won't be able to get at the feature just by picking your phone up.

However, it's not certain that 'raise to talk' for Google Assistant will be ready in time for the Pixel 4 launch on October 15 – it might be that the functionality gets pushed out as an update at a later date.

Counting down the days

We know that an improved Google Assistant is on the way, because Google showed off some of its features – including a more intuitive way of continuing a conversation with the app – at the Google IO event back in May.

The upcoming update will also enable the Google Assistant to answer some queries and deal with some commands even while offline, according to reports. It seems that Google sees software as one way to really make its Pixel phone series stand out.

We've heard plenty of rumors about the hardware that's on the way too, thanks to a seemingly endless series of leaks around the Pixel 4 phones, including hands-on videos with early versions of the handsets.

The Pixel 4 and the Pixel 4 XL will at last get their official unveiling on October 15, and we think Google might have a few other hardware surprises in store too. Whatever is on the way, we'll bring you all the news as it happens.


TechRadar: Photography & video capture news

Posted in Photography | Tagged , , , , , | Leave a comment

New Zealand vs Namibia live stream: how to watch today’s Rugby World Cup 2019 match from anywhere

All ready looking imperious after soundly beating South Africa and Canada in their opening 2019 Rugby World Cup matches, New Zealand are set to flex their might today against the tournament's rank outsiders. You can watch all the action as it happens no matter where you are in the world with our New Zealand vs Namibia live stream guide below.

Can Namibia cast aside their whipping boys tag and avert a cricket score scenario, or will the All Blacks be their ruthless selves and run up a World Cup record score?

Looking every inch the defending champs in their 63-0 win over Canada in their last outing, New Zealand will be looking to make two games on the bounce without conceding in Tokyo today.

Today's match provides another opportunity for fringe players to make a claim for a place in the All Blacks starting line up. Its also an opportunity to ease back in lock Brodie Retallick from injury, who has now recovered from the disclosed shoulder he sustained against South Africa back in July.

Namibia have crashed to defeat against Italy and South Africa in the first two World Cup matches, scoring just 25 points across both games. With one eye on next weekend's clash with Italy, coach Steve Hansen has rotated his squad and will be sending his side out today with the key goal of keeping things respectable.

You can watch all the action from pretty much anywhere on Earth by following our Rugby World Cup New Zealand vs Namibia live stream guide below.

How to watch the 2019 Rugby World Cup from outside your country

If you're abroad for any of the Rugby World Cup and don't want to miss out on catching the coverage from your home country, you'll inevitably find it geo-blocked when you try to stream online. But don't sweat. With the option of a VPN, you can tune into those fixtures no matter where you are in the world without resorting to some dodgy feed on Reddit. And best of all, it's really easy to do (or read on for details on how to stream coverage from the UK, Australia, New Zealand, Canada and the USA).

How to watch the All Blacks live in New Zealand

How to stream New Zealand vs Namibia live in the UK 

How to watch the New Zealand vs Namibia in Australia

How to live stream New Zealand vs Namibia in the US

  • Hulu with Live TV $ 40 per month – Hulu with Live TV includes CBS, Fox, NBC and ESPN.
  • FuboTV $ 35 for the first month – FuboTV gives you the first month at a discounted rate but after that the price increases to $ 45 a month. The service includes CBS, Fox, NBC and the NFL Network but does not come with ESPN.
  • DirecTV Now $ 50 per month – DirecTV Now includes CBS, Fox, NBC, ESPN and for $ 5 extra you can add the NFL Network.
  • YouTubeTV $ 40 per month – YouTubeTV gives you access to CBS, Fox, NBC and ESPN.

Divider

Live stream Rugby World Cup 2019 match in Canada


TechRadar: Cameras and camcorder reviews

Posted in Camera Reviews | Tagged , , , , , , , , , , , | Leave a comment

B&H has another 10-Rated Used Canon EOS R Camera w/ RF 24-105mm Lens in Stock – Save $350

B&H has a Canon EOS R Mirrorless Digital Camera with 24-105mm Lens in 10-rated (like new) condition in stock for $ 2,549.95 ($ 2,899.00 new).
 
Order now if you want it – used EOS R cameras at B&H have been selling fast.

Canon, Nikon, and Sony News, Deals and What’s New at The-Digital-Picture.com

Posted in Photo Equipment | Tagged , , , , , , , , , | Leave a comment

Dubai to take centre stage with live demonstrations and use cases in 5G, AI and autonomous vehicles

All eyes will be on Dubai next week as the city gears up to demonstrate and showcase a wide range of use cases in 5G cellular technology, artificial intelligence and future mobility, never happened before on a global scale.

The 39th edition of Gitex Technology Week will open doors on Sunday at Dubai World Trade Centre (DWTC) as global and prominent names including China Mobile, du, Etisalat, Huawei, Ericsson, Nokia and STC in what will represent a dazzling glimpse into the wireless and interconnected future that will transform Middle East businesses.

UAE is the first Arab country and fourth globally to launch 5G services. 

According to Ookla Speedtest, UAE is ranked fourth globally in 5G speed after the US, Saudi Arabia and South Korea.

DWTC is holding a ‘5G Countdown’ conference to focus on transition to and life-changing potential, including names such as Osman Sultan, CEO of du; Fadi Pharaon, Senior Vice-President and Head of Market Area, Middle East and Africa, Ericsson, who will home in on meeting operator demands; and Dr Mohamed Madkour, vice-president for Global Wireless Networks Marketing and Solutions at Huawei, who will discuss how to create the future of manufacturing through 5G, IoT and AI.

Driving the digital future

Apart from showcasing the emerging technologies, the 1.4 million square foot venue will welcome over 4,800 exhibitors from over 140 countries, and host 290 hours of content over five days, while Gitex Future Stars will feature over 750 international startups and corporate accelerators and more than 1,500 investors and corporate buyers.

Dr Ahmed Bin Ali, Group Senior Vice-President for communications at Etisalat, said that the telecom operator is always keen to bring the latest technologies and solutions to the event. 

“We aim to drive the digital future and bring solutions for different sectors. We are bringing a lot of 5G solutions such as transportation, health care, aviation, real estate and retail for the first time to the event,” he said. 

According to Ericsson’s Middle East and Africa Mobility Report, 30 million 5G mobile subscriptions are expected in the region by 2024.

“Our focus at the event will be on 5G and AI. We will be demonstrating use cases and solutions that are possible with 5G. We have invested over $ 1.4b globally into 5G product development in 2017 and 2018. We will showcase what solutions and enablement are available for enterprises from an AI point of view,” Hani Sobih ELKukhun, Vice-President for Strategy at Huawei Middle East, said.

Wojciech Bajda, Vice-President for Middle East and Africa, and Head of Gulf Council Countries at Ericsson, said that 5G promises a lot of economic and social values. 

New entrants

Companies making their debuts this year include China Mobile, Ericsson, Honeywell, Nokia, Schneider Electric and Siemens, who will unpack developments around the world’s most transformative and emerging technologies.

Franco Atassi, Head of Smart Infrastructure at Siemens Middle East, said that the company will demonstrate how cities and industries can benefit from digital transformation. 

“We will be showcasing MindSphere, its platform for open and cloud-based IoT operating system for the Fourth Industrial Revolution,” he said.

For Expo 2020, MindSphere will be guarding the whole expo and connect all the devices into one platform. The entire commercial platform will be done by Siemens.

“We can abstract big data and turn that into small and smart data. So, people can visualise it, analyse it and make smarter decisions,” he said. 

Government entities field strong presence

Apart from enterprises, government entities are also fielding a strong presence at the event.  

The Telecommunications Regulatory Authority (TRA) of the UAE is participating as part of the UAE mGovernment, which hosts 18 federal government entities, displaying their major achievements in the field of modern technologies and harnessing them in facilitating the provision of government services, achieving customer happiness, and promoting the one government principle and excellent technology services.

Hamad Obaid Al Mansoori, TRA Director-General, said that TRA is keen to activate all channels of communication with its strategic partners and the public, to exchange ideas and views and develop services provided by TRA in line with the aspirations of the UAE society in all its segments. 

 “Our participation will be a vision of the future, through which we foresee the technologies that will impact our lives and lives of generations to come. This is in line with TRA’s role in monitoring the digital transformation at the federal government level, as well as its vision to achieve the UAE global leading position in the ICT sector,” he said.

The Government of Abu Dhabi is fielding 32 key government and academic entities to accelerate Abu Dhabi’s digital transformation while the Sharjah Department of e-Government is fielding 33 departments to support digital transformation and develop processes and systems across entities in the emirate.

More than 100 Saudi organisations, including government entities, private companies and startups, are also participating.

Startups battle for top spot

Gitex Future Stars will give startups the chance to pitch their ideas against one another across a packed agenda of competitions. The Gitex Future Stars Supernova Challenge will be spread across 11 categories, including the NXG category, awarding the latest innovation from a Gen Z startup.

The Supernova Champion will take home $ 100,000, with each sub-category featuring a $ 10,000 prize. There will also be innovation competitions from the Department of Tourism and Commerce Marketing in partnership with Accenture and Department of Health Abu Dhabi. 

After a pre-selection process in Paris, London, Milan and Moscow to find the most innovative tech ventures, Chalhoub Group’s The Greenhouse retail tech startup challenge will see startups compete to win the title of the best creative economy startup.

The Government of Abu Dhabi is making its mark at the event with the Emirate’s hottest innovation prospects, including Hub71, Abu Dhabi Global Market (ADGM), Start AD, Krypto Labs, Department of Health Abu Dhabi, all aiming to put Abu Dhabi on the map as the innovation hub of the future.

What to expect

  • Etisalat will showcase Renault EZ-Ultimo robo-vehicle, four-wheel Lazareth Flying Motorcycle, WheeM-i (Wheelchairs Mobility Interface) designed for wheelchair users, Lift Aircraft Hexa Passenger Drone, fully automated bread-making machine BreadBot, staff-less retail outlet Moby Mart, a self-checkout IoT solution for retail Vicki, social robot Furhat, ANYmal  quadrupedal robot, TeleRetail outdoor delivery robot, humanoid robots Selma and Owen.
  • Huawei will be showcasing its Atlas 9100, the world’s fastest AI training cluster based on Ascend 910 chipset, and its AI-driven autonomous driving network for enterprises and AI-enabled distributed storage architecture.
  • Ericsson will be showcasing 30 new 5G use cases, including interactive sports experiences using high-quality in-car video, virtual reality, augmented reality. connected cities, remotely operated vehicles, more efficient and automated manufacturing, immersive sports and connected healthcare as well as transformational TV and gaming experiences.
  • Visitors can experience the Virgin Hyperloop One pod.
  • Siemens will be showcasing its MindSphere, a platform for open and cloud-based IoT operating system for the Fourth Industrial Revolution.
  • Oracle will demonstrate its autonomous cloud operating system, AI and machine learning embedded applications, enterprise-grade digital assistant bot, and autonomous database machine.
  • Microsoft will display a variety of industry-first demonstrations around AI, IoT, cybersecurity and explore modern workplace through interactive experience zones. It will also host a zone of over 32 regional and international partners and ISVs at its Gitex Stand.
  • Veritas will showcase the competencies acquired through APTARE, which offers analytics solutions driven by artificial intelligence, for both on-premises and hybrid cloud environments.
  • Global AI expert Dr Ben Goertzel, Chairman and Chief Scientist of Singularity Studio, and CEO and Founder of SingularityNET Foundation, will reveal how AI will merge with blockchain to create deep value for businesses and society, increase human life expectancy and support medical research.
  • Insta 360, 360-degree camera specialist, will be launching its GO portable camera, which features auto-intelligent editing and digital video stabilization features.
  • Software AG to showcase IoT and AI-led Smart City Solutions. Visitors can ask “Alexa” and it will demonstrate how it works.
  • Jacky’s will join SoftBank Robotics to showcase the wider applications of Pepper in customer and visitor management. Jacky’s will also showcase its new Robot Content Management Systems (RCMS) to update Pepper.
  • The TRA of the UAE is set to launch 10 innovative projects to enhance the smart lifestyle in the UAE, support the transition to the future of AI and Smart City, and develop a mechanism for dealing with modern technologies to serve humanity, through providing advanced solutions for the daily needs.
  • Cisco will showcase industry-leading solutions using AI, Machine Learning, IoT sensory information and video analytics to bridge connections between businesses and communities.
  • Kingston Technology will be presenting its Supermicro server along with all the memory modules of the portfolio, such as 2933MHz modules, DC SSD product line and NVMe SSDs in servers, accompanied by live demos of their encrypted USBs.
  • Korean startup Little will showcase its “Smart Bottle” for the infant that warms and cleans the milk/equation and gives tilt and air admonitions through a smartphone app.
  • South Korean start-up EXoPERT will showcase a technology that isolates high-purity exosomes without damage from the blood and uses Raman scattering to analyze the isolated exosomes. Raman scattering can tell the structure of the molecule by changing the scattered light due to the vibration and rotation of the molecule to analyze cancer information that exists in exosomes. 
  • Chinese manufacturer Chuwi will bring its 8-inch MiniBook and thin and portable 2-in-1 tablet 12.3-inch UBook Pro.
  • Epson will showcase EB-L1755U laser installation projectors with ELPLX02 ultra-short throw lenses that are used to display the VR content, apart from SCARAT3-401S robot, Moverio BT-35E smart glasses, EH-LS500w home cinema projector.
  • Belkin, Linksys and Phyn will jointly showcase connected things, connected home, and smart utilities for the first time.


TechRadar: Photography & video capture news

Posted in Photography | Tagged , , , , , , , , | Leave a comment

How to Make Your Photos Awesome in Lightroom or Photoshop Camera RAW

The post How to Make Your Photos Awesome in Lightroom or Photoshop Camera RAW appeared first on Digital Photography School. It was authored by Caz Nowaczyk.

In this video tutorial, Nemanja Sekulic will show you how to make some dramatic editing changes to your RAW photos using Lightroom or Photoshop Camera RAW.

During the process, you will learn the following in Lightroom (which you can also translate to Photoshop Camera RAW):

  • How to use the Basic Panel including the Exposure Slider, Highlight Slider, Shadow Slider, Color Temperature Slider,
  • The shortcut for viewing before/after (\)
  • How to use the Radial Filter tool – how to make multiple radial filter selections, reposition, and make adjustments to the selection.
  • How to use the Adjustment Brush Tool – including changing your brush size, flow, and feather amounts.
  • How to use it to make selective adjustments in your image, including color, temperature, exposure, highlights, shadows, clarity, etc. to fine-tune your image.
  • How to use selective color with your Adjustment Brush.
  • How to make new Adjustment Brushes to fine-tune the details in the eyes.
  • How to use Hue and Saturation Panels as well as the Split Toning Panel.
  • How to add a vignette.
  • How to go back and readjust any of your Radial Filter, and Adjustment Brush settings.

You can apply these techniques across any image you choose, or you can download Nemanja’s image file here.

You may also find the following helpful:


The post How to Make Your Photos Awesome in Lightroom or Photoshop Camera RAW appeared first on Digital Photography School. It was authored by Caz Nowaczyk.


Digital Photography School

Posted in Digital Photography | Tagged , , , , | Leave a comment

The HP Elite Dragonfly could be its best business laptop yet

As the battle for laptop workplace domination rumbles on, HP is hoping its latest release will help it continue its success in the space.

The company recently revealed its all-new HP Elite Dragonfly model, part of the long-running Elitebook series, as the latest business-focused hardware. 

Featuring an all-new design, colour scheme and improved portability, HP sees the Dragonfly as a major step forward in its B2B offering, and TechRadar Pro got the chance to go hands-on at the recent Microsoft Future Decoded event in London.

Disruptive

"This is something very different for us,” Simon Barlow, HP business development manager, tells us. “With Dragonfly, what we wanted to do was have something a little bit disruptive and memorable.”

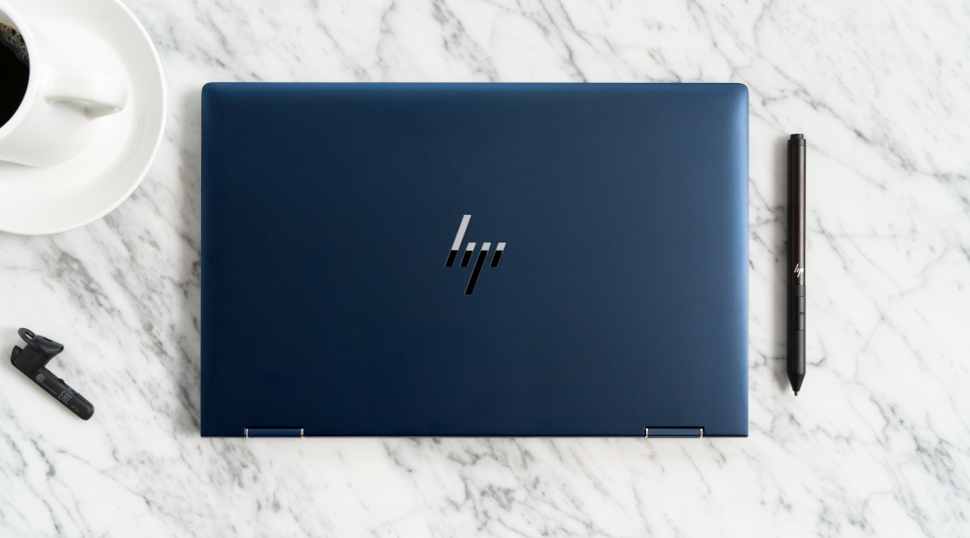
The most noticeable thing about the HP Dragonfly is its colour. HP wants its device to stand out from the crowd, and has created an all-new Dragonfly Blue colour scheme to do just that.

The company says that blue is the most trusted colour in the world, and the Dragonfly’s colour scheme will certainly make it stand out from the greys and blacks seen in most traditional business laptops.

The device is made from a single piece of magnesium alloy, making it incredibly light at just under 1kg for the lowest-spec model. Barlow adds that the device has been “tested to destruction”, fitting the requirements for the MIL-STD 810G military standard.

The screen has been re-engineered from previous generations, with a 13.3in display that has allowed HP to reduce the top bezel by 42 percent, and the side bezel by 14 percent. 

This results in an 87 percent screen to body ratio (up from 83 percent on the previous 1030) generation, helped by an inbuilt 3.5mm hybrid camera with integrated webcam blocker and  HP’s own Sure View technology for greater privacy.

It’s not all about technological progress, however, as HP says that the Dragonfly is its most sustainable laptop to date, right down to using water-based rather than lead-based paint.

The company notes that the device is the world's first notebook made with ocean bound plastic material, with up to 50 percent recycled plastic material used in the keycaps, and no metal components within the keyboard array, with rubber and plastic used instead. These keycaps also come alongside a redesigned trackpad and mouse that are quieter than previous generations.

Under the hood, there’s your choice of a quad-core 8th Gen Intel Core i5 or i7 processor, and either a two- or four-cell battery, the latter of which HP says can offer up to 24 hours of battery life. HP Fast Charge tech is also included, allowing the HP Elite Dragonfly to charge 50 percent of its battery in just 30 minutes.

When it comes to connectivity, the Dragonfly sports HDMI and two USB-C Thunderbolt ports, reflecting the trend of more businesses using PC docks in the office. HP has also included a USB-A port for those users whose office hardware may be a bit older, but the move will also allow the device to apply to more customers.

As for networking, the Dragonfly sports the option of gigabit-class 4G LTE wireless broadband connectivity, allowing workers to stay online on the go, with Wi-Fi 6 ensuring they stay connected whilst in the office.

The HP Dragonfly will go on sale from October 25, with prices starting at $ 1,549 / £1,099.


TechRadar: Cameras and camcorder reviews

Posted in Camera Reviews | Tagged , , , , , | Leave a comment