10 Photographic Exercises to Kickstart your Creativity

The post 10 Photographic Exercises to Kickstart your Creativity appeared first on Digital Photography School. It was authored by Charlie Moss.

We’ve all had those days, weeks, or months where we’ve felt photographically stuck in a rut. There could be many reasons for feeling like you just can’t shoot anything worthwhile and it often looks like there’s no way out. But simple creative photographic exercises might just be the thing that gets you back out shooting.

With that in mind, here are some of my favorite creative photographic exercises for those moments when I’m just not feeling good about my photography work. They’re adaptable for most subjects too, so shoot what suits you!

Of course, if you wanted to challenge yourself with a new kind of photography or different subjects, they might come in handy for that too.

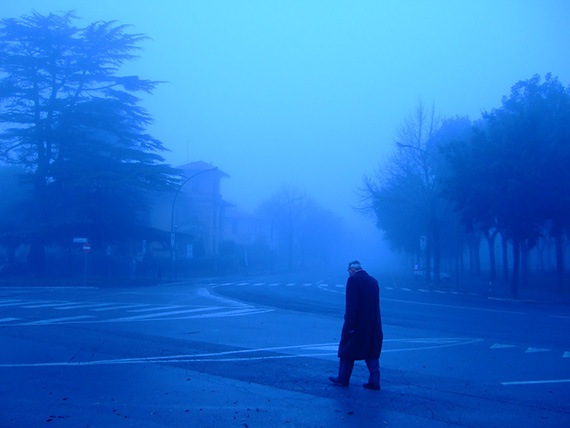
Set your camera to black and white

10 Photographic Exercises to Kickstart your Creativity

Most digital cameras will have the option to shoot in black and white. Shooting black and white, and viewing your shots that way on the back of the camera, will force you to see images in a different way.

When you shoot in black and white you see everything without the distractions of color. That means you can focus on composition, areas of light and dark, and the contrasts between different areas.

It’s a whole new way of seeing the world around you!

Shoot with a single focal length

I’ve always been a huge advocate for photographers using prime lenses wherever possible. Not only are they generally better quality than a similarly priced zoom lens, but they often have a faster aperture too! Having a couple of primes can really round out your photographic toolbox.

photographic-exercises-to-kickstart-your-creativity

Shooting with a single focal length means that you have to work a little bit harder to find a great composition. That, in turn, will make you see things a bit differently. And if you need to zoom, then you’ll have to use your feet – no shortcuts here I’m afraid!

If you don’t have a prime lens, then pick a focal length on your zoom and stick to it. Check it after every few shots to make sure it hasn’t moved.

And now do the same, but with aperture

Picking an aperture, and experimenting with the kind of images it will produce, can be a good way to start thinking about more advanced composition. Using depth of field as a compositional tool can be a powerful way of taking your photos to the next level.

If you pick a very wide aperture to work with, you’ll want to think about how you can make the best use of features like negative space in your images. You’ll want to look for interesting subjects that look good isolated away from their background.

However, if you choose a very narrow aperture, you won’t be able to isolate a subject as easily. You’ll be looking for whole compositions that work from edge to edge without anything being blurred out. You’ll need to look for scenes that don’t have distractions in the background – such as bright blobs of color or unsightly objects.

And shutter speed!

Limiting your shutter speed can be a good way of experimenting with different kinds of movement-related effects. Long or short, both offer different challenges.

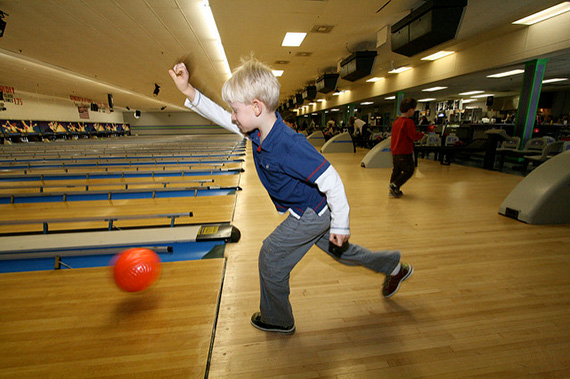
If you pick a short shutter speed, try to find movement that you can capture. A skateboarder in mid-air perhaps, or a dog leaping to catch a ball. Freezing motion is tricky and requires practice. It also needs some planning; you may have to pre-focus and predict your subject’s movement.

photographic-exercises-to-kickstart-your-creativity

On the other hand, a long shutter speed can lead to experiments that show movement. You could practice panning, light trail photography, or intentional camera movement.

Limit the number of shots you take

Think back to the days of film (or imagine it if you’re not old enough to remember). Film was costly, and so was developing! If you were shooting medium format, you had just twelve images per roll of film, and one of them really had to be a keeper.

I’m not saying you have to limit yourself to just twelve photos, but try a few hours of shooting where you really think about each shot you’re taking. Ask yourself why you’re taking it and make sure it’s the best it can be.

Before you press the shutter button, check all the edges of the frame, be sure of your composition, and make sure it’s the right moment to make your subject look their best. You might be surprised at how much your photography improves when you take this much care over every shot!

Now shoot a thousand images in a day

Sometimes you just need to recognize that practice makes perfect. And for some subjects, that means shooting hundreds or even thousands of images.

Take a day out to practice your technical skills, and make sure you take enough images that the technique becomes second nature. The better you know your way around your camera, the easier it will be to nail the shot next time inspiration does strike.

Shoot from the hip

Street photography is usually about being unseen and blending into the background. If your subject has noticed you taking pictures, it’s often too late to get the shot you initially saw.

Many street photographers like to ‘shoot from the hip’ to remain unnoticed. You’ll want to use a narrow aperture to get a large depth of field and prefocus your camera to where you think your subjects will be.

10 Photographic Exercises to Kickstart your Creativity

Then…go for it! Carry your camera in your hand (don’t forget a wrist strap), and whenever you see anything you like the look of, just point and shoot. You’re going to have a pretty low success rate, at least at first, but over time you’ll learn to use your camera to capture what your eyes see without looking through the viewfinder.

Limit yourself to available light

No flashes, no studio lights, no reflectors, no bounce cards. Just get out there and watch how the natural light falls on your subject. Move yourself or your subject around to find the most pleasing light and then capture that.

For an additional exercise, try to capture several different moods simply by moving your subject into different kinds of light. You should start to discover that our brain interprets different kinds of light in different ways. You can use this knowledge to start conveying more feelings and emotion in the future, which will improve your storytelling ability.

Shoot ten photos without moving your feet

Finding a great shot is often harder than actually taking it! To challenge yourself to see shots that you’d otherwise miss, plant your feet in one place and hunt out ten shots without moving.

photographic-exercises-to-kickstart-your-creativity

Make it easier for yourself by using a zoom lens. But if you want to make it even more of a challenge, start limiting your focal length, aperture, or shutter speed. The more rules you give yourself the harder you’ll have to work creatively.

You’ll soon start to consider subjects and compositions that you’ve never thought of before as you try hard to find shots number nine and ten!

Reprocess your old images

If all that fails and you can’t face going out and about with your camera then take a look back through your archives. You’ve almost certainly improved in skill since you processed your old shots, and you may have changed your taste too.

Revising your old work and reprocessing it gives you a chance to practice your post-processing skills. Pick something you want to learn and read some articles or watch a video on it. Then practice what you just learned on images from your archive.

You might end up discovering some old images that you missed at the time. Whenever I dive back into my archive, I usually end up finding something new for my portfolio!

10 Photographic Exercises to Kickstart your Creativity

Hopefully, these creative photographic exercises will give you a starting point when you’re not sure what to shoot. Just remember, creative ruts aren’t forever! You have to come out the other side sometime!

Do you have any other photographic exercises you’d like to share? Please do so in the comments!


photographic-exercises-to-kickstart-your-creativity

The post 10 Photographic Exercises to Kickstart your Creativity appeared first on Digital Photography School. It was authored by Charlie Moss.


Digital Photography School

Posted in Digital Photography | Tagged , , , | Leave a comment

5 things iPadOS will change on your iPad

iPadOS lands today (September 24) and it will change and improve a number of things on your Apple slate, whether you're rocking an iPad Pro 11 (2018), an iPad mini (2019), or any number of other Apple tablets.

It's a big update for Apple's tablet range, as the software is no longer just a scaled up version of iOS – hence the new name.

There are a lot of alterations and additions, both big and small, but in this article we've focused on five of the most significant things that are going to change. These are the things that you'll either notice straightaway or really should know about.

1. A whole new home screen

With iPadOS you can choose to have your app icons clumped closer together, meaning you can fit more of them on one screen so there's less swiping needed to find them.

Better yet, Apple lets you make full use of the extra space found on an iPad by optionally having Today View permanently displayed on the home screen, so you can see and access calendar events, recently played music, news stories, and more without any swiping at all.

It essentially means you have widgets on the main home screen, making it a bit closer to the functionality offered by Android.

2. Support for external storage

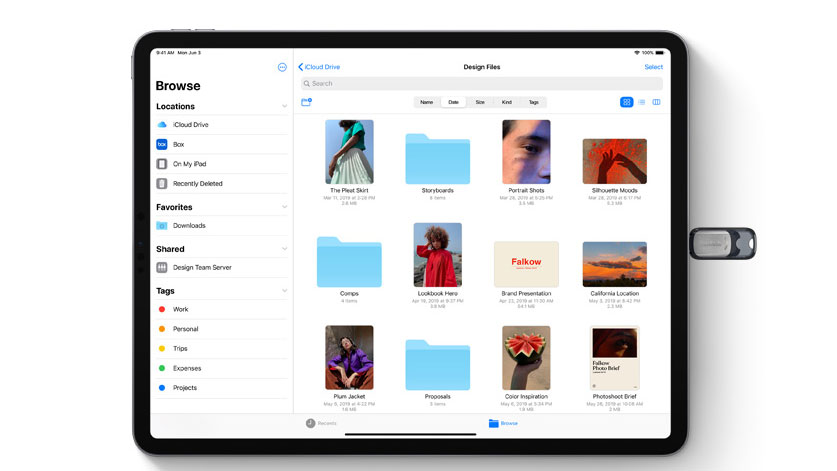
Many iPads come with a lot of storage – you can get the iPad Pro 12.9 (2018) with up to 1TB for example, but if your slate doesn’t have that much, or you need even more, then you’ll be pleased to hear that external storage is now supported via a USB drive or SD card.

You will of course need a card reader for the latter, so neither of these are really permanent storage solutions, but this should still be an appreciated upgrade, especially as the Files app can read the connected drive, so you can easily move files between the internal and external storage.

3. Access to a whole world of games in Apple Arcade

This isn’t iPad-specific – it’s already available for iPhone (thanks to the iOS 13 update) and will be coming to Mac and Apple TV as well, but Apple Arcade is landing on iPad as part of iPadOS, and it’s an exciting new service for anyone even mildly interested in mobile gaming.

There are 100 titles either already available or coming very soon, all new, and all available in full as part of a $ 4.99/£4.99/AU$ 7.99 monthly subscription. Expect more games to be added over time, and none of them will be available on Android or as paid or free games on iOS (outside Apple Arcade).

4. New gesture controls

It’s not just the look and features that are changing with iPadOS – the ways you interact with your slate are too, thanks to new gesture controls.

These include a three-finger swipe to undo, a three-finger pinch to cut and a three-finger splay to paste. Shortcuts which should make text entry and editing in particular a little quicker and easier.

In supported apps you’ll also be able to shrink the keyboard with a two-finger pinch, and there are also some new controls for multi-tasking.

5. Improved performance

You don’t need a new iPad to feel like you’ve got a new iPad, as iPadOS should do a decent job of that on its own. Not just because of the new look and features, but also because it should improve the performance of your existing slate.

Apple claims apps should launch up to twice as fast (as well as being smaller to download), and Face ID should be up to 30% faster. In practice this should make using your slate feel just that little bit slicker, and make the lure of newer hardware easier to resist – at least until the new iPad Pro 2019 arrives.


TechRadar: Cameras and camcorder reviews

Posted in Camera Reviews | Tagged , , , | Leave a comment

DIY Photography Backdrops for Still Life and Product Photography

The post DIY Photography Backdrops for Still Life and Product Photography appeared first on Digital Photography School. It was authored by Darina Kopcok.

Your choice of backdrop can have a big impact on the final look of your photos.

You may have purchased expensive professional photography backdrops because you know this. 

But whether you’re a hobbyist or pro, you probably already spend enough on your photography that you don’t want to shell out the big bucks for your props. Luckily, with a bit of creativity, you don’t have to.

Here are some of the best ways to create beautiful DIY photography backdrops for still life and product photography.

diy-photography-backdrops

Painted canvas backdrop

For a magazine-quality look, my top pick for a still life photography backdrop is painted canvas.

Professional canvas backdrops are expensive, but you can make your own for a fraction of the retail price.

Go to your local hardware store and buy a canvas painter’s drop cloth.  These are pieces of canvas you use to protect the floor when painting interiors.

Canvas drop cloths are usually large, so you can cut them into four pieces to get four backgrounds out of one stretch of fabric. Make that eight if you go double-sided. 

While you’re at the hardware store, purchase two or three paint samples in a similar tone for each backdrop. Note that the canvas soaks up a lot of the paint, so you may need to purchase primer as well, or use more paint than you thought. 

Layer the paint onto the canvas with a small, good-quality roller, moving the roller in different directions.

To add more texture, scrunch up a rag or use a large sea sponge and dip it into the paints. Randomly press the rag onto the canvas.

Your backdrops will have a natural texture that enhances but doesn’t compete with your subject. The canvas also has a great subtle texture, too. 

diy-photography-backdrops

Ceramic flooring tile

Another beautiful yet simple background is porcelain or ceramic tiles. You can get them from your local home improvement store. These are inexpensive and look great. They’re easily wipeable, which is a bonus if you’re dealing with food or liquid products.

Just make sure that any tiles you pick aren’t shiny, so you don’t get glare.  Good colors to choose are grey, black, white, or cool brown tones like taupe. These neutrals will enhance and complement a wide variety of products or still life subjects. They are better for smaller subjects because they tend to not be very large.

diy-photography-backdrops

Painted wooden backdrops

These days, there are a lot of suppliers selling painted custom backdrops for still life photography, but painting some yourself can be a lot less costly, and you don’t need any special skills. 

To make your own, buy thin plywood sheets at the home improvement store. Pieces that are at least 2×3 feet should accommodate most of your set-ups. The bigger stores like Home Depot can also cut larger pieces into smaller ones for you, so you can get more mileage out them.

You can purchase paint samples from the hardware store as well, or use craft paints. Just make sure that any paints or varnishes you use are matte. Even some of the satin types can cause unwanted shine in your images. 

Choose three or four colors in a similar color family and pour them together in the middle of the board. Take a large sea sponge and dab the paint all over the board to create a blended and subtle, mottled effect.

Finish with a thin coat of matte, water-resistant sealer. 

DIY Photography Backdrops for Still Life and Product Photography

Linens

Having a variety of linens on hand will make your life a lot easier as a still life photographer

Depending on what you shoot, these can run the gamut from natural fabric like linen to lightly patterned damask tablecloths.

You can use the fabric as the entire backdrop, as shown in the image below, or just to cover a portion of another backdrop.

When covering your entire surface with a piece of linen or tablecloth, place another layer of fabric underneath. This will plump it up and make it look more attractive.

Again, when choosing your colors, stick to neutrals. Shades of blue also look good, especially in dark and moody images. You can choose a pastel or brighter color depending on what you’re shooting and your desired result.

The key is that you don’t want your photography backgrounds competing with and drawing the eye away from your main subjects.

DIY Photography Backdrops for Still Life and Product Photography

Vintage Tray

Don’t get rid of any old or vintage trays you may have kicking around. They also make great photography backgrounds for still life. 

Depending on the metal, they will often have a lovely patina that will add something special to your shots. They look great close up or at a distance, or can be used as an element in telling your story.

You can often find vintage trays for an affordable price at secondhand or antique stores.

As with any backdrop, it should not be reflective. 

Note that in the images below, the tray doesn’t look overly shiny, even though I backlit my subjects. It has a nice and subtle texture. 

diy-photography-backdrops


Colored papers

Colored or textured craft or construction paper can make pretty and inexpensive photography backdrops that are light and easy to store.

Source large pieces of craft paper or construction paper at your local craft supply store, or check out sites like Amazon for packages of paper offering a variety of colors.

In the image below, I used a large piece of yellow construction paper as my background. To recreate this look, distance your paper a fair bit away from your set. This will help you get a blurred out horizon line and so your subject doesn’t look “stuck” to your background.

diy-photography-backdrops

Wooden cutting boards

Depending on the size, a wooden cutting board can function as a nice backdrop or be used as a layering piece in some types of still life shoots, like food photography.

Be careful about purchasing boards with a warm, orange, or yellowish tinge. Since most food is quite warm in tone, an image that is warm throughout can end up looking dated.

Also, the camera tends to exaggerate this orange tone. I find that I have to decrease the orange saturation in all of my images to start with.

Look for light boards like pine, or boards in deep espresso for darker shots. You can also paint these in whatever color you want. In the image below, I painted mine white and distressed it with fine sandpaper.

Be sure to keep painted boards for photography purposes only, because they won’t be food safe.

DIY Photography Backdrops for Still Life and Product Photography

To sum up

There are so many different ways to create stunning still life and product photography backdrops without the expense of buying and shipping wooden backdrops from specialist suppliers.

These are just a few ideas, but also look at contact paper, wallpaper, burlap, and old pieces of wood.

Experiment with the items you already own before spending a lot of money on costly photography backdrops. 

Do you have other tips for DIY photography backdrops? Share with us in the comments section!


DIY-photography-backdrops


The post DIY Photography Backdrops for Still Life and Product Photography appeared first on Digital Photography School. It was authored by Darina Kopcok.


Digital Photography School

Posted in Digital Photography | Tagged , , , , | Leave a comment

Tascam DR-05X 2-Input / 2-Track Portable Audio Recorder – $99.99 Shipped (Reg. $119.99)

B&H has the Tascam DR-05X 2-Input / 2-Track Portable Audio Recorder available for $ 99.99 with free expedited shipping. Regularly $ 119.99.
 
This is a very capable audio recorder that can be used on-camera with a hot shoe mount adapter or stuck in a pocket for recording with a lav mic.
 
Product Highlights
 

  • Speech, Sound Effects & Music Recording
  • Onboard Omni Mics, Built-In Speaker
  • 3.5mm Mic/Line Input w/ Plug-In Power
  • Built-In Tuner, EQ & Reverb

Canon, Nikon, and Sony News, Deals and What’s New at The-Digital-Picture.com

Posted in Photo Equipment | Tagged , , , , , , , , , , | Leave a comment

Red Dead Redemption 2 PC looks even more likely with updated Australian classification

A Red Dead Redemption 2 PC version is looking even more likely with the emergence of news that Rockstar has (again) successfully secured classification for the game over in Australia.

RDR2 has already been rated for console release, naturally, by the Australian Classification Board, which approves and determines ratings for movies and video games.

So the theory is that a fresh application for classification comes ahead of the PC release, which would be an obvious reason for this happening.

Although Red Dead Redemption 2 was initially refused classification this time around, as Kotaku reports, that refusal has since be rescinded, and the game has once again been rated as MA15+ (restricted to persons aged 15 or over) just as it was back in September of last year.

Blankety blank

Sadly, in the classification details, the game’s version entry is blank, with no information given as to what platform this move might pertain to.

So obviously we don’t know for sure that all this revolves around preparation for a release of a PC version. It could just be the case that Rockstar is about to unleash a hunk of fresh DLC (speaking of additional content, the most recent buzz we’ve heard concerns the potentially impending Undead Nightmare).

However, as we’ve seen of late, the evidence for a PC spin of Red Dead Redemption 2 just keeps adding up.

And that includes a ton of data-mined speculation, with various PC settings and references to DX12 support being spotted, and a leak from the source code of Rockstar’s Social Club that mentions Red Dead Redemption 2 accomplishments for the PC.

The recent release of the Rockstar Games Launcher could also be paving the way for a big launch such as the PC version of RDR2.

None of this is anywhere near conclusive, of course, so we’ll just have to sit tight, wait, and hope, as ever.


TechRadar: Photography & video capture news

Posted in Photography | Tagged , , , , , , , , | Leave a comment

Microsoft launches Dynamics 365 Commerce

As part of its ongoing efforts to gain ground against Amazon in the cloud wars, Microsoft has launched Dynamics 365 Commerce to help retailers manage their business online.

The new application will allow brands to create detailed personalized product web pages and it also supports customer ratings and reviews.

Businesses can even communicate with customers after they've made a purchase as Dynamics 365 Commerce integrates with other software from Microsoft. They will also be able to view charts on sales performance.

Dynamics 365 Commerce is an expansion of Microsoft's Dynamics 365 for Retail. While the former focused on supply chain management, staffing and promotions, Dynamics 365 Commerce is all about providing retailers with the tools they need to manage their business' online presence.

Azure vs AWS

Microsoft has made significant progress in retail lately as it has positioned Azure to take on AWS in cloud infrastructure.

Big box stores such as Walmart and even pharmacies like Walgreens have been trying to build stronger relationships with the software giant since they no longer want to give their business to their biggest competitor, Amazon.

In addition to launching Dynamics 365 Commerce, Microsoft also launched a new service called Dynamics 365 Connected Store. By using sensors and cameras installed in brick and mortar stores, Dynamics 365 Connected Store can send alerts to employees based on customer activity while shopping.

The food and clothing retailer Marks and Spencer has been an Azure customer for years and now the company is using the new service to improve the shopping experience for its customers.

Microsoft's push into retail and ecommerce is a welcome trend from businesses trying to break free from Amazon and as the cloud wars heat up, it will likely continue.

Via CNBC


TechRadar: Cameras and camcorder reviews

Posted in Camera Reviews | Tagged , , , | Leave a comment

Photography White Balance: A Beginner’s Guide

Related reminder: only a little while left for Topaz Sharpen A.I. at 25% Off

Have you ever noticed how sometimes you’ve taken a shot and there’s a weird color coming out in it? A yellow, blue, perhaps orange look to the photo?

cloudy white balance

photo by photophilde

We all have, and when we first start out in our photographic journey it can be a bit of a struggle to understand why this is happening.

Enter white balance!

Different light sources add different color casts to your images even though to the naked eye they appear ‘normal’. Fluorescent lighting is actually blue in color, tungsten bulbs add yellow.

The naked eye and the brain behind it are smart enough to discern these differences and therefore to us a white paper is a white paper… is a white paper!

The ‘brain’ in your camera is not quite that smart and won’t normalize the range of color temperatures that we can.

The white balance settings in your camera are here to help as this can have a tremendous impact on the quality of the images that you take as you can take control of your camera and tell it to warm up or cool down the image.

Look up the settings for your individual camera’s white balance mode. You can do this manually or—in most cases these days—use preset white balance settings.

Basic White Balance Settings

Below are some basic white balance settings that most cameras have:

Auto. This is where the camera makes a best guess on a shot by shot basis. You’ll find it works in many situations but it’s worth venturing out of it for trickier lighting.

Tungsten. This setting will generally cool down the colors in your photos.

tungsten white balance

tungsten, photo by Oleg Sidorenko

Fluorescent. This setting will generally warm up the colors in your photos.

fluorescent white balance with flash

fluorescent with flash, photo by Ken

Daylight/Sunny. This tends to keep the white balance in a kind of ‘neutral’ state.

Cloudy. This setting generally warms things up a touch more than ‘daylight’ mode.

cloudy white balance setting

cloudy, photo by Frédérique Voisin-Demery

Flash. The flash of a camera can be quite a cool light so in Flash WB mode you’ll find it warms up your shots a touch.

Shade. Shade will warm things up a touch.

shade white balance

shade, photo by Daniel Oines

Manually Adjusting White Balance

You can actually get pretty decent shots by using the above preset values. You can however, learn how to do this manually.

The basics behind adjusting things manually will remain the same even though the way you do it will vary from camera to camera.

In essence, you will set up a reference point for your camera (what white/grey actually is) and your camera will know that this is white.

expodisc white balance

custom, photo by Kain Kalju

You can then manually adjust the warmth factor up or down appropriately dependent on the conditions under which you are shooting!

As with everything else in photography this is one of the basics. Once you actually understand how to warm or cool an image, feel free to go nuts on the settings to get whatever effect you’re actually after.

After all, just because an image is correctly exposed and framed doesn’t mean it’s a correct image!

About the Author:
My crazy world has included successfully combining all the skills of an artist, photographer, designer, programmer, and marketer into one crazy life. I’m available for guest blogging, article writing, and speaking events. Follow me via my site or Instagram!

For Further Help Achieving Sharp, Crisp Photos:

Currently on sale, Topaz Sharpen A.I. is the first sharpening and shake reduction software that can tell difference between real detail and noise using artificial intelligence and neural networks. It was trained with millions of images so it could learn the characteristics of detail vs. noise – and then enhance just the detail. In some cases, it can even recover image detail.

sharpen ai photo

Results with Sharpen AI (Click to See How it Works)

It is currently 25% off which ends soon, plus our readers can save even more by using the coupon code picturecorrect at checkout.

Deal found here: Topaz Sharpen A.I. at 25% Off

Go to full article: Photography White Balance: A Beginner’s Guide

What are your thoughts on this article? Join the discussion on Facebook

PictureCorrect subscribers can also learn more today with our #1 bestseller: The Photography Tutorial eBook

The post Photography White Balance: A Beginner’s Guide appeared first on PictureCorrect.

PictureCorrect

Posted in Photo Techniques | Tagged , , , , | Leave a comment

How To Protect Your Camera Against Lens Fungal Damage

The post How To Protect Your Camera Against Lens Fungal Damage appeared first on Digital Photography School. It was authored by Kevin Landwer-Johan.

Protecting your expensive camera against lens fungal damage is necessary to prevent lasting damage. Left unchecked, fungal growth can damage the glass elements in lenses forever.

Fungus is a living, growing microorganism which can form on camera lenses. This type of mold is most common in humid climates. Often the damage it causes is only minor, but a rampant fungal growth can ruin a lens.

How To Protect Your Camera Against Lens Fungal Damage

Cleaning fungus on exterior elements of lenses can be relatively easy. However, you need to catch it before it becomes too advanced. Growth of mold on interior lens elements is more difficult to detect and it requires a skilled technician to be able to remove it. The lens must be stripped down, cleaned and then rebuilt – which is a costly process.

Prevention of fungal growth on lenses is far more preferable than having to remove mold. If left unrestrained, fungus can permanently damage a lens because it eats into the glass. Once cleaned, furrows remain in the lens and affects the way light refracts through it.

Methods for preventing lens fungus

Taking proper care of your camera equipment is always good practice. Well-kept equipment will last longer and retain higher used resale value.

Here are some ideas to help you avoid encountering the problem of fungal growth in your lenses.

How To Protect Your Camera Against Lens Fungal Damage

Clean your lenses often

Many photographers are in the habit of cleaning only the front element of their lenses, or the filters that screw on to cover them.

Wiping down your whole lenses with a damp microfiber cloth from time to time is good for them. Particularly if you’ve been photographing in a hot, humid climate. The atmosphere and sweat from your hands can affect your lens.

Using a microfibre cloth helps to avoid leaving unwanted lint deposits on the lens. Once you’ve wiped your lens down with a damp cloth, have a dry one on hand to wipe it down once more. Using a hairdryer on a low heat will also help any moisture evaporate from your lens.

Don’t leave your lenses in the sun to dry them. This can cause other problems.

Store your lenses in a dry box with silica gel

An airtight box is a good place to store your lenses. It’s convenient to leave all your gear in your camera bag, but left there it’s susceptible to affect by moisture.

Including a quantity of silica gel in the box helps to absorb any residual moisture. Small packets of silica gel often come with consumer goods. These do not contain enough to make a significant difference.

Silica gel can be purchased at a store or online, in larger quantities. I prefer the type of gel that can be used more than once. It changes color from blue to an orange color once it’s absorbed moisture. It can then be dried out by placing it in a microwave oven for a few minutes at medium power setting.

lens-fungal-damage-protection

Moist and Dry Silica Gel

A cup full of silica gel placed in an old or stray sock with a knot tied in it will help keep your gear dry in a box. You’ll want to make sure the sock has no holes worn in it.

lens-fungal-damage-protection

Sealed Storage Box

Food storage boxes with good seals are useful. I use this type of box to store my film cameras and older lenses I don’t use often. Every so often I dry out the silica gel in the microwave oven.

A more expensive and robust option is a Pelican case. These rugged camera cases are completely airtight when closed. Depending on the size of the case you may need to add more than one sock of silica gel.

lens-fungal-damage-protection

Pelican Case

Keep your lenses in an air-conditioned room

If you have an air-conditioned room, this is also a good location to store your lenses and other camera gear.

Air conditioning not only keeps the air in a room cooler, but it lowers the humidity. Ideally, you do not want the temperature of the room to be too cold. If you live in a hot climate, this can be problematic when you take the lenses outside. They will fog up.

When a lens is very cold and then taken into a very warm environment, condensation can form quickly. You’ll have to wait for it to clear before you’re able to take any photos.

Use a dehumidifier

This is the type of household appliance which sucks water from the air. It will not cool the room, but it will draw out any moisture in the air.

Running a dehumidifier for a few hours a day in a small room in wet weather is usually enough to dry the air.

They are often portable and cheaper than an air conditioning unit. They also consume less electricity.

lens-fungal-damage-protection

Buy a dehumidifier dry cabinet

This appliance is a dedicated piece of equipment. It’s designed for the task of helping prevent lens fungal damage in your camera equipment.

A dehumidifier dry cabinet is usually a glass-fronted cabinet. They are available in various sizes to accommodate as much or as little equipment as you have to store.

These units are digitally controlled so you can regulate them.

Conclusion

Taking good care of your precious lenses is well worth it. Finding mold in your favorite lens would be soul-destroying.

Investing in an appropriate storage solution can be far cheaper than having to pay for lens cleaning.

Please let me know in the comments below if you have any other tried-and-true ways of keeping your lenses from becoming mold farms.


lens-fungal-damage-protection

The post How To Protect Your Camera Against Lens Fungal Damage appeared first on Digital Photography School. It was authored by Kevin Landwer-Johan.


Digital Photography School

Posted in Digital Photography | Tagged , , , , , | Leave a comment

Xiaomi Mi MIX Alpha, i teaser mostrano lo schermo incredibilmente curvo

Lo Xiaomi Mi MIX Alpha (ufficialmente stilizzato come Mi MIX α) verrà presentato in Cina domani, il 24 settembre. I teaser condivisi dall'azienda mostrano un display curvato oltre i 90 gradi, con un potenziale rapporto schermo-corpo del 100%.

La serie Mi MIX di Xiaomi è conosciuta per le sue idee innovative che hanno reso possibile un design per smartphone con cornici ridotte al minimo. In passato i risultati sono stati ottimi, con un rapporto schermo-corpo che ha superato abbondantemente il 90%, ma con il Mi MIX Alpha l'azienda potrebbe arrivare addirittura al 100%.

Per la cronaca, il rapporto schermo-corpo di uno smartphone si calcola rapportando l'area del display (piano) all'ingombro fisico della parte frontale del dispositivo (visto come una silhouette). I dispositivi con un display curvo sono decisamente in vantaggio, infatti se si tiene conto delle dimensioni del display in piano, questo risulta più grande. Questo crea anche una differenza a livello visivo, le cornici laterali infatti risultano quasi invisibili se guardate frontalmente.

A giudicare dai teaser postati da Xiaomi, il Mi MIX Alpha ha un display che si curva quasi fino alla parte posteriore su almeno un lato. Questo surclassa il trend emergente dei display Waterfall, visto per esempio sul Huawei Mate 30 Pro.

Xiaomi Mi MIX Alpha: le specifiche

Al di là del concetto dietro al Mi MIX Alpha, ci aspettiamo che avrà specifiche incredibili, simili ad altri top di gamma recenti. Il display sarà un Super AMOLED curvo con un rapporto schermo-corpo del 100%. Probabilmente ci sarà anche un lettore di impronte digitali integrato nel display.

Ci si può aspettare la presenza del chipset Snapdragon 855 Plus e di 8 o 12 GB di RAM, di una batteria da 4.000 mAh con supporto alla tecnologia Mi Charge Turbo (ricarica rapida da 40W). Probabilmente lo smartphone supporterà anche il 5G.

Non è chiaro se il dispositivo verrà distribuito sul mercato di massa o rimarrà un prodotto di nicchia, semplicemente adibito a ricordare di cos'è capace di ideare Xiaomi. Le nostre domande dovrebbero ricevere risposta domani, il 24 settembre, quando il Mi MIX Alpha verrà presentato.


TechRadar: Photography & video capture news

Posted in Photography | Tagged , , , , , , | Leave a comment

Portrait of a Photographer: Joe McNally & Jerry Ghionis


From the Nikon USA YouTube Channel:
 
What happens when two internationally acclaimed photographers and Nikon Ambassadors go on assignment to create portraits of each other? Watch to see how Jerry Ghionis and Joe McNally execute their vision during this portrait assignment. Video shot with the Nikon Z 6 and NIKKOR Z 85mm f/1.8 S.

Canon, Nikon, and Sony News, Deals and What’s New at The-Digital-Picture.com

Posted in Photo Equipment | Tagged , , , , | Leave a comment

Do Cheap Photographers Take Work Away From the Rest of Us?

The post Do Cheap Photographers Take Work Away From the Rest of Us? appeared first on Digital Photography School. It was authored by Anabel DFlux.

Price tends to be one of the biggest points of contention with photographers. What is too low? What is too high? What’s just right? Running a profitable business is never easy. Whatever price you set, someone will likely have an opinion or two about it (solicited or not). Which leads to the biggest elephant in the room… do cheap photographers who price low take business away from those that price higher?

Do Cheap Photographers Take Work Away From the Rest of Us?

My answer?

No.

And here are 6 reasons why:

1. There is a client for everyone

Do Cheap Photographers Take Work Away From the Rest of Us?

This is business 101 that we often forget (and I am guilty of forgetting sometimes too!). Artists tend to be very emotionally tied to the work and the service provided, and photographers are certainly not exempt from this fact. As such, losing or not obtaining a client can feel like a personal jab even when it has nothing to do with us at all. You have to remember, there is a client for everyone!

This rings especially true in the tumultuous price debate. A client who is focusing on the price will not be looking for an expensive photographer. Likewise, a client who is focusing on high quality will often assume that cheap photographers cannot provide the quality that they seek. A Lamborghini is not concerned over the lower price of a Honda Civic because the Honda Civic buyers are not looking for a Lamborghini.

Alongside this, often price equates to years of experience. Photographers who are brand new may be absolutely fantastic and have beautiful quality images but aren’t able to charge the same as those that are seasoned professionals. Likewise, some clients do value quality work but simply cannot afford a seasoned professional. These two tend to find each other and work together well.

2. Client priorities are not always the same as yours

cheap-photographers-take-work-away

As photographers, we naturally (and rightfully) value professional photographs highly. From capturing memories to creating beautiful new stories, photographs are essential. However, the priorities we hold as photographers may not always ring true for the subjects in front of our lenses.

Some clients would rather invest their money into something else – something that holds more importance to them. Whether you agree or not, that’s not your decision to make. Some clients look for less expensive photographers because their finances are tied into something that they find to hold more worth to them (and thus receive what they have paid for). And that’s okay – let them.

3. Some clients will eventually understand the price versus value point

cheap-photographers-take-work-away

This is something that tends to happen to me often. A client will go to a very low-priced photographer, end up unsatisfied with the experience or the end result, and quickly learn the general value of the price. They then come to me and ask to shoot their concept once more. This does happen quite a bit. This is why staying firm on your policies and pricing is important (and tends to command respect).

Wait, wait.

This is assuming that the low-priced photographer has a quality that doesn’t match that of the higher-priced ones. What if a great quality photographer prices low? Doesn’t that cut into my jobs? 

cheap-photographers-take-work-away

Some photographers have a different business model than the rest – known as the “low price and high turnover model.” This model works on the idea that you charge low, service many, and turn over a profit much like a photographer that charges high and services one.

However, what many don’t see behind the scenes, is the reason this model works is much of the process is automated or simplified. It allows the photographer to have a lower output of effort that matches their price. This service is not individualized, and generally not specifically tailored for the individual. It’s the difference that is similar to “ready-made” versus “custom-made” clothing. But this doesn’t work for all clients. The clients this does work for are likely not your clients if you have a traditional photographic business model.

Many major brands have a high-end and a low-end to their business. Take the car company Toyota, for example. Their high-end line is called Lexus – a luxury brand of car. Their consumer-grade line is just good ol’ Toyota. Both cars are great, hardy, and will get you where you need to go in comfort. A Toyota is not worse than a Lexus. The Lexus is just intended for a different kind of buyer.

Well, now that’s said…how do I justify my price? 

4. Express your value and stand by your worth

cheap-photographers-take-work-away

First and foremost, confidence speaks volumes. If you set a price and are confident about it, stand by your worth and be firm.

That being said, every price needs something to justify it. Show the client what the value in investing in your work is versus someone else’s. Do you do something unique and different? Is your client experience above and beyond what the rest do? What do your years of experience or high-quality gear bring to the table? Do you have any awards or honorable mentions? These are all important topics to cover with your client when explaining what you offer and how much you charge for your offering.

5. Find your demographic and market to them!

cheap-photographers-take-work-away

Marketing is what makes or breaks a business. If people don’t know about you, how can they book you? Marketing is extremely important, especially in the social media age. Marketing is the act of spreading awareness about your business, whether it be through digital advertising, partnering with local businesses, or launching billboards!

If you’re finding that the clients you are marketing to keep choosing a photographer that prices lower than you, that is a big sign that this client base is not the right demographic for you. Demographics are particular sectors of a population that are divided by factors. For marketing purposes, factors tend to be interest, age, location, income, and more.

As a business owner, you need to find the demographic that relates to the service you are offering. Look at income levels that tend to align with your price point, and for clients with interests that may be more aligned with your offering (e.g., pet photographers will look for clients with interest in animals), and age group can also be a big factor. If you’re a family photographer, look for moms and dads, or youth sports – keywords like that!

Remember, you must segment your population based on more than one factor to find the right demographic. Filling out location and interests in the minimum is a good starting point.

6. Stop worrying about what others are doing and charging

Do Cheap Photographers Take Work Away From the Rest of Us?

Everyone has a different ideology when it concerns their business. They use the business model that suits them, dependent on variables you likely do not know about. As such, the running of their service (and what they charge for it) does not apply to you. It’s best to stop concerning yourself with what others are doing and focus on what you are doing for you!

The industry is changing, and society has changed its view on the value of art.

Conclusion

Do Cheap Photographers Take Work Away From the Rest of Us?

You’re not losing jobs because your competitors are cheap photographers, you’re losing jobs because you either haven’t found your right client base or you need to get better at expressing your value.

Focus on your business and what you can improve in your work, and the right clients will come! The world is not as small as it seems; there are thousands of potential clients out there for you.

Do you agree with this or do you think cheap photographers do take work away from us? Or perhaps you have some other valuable points to share? Share them with us in the comments section.


cheap-photographers-take-work-away

The post Do Cheap Photographers Take Work Away From the Rest of Us? appeared first on Digital Photography School. It was authored by Anabel DFlux.


Digital Photography School

Posted in Digital Photography | Tagged , , , , , , | Leave a comment

NSW traffic cams will soon detect – and fine – drivers for using their phone

After conducting trials earlier in the year, Transport for NSW will begin rolling out a host of world-first cameras that are exclusively designed to catch drivers using their mobile phones on the road.

Cameras will be placed in 45 separate locations around the state by December this year and, unlike speed cameras, will come with no warning or signage related to their presence.

The new cameras cost the government AU$ 88 million in total and are able to function in all light and weather conditions, using AI in order to detect mobile phone usage 24-hours a day in vehicles travelling anywhere up to 300km/h.

According to NSW Roads Minister Andrew Constance, a single camera trialled over one month detected more than 11,000 drivers illegally using their phones. 

“We have to unfortunately use the element of surprise to get people to think,” Constance said. “It’s not about revenue – it’s about saving lives”.

The Minister for NSW’s Regional Roads, Paul Toole, pointed out that independent modelling has found that about a hundred fatal and serious crashes could be prevented over the course of five years with the installation of these cameras.

As was the case with the two trial cameras put in place in January of this year, a three-month grace period will follow the installation of these new cameras in order to iron out any kinks in the technology or the process.

Once this grace period has ended, however, drivers caught using their mobile phone could face AU$ 344 fines and the loss of five demerit points.

There are some exceptions to this rule – using your handset for calls, music and navigation while it’s in a cradle is allowed so long as it’s hands-free, as is interacting with your phone in a drive-through or in order to pass it to a passenger.


TechRadar: Cameras and camcorder reviews

Posted in Camera Reviews | Tagged , , , , , , , , | Leave a comment