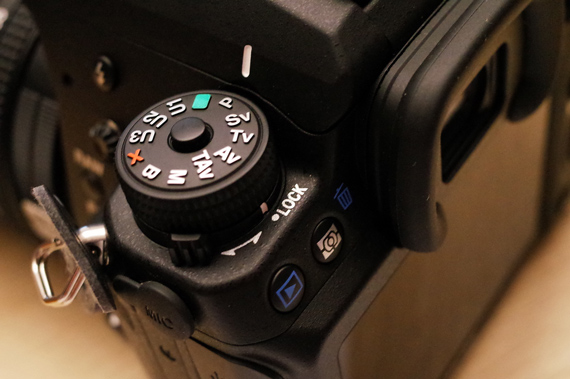
If you’re just learning about your camera, then chances are you’ve taken a look at the top of your camera only to become immediately confused. However, you don’t need to worry, as I’m going to explain what each and every one of these camera modes does.
Automatic ([ ])
The automatic mode really doesn’t need much of an introduction; you can probably guess by the name what it does. Automatic allows your camera to set all of your camera options “automatically” to produce the exposure that it thinks is correct.
Automatic mode doesn’t allow you to set the shutter speed, aperture, ISO, or even the flash, which often pops up and ruins your photos. If you don’t know how to use your camera and are considering shooting in this mode, I would advise against it; it won’t help you one bit, and your images will more than likely come out terribly.
Program Mode (P)
Program mode is a mode for beginners to start to understand their cameras. Program mode is similar to automatic in the way that it allows the camera to make the decision on which settings to use to correct the exposure. Once the settings are selected, you can easily change them. For example, if the camera thinks that the correct shutter speed would be 1/200 of a second but you think this is too slow, you can change it so it gives you a shutter speed of, say, 1/400.
If you don’t know much about cameras, I would recommend using this mode to start off with.
Aperture Priority (Av)
Aperture priority is a mode in which you set the aperture while the shutter speed is automatically set for you to give the correct exposure. This mode is useful when you want to achieve a certain depth of field. For example, if you wanted a shallow depth of field (not much in focus) then you could set the aperture to your lens’s lowest number (e.g. f/1.8), and if you wanted a wide depth of field you could set it to its highest aperture value (e.g. f/22).
Shutter Priority (Tv)
Shutter priority is similar to aperture priority. This time, however, you only set the shutter speed, and the rest is done for you. This mode is useful when you want to tell the camera that you only want to shoot photos at a certain speed and not any lower or higher.
Manual (M)
While in manual mode, you are able to change all of the settings as you see fit. Aperture, ISO, shutter speed, and white balance settings can all be changed independently to create the image you’re looking for.
Learning to shoot in manual mode will help you understand photography in greater detail and will allow you to produce good, consistent shots each and every time.
Give each of these modes a try and see how they work for you.
About the Author:
Ricky Davies is a freelance photographer.
Go to full article: Camera Modes Explained
What are your thoughts on this article? Join the discussion on Facebook
PictureCorrect subscribers can also learn more today with our #1 bestseller: The Photography Tutorial eBook
The post Camera Modes Explained appeared first on PictureCorrect.


