Related reminder: only a little while left to Pre-Order Luminar 4 at a Discount
Would you like to know how to add creative effects to your images in just a couple of mouse clicks?
Creative LUTs (which stands for Look Up Table) in Luminar are designed to quickly enhance the overall look and feel of your photos, giving your images a complete color-grading overhaul. You can really let your imagination have free rein to make your images as creative and dramatic as you wish.
LUTs are a great tool for changing the look of your images quick and easy by using clever combinations of color.
Here’s the image we’re starting with:
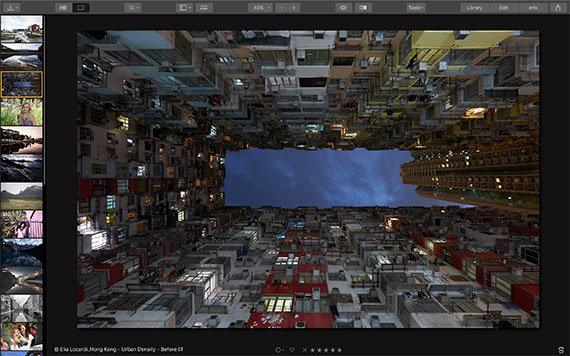
This is unedited, but to get the best out of LUTs you should really do all your basic adjustments before applying a LUT. Think of it as the icing on the cake!
Bearing that in mind, I very quickly used the Accent AI 2.0 filter at half strength to do all the necessary adjusting for me:
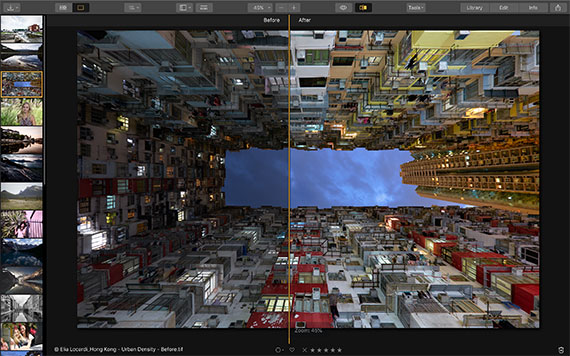
Accent AI 2.0 has lifted the shadows nicely, so now it’s time to add a LUT.
You’ll find the LUT Mapping filter in the Professional Workspace section of Luminar, over on the right-hand side:
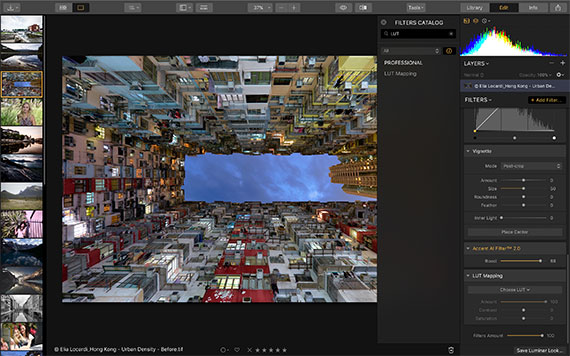
Click on the Choose LUT drop-down, and you’ll get a nice array of built-in LUTs:
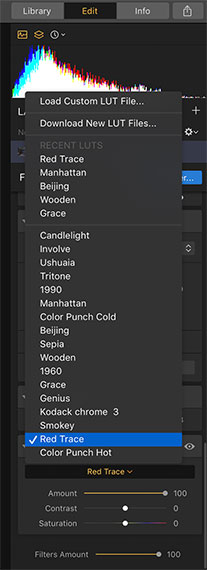
I added Red Trace at 100 strength (you simply adjust the slider to apply the amount you want).
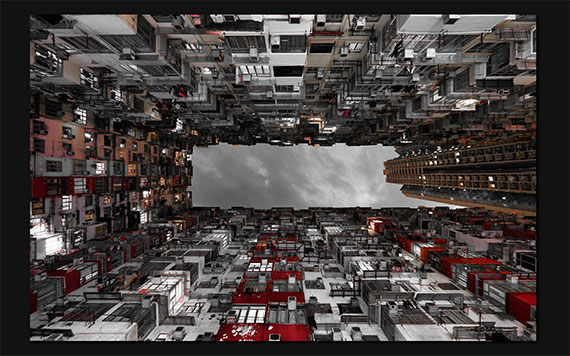
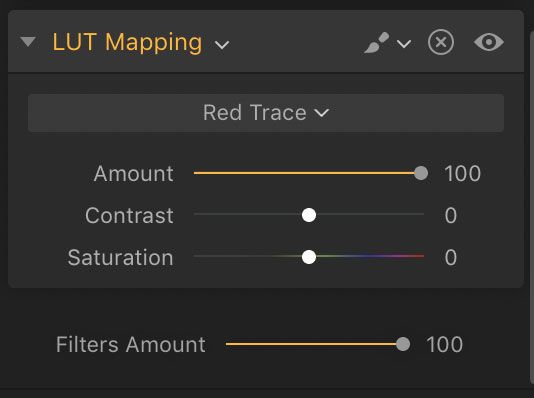
It’s given the image a whole new tonal shift, and I’m really liking it, but I feel it needs a little more saturation and a touch of contrast. That’s easy too, as the Saturation and Contrast sliders in the LUT filter are simply adjusted:
Here’s the image with the before/after split:
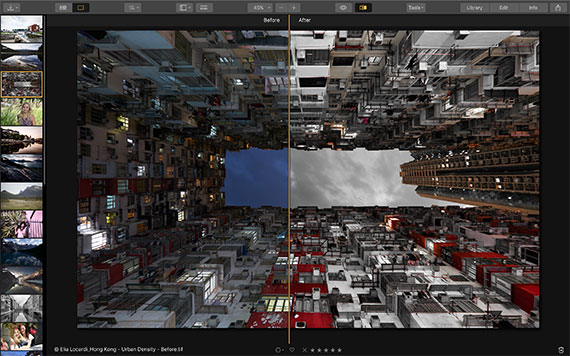
Pretty nifty, right?
Let’s see what we can do with the other landscape image. Here’s the original:
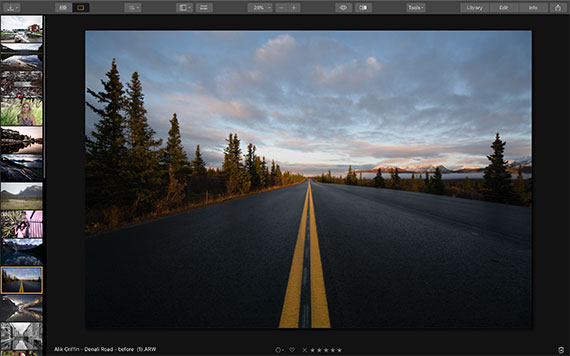
I did a very small adjustment with Accent AI 2.0, with the Boost slider at around 20 to give a good base for the LUT to work from. I then chose the Ushuaia LUT. Here it is at 79 percent strength:
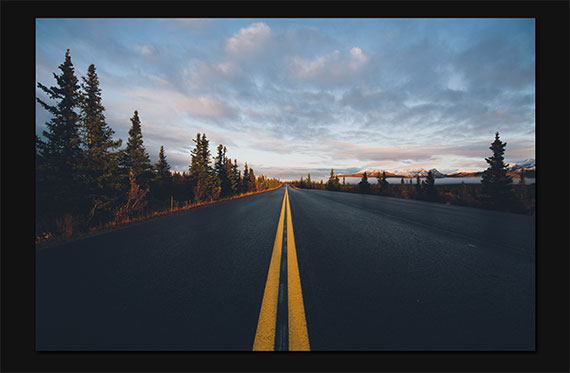
Again, it gives a whole different feel to the image. Here is the before/after split:
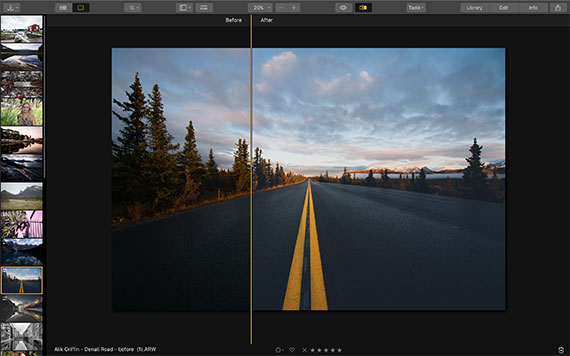
LUTs are great to use, as they are developed to have all the colors work well with each other, and they can really take your color grading of images to a different level.
One of the other great things about Luminar’s Creative LUTs is that when you run your mouse over the drop-down menu of the LUTs, your image will automatically change on screen to show you a preview of what it will look like with the LUT applied; that saves a great deal of time and mouse-clicking.
Just remember to always do your basic editing first before applying the LUT, and you’ll get the best results.
Creative LUTs are fun and amazingly quick to apply, but they’re also brilliant for professionals to use to give their images that particular cinematic or tonal feel. LUTs in Luminar can also be added to with other filters or adjustment layers, and the results saved as a personal preset in Luminar Looks.
LUTs are very versatile and time-saving, and they give great color results. You can also find lots of free LUTs on the internet, which is a bonus.
Luminar 4 Pre-Order Sale Happening Now:
Currently available to pre-order at a discount, Luminar 4 is designed to elevate photo editing to new heights. Revolutionary tools and AI technologies open breathtaking potential for your creativity. With a refreshed interface and workflow, Luminar 4 shifts from being a tool-based approach to one that is purpose-based.
Luminar 4 is the biggest update in the program’s history. Based on user feedback and data that the company has studied, the software has received significant improvements and refinements. The pre-order sale (with a bonus) is ending soon if you want to check it out.
Found here: Luminar 4 Photo Editor Pre-Order Sale
Go to full article: Change the Mood of Your Photos with Creative LUTs in Luminar
What are your thoughts on this article? Join the discussion on Facebook
PictureCorrect subscribers can also learn more today with our #1 bestseller: The Photography Tutorial eBook
The post Change the Mood of Your Photos with Creative LUTs in Luminar appeared first on PictureCorrect.
