There is something magical about sunset that seems irresistible to snap a photo. No matter what genre of photography you do, you must have—or will at some point—take a photo of the sunset.
Most of the sunset photos we see are either exposed for the sky, making the foreground underexposed, or exposed for the foreground, leaving the sun and the sky overexposed. This is because our camera’s limited dynamic range compared to that of the scene and is a common problem in situations with extreme contrast.
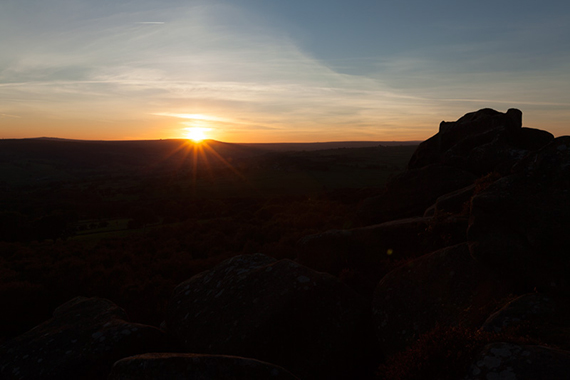
Underexposed Foreground
A common solution to this is to bracket multiple exposures and merge them into a HDR image with HDR software. This often creates an image with a typical “HDR look.”
Another way of creating an HDR image with a more natural look is to blend your bracketed images with luminosity masks. Luminosity mask is a selection tool that creates highly targeted selection based on the luminosity value of the pixels. The advantage of luminosity masks is its self-feathering border that makes the transition smooth and natural. You can read more about luminosity masks here.
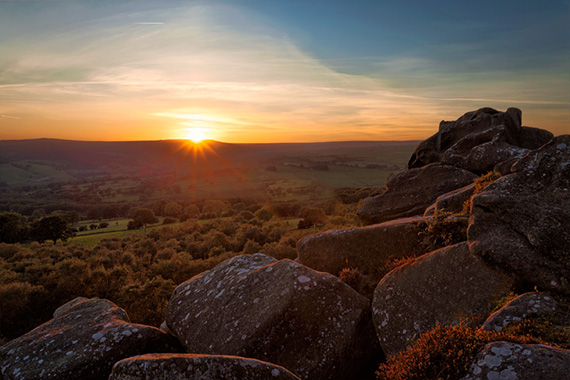
Final image after blending 0EV and -2EV in Photoshop with luminosity masks
In this tutorial, I will show you how you can create a natural yet stunning sunset photo with luminosity masks in Photoshop with two bracketed exposures. You need Photoshop actions to create luminosity masks, which you can download for free by searching “luminosity masks Photoshop actions download” in a search engine.
Step 1
Bracket your exposures. You can bracket manually or use the automatic exposure bracketing in your camera. I recommend a +/- 2EV between each exposure due to the high dynamic range of a sunset.
Tip for Reducing Sun Flare
One of the main problems when shooting into the sun is lens flare. Here is a simple way of getting rid of it during shooting. You need a tripod for this. If you notice lens flare in your images following bracketed exposure, simply take another set of bracketed exposures with your finger covering the sun. You can then blend the image to get rid of the lens flare easily in post-processing.
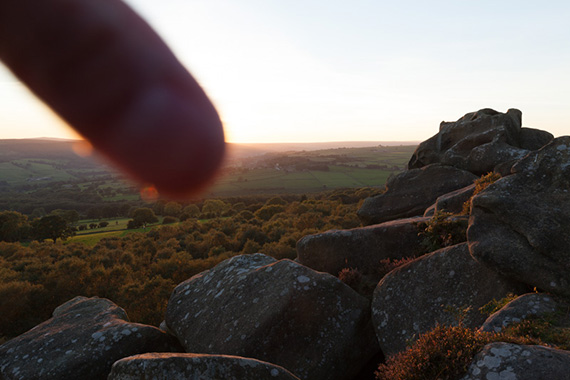
Cover the sun with your finger to get rid of lens flare.
Step 2
Open your images in Photoshop as layers. If you have Lightroom, select the images, right-click, and choose Edit in > Open as layers in Photoshop. You can also open all the images in Photoshop and drag them into a single file. Place the darker exposure on top of the brighter exposure.
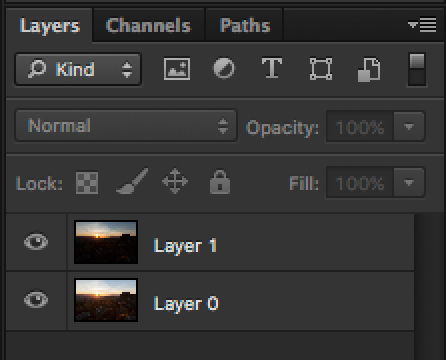
Darker exposure on top
Step 3
Uncheck the eye icon to make the top layer invisible. Now generate luminosity masks with the Photoshop action.
Step 4
Check the eye icon to make the top layer visible again. Now create a black layer mask on the top layer by holding opt (Mac) or alt (Win) and click on the add layer mask icon.
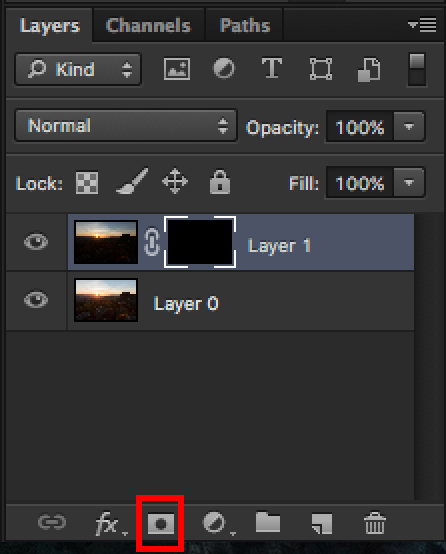
Add a black layer mask by holding opt/alt + left click to add layer mask (in red).
Step 5
Go to the channels panel, select brights 1 luminosity mask by holding down cmd (Mac) or ctrl (Win) + left click on brights 1 mask. You should now see marching ants on the image. You can use cmd or ctrl + H to hide the marching ants if you like.
Step 6
Go back to the layers panel and click on the black layer mask. This will load the selection made with luminosity mask onto the layer mask. Now use the brush tool, set the hardness to 0, opacity to about 50 percent and color to white. Paint over the sky a few times to reveal the darker exposure concealed by the layer mask. You have now blended both exposures together!
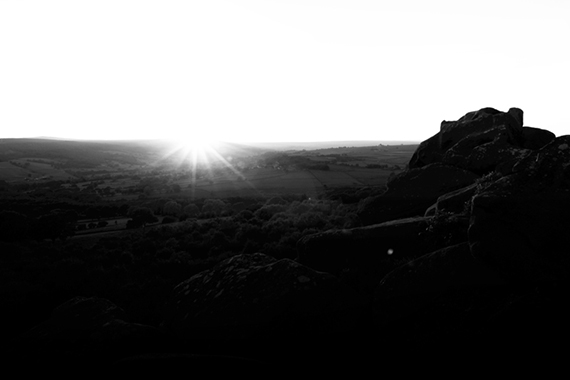
Layer mask after painting with a white brush
Step 7
The foreground is in shadows, which you are going to brighten up to recover some details. To do so, add a curves adjustment layer and increase the brightness of the foreground to your liking. Focus on the foreground and don’t worry about the sky because you’re going to mask it. Once you’re done, click on the layer mask of the curves adjustment layer and fill it with black.
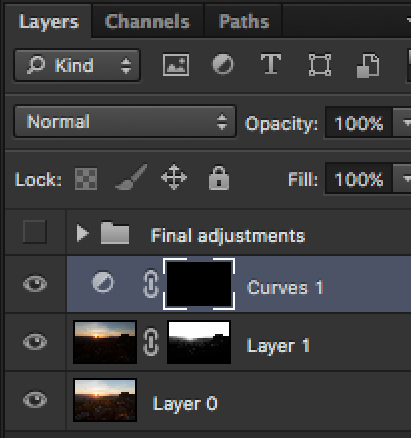
Fill the layer mask of the curves adjustment layer with black.
Step 8
Go to the channels panel and remove the existing luminosity masks by using the “remove mask” Photoshop action. Now generate a new set of luminosity masks based on the blended image. In order to brighten the shadows while maintaining contrast, you need to subtract the darkest masks from a dark mask. I know it sounds complicated, but it’s actually quite straightforward. Select the darks 3 mask, and subtract darks 5 and darks 6 masks by holding down cmd + opt (ctrl + alt for Win) and left click on darks 5 and 6 masks. You should see changes to the pattern of the marching ants on your image.
Step 9
Go back to the layers panel again and click on the layer mask on the curves adjustment layer. Now use a white brush, set the opacity to 30 percent and hardness to 0. Paint over the dark foreground to reveal your adjustments. The foreground should brighten up and still maintain its contrast. You don’t have to worry about painting over to the sky because anywhere outside the dark foreground is protected by the mask. You can try repeating this step without subtracting darks 5 and 6 to see the difference.
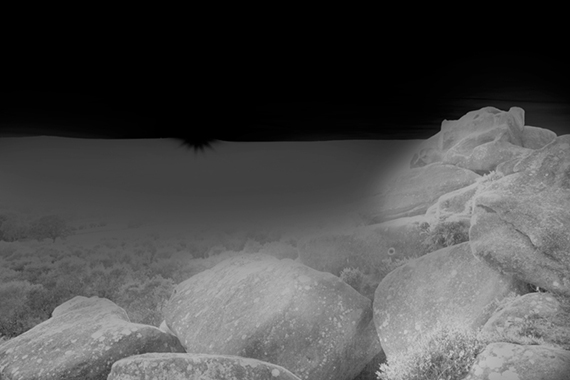
How your layer mask will look after painting with white
For the final touch, apply tonal or color adjustments and sharpen it to finish up!
The concept of using luminosity masks may seem very complex at the beginning. Just remember that it’s a selection tool and you will get more efficient with practice and experience.
About the Author:
Yaopey is a self-taught photographer passionate about sharing and teaching photography. His work has been published in travel guidebooks, websites, and magazines. He routinely uses HDR, luminosity masks, and blending in post-processing. You can read his guide on luminosity masks on his website.
Go to full article: How to Create Stunning Sunset Photos with Luminosity Masks
What are your thoughts on this article? Join the discussion on Facebook
Article from: PictureCorrect