Photographing wildlife of deeply contrasting colors, such as black bears or white waterfowl, can present certain challenges setting up shots that are properly exposed for the wildlife and also the surroundings. Harsh lighting also makes exposing for these subjects especially difficult. The hurdle to overcome in these cases is to expose for the subject animal(s) properly and still capture a scene that is pleasing to the viewer. What often results are images where the exposure is correct for the surroundings, but the creature is either under or overexposed.
Getting the subject wildlife exposed correctly is a more important aspect because the background can be dealt with later in post-production. In some cases, the background just doesn’t really matter in comparison to the photo capture of the often elusive wildlife in the scene.What follows are methods to use in stark color-contrasting situations. One is for dark colored wildlife such as black bears or ravens, and another for light colored wildlife such as egrets or swans.
What follows are methods to use in stark color-contrasting situations. One is for dark colored wildlife such as black bears or ravens, and another for light colored wildlife such as egrets or swans.
Exposure Details
A reality of photographing wildlife is that when things happen, they happen fast. Lighting may change very quickly and there may not always be time to make adjustments while shooting the action of the wildlife in view.
Most experienced photographers want control of all camera settings and don’t generally choose to shoot in auto modes for shutter speed and aperture in order to control movement and depth of field. So is there was a way to set the shutter speed and aperture and still get the correct exposure without the hassle of continually changing settings as the light changes?
There are many ways of shooting wildlife resulting in a desirable exposure, but probably one of the most overlooked ways is using the Auto ISO setting in Manual mode. To use this method, set the camera in Manual mode, adjust shutter speed and aperture to the settings desired, and then set the ISO to auto-ISO. Most cameras will allow you to set a maximum ISO, so it’s helpful to know at what ISO the images become unacceptably grainy with your camera. However, this still doesn’t entirely solve the problem of correctly exposing for those dark and light animal subjects. To solve these problems you can fine-tune the exposure by using exposure compensation.
Correcting the background in post-production
As in any image, if editing is planned it is important that the image be shot in RAW mode. When opening an image in Adobe Raw Converter (ARC) (or Lightroom) and if the exposure for the animal is correct in camera, then only the background may benefit from corrections in post. In most cases for wildlife images, the background hues are green, yellow or blue. To enhance or balance these colors in ARC, go to HSL/Grayscale panel and simply darken or lighten the luminance for green, yellow or blue until the background exposure appears to match the exposure of the animal. A little saturation may also be added. If a little punch or contrast would improve any background flatness, one may use an adjustment brush to add some contrast and clarity to the background. It’s that simple!
Dark Colored Wildlife
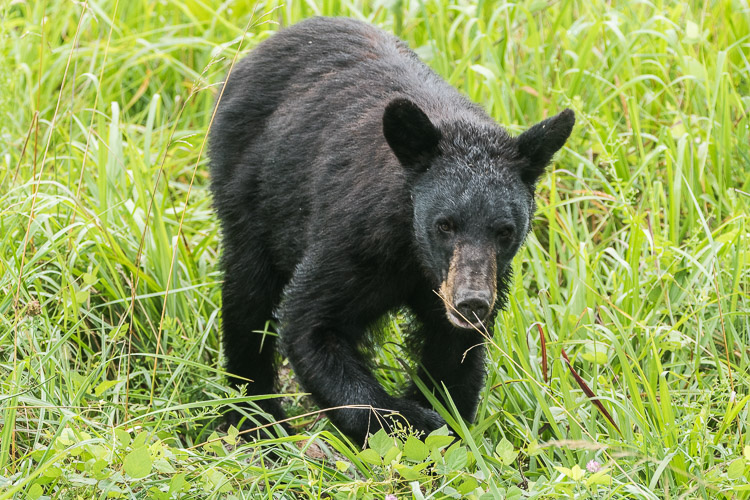
In this image the correct exposure for the black bear over-exposes the green background.
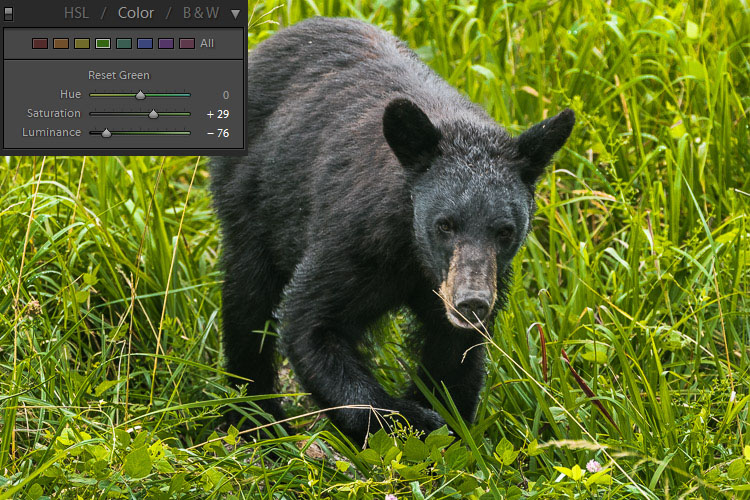
The luminance of the green has been adjusted to decrease the background exposure.
The dark hues of some wildlife will absorb more light than the scene around them, so it becomes necessary to increase the light taken in by the camera by using exposure compensation as mentioned above. For wildlife with dark colored coats or feathers, use exposure compensation and adjust by adding light (+value). This will suffice in most cases, depending on the amount of natural light available.
Keep in mind that the wild subject is the most important component in the image, so if any aspect of the image should be sacrificed in the moment, make it the background. For really dark creatures, such as bears, start out by using a compensation of +1. Remember, don’t worry about the background. The animal is the important exposure!
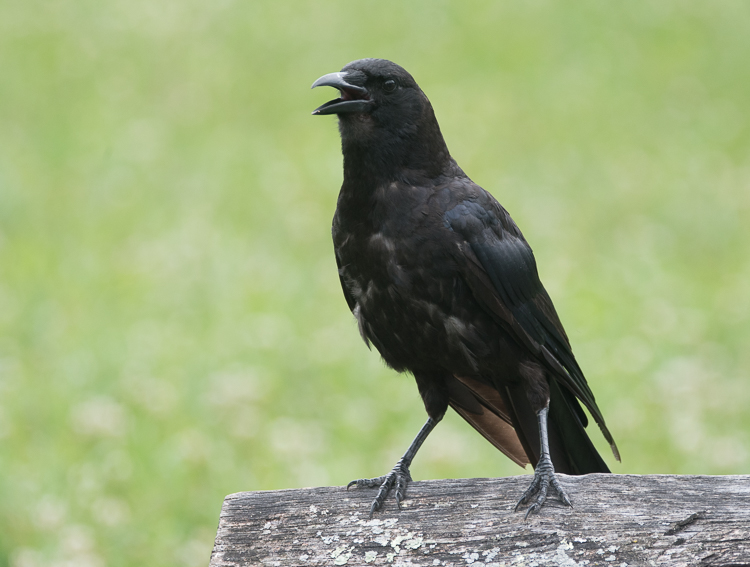
The exposure is correct for the black bird, but the background is washed out and boring.
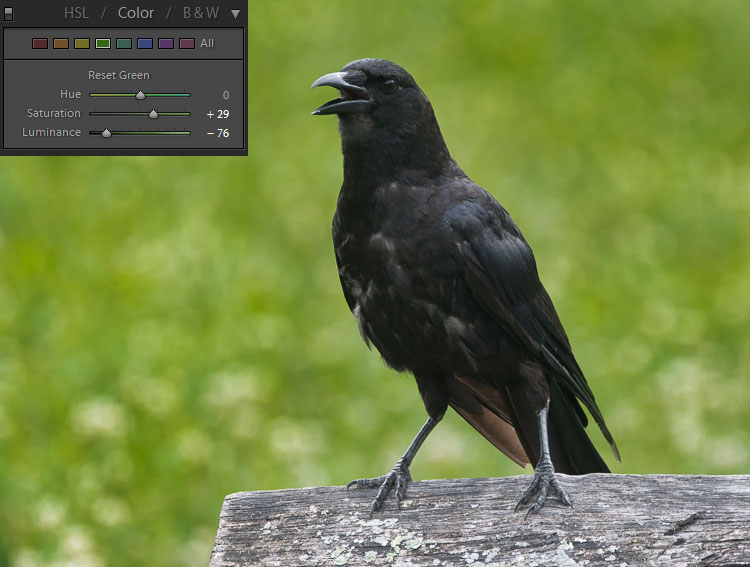
Again, the luminance of the green has been adjusted. Then an adjustment brush has been used to add contrast, creating a vibrant background.
Light Colored Wildlife
Conversely, for light colored animals, use exposure compensation and adjust by subtracting light (- value). The whiter color of many beautiful creatures will reflect much more light than the background will, so it helps to decrease the light the camera takes in so as not to overexpose the animal.
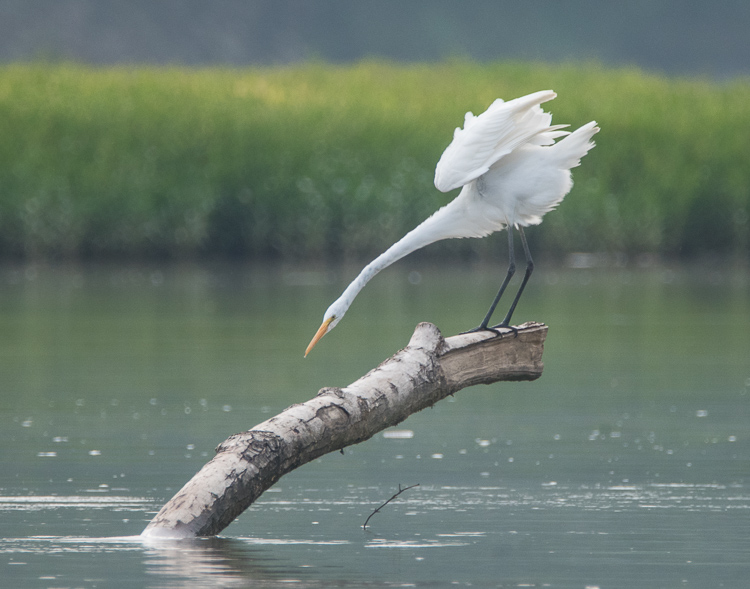
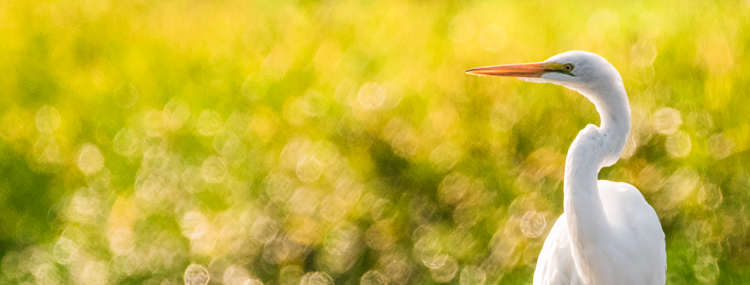
In keeping the white egret from being overexposed, the background appears dull and dark.
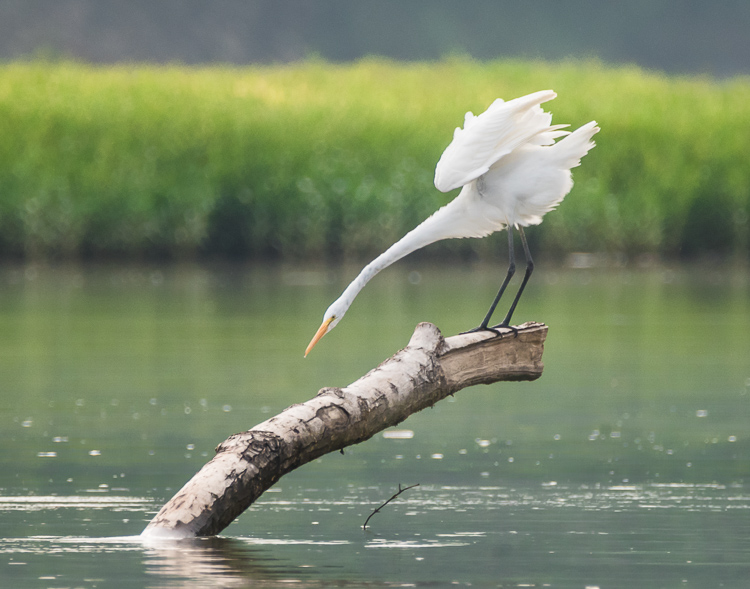
The green and yellow hues were adjusted to add life to the background. Notice that in every case the exposure of the subject is unchanged.
Why can’t I just correct the exposure of the wildlife in post-production?
Of course, this is an option. But there at least two reasons for not correcting the exposure of the subject later on the computer.
- Any time a major exposure correction is undertaken, there is a certain amount of digital data of the image that is lost. Therefore, it is best to get the main subject of the image captured as closely as possible in camera. (This is true of any image, not only wildlife subjects.)
- When photographing extremely light colored animals, if the white is over-exposed to absolute white there is nothing that can be done in post-production to pull out any detail. Darkening the subject will not bring back any nuance in the creatures coloring, and the image will lose desirable texture. Again, conversely, if the black-coated bear or bird is underexposed to absolute black there is no way to lighten the subject and pull out interesting details from the fur or feathers.
What about the Eagle?
Some animals are doubly challenging as in the case of the American Bald Eagle, with its white head and dark body. These magnificent creatures are almost impossible to photograph in harsh light. If choosing which end of your histogram to sacrifice, my opinion is to expose for the white head. Again, avoid harsh lighting if at all possible.
Conclusion
Remember, when you’re faced with a choice of settings for an extreme exposure while photographing wildlife, never sacrifice your subject. Whether a light or dark-coated bird or animal, intentionally set up the shot to capture the creature and its distinctive features and keep the background as a secondary consideration. To make sure the subject will be correctly exposed, use a 3-shot bracketed exposure, with an exposure one stop over and another exposure one stop under the setting.
Do you have any wildlife exposure tips? Please leave them in the comments below.
The post How to Expose Correctly for High Contrast Wildlife by Bruce Wunderlich appeared first on Digital Photography School.