What does low key mean?
In a world where the crisp, clean, high key shot dominates, it’s great to see a return to the low key portrait. In comparison to the high key image, where most of the tones are above (lighter than) 50% grey, the low key portrait has tones that are mostly under (darker than) 50%.
You’re replacing the light, airy feel with a more moody, dramatic look. Looking at your histogram, most of the information is bunched on the left-hand side. That’s not to say that you’re underexposing the subject to get this look. You still need correct exposure on the face. A lot of action movies or thrillers have posters with a low key feel. Think drama and you’re in the ballpark for how a low key portrait will look.
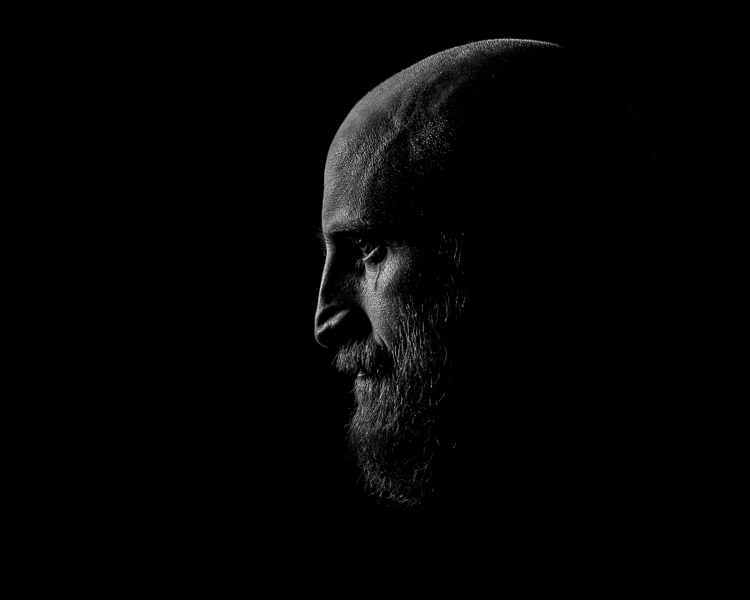
The background and lighting
Your background needs to be dark, usually dark grey or black, and the tone of the clothing will be of a darker tone. They don’t need to be black strictly speaking.
You should set your lighting to create drama. Take your cues from film noir. The photos don’t need to be in black and white, though. However, you may find that the absence of color in low key images can lend itself to this look. As well as choosing dark clothes, avoid ones with patterns, as this will draw attention away from the face.
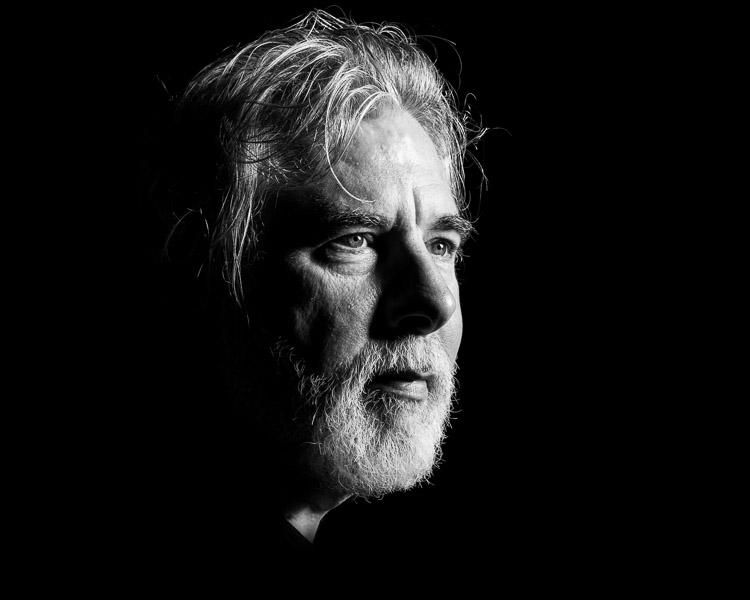
Lighting a low key portrait
You don’t need to use artificial lighting to get a low key portrait. You could use natural light through a window. To get control, you need to close the curtains down to a tiny slit of light. Then, with the room lights off, place your subject in the light and expose for their face.
The rest of the room will go dark for a naturally lit low key portrait. If you’re in a corner room with a window on each side, you could even do this trick where the second window acts as a backlight. Just narrow the slit in the curtains to control the light for this effect (see below).
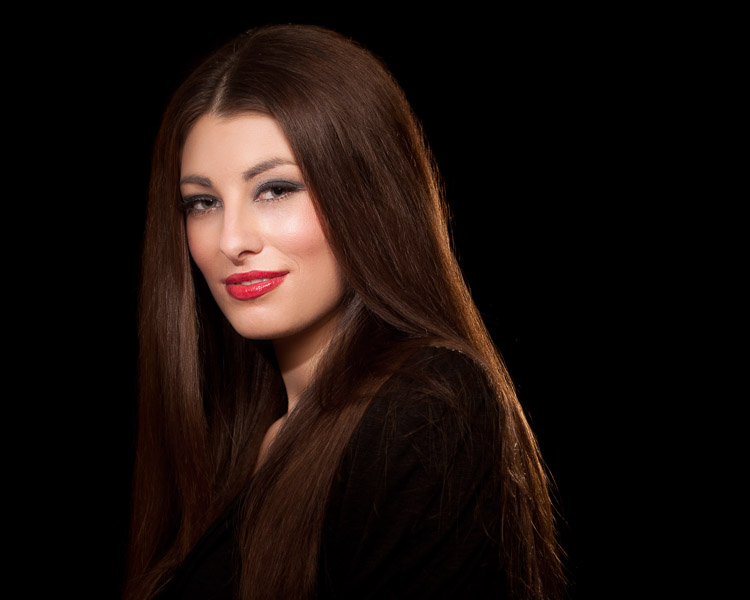
You can also have this control in the studio, so let’s set up and refine a studio portrait.
You’ll need a lighting setup that is flattering and controllable. A strip softbox lets you control the light more, as would a beauty dish. If you don’t have either, you can add some material over the softbox you do have to create a strip light. If you have a grid, even better. As long as you can control where the light goes, you’ll be able to get this down. You can even block your light from the background using a black card (things that block light are referred to as flags).
Creating a low key portrait from scratch
For the examples here, I used an Elinchrom BRX500 with a 44cm White Beauty Dish and a white deflector. Like I’ve mentioned, you don’t need to have exactly this gear to get these shots. Gear is only small part of the equation, it’s using the gear that counts.
Making the background darker
In this first shot, you’ll see the model against the wall, photographed with a butterfly lighting pattern. Even though the tones are dark, the image itself is too bright for a low key portrait.
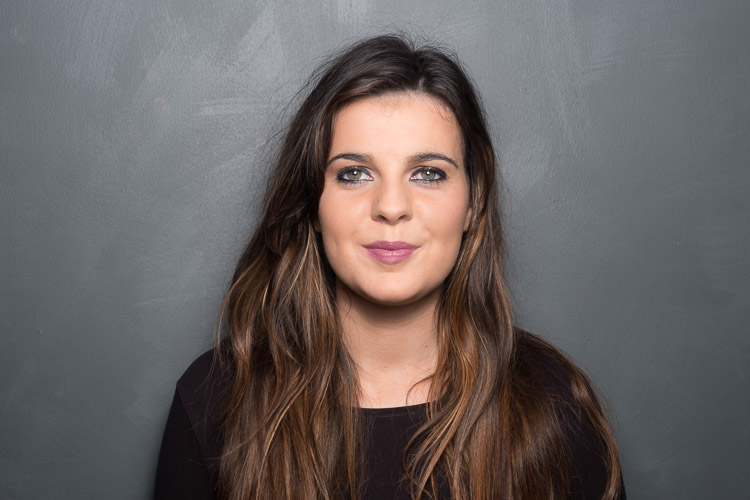
Close to the grey wall.
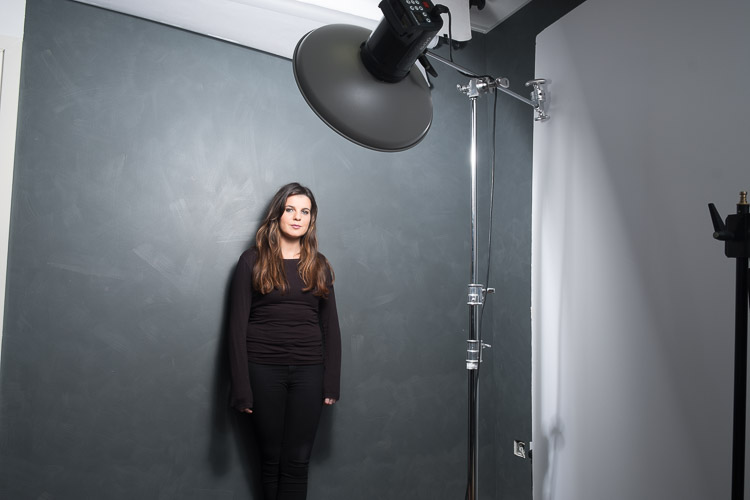
By moving the model and the light evenly away from the wall, you’ll notice the light on the subject stays the same, but the background gets darker.
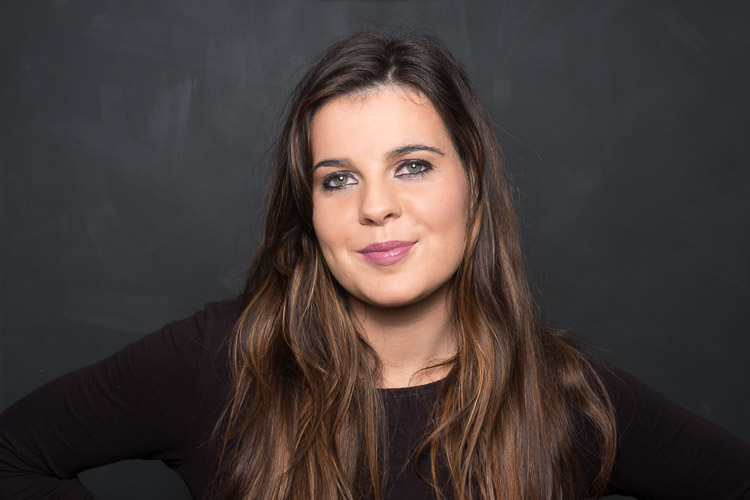
Moving the model away from the wall means the light falls off and the background gets darker.
Move the light to the side
If you move the light around to the side, into a short lighting position, you’ll see the background darkens even more, and there is an increase in the drama of the shot. We still have light spilling on to our background, though.
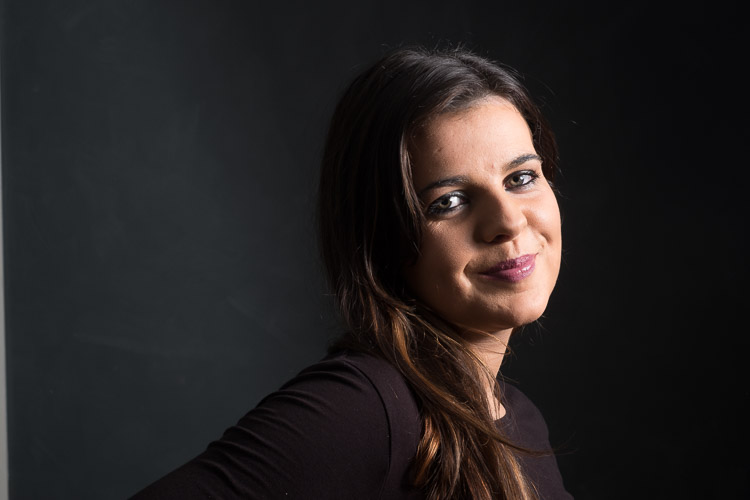
Moving the light to the side means even less light falls on the background, darkening it even more.
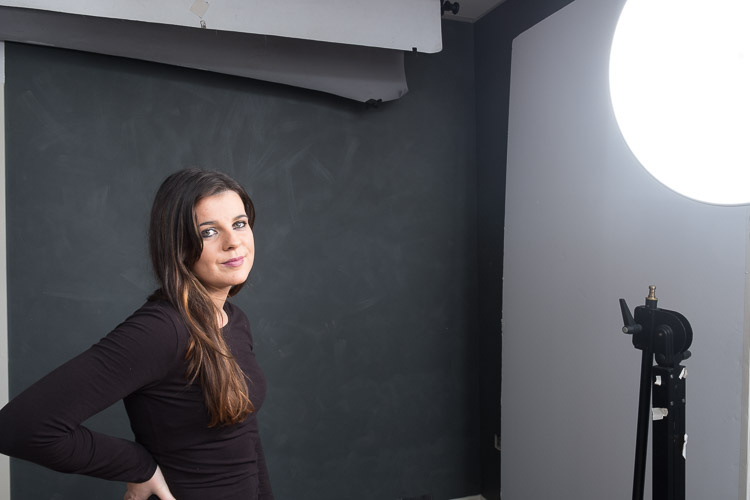
Add a grid to the light
By adding a grid to the light, you can control the light even more. The grid restricts the light to whatever is in front of the light only, none bounces around or spills out the sides.
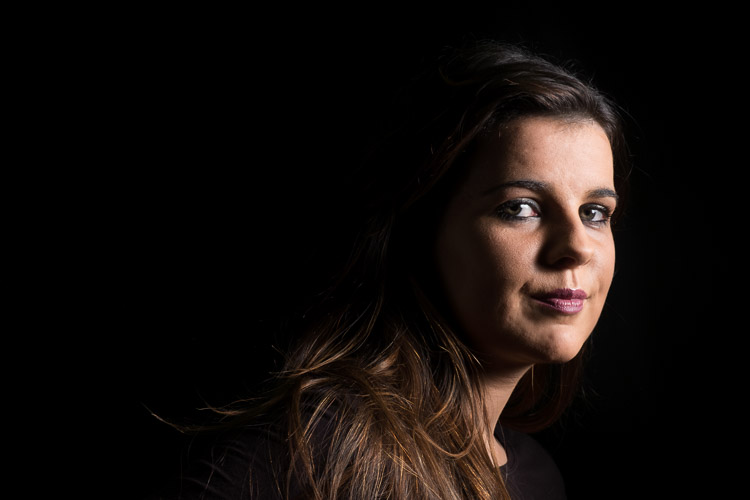
With a grid added to the light.
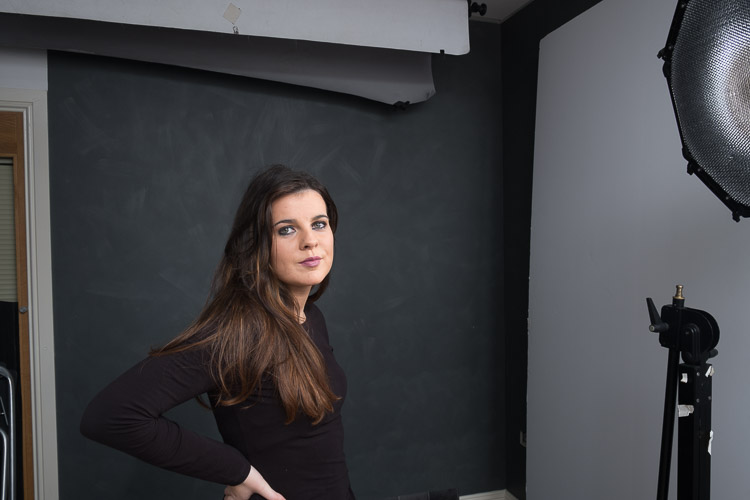
Light with grid added.
Add light onto the hair
You’ll see that the hair is starting to blend in with the background now. This can be a great effect sometimes, but if you want separation between the hair and the background, you need to add fill light in there somehow.
You could choose a reflector, but a second light offers more control. I’ve added a strip light on the other side of the subject opposite the main light. Make sure that light doesn’t hit your lens or you will get flare. Use a grid or a flag to block it if necessary.
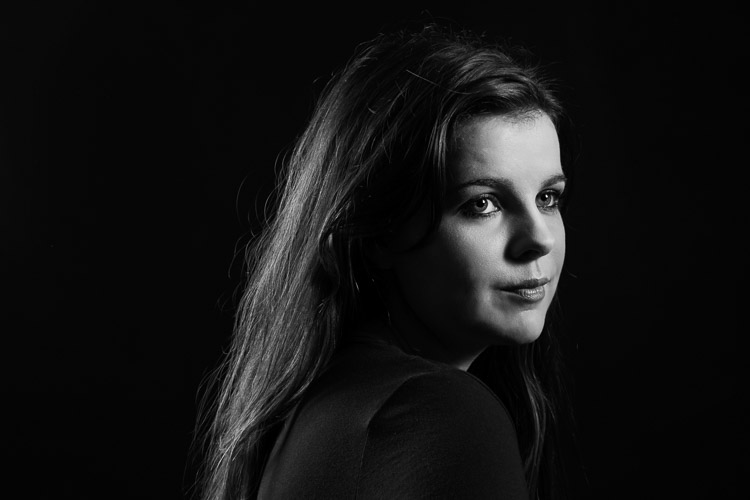
Second light added for her hair.
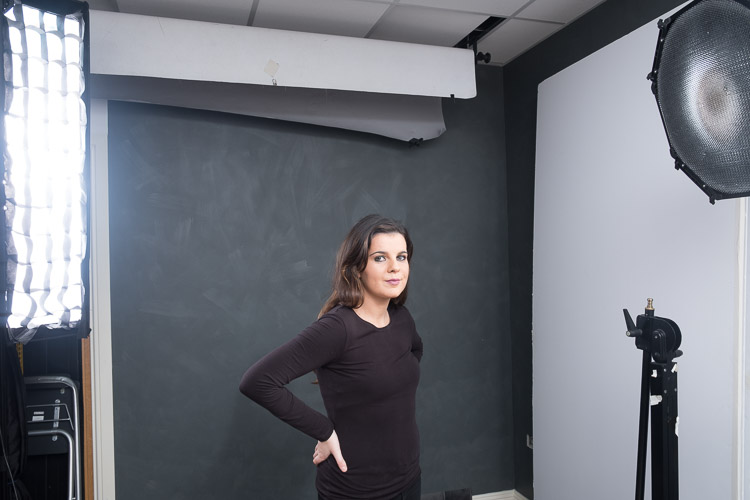
Light position with main light (with a grid) and hair light (also with a grid) opposite and behind the subject.
Practice it!
These examples should get you going towards making your own low key portrait. The trick is to control the light so you darken the environment. Try the curtain trick if you don’t have any lights. You can even use that trick with an off-camera speed light by putting the flash outside the window to replace the natural light for more control.
Have you done any low key portraits? Have any questions? Please share in the comments below.
The post How to Make a Low Key Portrait Step by Step by Sean McCormack appeared first on Digital Photography School.