Images of night scenes never fail to impress. Night-time images have great ambiance, something which is often absent in flat, bright, daylight photos. Skillful low-light photos can look simply incredible and if you’re looking for ways to make money from photography, selling canvas prints of night scenes is one way to achieve this. They are very popular.

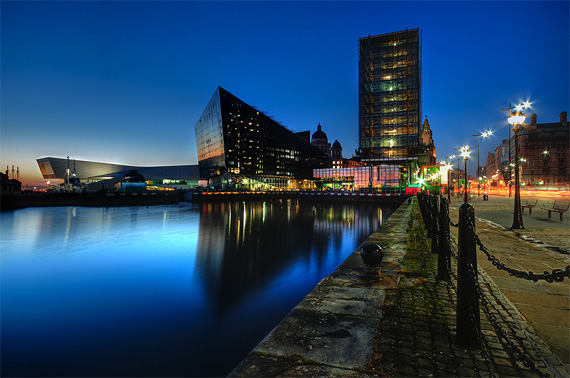
“New Graces” captured by PictureSocial member ian newton
The main aim of this article is to highlight:
- Night photography settings and techniques
- Good low light cameras on the market
1. Exposure: The basics
Given the amount of available light, there is a “right” exposure, where just enough light is allowed onto the camera’s sensor to make an accurate representation of the scene – i.e. preventing the picture from looking too bright or “blown out” because there was too much light, or at the other end, under-exposing the picture through allowing in insufficient light.
Three camera settings can be altered to control exposure:
- Aperture (or f-stop): Here is an inverse relationship – Low f-stop values mean more light is being let in
- Shutter speed: At slower shutter speeds the sensor is exposed to light for a longer period of time
- ISO / Sensor Sensitivity: At higher ISO settings the sensor is more sensitive to light
For any given scene, there can be more than one combination of the above settings that will give you a correct exposure. Your camera’s light meter tells you how to combine them. For instance, if you choose to fix the ISO and aperture, the camera will set the correct shutter speed. Or when you select ISO and shutter speed values, the aperture will be set accordingly (more on this in the tutorial eBook).
If you set the camera to “auto” all 3 of these variables are set by the camera. Good night photos, however, require that we do more than shoot on “auto”

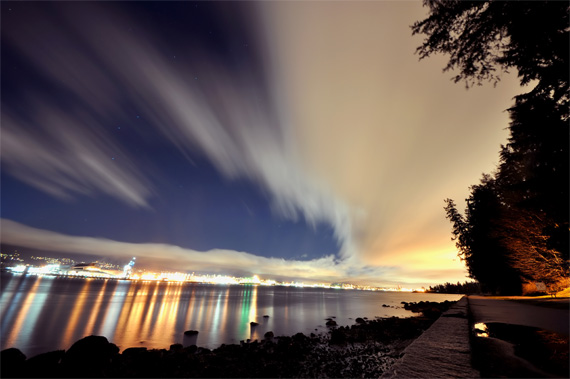
“Sea Wall” captured by PictureSocial member Lorin Hughes
2. Night photography settings
Note: The one night shooting option omitted here is using a flash – but this is a completely different kind of concept for a “night scene” and I’ll deal with flash photography on its own in a later article.
a. Shoot “wide open” with a fast lens
This is a good option for street photographers who want to capture low-light (but perhaps not night-time) street photos.
Use a good lens which can go down to f/2.8 or even f/1.4 – i.e. a lens that can let in a lot of light! This will give you a nice shallow depth of field which adds dimension to your photos, whilst allowing you to shoot at decent shutter speeds (around 1/60th of a second). At slower shutter speeds you’ll most likely get blurry images unless you use a tripod.
This is an essential technique if you have an older camera that only delivers good quality at low ISO settings. Still, even when you have a good high-ISO camera you may want to exploit the nice shallow depth of focus brought about by shooting at a lower ISO and wide-open aperture
b. Use a tripod and expose for longer
This is ideal if you want to capture a night scene of a cityscape, for instance, where your subject isn’t moving, so you have time to set things up.
Ensure a wider depth of field by choosing a medium aperture such as f/8, fix the camera to your tripod and leave the shutter speed selection to the camera. Depending on the light in the scene it could be one second, several seconds or, for seriously low ISO settings, even several minutes.
Top tip: The best time to take photos of cityscapes is just after sunset, when there is still a little bit of ambient blue in the sky. If you’re using in-camera metering, point the lens at the sky to determine the correct exposure – you’ll be delighted by the good exposure you get in the end.
c. High ISO photos
This is especially useful (and sometimes unavoidable) if you’re taking photos at an indoors or night-time event where flash photography isn’t allowed, or perhaps you don’t want to use a flash because it will disturb your subject and ruin the photo.
You can force the camera to be more light-sensitive by increasing the ISO. This opens up the possibility of getting sharp photos in dark circumstances without having to use a flash or tripod. Why? You’ll be able to shoot at faster shutter speeds, which helps keep the images sharp..
Take note: There’s no such thing as a free lunch. Increasing the ISO means that you are more likely to get a noisy / grainy photo.
3. Which cameras perform well in low light conditions?
Certain cameras give you more low-light flexibility because they perform well at high ISO settings – leaving you full creative control over which of the three above options you choose to make your photos.
Because DLSR cameras tend to have bigger sensors, they generally take better high-ISO photos than compact cameras with relatively small sensors (it’s a bit technical, but it’s based on the laws of physics and electronics). The latest DSLR cameras have full-frame sensors achieving superb high-ISO performance.

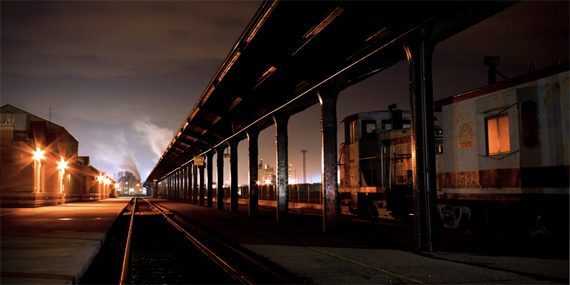
“Union Station” captured by PictureSocial member Torrey
About the Author:
Matthew Foster writes for a publication, top10digitalcamerashq, which is currently offline.
For Further Training on Night Photography:
This new in-depth tutorial eBook is designed to help you master challenging lighting conditions in landscape & cityscape photography no matter your experience level. Take more compelling photos, post-process them to perfection, and delve even further into long exposure tricks so you know all the possibilities. Currently 60% off for the summer sale which ends soon.
Deal found here: The Photography Tutorial eBook at 60% Off
Go to full article: How to Take Photos in Low Light
What are your thoughts on this article? Join the discussion on Facebook
Article from: PictureCorrect