Lightroom’s graduated filter is an extremely powerful tool when used with purpose. For landscape photographers there are several different things that you can accomplish with the graduated filter, and in this article we’ll look at four specific uses.
1. Replicate the Effect of a Graduated Neutral Density Filter
Graduated neutral density filters can be used to balance the exposure in situations where you have very dark and light areas in the same scene (for example, dark shadows below the horizon and a bright sky above the horizon). While using a graduated neutral density filter can be very effective, there may be times when you don’t have one with you or times when you would rather get by without one. Lightroom’s graduated filter will allow you to replicate the effect by selectively adjusting exposure.
Let’s take a look at an example. With this photo I would like to use the graduated filter in Lightroom to lighten the foreground by increasing exposure.
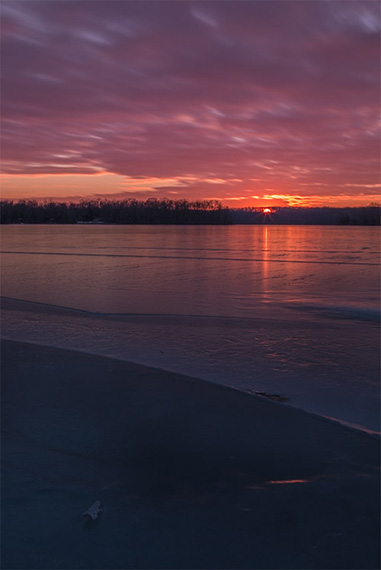
Example Image
Now, I’ll select the graduated filter tool with the keyboard shortcut “M” and add the filter so any settings that are changed will impact the bottom part of the photo.
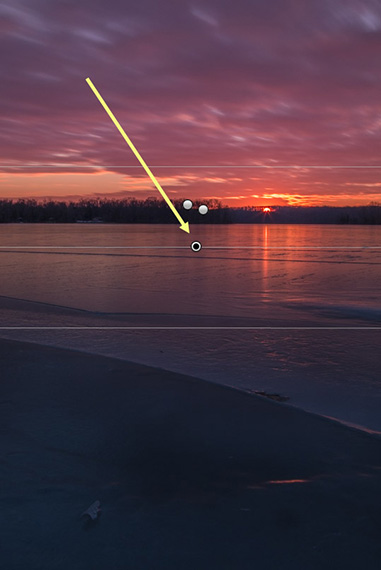
Lightroom’s Graduated Filter
In this case I want to drastically lighten the foreground so I will change the exposure to +3.00.
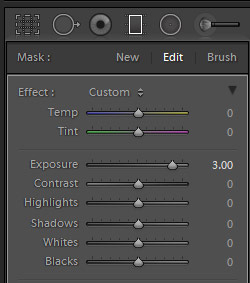
Increase Exposure
And after that change the photo looks like this.
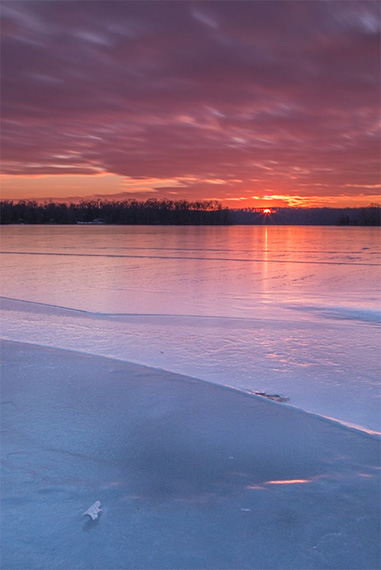
Foreground is Lightened
So the graduated filter lightened the foreground without impacting the sky.
2. Boost Blue Skies
Improving the sky is one of the best ways to get the most out of your landscape photos. If the sky is a dull blue you can add some color with the help of the graduated filter.
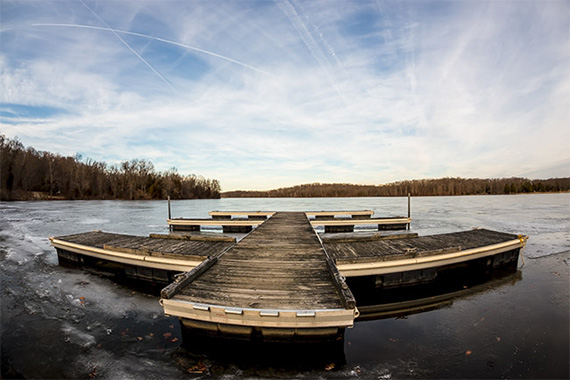
Example Image
I’ll add the graduated filter and get it lined up on the horizon.
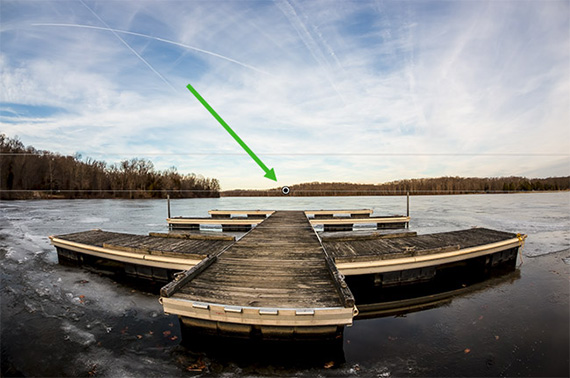
Graduated Filter on Horizon
And then I’ll change the settings as shown below. Adding the blue color and bumping up the saturation will make the biggest impact, but I’ll also decrease the exposure a little, and add some contrast and clarity and bring down the highlights a little.
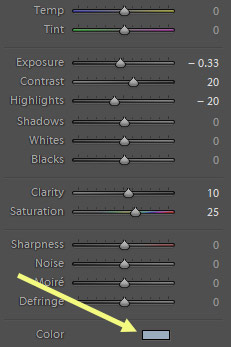
Settings to Enhance the Sky
And with those changes the photo looks like this.
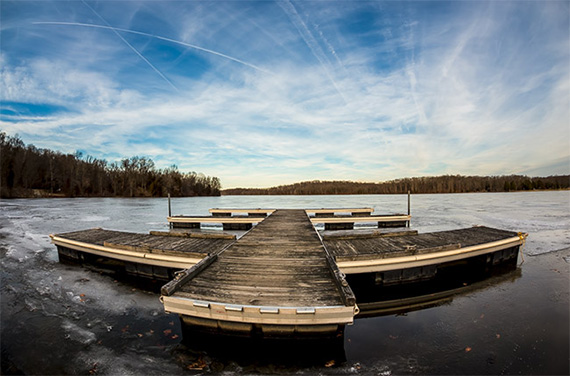
Boosted Sky
3. Enhance Sunrises and Sunsets
Another great use for the graduated filter is to enhance the sky in a sunrise or sunset shot. Let’s take a look at this example.
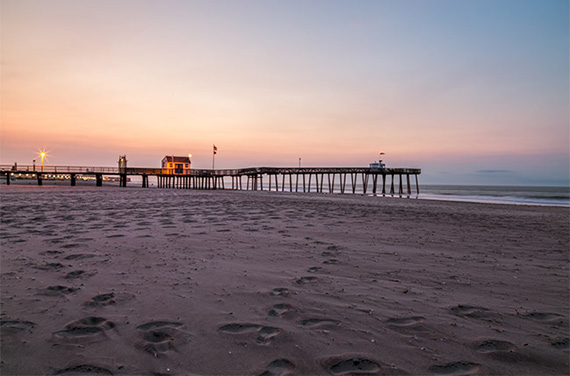
Example Image
I will add a graduated filter at the horizon to impact the sky.
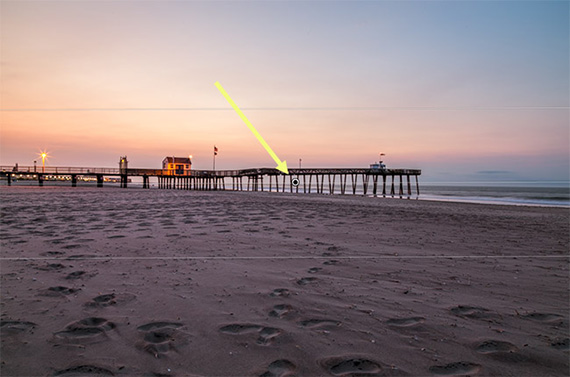
Graduate Filter for Sunrises and Sunsets
And then I’ll change the settings as shown below. This will add a purple color to the sky, increase saturation and contrast, decrease the exposure, and bring down the highlights a little.
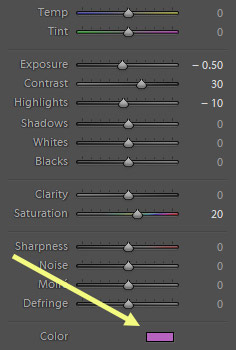
Settings to Enhance Sunsets and Sunrises
And after those changes the photo looks like this.
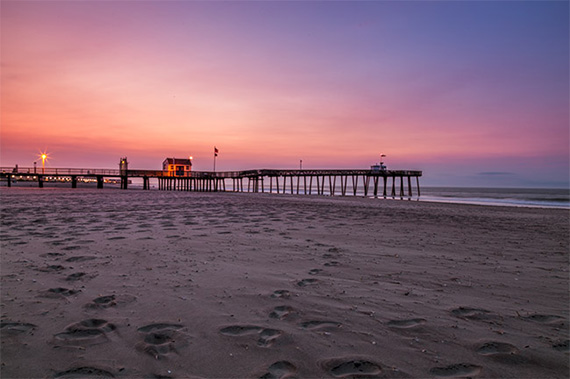
Enhanced Sunrises and Sunsets
4. Blur
There may be times when you find it helpful to use the graduated filter to apply blur selectively. I like to do this sometimes with photos of water, such as lakes.
With the photo below I would like to soften the water by bringing down the exposure and using negative clarity and sharpness to blur it a little.
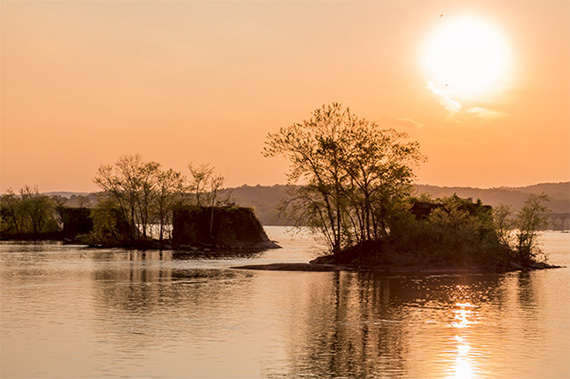
Example Image
I’ll add the graduated filter and situate it so the changes will impact the bottom part of the photo.
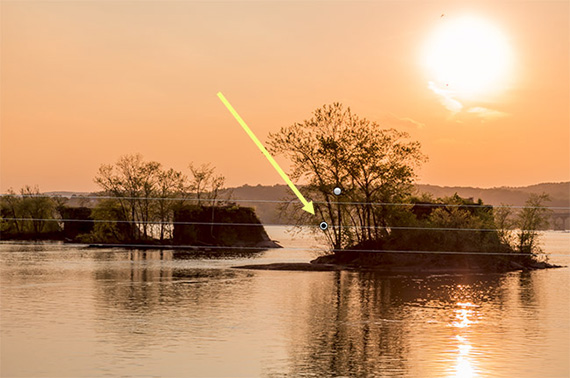
Graduated Filter for Blur
And then I’ll drop the exposure to -0.80 and reduce the clarity and sharpness each to -50.
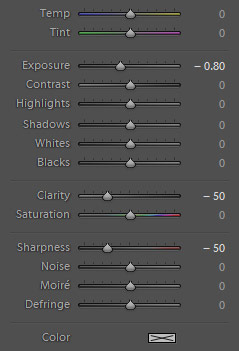
Settings for Blur
And after those changes the photo looks like this.
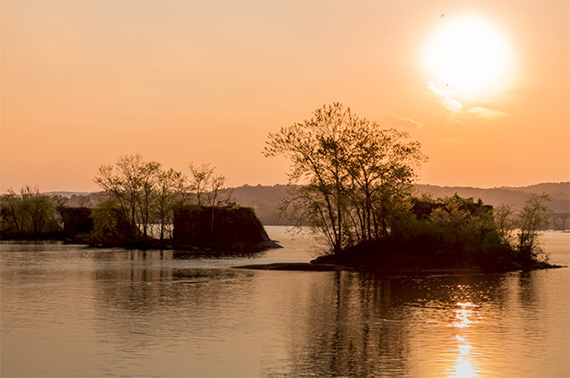
Blur
These are just four examples of how you can use the graduated filter with your own landscapes and nature shots. The more comfortable you get with the tool the more ways it can be used.
About the Author:
Marc Andre is the editor Loaded Landscapes, a blog that focuses on landscape and nature photography.
Go to full article: How to Use Lightroom’s Graduated Filter to Improve Landscapes
What are your thoughts on this article? Join the discussion on Facebook
PictureCorrect subscribers can also learn more today with our #1 bestseller: The Photography Tutorial eBook
The post How to Use Lightroom’s Graduated Filter to Improve Landscapes appeared first on PictureCorrect.