There are tools in Photoshop that I use more than others, and some not at all. The Patch tool is one of my favourites. It is so easy to use and with each version of Photoshop, it has gotten even better.
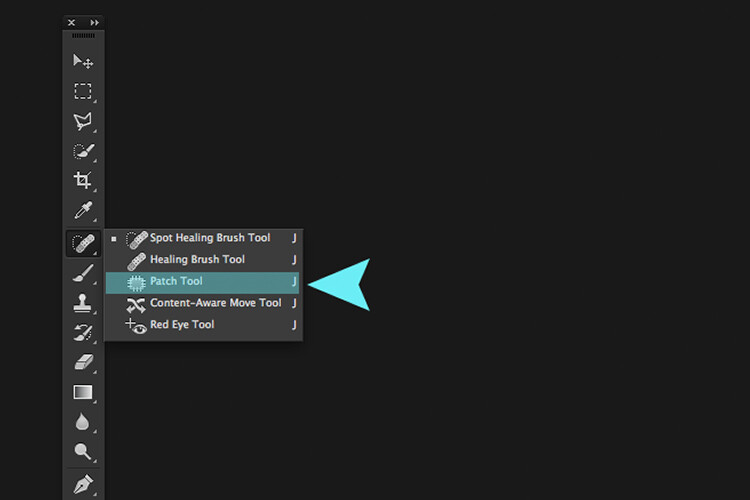
The Patch Tool is located under the fly out menu of the Spot Healing Brush.
What exactly is the Patch Tool for?
The Patch Tool is part of the healing brush set of tools. These are the go-to tools for retouching and repairing your images. The Patch Tool is primarily used to repair larger areas of an image, or get rid of any distractions or blemishes.
The patch tool was introduced into Photoshop at the same time as the Healing Brush. It is similar to the Healing Brush Tool, in that it matches the texture, lighting and shading of the sampled pixels to the source area. But, the Patch Tool uses selection-defined areas instead of a brush.
Prior to Photoshop CS6, you could not work on a separate empty layer when using the Patch Tool, unlike the Spot and Healing Brushes. This meant that you had to duplicate the layer that you were working on. However, in Photoshop CS6, Content-Aware was introduced to the Patch Tool. So you can now work on an image using an empty layer. This has made it quite powerful indeed.
What makes the Patch tool unique is that each time you use, it will give a slightly different result even on the same selection. It is great for retouching larger areas of your image, very fast and quite seamlessly. Or if you are in Destination Mode, this can also duplicate, or clone an object. Although, I rarely use it for that, it’s still an option. I will illustrate this further on in the article. There is also an option to use a pattern or Transparent, neither of which I’ve had a use for yet to date.
What does the Patch Tool look like?
The Patch Tool can be found hidden behind the Healing Brush tool in the Tools panel.

By clicking on the Spot Healing brush in the tools panel. A fly out menu appears, the Patch tool is the third one down.
How does the Patch Tool work?
- Select the Patch tool and draw an area around your selection. It works in a similar way to the Lasso selection.
- Move the cursor over the selected area and drag it to the left, right, or in any direction.
- Choose whether you choose Source or Destination mode in the Options Bar. You will see a preview of the image as you drag it.
- When you release the mouse or stylus, Photoshop does the magic of blending the pixels from the source or the destination area, to merge the pixels with the original selection seamlessly. Deselect by hitting Cmd+D on a Mac. Ctrl+D on a PC.

Image showing definite areas that needs to be removed.

The Patch Tool in normal mode removed some unwanted things (cigarette butts) in this image very easily and quickly.
It’s that easy, but you probably won’t get a 100% accurate result every time. You may have to make a few attempts. Just make sure you are working on a duplicate background layer, or using a separate empty layer – not your original background layer.
Tip: You don’t have to use the Patch tool to define a selection. You can use any selection tool and then select the Patch tool.
Before I show you how to use the Patch Tool with Content-Aware, I want to demonstrate how the it can be used to clone an isolated area of your image.
Duplication
In the following example, I want to duplicate the bird and add another one. Similar to the steps above:
- Make a selection around the bird.
- Choose Destination in the Options Bar.
- With the Patch tool selected, position the cursor over the selection and move it into place.
- It doesn’t do a bad job, however, if you look closely the surrounding pixels of the selection haven’t blended in so well.

Click on the Destination radio button to duplicate or clone a specific area.
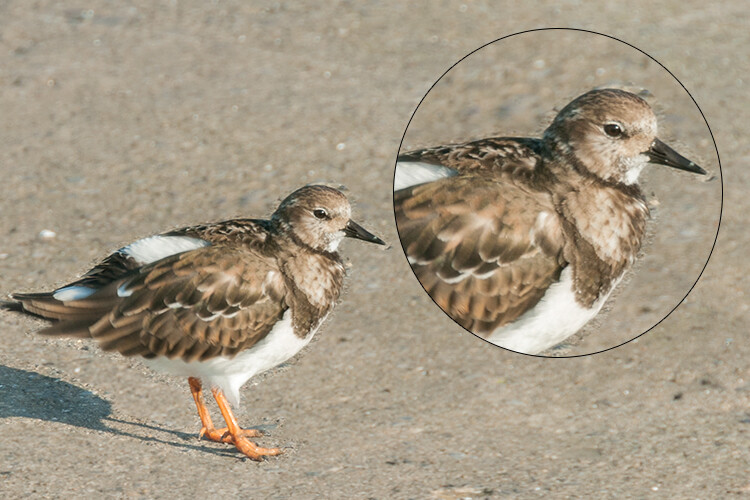
Using the Patch tool to clone or duplicate an area of an image in Destination Mode. However, the results can produce a noticeably pixelated edge.
Here’s an alternative method in getting a better result. Once you have made the selection for duplicating an area.
Press Cmd+Alt+T on a Mac (Ctrl+Alt+T on a PC). This brings up the free Transform tool. Now move the selection to a new area on the image. Click on the tick box to commit, or press Enter. The selection is still active as the marching ants are visible around it. With the Patch tool selected, move the cursor over the selection, hold down the mouse or stylus and move the selection slightly and then release. You will notice the surrounding pixels are blended better.
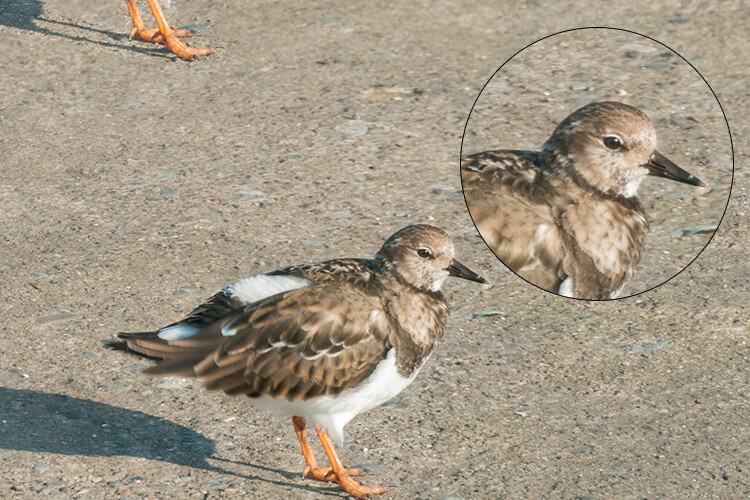
There is a definite improvement using the free transform tool, then holding down the mouse or stylus and moving the selection slightly at the same time just before releasing it.

And voila, three birds!
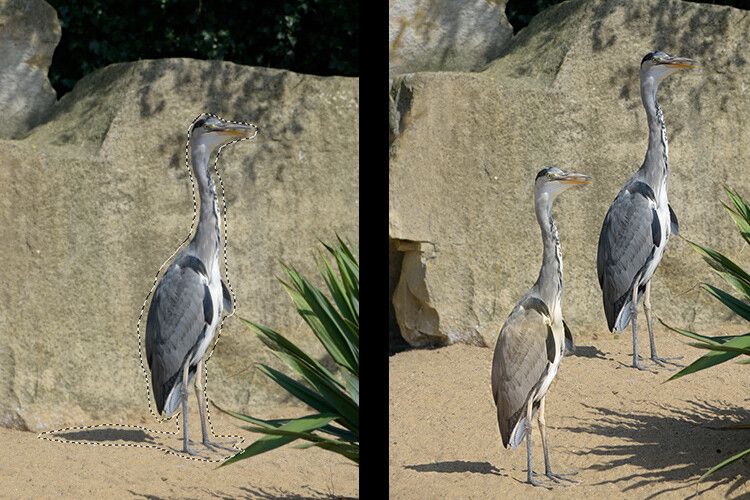
Another example of using the free transform tool along with the Patch tool set to Destination Mode.
I like to use the Patch Tool in both the normal mode and content-aware. In normal mode the Patch Tool does a great job for general clean up. However, where there are areas close to the edge of the image, the Patch tool struggles to blend or repair the selection. This is where the Patch tool in Content-Aware mode really shines.
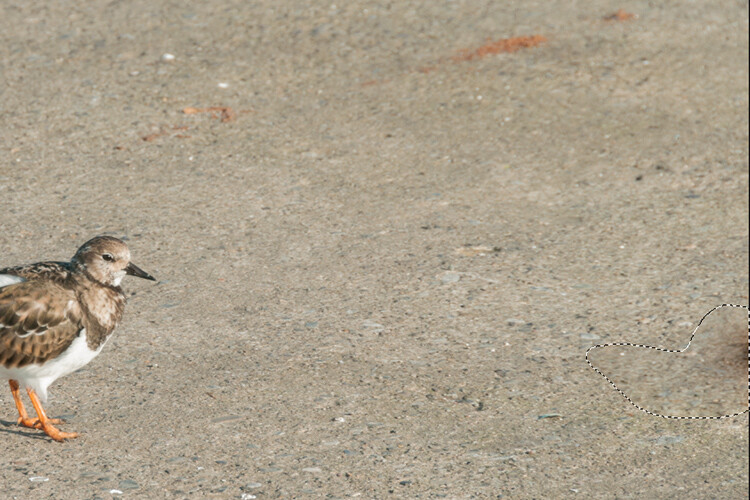
When an area has a sharp contrast, or is up against the edge of a photo, the Patch Tool in normal mode is less effective than using the Patch with Content-Aware. (notice the selection on the right here)

In this image. I removed the unwanted areas using a combination of the Patch Tool in normal mode and Content-Aware.
Content-Aware Mode
In order to use the Patch Tool in this mode, go up to the Options Bar and change it from Normal to Content-Aware. If you want to work using an empty layer above the image, make sure Sample All layers is checked. As well, in the Options Bar, you will also see Adaption.
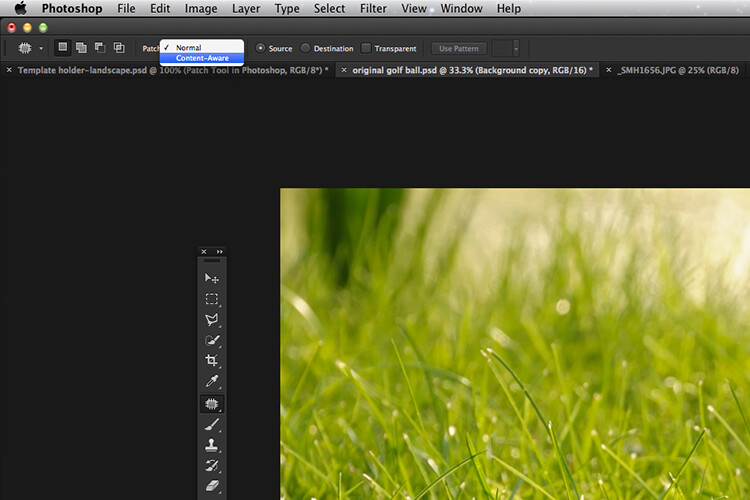
Switching the Patch Tool in the Options Bar from Normal to Content-Aware.
By clicking on this, a drop down menu appears with five options. Your choices range from Very Strict to Very Loose, depending on how much blending is required. You will need to experiment to see which one looks best. Before you deselect, press Cmd+H to hide the marching ants and toggle between each option to see which one you prefer.
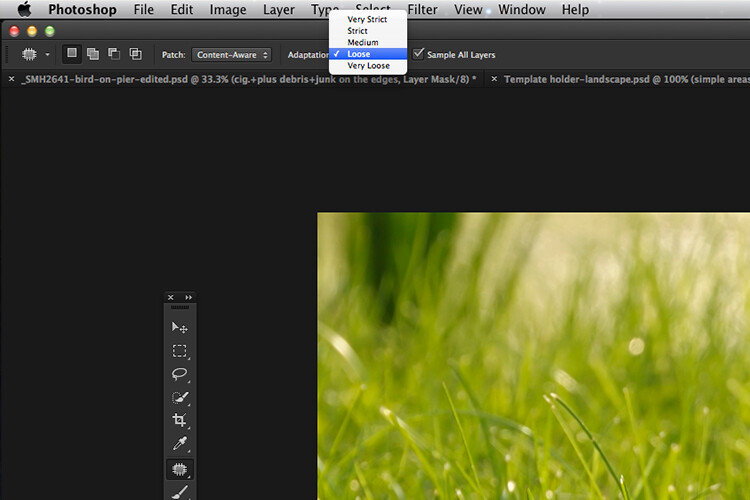
The five options for the Adaptation setting of the Patch Tool in Content-Aware.
You can see quite clearly the differences between the two modes in the images below.
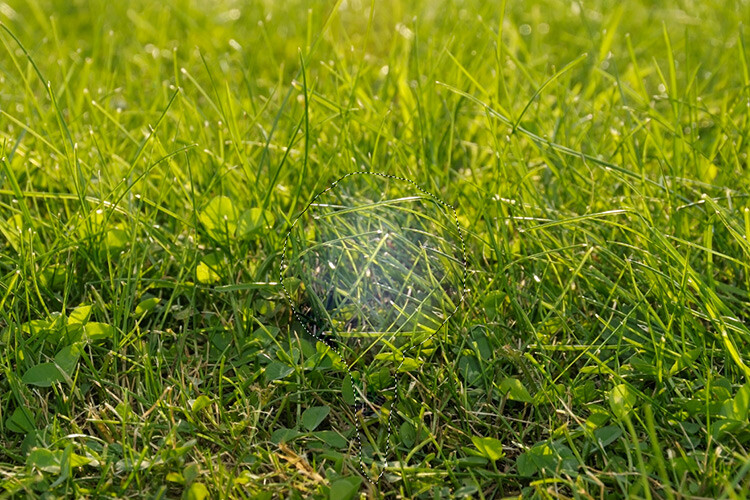
The Patch Tool in Normal Mode is trying to remove the golf ball on the tee from the image.
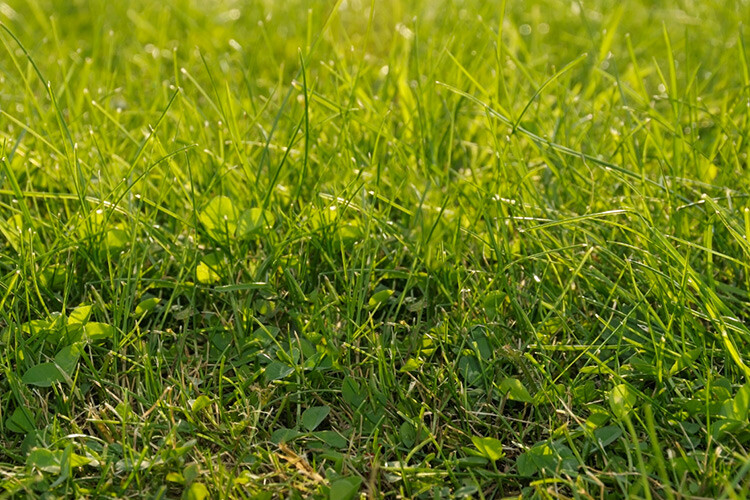
The Patch tool in Content-Aware has successfully removed the golf ball and tee from the image.
I hope you found this article useful. Do you use the Patch Tool in Photoshop? Please let me know in the comments below.
The post How to Use the Patch Tool in Photoshop by Sarah Hipwell appeared first on Digital Photography School.