When you first move off auto, you realize how much control you have over your camera. You get to choose the aperture, shutter speed, ISO, and be able to manually select the autofocus point, among many other things. In short you get control over everything!
You also get full control over the exposure, or brightness, of the image. You decide you where to set the exposure for each image – something that the camera does not always get correct. The reason the camera doesn’t get it right all the time is because the in-camera light meter doesn’t always know how the brightness level of the subject. What tricks the light meter is bright or dark tones.
So how do you take back control of the exposure, and compensate for the camera’s errors? The process of correcting your exposure is referred to as Exposure Compensation. For more on that read: How to Use Exposure Compensation to Take Control of Your Exposure. However, before you add any exposure compensation, you first need to know how much to compensate, and understand exactly what your camera’s light meter is doing. This is why learning how to meter is important. If you are unfamiliar with the term metering, it is the process of measuring light values.
The first thing to grasp when is how your camera’s light meter sees the world. Put simply, it sees everything in grayscale. This means that all your camera sees is a world of tones; a colourless world. It cannot differentiate trees from people, people from snow, etc. (Although more modern in-camera light meters will now also recognize colour, the same basic principles apply.)
The other critical element to know is that your meter wants to make everything middle-gray, commonly referred to as 18% gray. Remember that! Right it down! Keep it with you in your camera bag until it’s firm in your memory! It’s very important!
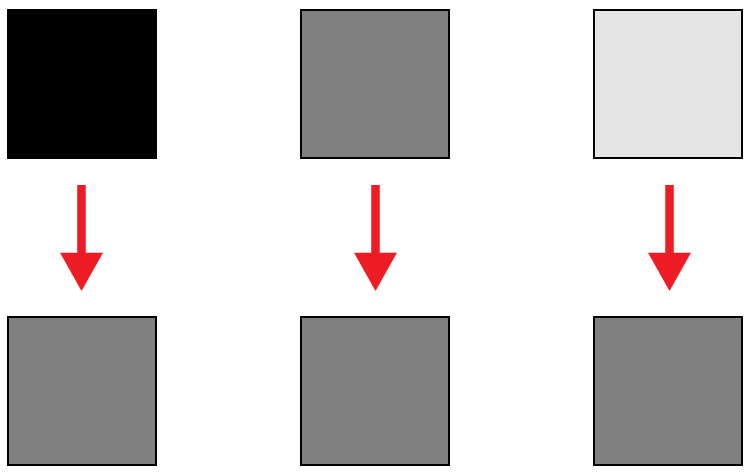
Everything you need to know about doing exposure compensation correctly hinges off 18% gray. If your scene has a lot of bright areas in it, such as snow or sand for example, your camera will want that to be 18% gray. If you’re photographing a person in dark clothing, your camera will also want to make that 18% gray. Your camera doesn’t know your subject is actually meant to be black, nor does it know that all of that white in the viewfinder is actually snow. Leaving your camera’s meter at zero, or Meter as Read (MAR), can cause your photo to be over or under exposed.

Here is an illustration of what your camera meter will do. All tones will end up 18% or middle gray.
So how does knowing how your camera will meter, help you to decide how much exposure compensation to apply? This is where knowing a little about the Zone System can come in handy.
What is the Zone System?
The Zone System was developed by the late Ansel Adams and Fred Archer. In essence, it was a system used to meter and continue on in the dark room when developing images. I’m not going to discuss the Zone System in its entirety – that could be something for a future article – but at its core, the Zone System will greatly help you decide how much exposure compensation to add or subtract.

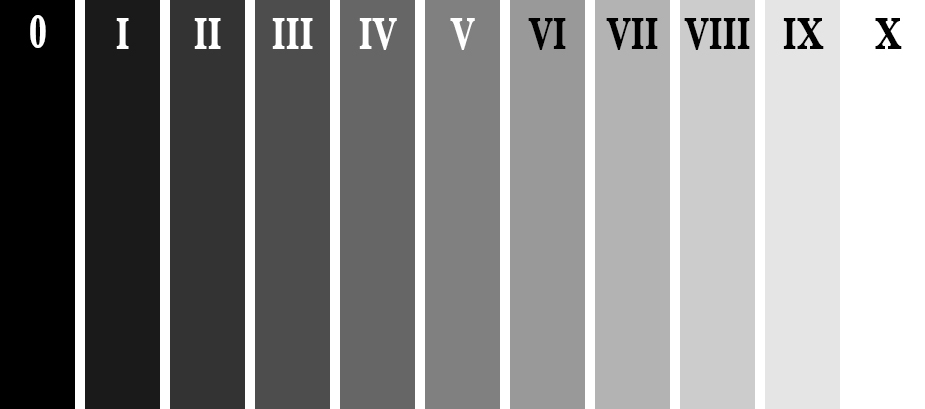
The Zone System
Above is an illustration of the Zone System. In it are 11 zones, denoted by Roman numerals. Here is a quick rundown of examples for each Zone:
- Zone 0: Pure black, no detail. This is would be the edge of a negative film.
- Zone I: Near pure black with slight tonality, but no detail.
- Zone II: This is the first Zone where detail starts to show; the darkest part of the image where detail is recorded.
- Zone III: Average dark materials.
- Zone IV: Landscape shadows, dark foliage.
- Zone V: Middle-gray, what your light meter sets to.
- Zone VI: Average Caucasian skin tone.
- Zone VII: Very light skin; shadows in snow.
- Zone VIII: Lightest tone with texture.
- Zone IX: Slight tone without texture, (e.g., glaring snow).
- Zone X: Pure white with no detail. This would be light sources, or reflections of light sources.
This next piece of information is the other piece to the exposure compensation puzzle:
Each Zone is separated by exactly one stop of exposure.
Now that you have the information, how do you use it?! You know that you camera is metering for Zone V, or middle-gray, now consider your subject. How light or dark is it? If you were photographing a bride’s white dress, that would be very bright with texture; so going by the chart that would fall into Zone VII or VIII, which makes the exposure compensation required for correct exposure PLUS two or three stops (the difference between Zone V and where your subject should fall).

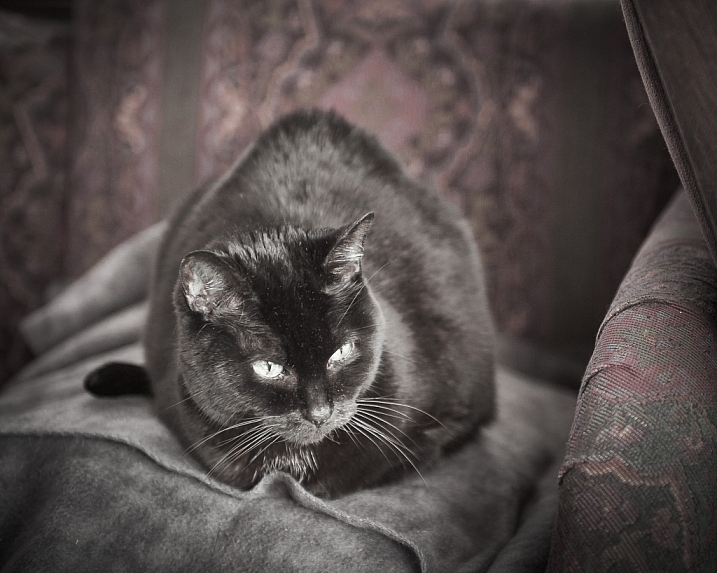
Shot at zero exposure compensation. Black cat is gray or Zone V.

Shot at -2 stops black cat is now black or Zone III.
As an experiment, try photographing a piece of plain white paper. First, make sure that there is no exposure compensation added – your meter should be in the middle. Take a photo. Next, add +2-stops of exposure compensation. This will bring your exposure to Zone VII. Then, take another photo. Notice the difference? The first image should be very close to middle-gray, or Zone V, where the last image should be bright white, but still show detail in the paper.
External Light Meters
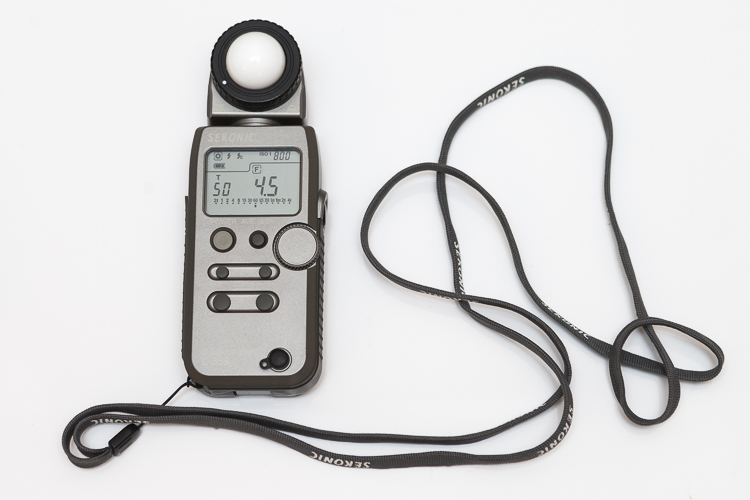
Another tool that may be helpful to you, is an external handheld light meter. They work the same way as your camera’s light meter in that they meter for middle-gray, but they have the added advantage of being to reading what’s known as Incident Light: that which is falling on the subject, not reflected from it. Your camera’s meter is a reflected light meter; it reads the light that has been reflected or bounced off your subject. This may seem obvious, but there is a big difference between incident light and reflected light. Reflected light is greatly affected by tone – the darker your subject is, the less light that will be reflected, whereas the brighter your subject is the more light that will be reflected. However, the incident light – or light coming from the light source – will remain the same no matter what the tones are in your subject. By using an external light meter, you are reading the light directly from the source; unaffected by the tone of the subject.
However, do be careful when you are using an external light meter that you read the incident light from the subject’s position. You may be in the shade, for example, and your subject in the sun. If you were to read the incident light for your position,you would be getting a reading for the shade area, and not the sun, which is the light that’s falling on your subject!

This is an external light meter. It’s a Sekonic L-358, and is able to meter ambient or natural light as well as flash.
Summary and application
Now that you know what your light meter is doing, and how to correct it with exposure compensation, you are on your way to getting more consistent and correct exposures.
Before you press the shutter button next time, do consider what the tones in your scene are like. Are there lots of brighter tones, or more darker tones? If your frame has more brighter tones, the exposure compensation will need to be more on the plus side to render them correctly. However, if there are more darker tones, your exposure compensation will be more toward the minus side of your meter. If you feel there are equal amounts of bright and dark tones, you may find that you don’t need to add any compensation at all.

Snow shot at zero exposure compensation is gray, or Zone V. |

Snow shot at +2 is now white with detail or Zone VII. |
If you’re ever unsure of how much exposure compensation to add or subtract, take a test shot at zero, or in the middle. This will help you decide the direction in which you need to go.
The post How to Use the Zone System to Learn about Metering and Exposure Compensation by Daniel Smith appeared first on Digital Photography School.