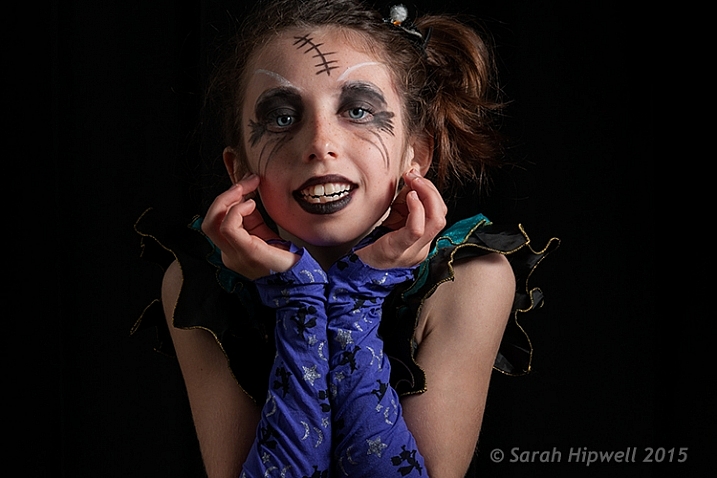
Young girl dressed up for Halloween. Low-key portrait using one speedlight, against a typical black background.
I dare say that nothing is quite like the effect of low-key lighting to show drama in an image. So what does low-key lighting mean in terms of photography? A good definition is found here.
Low-key lighting often uses only one key light, optionally controlled with a fill light or a simple reflector.
The term “low-key” is used in cinematography to refer to any scene with a high lighting ratio, especially if there is a predominance of shadowy areas. It tends to heighten the sense of alienation felt by the viewer, hence is commonly used in film noir and horror genres.
To simplify the term further, low-key lighting focuses on the shadows by using usually one light source. Therefore, shadows are now the primary element of the composition.
What you should know about low-key lighting
The nice thing about low-key lighting is that it’s quite experimental. There are no hard and fast rules that you need to adhere to. You can vary the position, and the distance, of the one light source more to the front or side of the subject, depending on how much contrast you want your model to have. Or ask the subject to turn more into light source or away from it. Here are a few more guidelines:
- A black seamless background is the classic low-key look.
- As this type of lighting is quite strong and contrasty, it’s probably suited for the very young, who in general have flawless skin and subjects (seniors 65+) where the emphasis is on the character of the person. For people who don’t have great skin, this type of lighting won’t be the most flattering.
- You can move the light more to the front and use a reflector to control the light and act as a fill.
- Creates drama and mystery to your portraits.
- This type of lighting is probably not best to do wedding portraits!
- Keep ISO low to 100/200 so that ambient light doesn’t reach the sensor. This will keep the quality of images high by reducing noise.
- Set your flash to manual and start on a low setting of 1/8th power.
- Use a small aperture setting of f/8 and upwards (f/11 and smaller).
- Keep the shutter speed at 1/125 second or higher (not to exceed the native sync-speed of your camera).
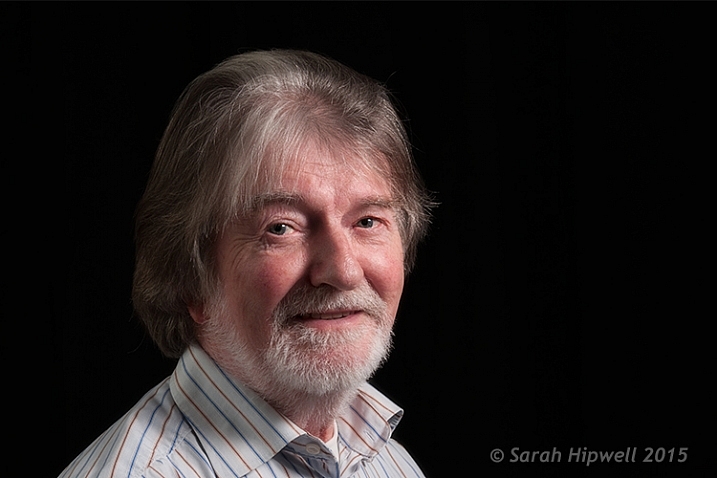
A senior model poses with his body turned more towards the light source to provide less extreme shadows while emphasizing the model’s facial character.
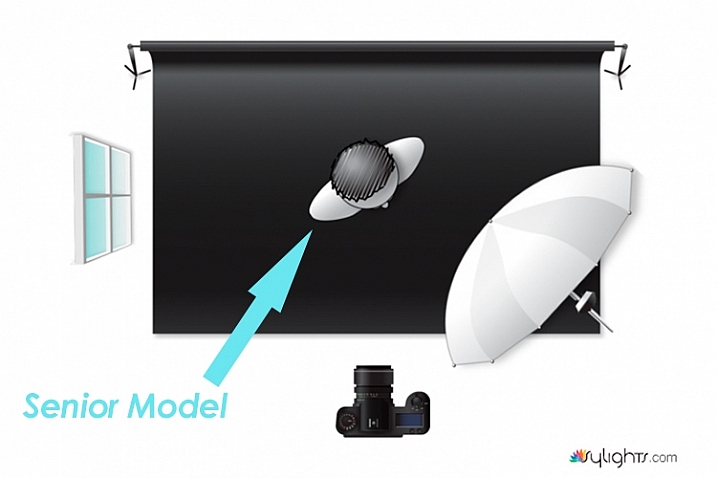
Lighting diagram to show the position of the model in relation to the light source.
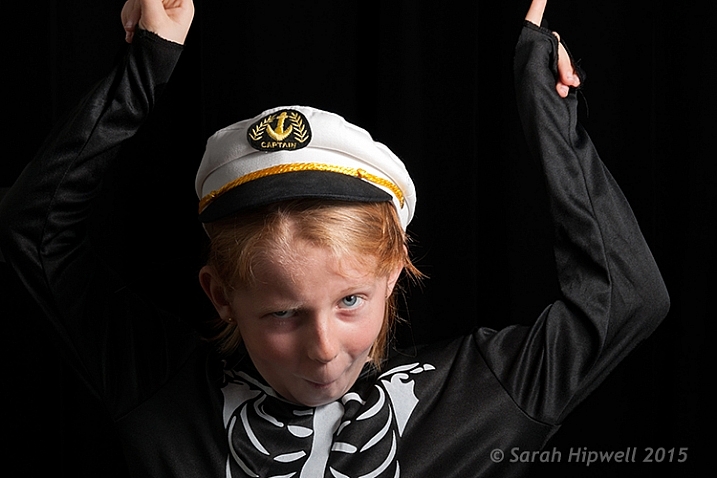
In this particular shot, I wanted more shadow on the model’s right side to give more drama to the shot.
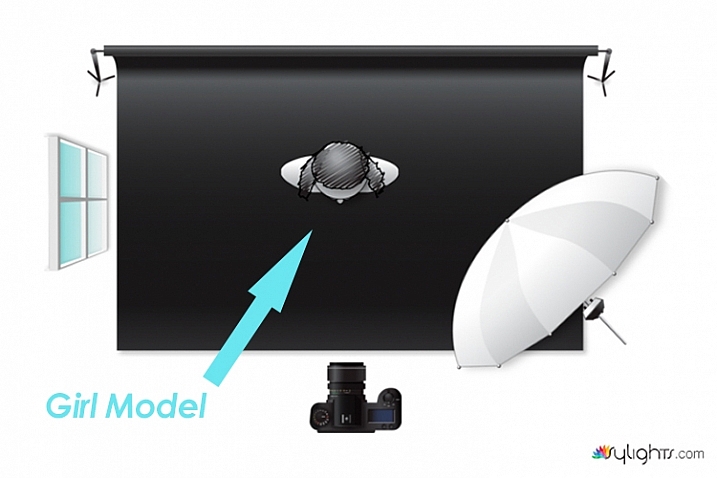
Keeping the light source in the same position, I got the model to look directly at the camera.
What’s involved in a low-key setup?
You may be surprised, but this type of setup doesn’t require a proper studio. You can do a low-key portrait in a relatively small area, or anywhere in fact. This setup requires the minimal of gear:
- A camera and lens (whatever lens is your choice for portraits)
- One speedlight
- One lightstand
- One light modifier (a shoot through umbrella is a great and inexpensive modifier that acts like a softbox)
- A subject or model, or willing participant
- Preferably a black background. See my DIY solution below.
Low-key low cost
I am a great believer in practicing what I preach. So I came up with a DIY solution for shooting a low-key setup, using a black shower curtain, in your own home. It is inexpensive, and doesn’t require a lot of time to implement.
First item was the black background
- I sourced a black shower curtain for less than $ 10USD. Size L180, W180cm. It also comes with plastic rings. Don’t worry that the curtain doesn’t reach the floor. Remember, this is for portraits only. I already had a telescopic white shower rail.
- 1 ½inch in diameter x 10ft. length of white PVC tubing will do equally well. It works out at $ 2.10 from Home Depot. I would cut this down to 8ft.
- One pair of White Command Cord Clips that cost from $ 3 to $ 5. These clips have a self-adhesive backing and can stick to most surfaces. So they are easy to put up, and are also removable. They can hold up to 900g or 2 lbs.
So that is your background sorted. The shower curtain, when taken out of the packaging, has obvious pleats. Don’t worry about these. This is easily sorted in post-production.
As I really enjoyed using this DIY method. I have left the Cord Clips up on the wall in my kitchen. They are relatively discreet. I intend to use this setup again. It is so simple and a perfect solution if you can’t get to your studio, or if you don’t have one!
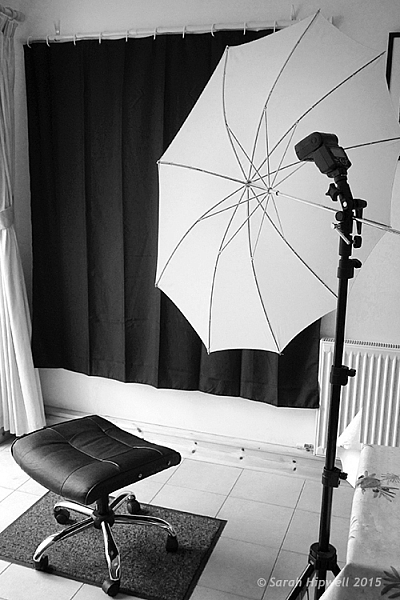
A DIY low-key solution that you can set up at home.
Post-production to get rid of pleats or wrinkles
You don’t want any light to hit the black background, this is called contamination. Plus you want the black background to be texture, and wrinkle free. In some of my shots, the pleats were a little obvious in the background.
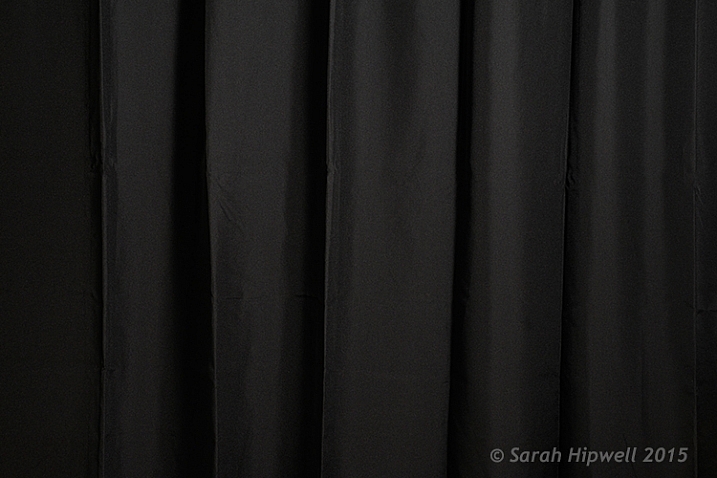
Black shower curtain with pleats visible.
Getting rid of them was relatively easy. In Adobe Camera Raw (ACR), I adjusted the Shadows and Blacks sliders,
until I had a wrinkle free black background. However, as this is a global adjustment, you may need to an Add Adjustment Brush to areas on the subject to bring back some detail.
Another alternative in Photoshop, is to apply a mask to isolate the subject. For the image of the senior man, I used Select>Color Range rather than using the Quick Selection tool or the Refine Mask tool. The Color Range is a color-based selection tool which was ideal in this case, as my subject was much lighter than the background making selection relatively easy. A few clicks on the background and I had a near perfect mask, except where the two eyes were. I applied the mask and filled in areas that were needed in black with the brush tool.
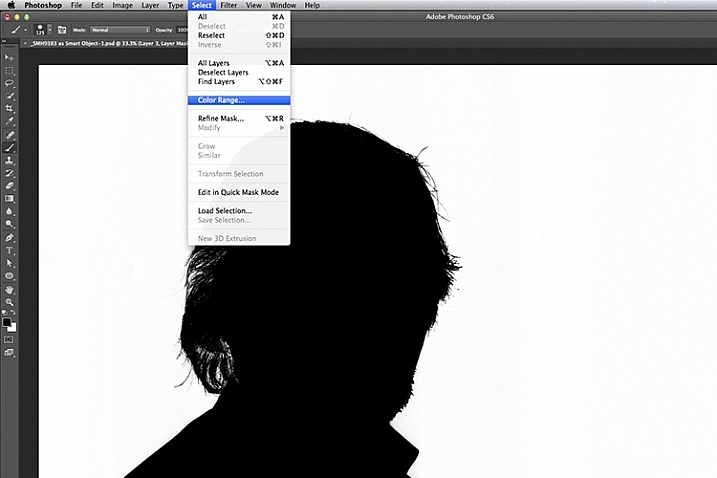
Choosing the Color Range under Select in Photoshop to create a mask.
I then applied a Levels Adjustment layer, and moved the black slider ever so slightly to the right, until the background was completely black.
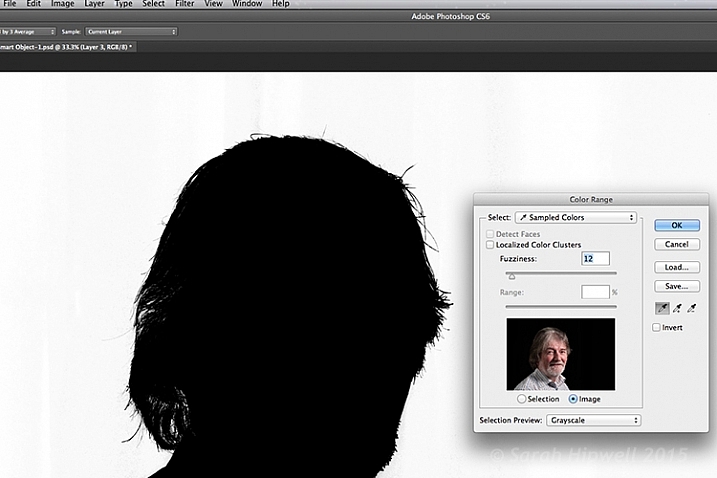
The Color Range dialog box.
Of course shooting lo-key isn’t restricted to indoors, nor do you need a black background. You can achieve similar effects outside. Check out this great video on the topic of creating an invisible black background to portraits using the same techniques.
Caution: You may possibly experience lots of fun shooting low-key! So let’s see your examples in the comments below.
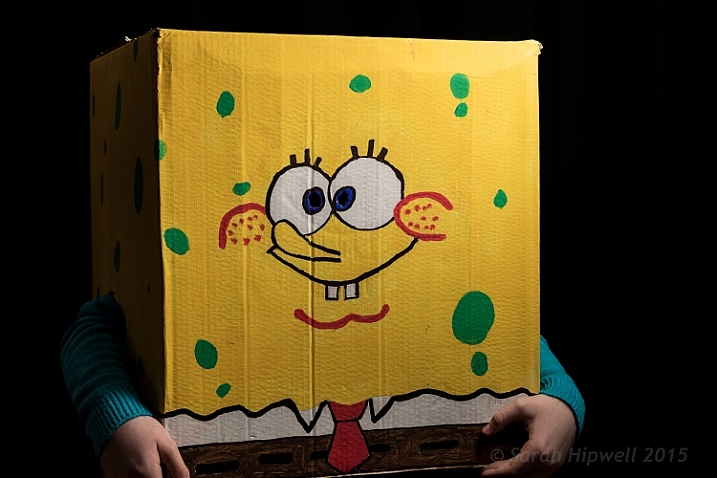
My daughter’s friend dressed for Halloween as Sponge Bob.
The post Low-Key Lighting for Dramatic Portraits by Sarah Hipwell appeared first on Digital Photography School.