HDR, or High Dynamic Range, photography originally started as an attempt to correct the limited dynamic range for standard camera sensors, compared to what the human eye can see or perceive. This is not a new concept, but in case you’ve never heard of it, allow me to explain.
Back in the day, camera sensors had an average dynamic range of about 5–7 stops, where our eyes can easily adapt and recognize ranges from 11 to 14 stops. Nowadays, sensors of modern cameras are much more capable in terms of dynamic range, but they still, depending on the situation, can’t capture the whole range.
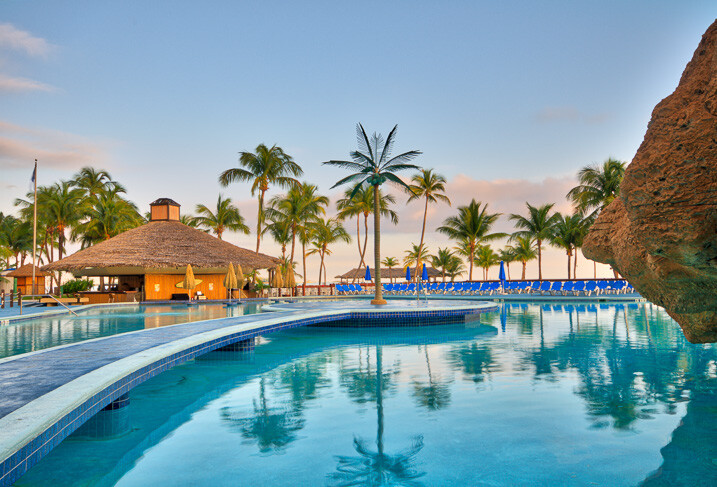
5 Images 1 Stop Apart – Basic Preset – Slight Contrast Adjustment
So HDR techniques utilize multiple images, with different exposures, of the same subject, that are then merged together to create an exposure range closer to what we can perceive with our eyes. Of course, this is not a new concept, and there is always a lot of controversy among photographers regarding the subject. Some people like it extreme or artsy, and others like it more natural. Both can be achieved through HDR methods. There are many different techniques and types of software for doing HDR. But, not all of them are easy to use and understand, with resulting images that are not natural, and over-processed.
Recently Macphun, one of the world’s leading developers in consumer and professional photography software for the Mac, has teamed up with Trey Ratcliff, an artist and HDR pioneer who mastered the technique, gaining over nine million fans. According to their statement, “Aurora HDR contains every imaginable tool needed to produce high-quality next generation dramatic images.”
I’ve been a fan of Trey’s wonderful images myself, so when I heard about the software, I wanted to give it a try. I just received a copy and have been playing around for a couple of days.
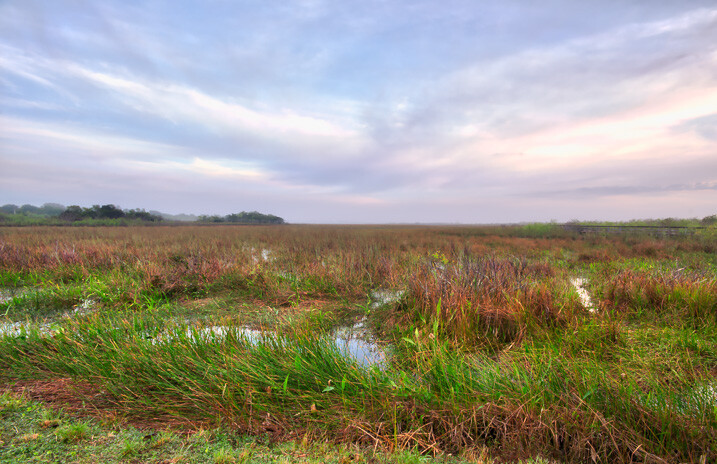
5 Images 2 Stop Apart – Treys Angels Within Preset – Slight Contrast Adjustment
Some of the key benefits of Macphun Aurora HDR Pro, as described by the developer, are:
- Revolutionary HDR algorithms make possible the entire spectrum of HDR looks, from natural to highly stylized.
- Total HDR editing experience with the most complete set of tools available.
- Powerful one-click presets, including Signature Pro presets by Trey Ratcliff, yield fantastic results instantly.
- Layers, masking and brushes provide the ultimate in selective editing.
- Unique Radiance controls and custom texture blending for creative versatility.
- Detail enhancement to increase drama in images.
- Extensive color and toning controls for vibrant color combinations.
- Approachable user interface makes for a comfortable, understandable experience.
- Built-in sharing supports popular photo communities and social networks.
- RAW, JPG, TIFF and other popular files support for the greatest flexibility.
- Workflow tailored to any style, with support for using as a standalone app, or as a plugin to popular host applications.
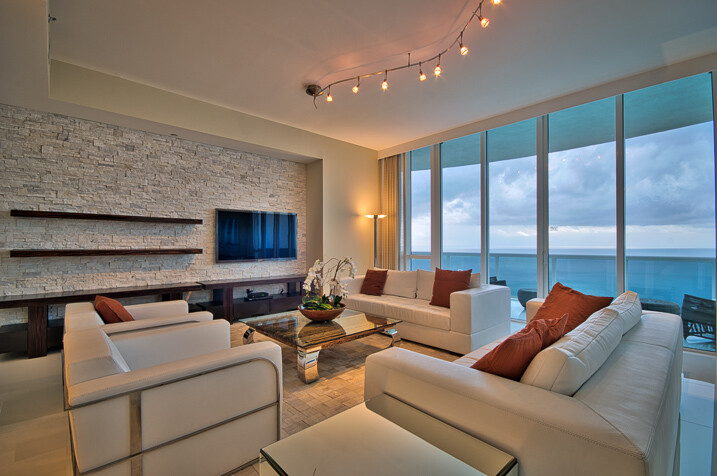
7 Images 1 Stop Apart – Indoor Bright Preset – Slight Contrast Adjustment
As mentioned above, the software can be used as a stand-alone application or as an plugin host operation within Adobe Photoshop, Adobe Lightroom or Apple Aperture. Because Lightroom is my base, I have chosen to use it from there.
After the installation, it took me a while to figure out how to make it work with Lightroom. Most plugins automatically install the extensions but with Aurora, you actually need to open the program, open an image, and then go to the Aurora HDR Pro menu and select Install Plug-Ins. In my opinion, I think it would be better in future editions to have the option of installing the plug-ins upon the initial installation, rather than having to go through this process. But after that, it integrated with Lightroom flawlessly.
When launched, the first window that shows up displays the images from which the HDR will be made, as well as options for Alignment, Ghosts and Chromatic Aberration Reduction. So far so good. Pick alignment if the images were shot hand-held, pick Ghosts Reduction if there are moving subjects, and so on.
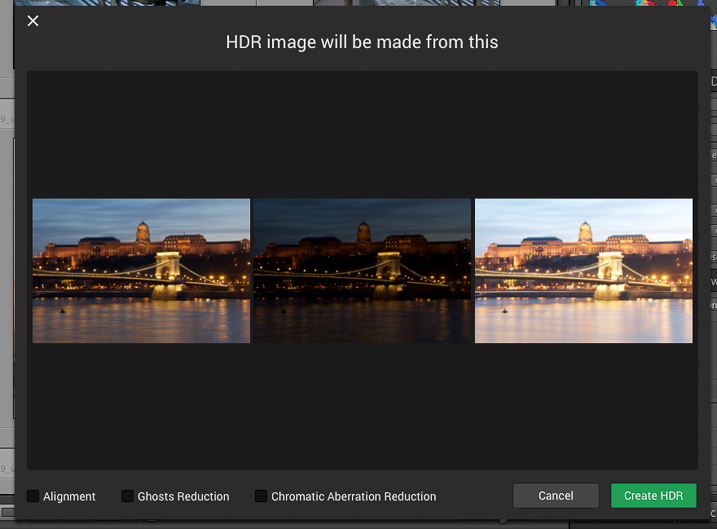
Once you click Create HDR, the images are combined and the main interface will open up. The interface is well-rounded and easy to navigate. It features a large image view with three main sections: a navigation and tool bar at the top, layer and adjusting tools on the right side, and presets selections at the bottom.
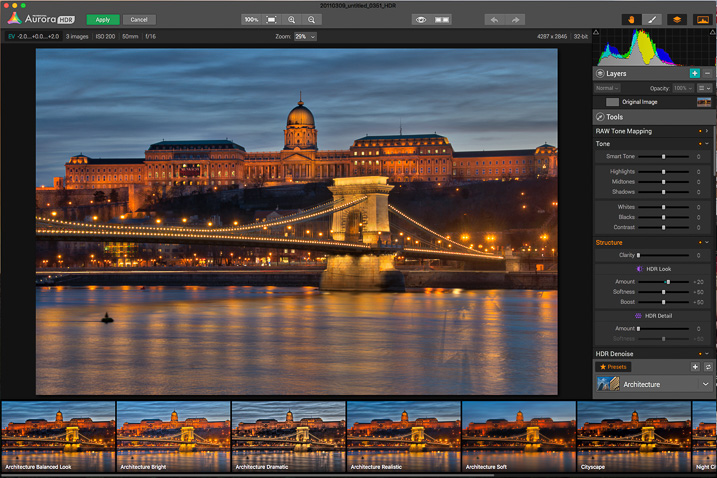
On the top bar you’ll find: the zooming tools, quick preview and compare options (to check against your original and edited images), a move tool (to move around when zoomed in), and a brush and eraser to use in layers (when creating masks) and the layers tool.
The main section of right panel contains the following tools:
- Histogram: Displays the complete tonal range of your image from dark to light. Similar to in Lightroom, clicking the upper right and left corners will display the black and white clipping points.
- Layers: I really liked this one; layers are a great way to stay organized and add different effects on your image by isolating them using masks. You can add as many layers as you want, and they can be also applied using different blend modes: normal, soft light, hard light, overlay, multiply, screen luminosity and color. They pretty much work as they do in Adobe Photoshop.
- Tone Mapping: This panel controls how Aurora HDR compresses the files, and the weight it places on each exposure in the bracketed set.
- Tone: This panel controls the highlights, mid-tones and shadows; it also helps with contrast, as well as pushing the black and white points.
- Structure: This panel has several functions, but think of it as clarity on steroids. It works by finding edges, and avoids adding contrast to edges but rather, it affects areas. It contains several sliders to play with, including, of course, “Clarity” as well as sub-panels called “HDR Look” and “HDR Detail.” From here you can increase and decrease the texture of the image.
- HDR De-noise: A tool to eliminate noise and artifacts produced by the merging of the photos.
- Image Radiance: You can clearly notice Trey’s hand in this one; it gives a “dreamy” feeling to the photos.
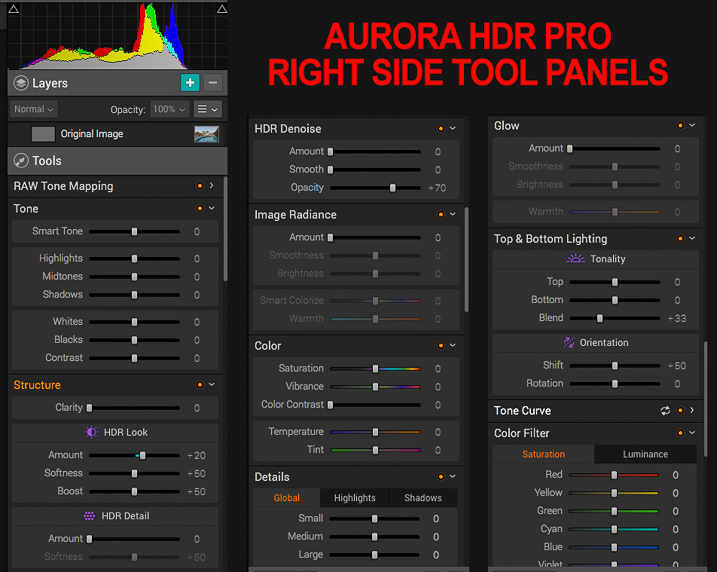
- Color: Includes controls for adjusting color, vibrance, color contrast, temperature and tint in the image.
- Details: Increased clarity, detail, and sharpness to bring out the details in an image. As there is no sharpening function, this works as a sharpening tool.
- Glow: Another creative tool. With this one you can create softening effects to the lighter tones.
- Top & Bottom Lighting: I really liked this addition too; they work similar to a graduated neutral density filter. This control splits the image in two segments and darkens or lightens the image.
- Tone Curve: The curves tool. As in Adobe Photoshop or Lightroom, if you are familiar with working with curves, the panel is there. You can apply it overall, or it also works with independent channels: red, green and blue.
- Color Filter: The color filters are available to adjust saturation and luminance to specific colors. It works similar to the HSL panel in Adobe Lightroom, but the Aurora Software lacks the hue option and is limited to six basic colors. Still, it is good to have it there to adjust. I’m not pretending to compare it with Lightroom as this is a different software; just mentioning options that you could be familiar with.
- Color Toning: With this one you can change the tone of either the highlights or the shadows, and individually increase or decrease saturation of the same. A really nice creative tool for split toning. I also really like the preset options on top of the panel.
- Vignette: The traditional vignette tool. It works as expected, but there is something very clever as well: the Inner Light function allows you to add more light to the center, or any part of the image.
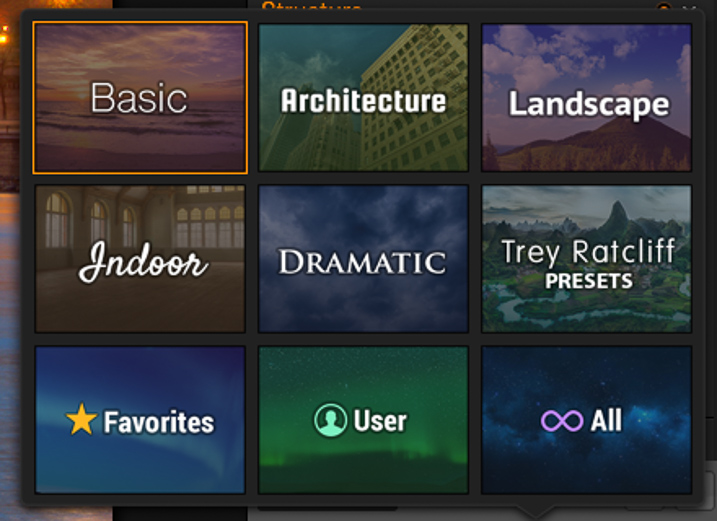
Lastly, there are the presets, created by Macphun and Trey himself. They provide a good starting point to try out different looks in a single click. Of course, you can also create your own presets and save them for future use.
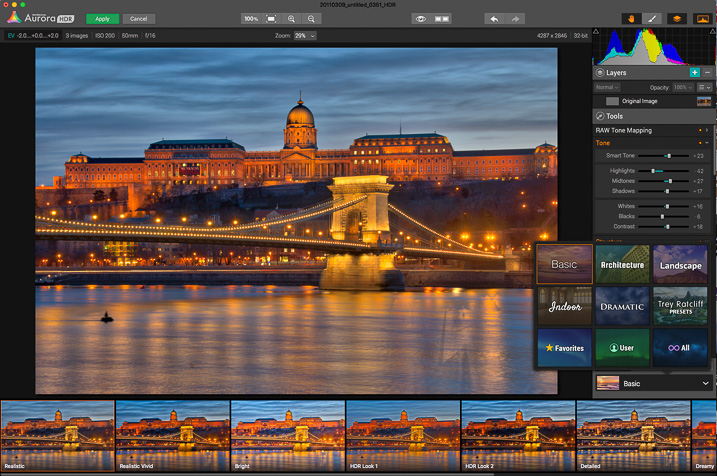
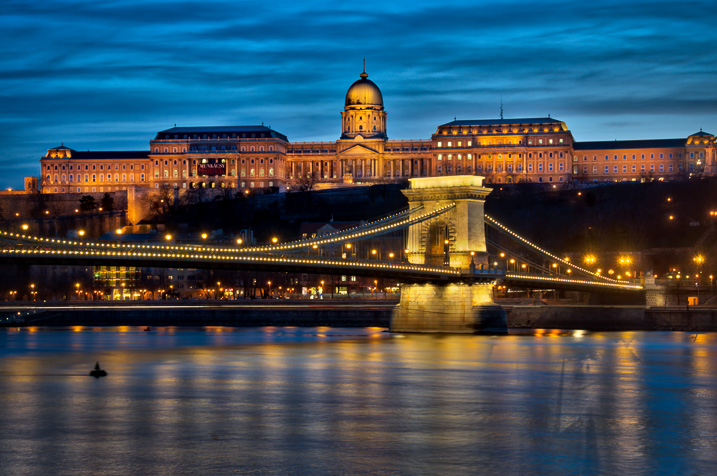
I created the image below by using three images, shot two stops apart. I started with the Basic Realistic preset as a base, and played with the sliders until I got what I wanted. Then, I added a layer to add more light to the palace in the foreground, and masked out the rest.
One of the things that I’ve noticed while working, is that the application is fast compared to other software I’ve used in the past, and that is a godsend. Everything loads fast, and the application seems to be very responsive. I’ll definitely continue to use it in the future and test more functions.
Whether you are an HDR fan or have never experimented with the technique, you should give Macphun Aurora HDR Pro a try. This is a well-rounded application that can serve the needs of pros and amateurs alike.
Unfortunately, the software is only available for Mac, but I think overall it is a great alternative. They are currently three options. The Aurora HDR currently retails for $ 49.99; with this option there is no RAW support, and it can just run as a standalone application. The tested version is the Aurora HDR Pro that retails for $ 99, and there is also a package that includes the application plus training for $ 129.
The post Macphun Aurora HDR Pro Software – First Impressions by Daniel Korzeniewski appeared first on Digital Photography School.