If you’ve used Photoshop, you are likely aware by now that there are many ways to accomplish the same tasks. One of the more important ones that should be done to almost every digital image is sharpening. This is necessary because most digital camera sensors make use of an anti-aliasing filter, which very slightly blurs the image, to reduce the chances of moire occurring in the image. This slight blurring, generally only one pixel in size, causes a slight loss of detail in an image. To correct for the slight blurring, tools such as Unsharp Mask are used. For a good tutorial on Unsharp Mask, check out How To Sharpen Photos: An Introduction.

This shot of sunflowers benefited from the High Pass filter by sharpening the fine detail in the center of the flower.
Another easy way to sharpen your images is with a filter that’s not even found in the Sharpen menu under Filters in Photoshop. It’s relegated to the Other category at the bottom of the Filters menu, and is called High Pass. The High Pass filter is a bit easier to use than Unsharp Mask, in that it only has one slider to worry about, and the technique for using it allows for some experimentation even after it’s applied, so you can get your image looking exactly as you want.
Note: I am using the latest version of Photoshop, version 2015.0.1 in Creative Cloud.
Step 1: Edit your image, then flatten it
Before you use the High Pass filter, you’ll first want to process the image to your liking. Generally speaking, sharpening should be the final step in image editing, because it is directly dependent on image size. You will sharpen an image sized to 5×7″ differently than one sized to 13×19″. Once your image is edited, flatten all layers by going to the Layer menu and selecting Flatten Image. Then adjust your image size as needed if you’re going to print or to display online.
Step 2: Duplicate Layer
Now that your image is flattened, duplicate that layer by pressing <CTRL + J> (in Windows) or <CMD + J> (on a Mac). You’ll then want to zoom in to view the image at 100% by pressing <CTRL + 1> (in Windows) or <CMD + 1> (on a Mac), or just double clicking the magnifying glass in the toolbox. You’ll want to be at 100% so you can see the detail of the image clearly.
Step 3: The High Pass Filter

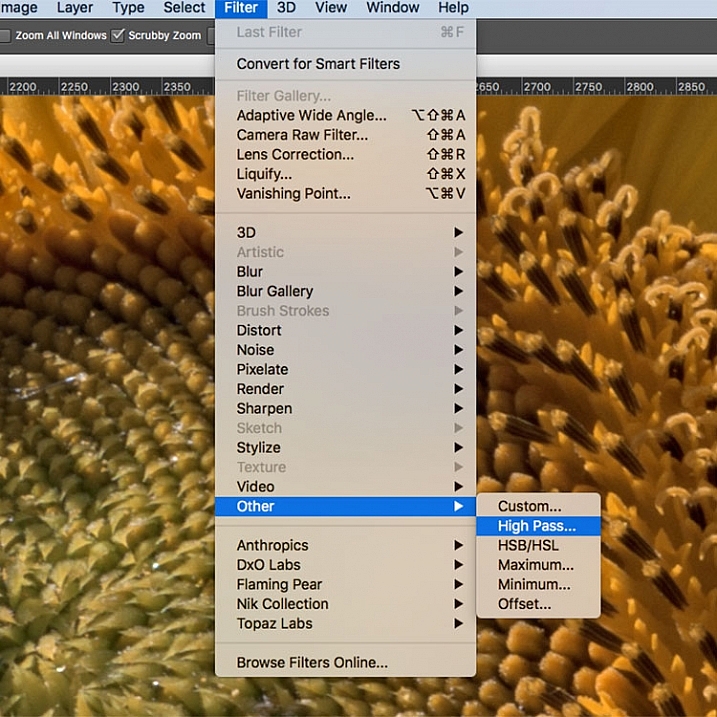
In the Filter menu, select Other, then High Pass.
Go to the Filter menu and select Other, and then High Pass. You will see the entire image turn a flat grey color. Not to worry, as this will allow you to see what the filter is doing.
Step 4: Adjust the amount of sharpening

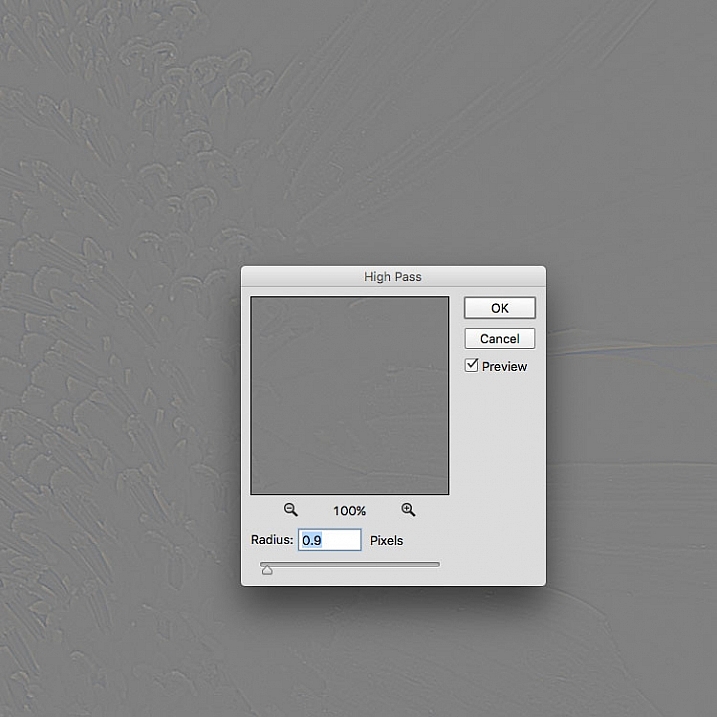
Once the High Pass filter dialog box pops up, use the slider to adjust the radius.
Once you run the filter, you’ll see a dialog box open up, showing a preview along with a radius slider. In addition, the image behind the dialog box will have turned grey, with some edge lines showing. This allows you to see exactly what is being sharpened. The High Pass filter only sharpens edges, so anything that’s not an edge becomes flat grey. The amount of sharpening you do will largely be image dependent, as well as size dependent.
For this image of the sunflowers, I was making a large print, using the full resolution of the image. When doing so, I’ve found my radius amount will usually fall somewhere between 0.5 and 5 pixels. You need to be careful here, as too much sharpening will introduce unwanted artifacts and noise into the image. I use the preview as my guide. I want to see thin black lines over the grey areas, with little to no white. Once you see any white, it means you’ve begun to get a halo, which you want to avoid. The final effect will be a subtle sharpening, not a drastic pop. For this image, I used a radius of 0.9. You can see above that there are only black lines around the edges of the flower, with very little halo. Click OK when ready.
Step 5: Adjust Layer Blending Mode
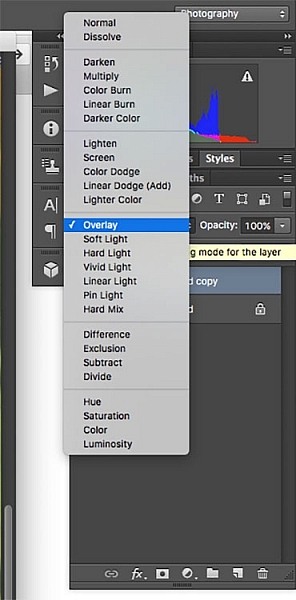
 Once you’ve applied the High Pass filter, it’s time to get rid of that flat grey image and bring your photo back to life. Go to your Layers palette and select the Blending Mode drop-down menu and set it to Overlay. Your image will regain its color, and you can toggle the sharpened layer off and on, to compare the image with and without sharpening.
You can also experiment with different blend modes, including Soft Light, Hard Light, Vivid Light, Linear Light, and Pin Light. In addition, you can use the Layer Opacity setting to reduce the effect a bit, if you decide the sharpening is a bit too strong. The beauty of this technique is that it’s completely adjustable (non-destructive) after you’ve applied the filter, and because you’ve worked on a separate layer, you can easily undo the sharpening and start over again if needed. Also, again because you’re working on a separate layer, if there are certain areas in the image where you want the sharpening to be applied, you can use Layer Masks to hide or show it.
Final results

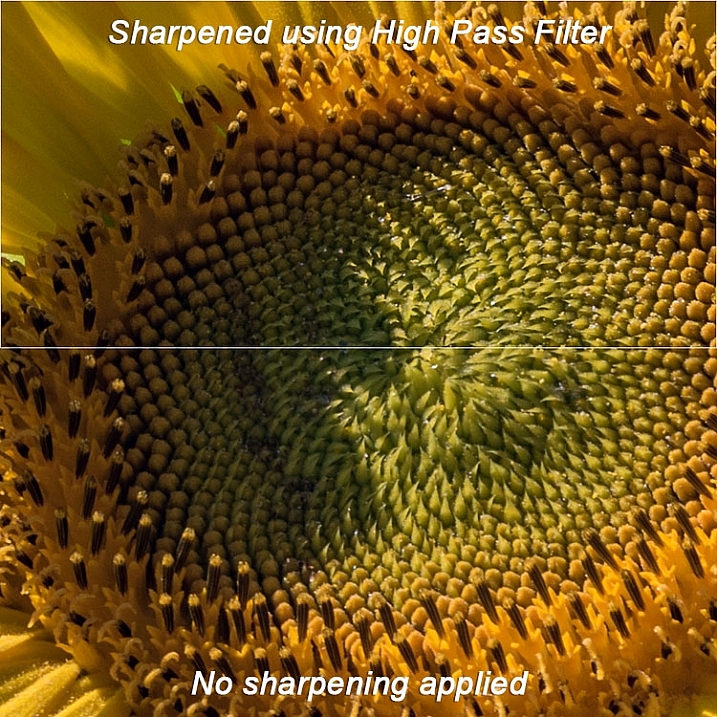
In this comparison image, the top half has been sharpened using the High Pass filter, while the bottom half has not been sharpened.
The High Pass filters allows a lot of flexibility in sharpening photos and is simple to use. It’s a great way to give your images a sharper, crisper look before uploading or printing. Give it a try and let me know what you think!
The post Photoshop Tip: Using the High Pass Filter to Sharpen Images by Rick Berk appeared first on Digital Photography School.