Have you ever stared at a photo of a food dish, and instantly thought that something looked a little odd? Like the shot wasn’t quite bang on, but you can’t quite put your finger on what it is? Chances are the dish hasn’t been shot using its hero angle.
You can have the freshest ingredients, the maddest styling skills, and be able to tame ever changing natural light, but if your angle isn’t complimentary to the food you’re shooting – you’re missing out on the full potential of creating a powerful food image.
Never fear though, the secret to finding the hero angle in food photography is simple. Just approach the shoot with two things in mind; the height of the dish and/or the props, and the layers contained in them.
The Height of Your Dish and Props
The height of food basically falls into two categories; tall or flat.
Tall subjects are simply anything with height – like a bundt cake, an ice cream cone, or a burger with the lot. For tall subject you will usually default to shooting somewhere between a 45 degree angle to straight on. Going beyond 45 degrees can sometimes limit being able to see the full dish and layering.
Flat subjects are simply anything whose width is inherently larger than its height – like a tart, a cookie, or a pancake. For these types of subjects, default to shooting somewhere between straight above and a 75 degree angle. Going too close to 45 degrees will also accentuate their flat qualities.
 |
 |
But what about everything else? What about soup, salad, or how about liquids? I am so glad you asked, because this is where the fun starts.
There are quite a few foods that are dependant on serve-ware. A burger or cake can hold their own, but liquids, soups, salads, and puddings cannot. Which category these guys fall into is dependent on the food styling prop in which they are presented.
Take soup for instance, is it being served in a bowl, or is it a fancy cold soup served in a tall shot glass? The salad, is it served on a plate or a large glass bowl? What sort of holder is the liquid in; tall, short, opaque? Is it in a flat tray because you’re about to freeze it and turn into granita?
Oh the possibilities are endless! But remember, they all fall into two categories, so you’ve got a 50/50 shot of getting it right. I’m pretty sure you’ve got this.
The Layers in Your Dish and on Set
There are two things to consider when thinking about layers in food photography. The layers present in your food dish and the layers present on set.
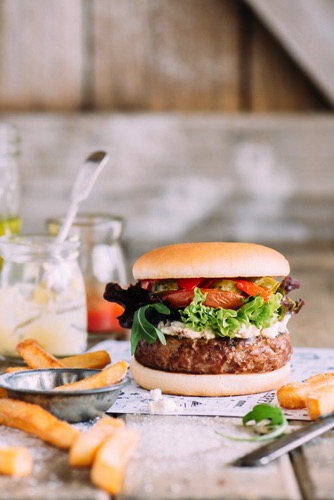
Layers in a dish are the number of visual components in a recipe. The classic example is a burger with seven layers, bun, meat patty, cheese, sauce, slice of tomato, lettuce, bun. Or a layer cake with seven layers, cake, jam, cream, cake, jam, cream, cake. So to get the best food photography shots, you’ll want to choose an angle that exposes these layers in their best light.
 |
 |
Layers on set are the number of elements or props that you have on your set (props) on top of one another. For example, napkin, plate, and garnish would be three layers and would appear on top of one another. I don’t count the food/recipe as a layer as it is the subject and will always be present. If the prop layers are an important part of telling the food story, you’ll want to make sure your angle captures those elements too.
Putting it all Together
Now that you’ve thought about the height of your dish and the layers, you can marry those two, in order to figure out your hero angle. Let’s look at some examples.
This is a little game I like to play called; Okay, Better, Hero. There is nothing wrong with any of these shots I’m about to show you per say, but there can only be one hero, right? That’s what we’re aiming for, so let’s dive right in.
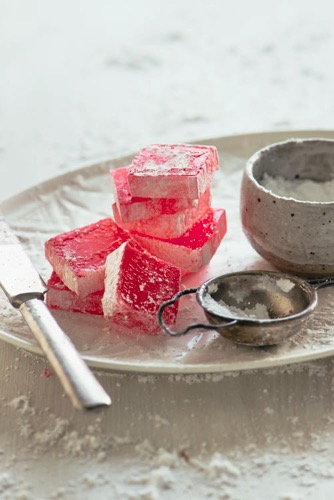
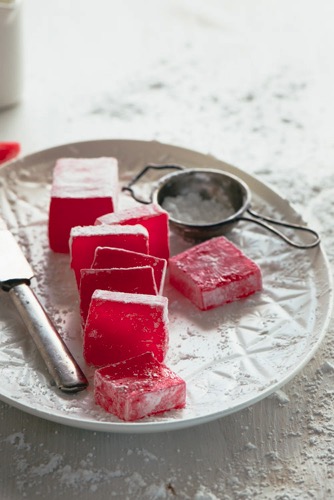
Turkish Delight (a flat dish without layers)
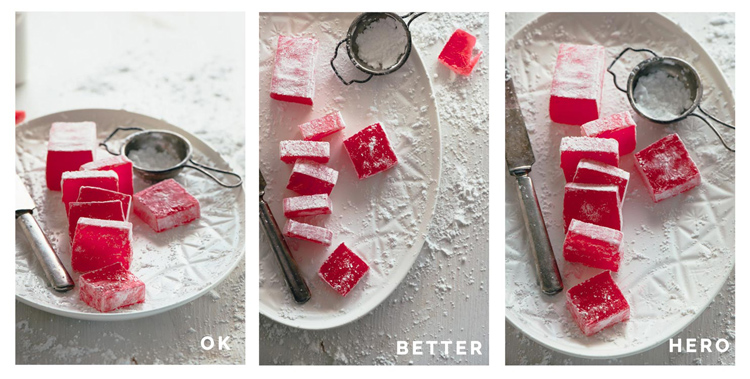
I shot this Turkish delight with a 105mm micro (macro) lens, at a 25 degree angle, overhead, and 75 degree angle respectively.
Because this is such a flat dish, you may expect that the overhead angle would be the most flattering. But really the 75 degree shot is hero angle, here is why. It is so close to overhead, yet allows you to capture the gorgeous light coming through the Turkish delight which adds to the richness of its colour.
25 degrees also captures the colours, but accentuates the flatness of the dish, and detracts from the overall feel.
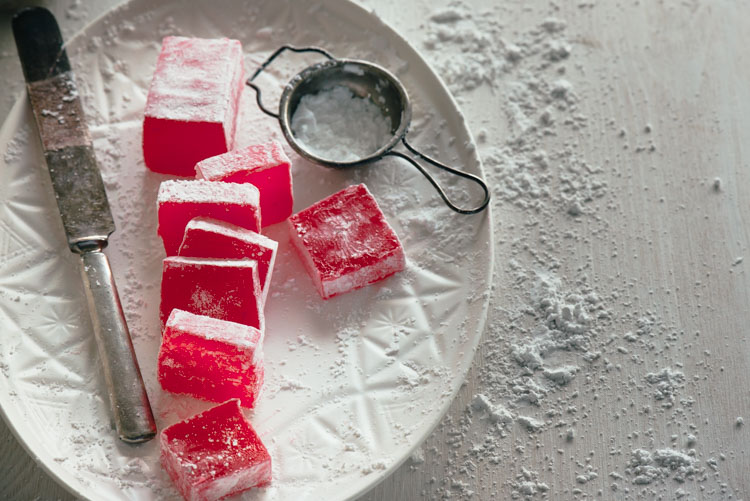
Horizontal variation, shot at the same angle.
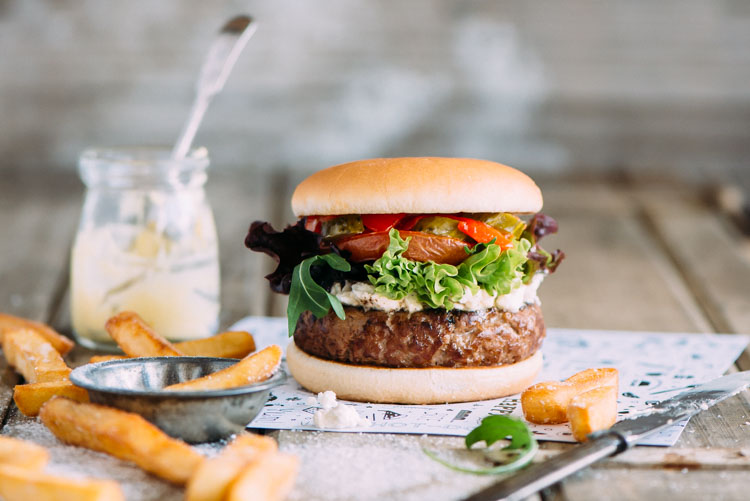
The Burger (tall dish with layers)
I shot this burger with a 105mm micro (macro) lens, at a 45 degree angle, 25 degree angle, and straight on respectively.
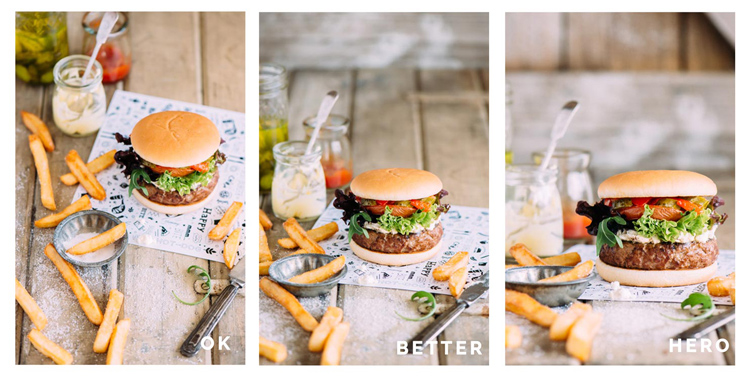
The hero angle is the one shot straight on, because it allows the viewer to focus on all the delicious layers, and elongates the height of the burger which you naturally expect to be a tall food. Your mind thinks, the taller the burger, the more ingredients, and the more bang for your buck you get.
The 45 degree angle doesn’t give you enough context of the layers, and the 25 degree angle makes the top burger bun look too flat.
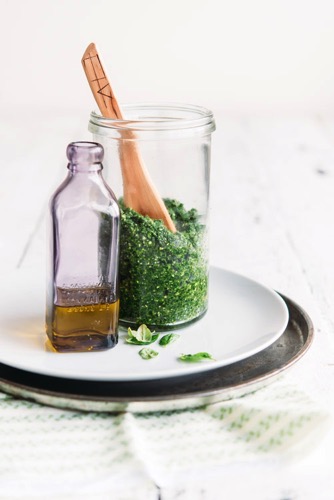
Kale Pesto (tall dish without layers)
I shot this with a 60mm micro (macro) lens, at a 85 degree angle, 45 degree angle, and straight on.
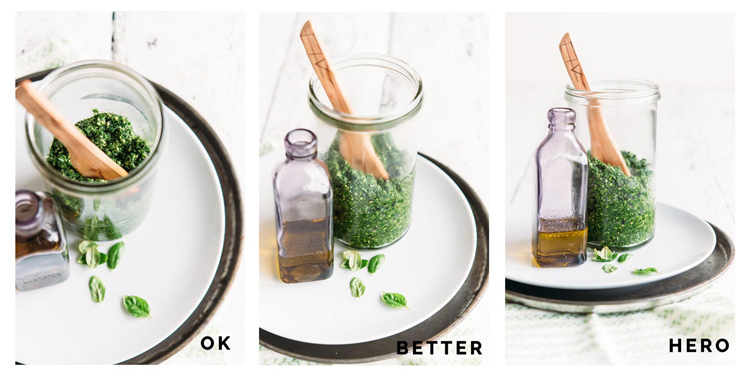
Pesto, being a sauce or condiment, is dependant on the serve-ware in which it is presented. As you want to show that there is enough of the pesto to coat an entire family size dish of pasta, it was shot in a tall glass. This also complimented the tall spoon, and bottle of oil in the shot as props.
The 45 degree angle is workable, but straight on one is the hero angle here. It allows for an overall sense of how the dish is being served and stored, while still allowing the viewer to comprehend its texture.
If you want to get into the nitty gritty, the 45 degree angle allows for reflection of the plate to show up in the glass, hindering the ability to see the texture of the pesto.
Egg and Bacon Muffins (flat with layers)
I shot this with a 60mm lens, at a 45 degree angle, 30 degree angle, and from directly overhead.
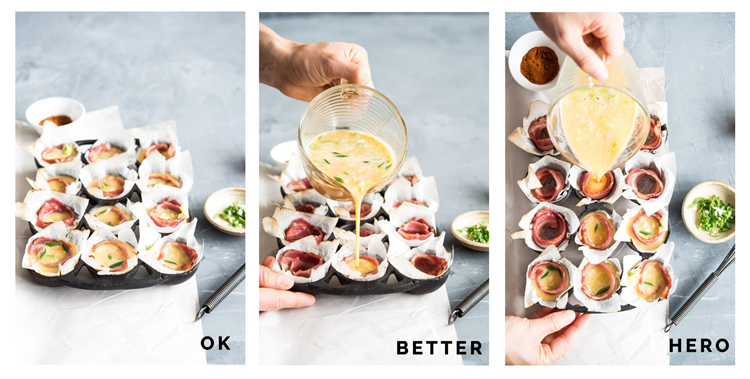
Here the 45 degree angle accentuates the flatness of the dish, but does show the layers. The 30 degree angle is better, but it doesn’t show the full layers of the dish as much as the overhead shot does. That’s why the overhead shot is the hero angle in this case. It allows you to see right into the dish, while still getting the action of the egg filling being poured into each compartment.
Putting Finding That Hero Angle Into Practice – 5 Take Aways
Next time you’re doing a food photography shoot, put the following into practice:
- Thinking about whether your dish falls into the tall or flat category.
- Are there layers in your dish, or through your use of props on set?
- For tall foods, especially those with layers, explore angles between straight on and 45 degrees.
- For flat foods, explore angles between overhead and 75 degrees.
- Take a few shots with different angles outside the recommended ones above, and look for the OK, better, hero shots.
Do you have a favourite angle for food photography that you can always rely on? Please share in the comments below, as well as your food shots.
The post The Secret to Finding the Hero Angle in Food Photography by Rachel Korinek appeared first on Digital Photography School.