Light has different Properties, and by understanding those differences and using them in your favor, you can become a better image maker.
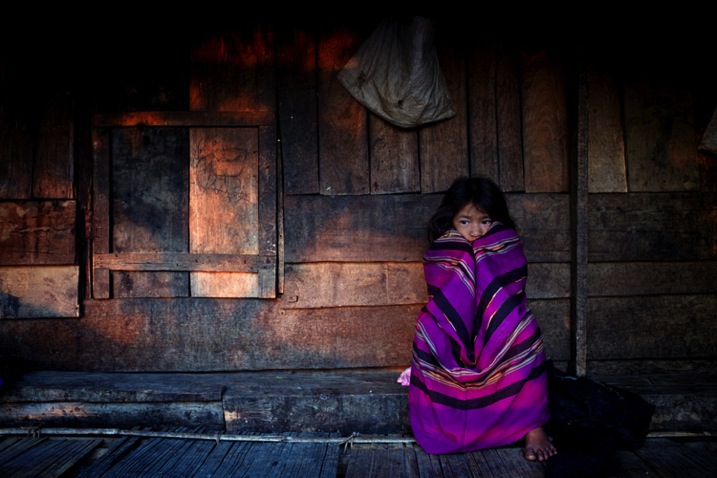
Golden light of late day, mixed with cool light in the shadows.
Chapter Two: Understanding color in natural light
In this chapter, we will:
- Explore how color can affect the viewer’s emotional response.
- Understand how the color of natural light changes throughout the day.
- Learn how to mix light colors to create depth.
- Practice using exercises.
Please note that as a portrait photographer, I will be discussing portraits and using them as examples. However, this knowledge applies to any type of photography.
Color as a visual storytelling element
What we perceive as color is actually our brain’s interpretation of light reflected off objects and transmitted to the brain via our optic nerves. Under the field of color psychology, a range of studies have shown that colors can deeply affect how we experience the world around us, from the taste of the food we eat, to how we respond to new brand packaging on supermarket shelves. Colors affect how we feel, and this is precisely why understanding color is so important to you as a photographer.
There are many ways you can control or change the colors in your images, such as by editing, with the use of filters, or adjusting the White Balance. But as we are here to discuss natural light, so let us delve deeper into understanding how to create an emotional response by using the right color of natural light.

Because color is an amorphous concept (we all see colors slightly differently), there is a standard way to define color tone; this is called color temperature. We will not discuss the technical definition of color temperature for two reasons: first, it will make you very sleepy and second, it will not make your photos better. The important thing to know about color temperature is that it is a standard that is measured in degrees of Kelvin (now you understand what the “K” symbol means in your White Balance menu). Color temperatures below 4000K are considered warm (red and yellow) and color temperatures above 4000K are considered cool (blue).
Plan your shooting time
In the previous article, Understanding Natural Light Part 1: Quality of Light, you learned to forget the concept of good or bad lighting, and think in terms of suitable or less suitable. It is your responsibility to shoot under the most suitable light for the visual story you wish to create, and this concept applies to the color of light as well. Now, let’s get familiar with how the color of the light changes throughout the day.
Blue Light (about 11000K)

- When: Before sunrise and after sunset.
- Common emotional effect: Glum and mysterious, with a sense of coldness.
- Take it to the next level: If you are in an urban environment, try mixing the natural blue light with the artificial orange light from street lamps to create an amazing color combination and depth (which will be later explained).
- Please note: Due to the low level of light during this time of day, pay close attention to your shutter speed to avoid blurry images.
Golden Light (about 3500K)
- When: It depends on your location on earth, but golden light is usually around sunrise and sunset.
- Common emotional effect: Praised by photographers as the golden or magic hours, with soft, pastel-like warm colors of red and yellow. Portraits and landscape images will seem almost magical.
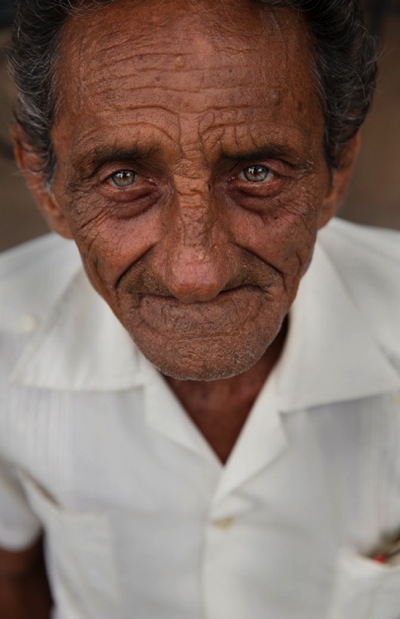
- Take it to the next level: By standing higher than your subject, shooting from an angle of 45 degrees, you can achive a wonderful catch light (a spark of light in the eyes of the subject) due to the reflection of the sky in the subject’s eyes. (see image below)
- Please note: As with any type of magic, you need to be swift and efficient. Plan your daily schedule carefully. For example, if you want to shoot during the golden light of sunrise, you must get up early. Very early.
Midday Light (between 5000-6500K)
- When: It depends on your location on earth, but usually from one hour after sunrise until one hour before sunset.
- Common emotional effect: This light seems neutral in color to the eye, even though it’s considered a cold color in terms of Kelvin degrees. The contrasts caused by midday light will amplify objects’ colors. So, vibrant objects will seem even more vibrant and vice versa.
- Please note: You can enjoy the amplifying benefits of midday light without the harshness if you place your subject indoors near a window.

Cloudy Day (about 7000K)
- When: When the sky is heavily overcast.
- Common emotional effect: Similar to that of blue light with a glum, winter-like feeling, but stronger and brighter, allowing you to work with faster shutter speeds.
- Please note: The biggest benefit of working on a cloudy day is the continuity of color tone throughout the day. This means there’s less pressure on you to work as fast as possible, as you would need to do at other times of the day, like the golden hours.

Mixing colors
You can achieve very satisfying results by mixing cold with warm color tones. For example, by placing warmer colors in the foreground and colder colors in the background, you can add volume and depth to make an interesting image.
You can do this by either working during the border of two periods of the day, or by mixing natural and artificial light.
Working during the border of two time frames
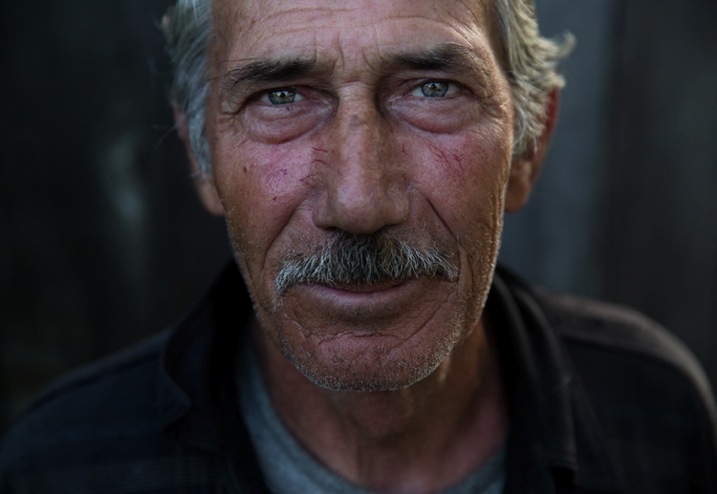
For example, if you choose to shoot at dusk, which I heard National Geographic photographer William Albert Allard refer to as the “The time between dogs and wolves”, you can combine the warm colors of the golden light, with the cold colors of the blue light. Here is an examples:
Mixing natural and artificial light
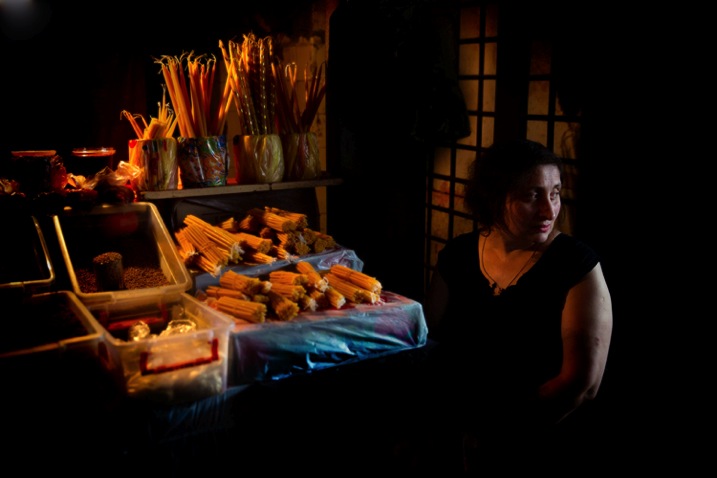
If you choose to mix light sources, the sky’s the limit. In this image: on one side (camera left), this lady was illuminated with the warm orange light of the shop’s light bulbs and on the other, with the blue cold light of a cloudy day (camera right).
Or in this image where I mixed the warm natural light of fire with the blue artificial light from the projector in the background.
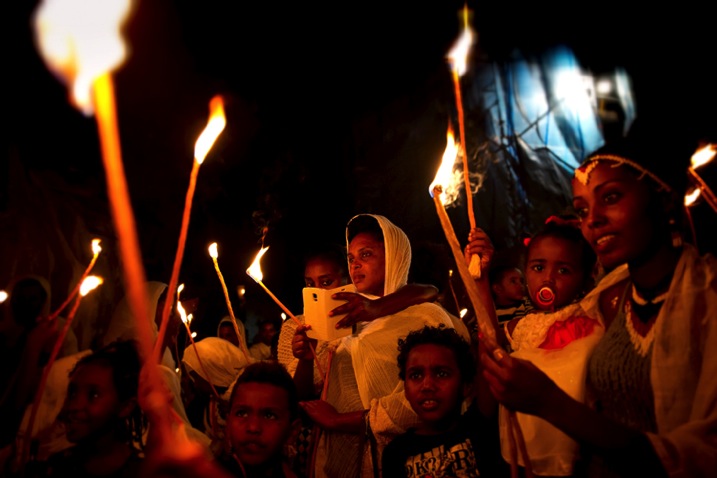
Exercise #1: Study other photographer’s work
Search the web and gather 20 images from your favorite photographer. Analyze his or her color choices:
- Are there themes or common colors choices?
- What is the light source: natural or artificial?
- Are there specific time frames when this photographer works (golden hour, midday, etc.)?
Exercise #2: Shoot with the wrong White Balance
To make it short, White Balance is how you help your digital camera create a more accurate representation of the colors in your image. By telling your camera the lighting conditions (cloudy, sunny, flash, etc.) you help the camera adjust to neutralize the color balance in the image.
For this exercise, I will ask you to go to the White Balance menu in your camera and shoot with the wrong setting. For example, if it’s a sunny day, choose the Cloudy setting, which will make your photo look much warmer. Or shoot in the Tungsten or Incandescent setting to make it really cool.
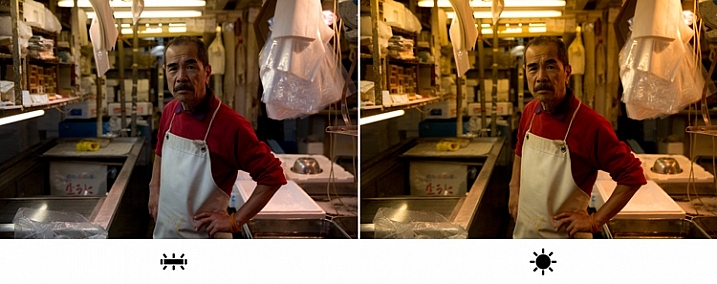
I took this image in Tokyo’s Fish Market, under the white light of Fluorescent. On the left image, I went for the Fluorescent white balance preset, which is indeed more faithful to the original lighting situation in the market. But, on the right image, I selected the “wrong” white balance ( daylight preset), which made the image much warmer, in color and feel. Which one is better in your opinion?
If you are shooting in the RAW image format as opposed to JPEG, the White Balance setting is not that relevant, as you can easily change it in post-processing. This is one of the characteristics of RAW files. But this exercise allows you to understand how, by intentionally changing the image’s color tone, you can create different and interesting emotional effects using color.
The author would like to thank Nicholas Orloff for his assistance in writing this article.
The post Understanding Natural Light Part 2: Color of Light by Oded Wagenstein appeared first on Digital Photography School.