Once you start taking photos, many things become clear. The first is that light is vital to creating a nice photograph.
The second thing is that digital photography has made things much quicker and simpler. Third, we understand that proper camera usage is crucial to getting good quality photographs. As soon as these three things meet, we can start to feel pleased with our images. Once we recognize that various subjects and distinctive scenes need different adjustments, we can then go ahead and take beautiful shots.

photo by Jamie McCaffrey
Shutter speed and aperture (f-stop) are the two main things we must concern ourselves when aiming for sharp pictures. Shutter speed is responsible for the amount of time that the shutter is open. Aperture is responsible for depth of field and the amount of light coming into the sensor. Once you start exploring this closely you will realize that there’s more to the shutter than letting light in.
What causes blurry images?
If you are photographing at night, for instance, and you choose a shutter speed that is too quick, your images will be very underexposed. The shutter simply closes too fast to let any decent amount of light in. Alternatively, if you choose a speed that is too slow, you may run the run the risk of over exposing your scene. At times, when our shutter is too slow we can create blurry motion. Blurring the motion is good for intentional special effects, but it’s not good when you want tack sharp pictures.

photo by Keith Williams
Shutter speed is one of the main factors for image clarity. An unintentional blurry photograph is often a result of hand holding the DSLR when the shutter is slow. It is really difficult to take a photo with a slow shutter speed and get absolute sharpness. You can have the best intentions in the world yet still manage to blur the shot just by standing there.
How slow can you go?
So what is the slowest shutter speed you can use when hand-holding the camera? In my professional experience, it lives anywhere between 1/80 and 1/ 50 of a second. I can quite confidently shoot at 1/80 of a second and see no blur. A number of people I know can shoot at 1/50 of a second and see no blur. Your neighbour or friend may be different from you and me. This won’t make it correct or wrong. It simply means there is a cutoff point that we can go past.
A useful way to develop the sharpness in your images, without a tripod, is to position your shutter speed at the same number as your focal length. If you are working with a 50mm lens then try not to shoot slower than 1/ 50 of a second. If you are shooting with a 200mm lens then try not to shoot less than 1/200 of a second. The further away your subject is the longer the focal length you will need. Longer the focal lengths require a faster shutter speed. This is due to the fact that the more you zoom in, the more the image shakes and moves in the frame. You will have to balance this out by choosing a faster shutter speed.

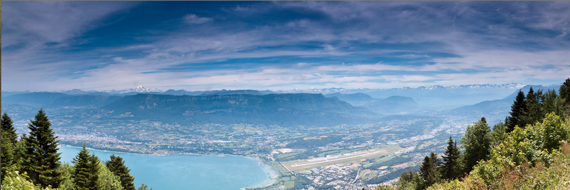
“Lac Bourget,” handheld panorama captured by Shaun Plumb
The smallest motion can totally distort your image. This comes about simply from breathing or just standing. If you are shooting with a DSLR, you’ll be able to see what focal length you have by looking down the barrel of your lens. Around your lens is a sequence of numbers. If you have a 24 to 105mm lens, you will see a succession of numbers ranging from 24 right through to 105. As you zoom closer into your scene you will see a little indicator next to the number. For example, if you see this small indicator pointing to the number 85 then you understand that you are working at 85mm. Matching the shutter speed and focal length numeric value is a good way to increase image clarity. However, there is a limit.
You cannot use this rule for very slow shutter speeds unless you use a tripod. For example, if you are photographing a landscape scene at 20mm then I can promise that setting your shutter speed to 1/20 of a second will not advance your clarity. You need to be sensible about how slow you go with your shutter speed before you need the help of your tripod.
Matching your shutter speed to your focal length to attain sharpness may not be observable right away. You will not be able to see a massive change for the better when you take a look at the shot on the LCD on the camera. Only when you get your photo into Photoshop or Lightroom will you observe the difference.
Once you zoom into your photo you will see variation in sharpness. Once you know how to achieve sharpness, you will not need to over sharpen your images in post-production.
About the Author:
Amy Renfrey writes for DigitalPhotographySuccess.com. She’s photographed many things from famous musicians (Drummers for Prince and Anastasia) to weddings and portraits of babies. Amy also teaches photography online to her students.
For Help with High ISO Photos:
The new Topaz DeNoise 6 is designed to let you shoot anywhere in any light and still get crisp, clear and noise-free images. DeNoise removes distracting image noise while preserving image detail, giving you the image you wanted without the noise you don’t. They are currently offering it at 37% off which ends soon, simply remember to use the voucher code NOISEFREE at checkout.
Deal found here: Topaz DeNoise 6 at 37% Off
Go to full article: What is the Slowest Shutter Speed You Can Use for Handheld Photography?
What are your thoughts on this article? Join the discussion on Facebook
Article from: PictureCorrect